Plate fixation with one plate
1. Principles
At the time of surgery, the decision has to be made about choices for osteosynthesis.
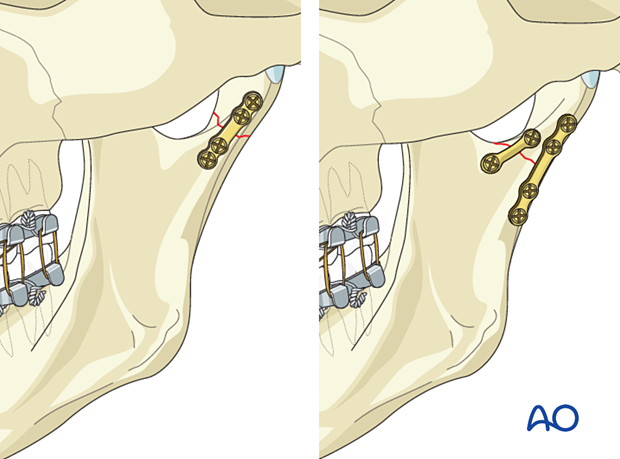
Whenever possible, two plates should ideally be used in all condylar fractures. In some high condylar fractures only one plate can be placed due to bony limitations.
When two plates are used, the posterior plate is placed on the lateral surface parallel to the posterior rim. The anterior plate is placed below the sigmoid notch.
Either plate can be inserted first according to the surgeon's preference. In this procedure, the posterior plate will be inserted first.
Anesthesia
In condylar fractures, avoiding muscle relaxation during anaesthesia is crucial.
Several extraoral surgical approaches to the condylar region can involve the facial nerve. During the soft-tissue dissection, a nerve stimulator may be used to identify and protect the facial nerve. Chemical muscle relaxation will interfere with the use of a nerve stimulator. However, once the bony fracture has been reached, muscle relaxation may help the surgeon reduce and stabilize the fracture.
Therefore, a sufficient dose of muscle relaxant is administered before the reduction maneuvers.
Use of MMF
When treating condylar fractures, the surgeon may use arch bars or another form of maxillary mandibular fixation(MMF). However, reduction and manipulation of the fracture may be best accomplished with the jaw open. During the plate and screw fixation, the patient should be placed into occlusion. This may be accomplished by MMF or an assistant holding the patient into occlusion while the fracture is being plated. This minimizes the risk of postoperative malocclusion.
Additionally, many surgeons prefer the use of training elastics in the postoperative period so the application of arch bars and bone anchors is beneficial.
Special considerations
Additional considerations and reading material:
- Multiple fractures
- Complications
- Biomechanics of the mandible
- Locking plate principles
- Screw insertion into locking plates
- Transbuccal system
- Angulated screwdriver
- Emergency screws/system
Click on any subject for further detail.
2. Patient preparation
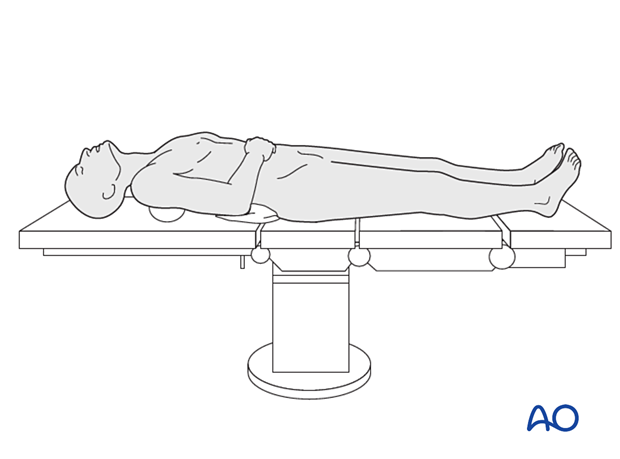
This procedure is typically performed with the patient placed in a supine position.
3. Approach
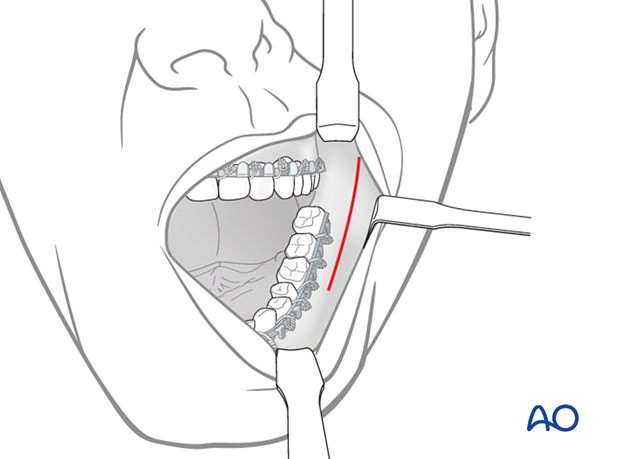
Transoral approach
The transoral approach to the ramus can be used to access subcondylar fractures
Transcutaneous approaches
For higher condylar fractures either the retromandibular, facelift, or preauricular approach is typically used.
For lower condylar fractures, the submandibular or the retromandibular approaches are typically used.
4. Choice of implant and plate position
Choice of implant for one plate fixation
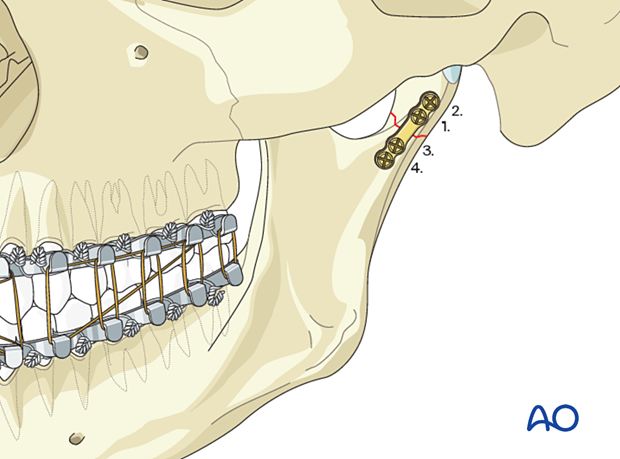
If only one straight plate can be used, the surgeon should opt for a thicker and/or wider plate, rather than a standard 1 mm thick miniplate, and bicortical screws.
A minimum of two screws on either side of the fracture must be inserted. Plates with or without a center space can be used.
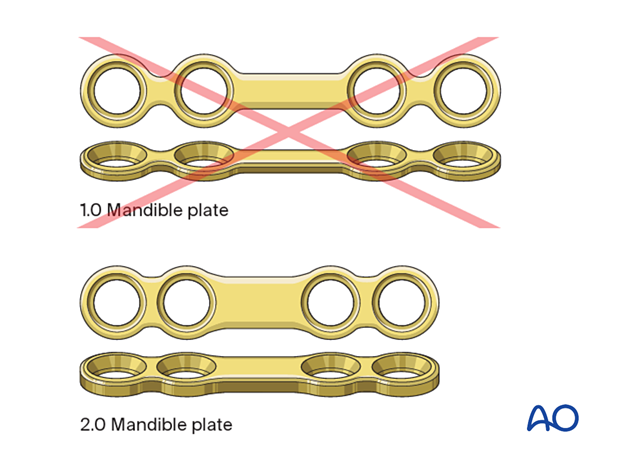
Plate position and order of screw insertion
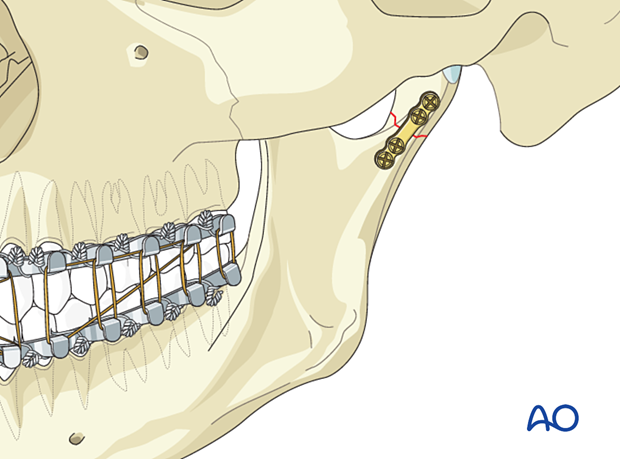
The plate should be positioned in the center of the condylar region (condylar neck) or close to the posterior border. The numbers in the illustration indicate the order of screw insertion.
Specialized condylar plates
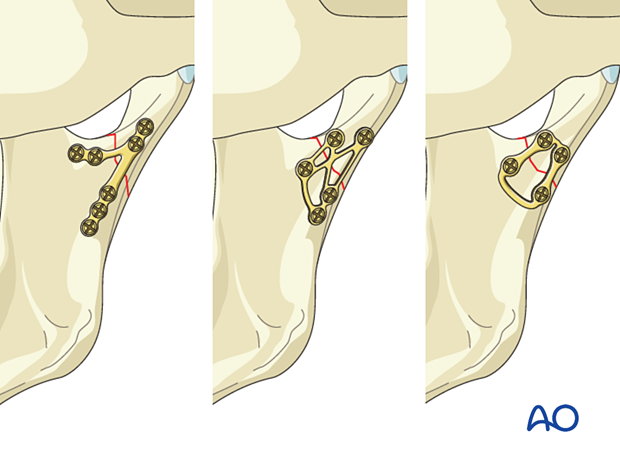
Specific plates have been designed to use for condylar fractures. Examples are shown to the left.
The order of screw insertion is similar to that of one straight plate. The plate is first attached to the condylar fragment and then used to reduce the condylar fragment to the ramus.
The plate is then fixed to the ramus.
5. Reduction strategy
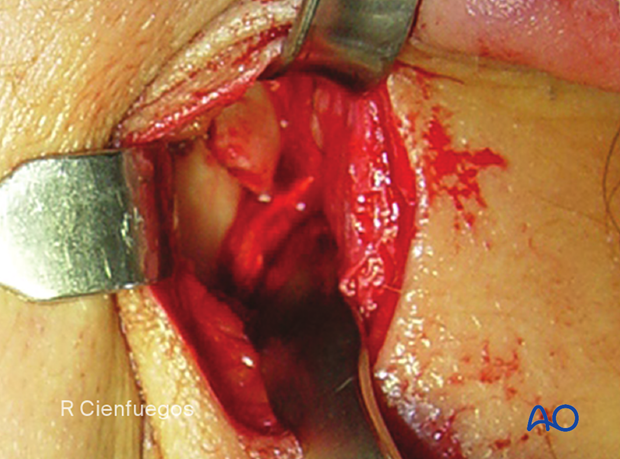
It is advantageous if the condylar fragment is already displaced laterally (lateral override). However, displacement of the condylar fragment may be medial, by pull of the lateral pterygoid muscle. If the fragment is displaced medially, the surgeon must manipulate it and convert it into a lateral override situation.
Then the plate can then be applied and fixed with one screw to the condylar fragment while it is supported by the underlying mandibular ramus. Using the plate as a handle, the condylar fragment can be reduced anatomically.
For high condylar fractures, it may be impossible to visualize the most superior plate hole. In such cases, the plate can be used to pull the condylar fragment inferiorly, allowing access to insert the most superior screw.
Intraoperative image shows angulation and lateral displacement of the condylar fragment.
6. Reduction and fixation
MMF
Open reduction and stable internal fixation in dentate patients begins with fixation of the occlusion.
Elastics are placed to maintain occlusion during ORIF of the condylar fracture so that the mandibular ramus can be distracted inferiorly if necessary to reduce the fracture.
Click here for further details on methods for applying MMF.
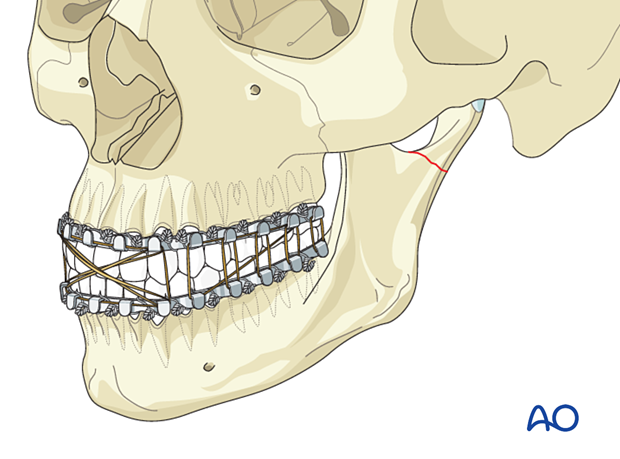
Drill hole for the first screw in condylar fracture fragment
Drill a hole in the midaxis of the condylar fragment through the plate hole closest to the fracture line using the 6 mm drill stop drill bit of 1.5 mm diameter. The use of the drill guide is recommended to avoid injuries in the soft tissues.
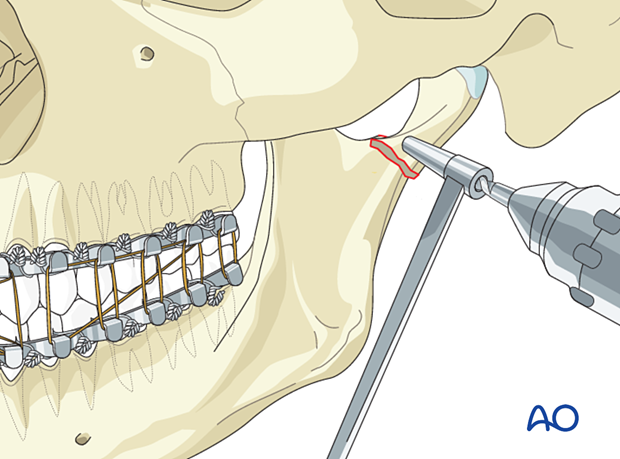
Plate placement
Center the plate over the long axis of the condylar process
and insert the screw manually without complete tightening.
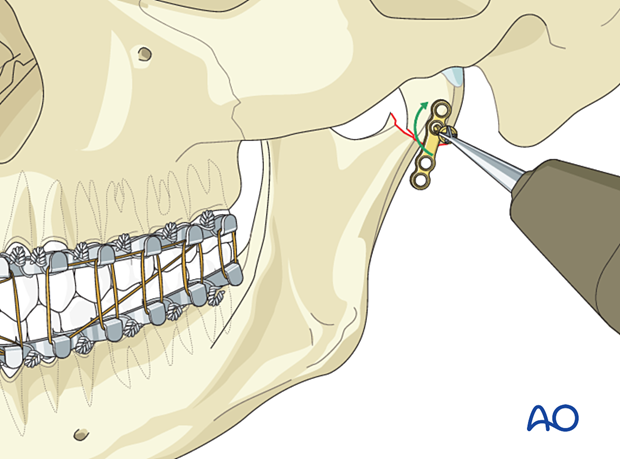
The fracture is reduced, and the plate is manipulated to ensure that all four screws can be inserted in secure bone.
The previously placed screw is then tightened.
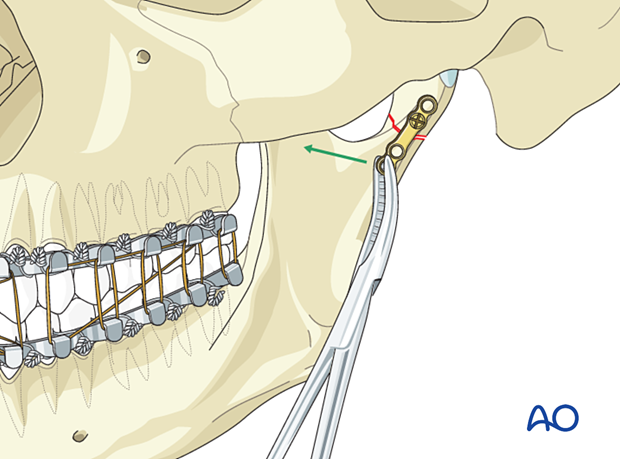
The bone plate is then used to distract the condyle inferior and laterally. Typically, the condyle can be inferiorly distracted 8-10 mm, allowing access for screw insertion in the most superior plate hole.
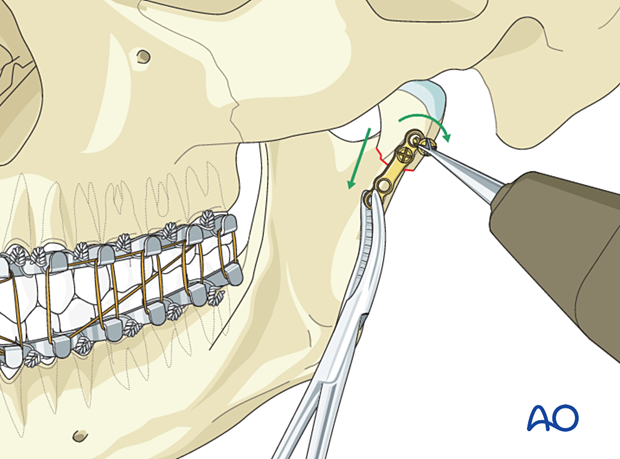
The condylar fragment is then reduced and the screws below the fracture are inserted.
7. Final check
Release the MMF and check the occlusion for accuracy and the bony surfaces for precise anatomic reduction.
The incision is then closed in layers.
8. Aftercare following ORIF of condylar process and head fractures
Arch bars and MMF screws
If MMF screws are used intraoperatively, they are usually removed at the conclusion of surgery. Arch bars may be maintained postoperatively for functional therapy. Removal of the arch bars, MMF screws etc should be delayed until the patient's occlusion has normalized without the use of elastics.
X-ray
Postoperative x-rays are taken within the first days after surgery.
Malocclusion
It is imperative that the occlusal relationship and mandibular function be assessed early and on a regular basis. The patient is evaluated at 1 week to verify the occlusion and to assure adequate performance of functional rehabilitation exercises.
If a malocclusion is detected, the surgeon must ascertain its etiology (using the appropriate imaging technique). If the malocclusion is secondary to surgical edema or muscle splinting, training elastics will be beneficial. The lightest elastics possible are used for guidance, because active motion of the mandible is desirable. Patients should be shown how to place and remove the elastics using a hand mirror.
If the malocclusion is secondary to a bony problem due to inadequate reduction or hardware failure or displacement, elastic training will be of no benefit. The patient must return to the operating room for revision surgery.
Follow up
The frequency of follow-up will largely be based on the findings of the 1 week appointment. Typically, if the patient is doing well at 1 week, they will not be seen for 2 more weeks. The necessity and frequency of future appointments will be based upon the findings from this appointment and at the discretion of the treating surgeon..
Basic postoperative instructions
DietThe patient can eat whatever is comfortable. If solid foods cause pain, the patient will self-limit their diet to softer foods. There is no contraindication to taking solid foods from the standpoint of their fracture. Nevertheless, most surgeons recommend soft diet for a variable period of time.
Patients with extraoral approaches are not compromised in their routine oral hygiene measures and should continue with their daily schedule.
Patients with intraoral wounds must be instructed in appropriate oral hygiene procedures. The presence of the arch-bars and any elastics makes this a more difficult procedure than normal. A soft toothbrush (dipping in warm water makes it softer) should be used to clean the surfaces of the teeth and arch-bars. Any elastics are removed for oral hygiene procedures. Chlorhexidine oral rinses should be prescribed and used at least three times each day to help sanitize the mouth. For larger debris, a 1:1 mixture of hydrogen peroxide (0.25%)/chlorhexidine (0.12%) can be used. The bubbling action of the hydrogen peroxide helps remove debris. A Waterpik® is a very useful tool to help remove debris from the wires. If a Waterpik® is used, care should be taken not to direct the jet stream directly over intraoral incisions as this may lead to wound dehiscence.
Patients are instructed in physical therapy maneuvers to restore mandibular excursions. This includes maximum jaw opening, right and left lateral excursions, and protrusive excursions of the mandible. They should perform these exercises several times a day.


