The transbuccal system
1. Principles
General considerations
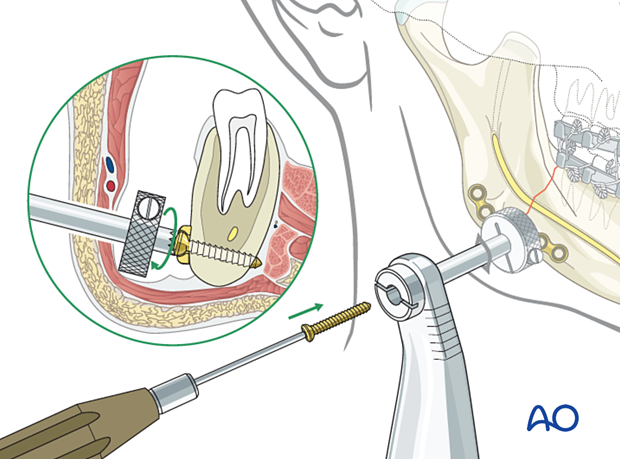
Transbuccal instrumentation extends the versatility of transoral approaches.
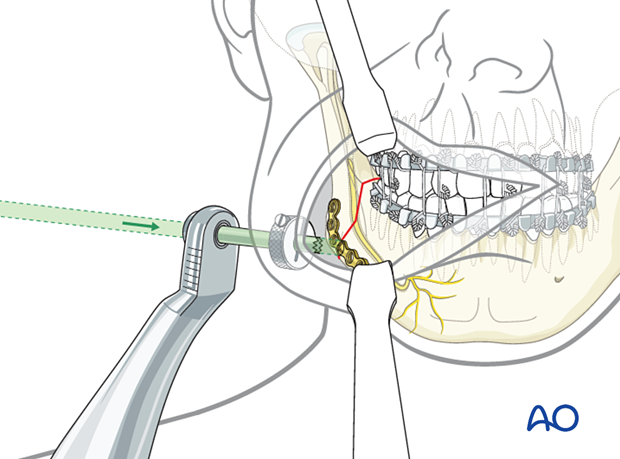
Drilling and screw insertion can be performed at a right angle to the lateral mandibular surface through a transbuccal approach while having a direct vision of the surgical field transorally.
The technique allows for less soft-tissue retraction when operating in the posterior mandible.
AO Teaching video
AO Teaching Video "The Transbuccal System"
2. Transbuccal system
Transbuccal guide
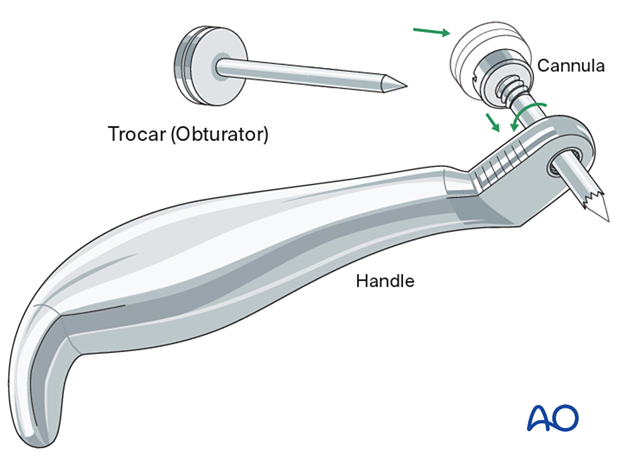
The transbuccal system's main component is the handle, equipped with either a removable cannula (as illustrated) or permanently fixed cannula. The trocar (also known as the obturator) is used to penetrate the soft tissues with its pointed tip.
Mountable retractors
The cannula is mounted through the transoral route with a self-retaining retractor for the buccal soft tissues.
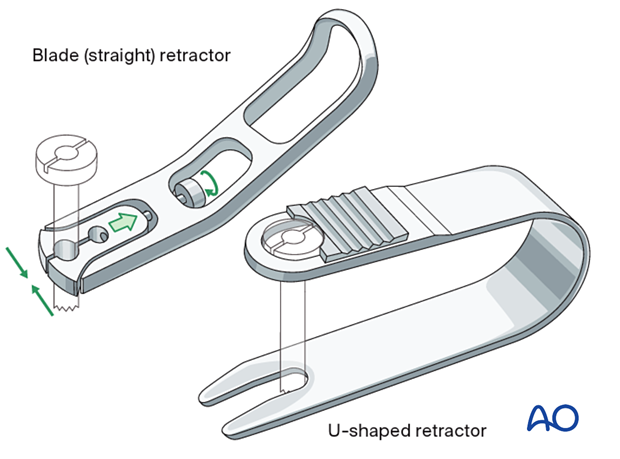
There are several retractor types available which are used at the surgeon's preference such as:
- Blade retractor (fixed with a screw to the cannula shaft)
- U-shaped retractor (fixed externally to the handle)
The following retractor types can also be used:
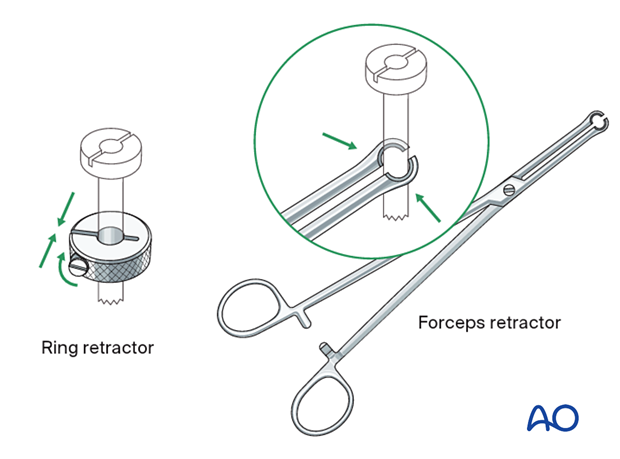
- Ring retractor (fixed with a screw to the cannula shaft)
- Forceps retractor (fixed to the cannula shaft)
Drill sleeves
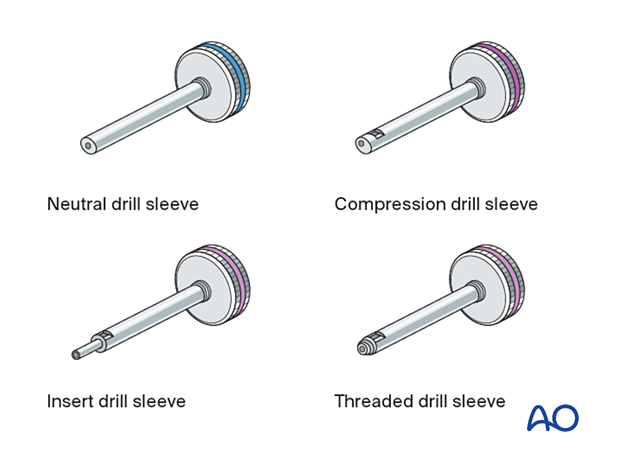
For accurate drilling, a set of exchangeable drill sleeve inserts with various inner diameters can be used.
Some drill sleeves are threaded and can be screwed into a plate hole, thus facilitating plate positioning.
Some drill sleeves have side windows, which allow for visualization of drilling or screw insertion and provide a port for direct irrigation.
3. Insertion of transbuccal instrument
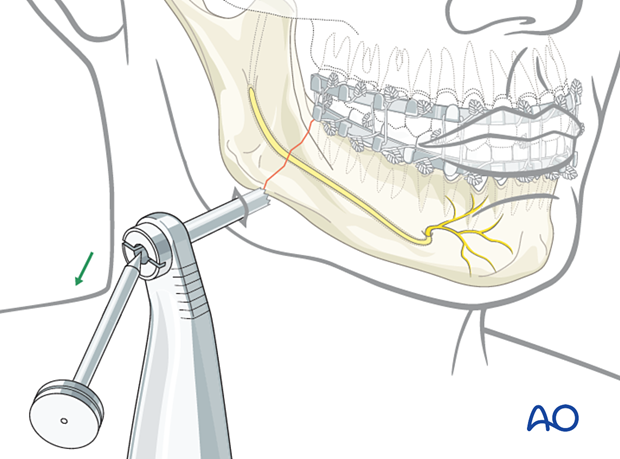
Making a stab incision
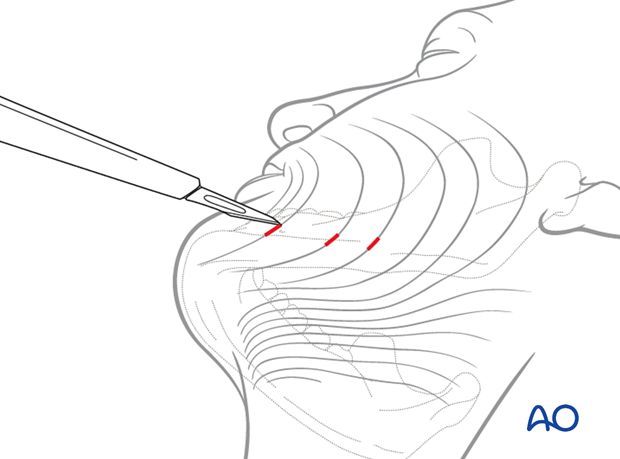
The location of the stab incision is predetermined by palpation. Place the index finger intraorally over the desired osteosynthesis site and match it with the thumb on the external cheek surface. The incision is marked on the skin and a small stab incision is made to prepare for the insertion of the cannula.
The orientation of the stab incision must be parallel to the relaxed skin tension lines (RSTL).
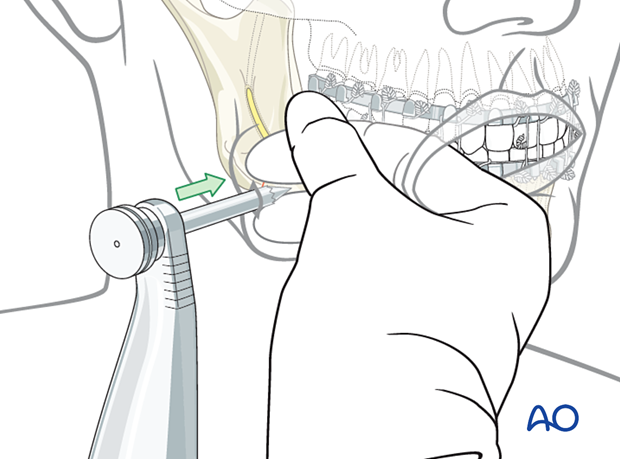
Insert the cannula with the trocar through the facial tissue down to the bone.
Care should be taken while inserting the cannula to avoid injury to the operator's fingers.
Remove the trocar to open the cannula as a channel for drilling and screw insertion.
Make sure to keep the trocar in place as it may slip out easily. Recannulation may sometimes be difficult and may even require the use of the trocar again.
4. Retractor options
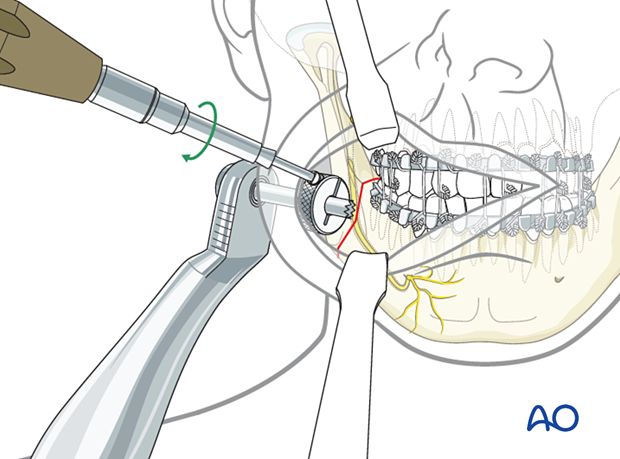
Ring retractor
Angle the tip of the cannula slightly anteriorly and place the ring retractor over the cannula tip.
Use a screwdriver (2.0 or 2.4) to tighten the screw until the ring is secured to the cannula.
The cheek soft tissues can now be retracted using the handle.
Blade (straight) retractor
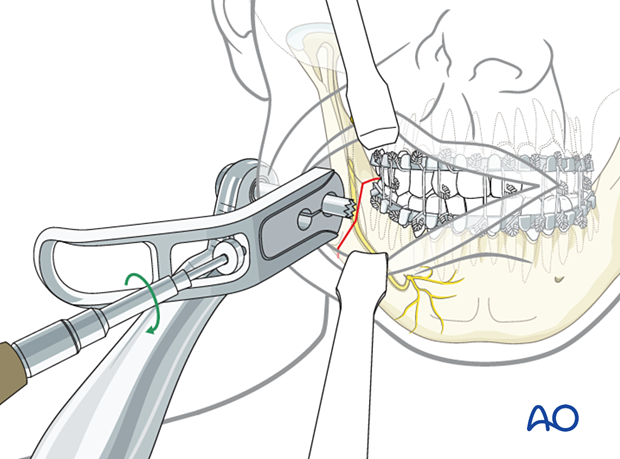
Place the blade-shaped retractor over the forward-tilted cannula tip.
Tighten the blade fixation screw.
The cheek soft tissues can now be retracted.
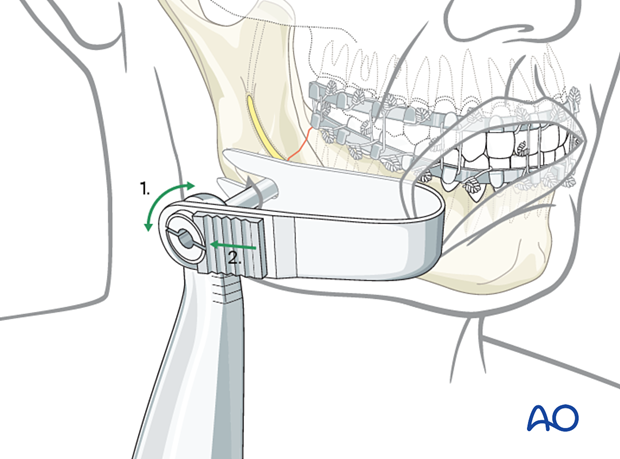
U-shaped retractor
Start applying the U-shaped retractor by placing the forked inner end of the retractor around the cannula intraorally.
Place the outer end over the cannula disk at the handle.
The handle and the U-shaped retractor can be hinged around a ratchet joint (1) on the end of the outer cannula (2). The handle is then brought into a comfortable working position.
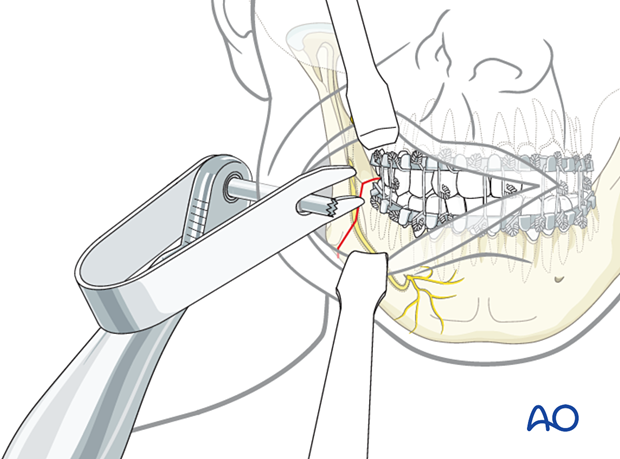
Forceps retractor
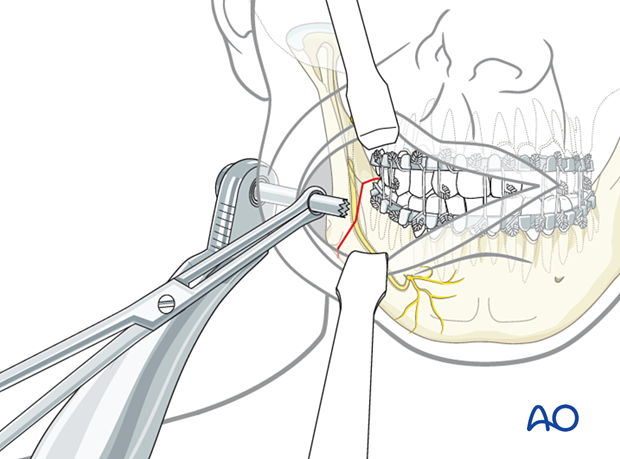
Place the forceps retractor next to the cannula tip, which is tilted forward. Then open the mouth of the beak-shaped forceps and grip the cannula tip. Adjust the placement of the forceps to the appropriate height and close them using the ratcheting mechanism.
Retraction of the cheek soft tissues using the forceps and handle allows simultaneous viewing and handling of the cannula tip inside the transoral surgical cavity.
The cheek soft tissues can also be retracted using the external handle. However, viewing and handling are then separated by the cheek soft tissues, requiring switching of the view between the inside and outside.
5. Screw insertion
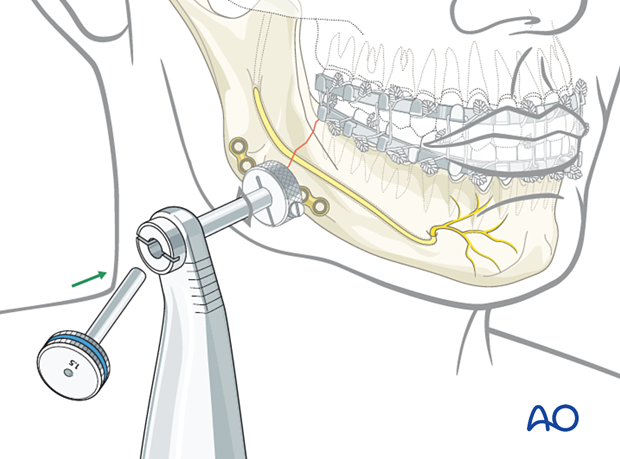
Insert drill sleeve
Next, an appropriate drill sleeve is chosen and inserted into the cannula.
The sequence of screw insertion is demonstrated in this section.
Drill hole
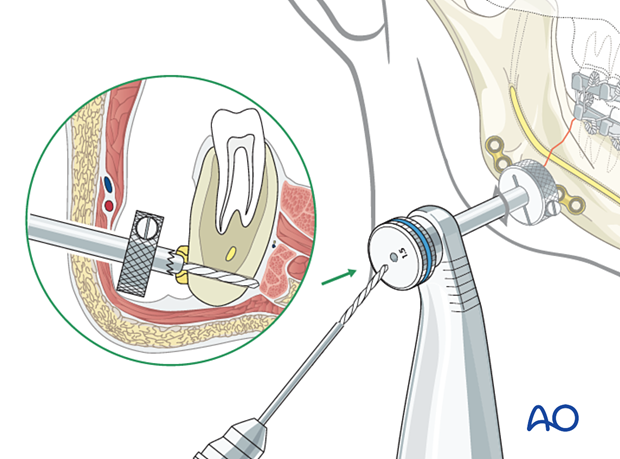
The tip of the cannula with the drill sleeve inserted is placed precisely at the position of the intended screw placement directly on the bony surface or into a hole in the fixation plate.
A hole is drilled using the appropriate drill sleeve and drill bit. The drill bit's advancement into the bone cannot be directly observed unless a drill sleeve with a window is used or the cannula is retracted slightly.
Determine screw length
The appropriate screw length is determined with a depth gauge, and the screw is inserted using a self- retaining screwdriver.
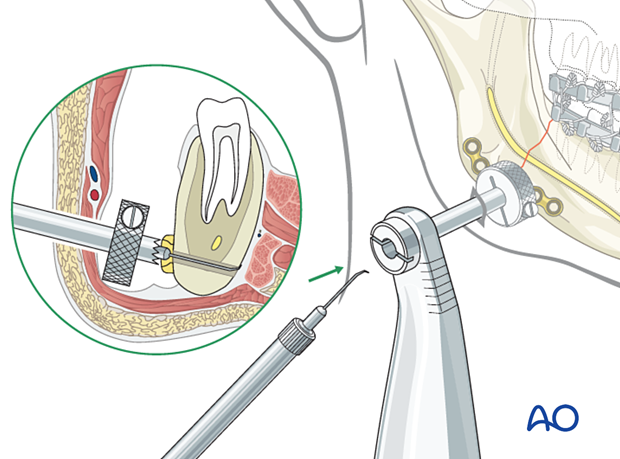
Insert screw
Mount the screw on the self-retaining screwdriver and introduce the screw into the cannula.
Unless securely attached to the screwdriver blade, the screw can easily become detached from the screwdriver.
After screw purchase has been obtained, the cannula can be slightly retracted to allow observation of screw insertion.
The transbuccal system is dismantled after all screws have been inserted.
A simple suture is usually sufficient to close the stab incision. Alternately, a small piece of adhesive tape may suffice. The stab wound heals rapidly with minimal scarring.
