

Screw fixation
1. General considerations
The treatment goals are to reposition the first metacarpal in the carpometacarpal joint and to restore the articular surface.
Depending on the size of the palmar marginal fragment, two treatment options are available.
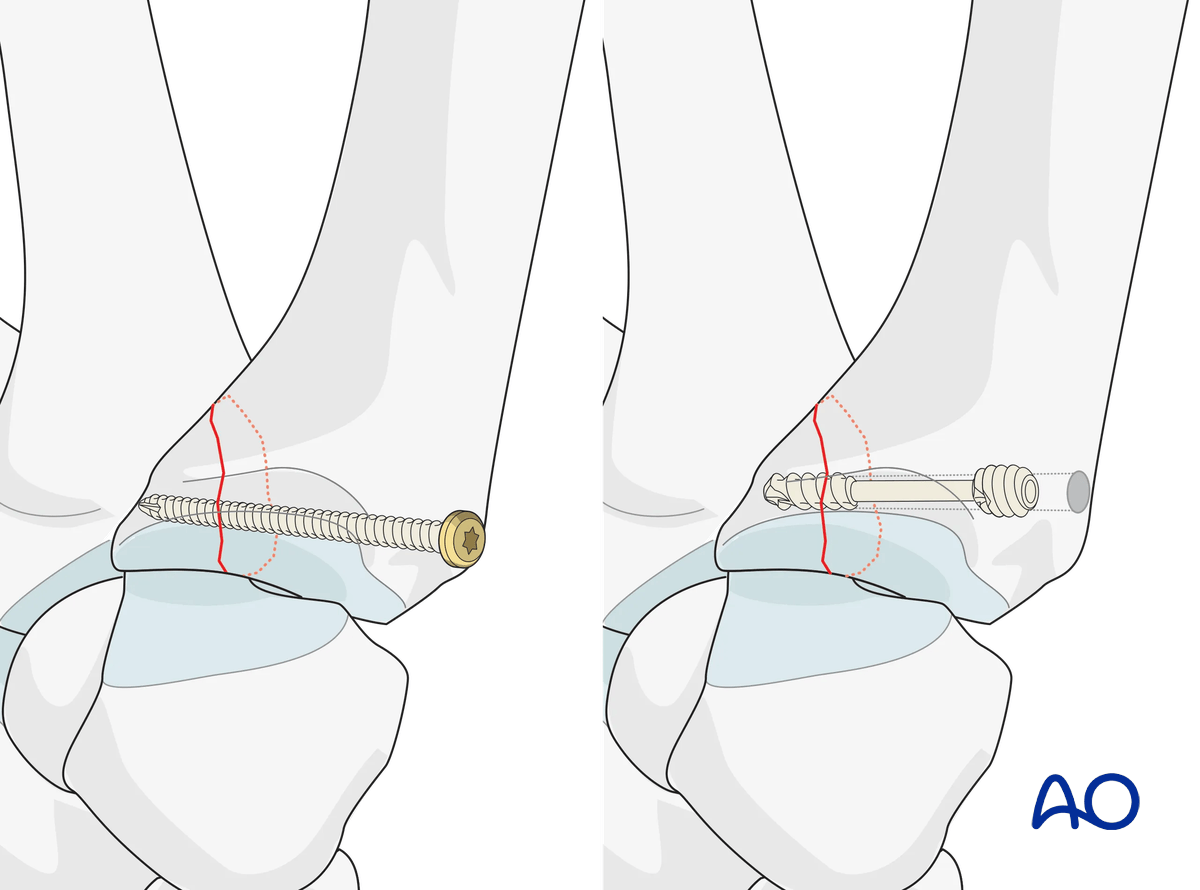
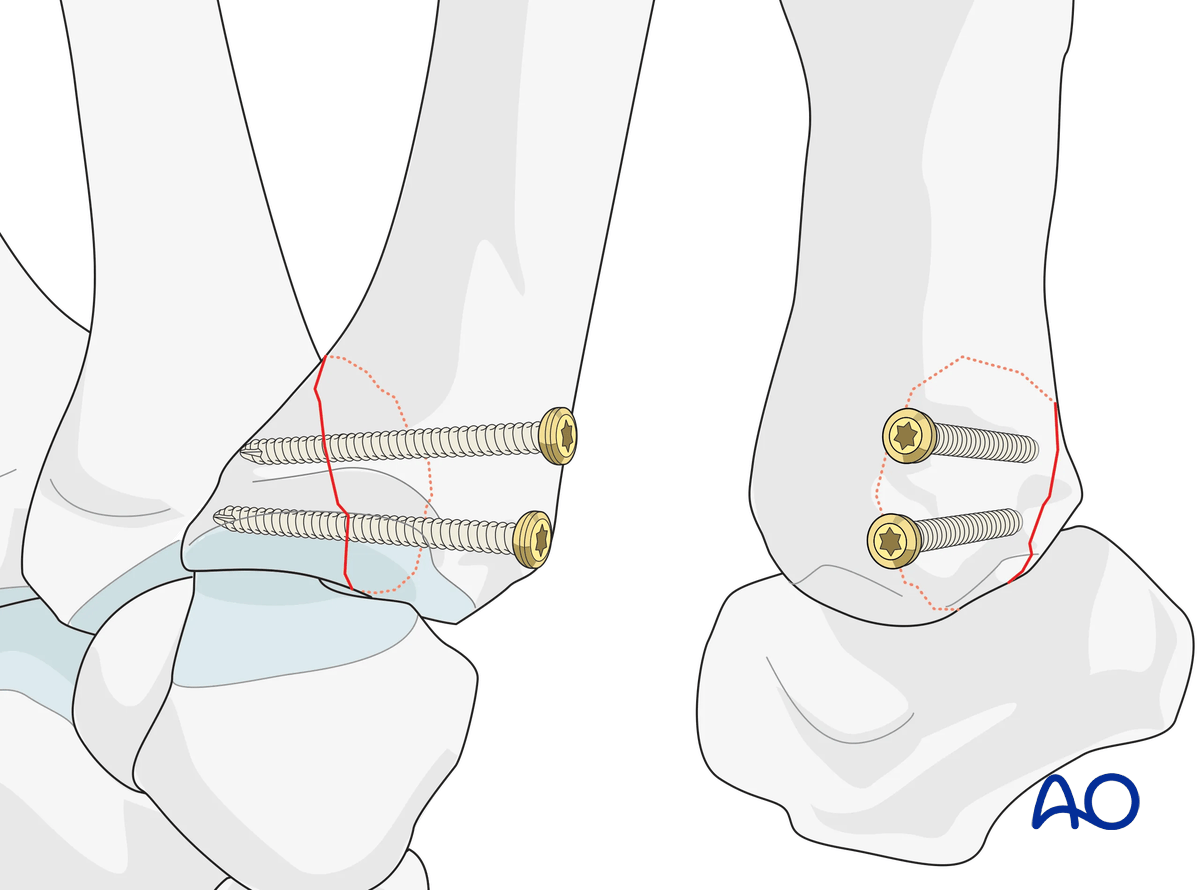
Position screws
If the fragment comprises more than one third of the articular surface, two screws are used to ensure rotational stability of the fragment.
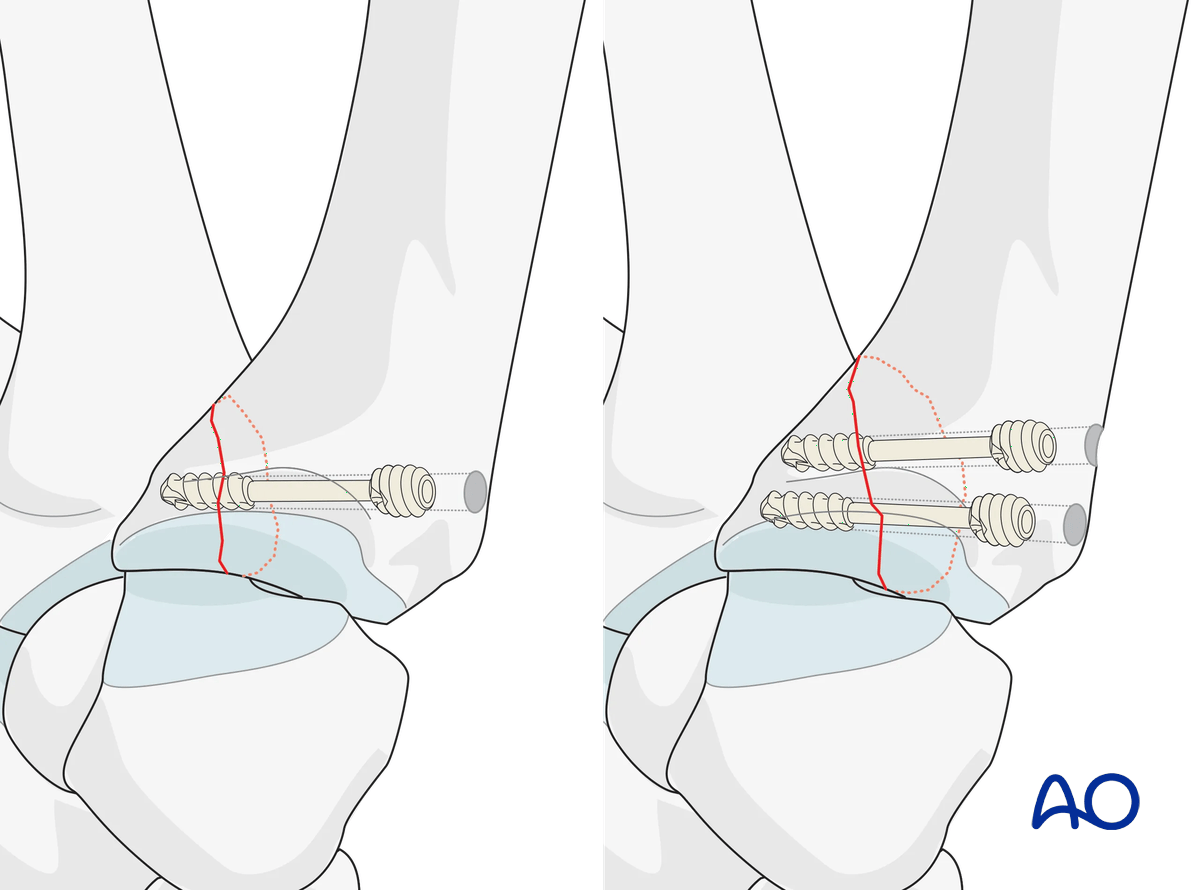
Headless compression screw
Alternatively, one (or two) cannulated headless compression screw(s) may be used. This has the advantage of less protrusion of the screw head. Also, placing the guide wires allows for trajectory adjustments, holding the reduction, and optimal screw placement.
AO teaching video
Metacarpal I, base—Bennett fracture—Fixation with 2.0 mm lag screws
Renato Fricker, Ladislav Nagy, Doug Campbell, Sudhir Warrier
2. Patient preparation
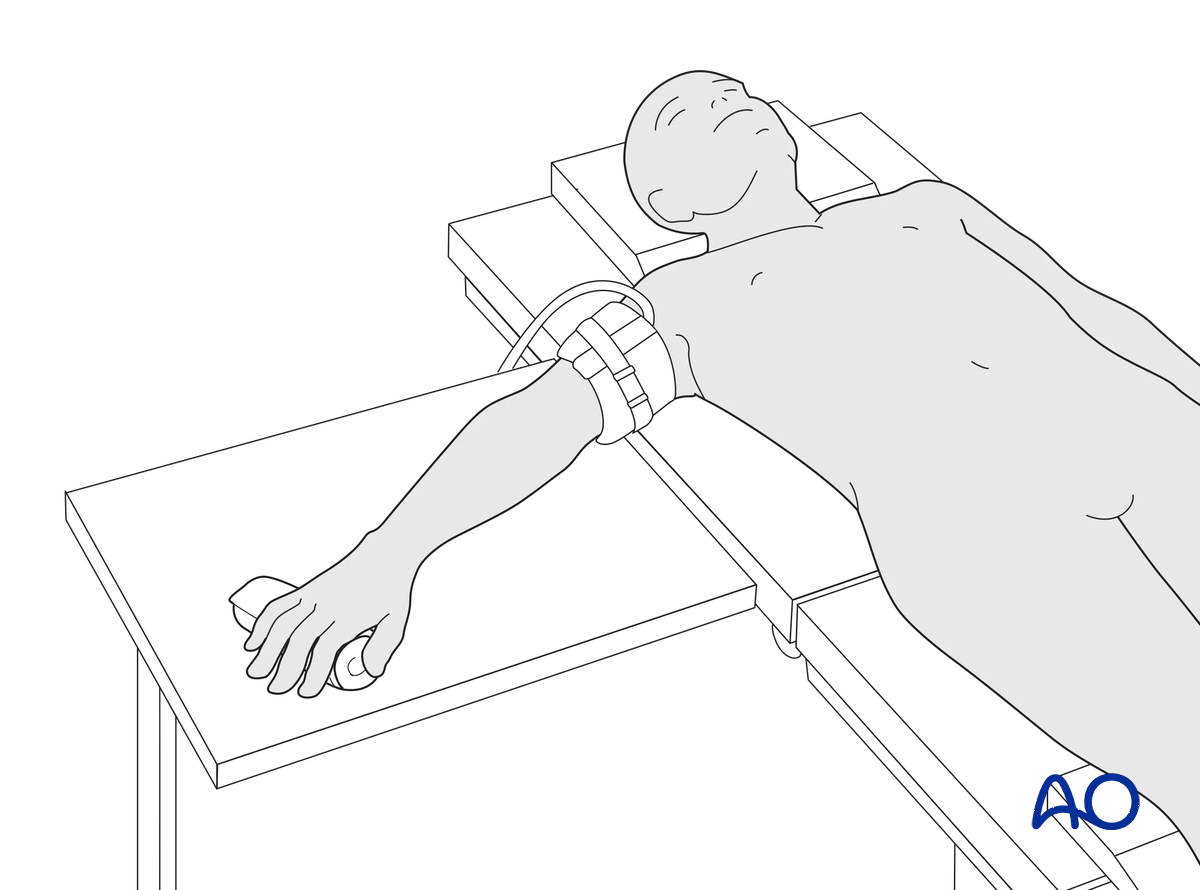
This procedure is usually performed with the patient in a supine position with the arm on a radiolucent side table.
3. Approach
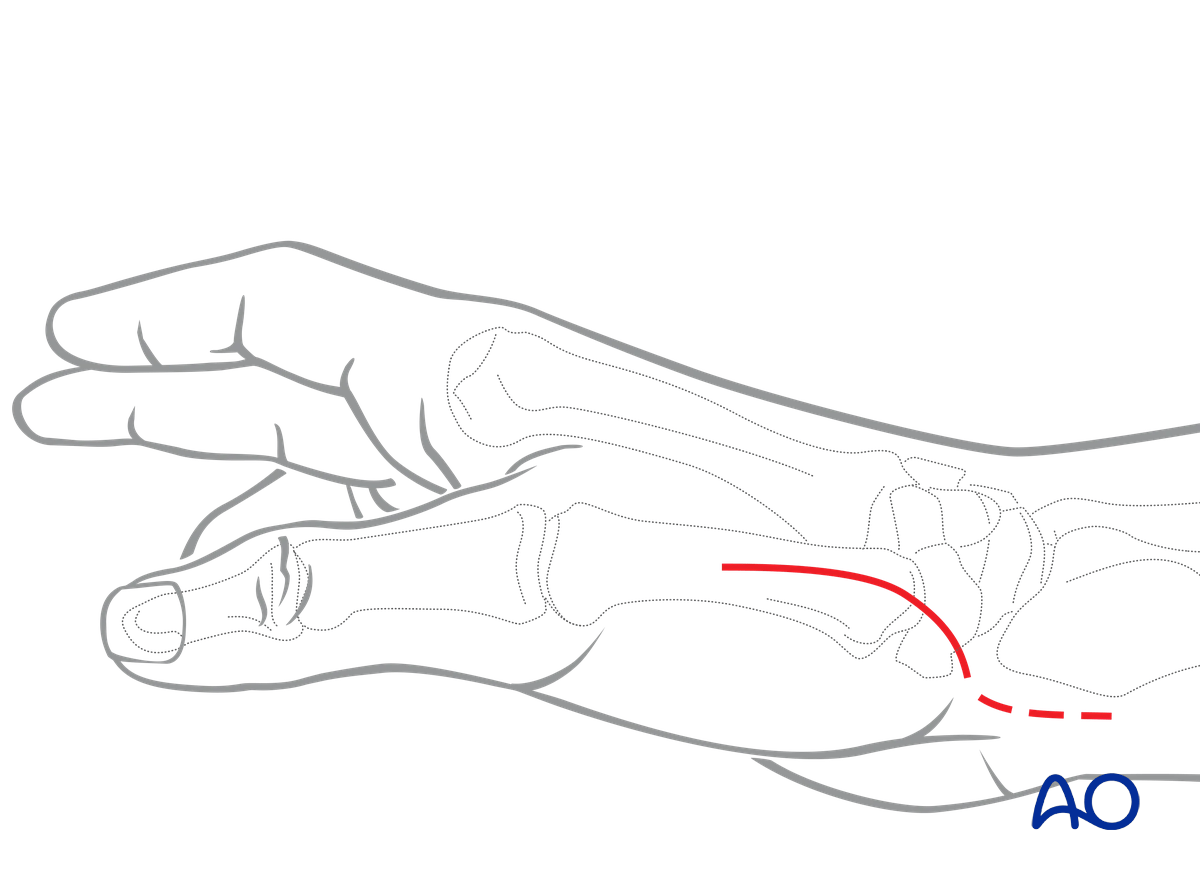
For this procedure a radiopalmar approach to the base of the thumb is normally used.
If the Bennet fragment can be reduced in a closed fashion, the proximal section of a dorsal approach to the metacarpal may be sufficient for screw insertion. This approach does not allow for direct visualization of the fracture line.
4. Closed reduction
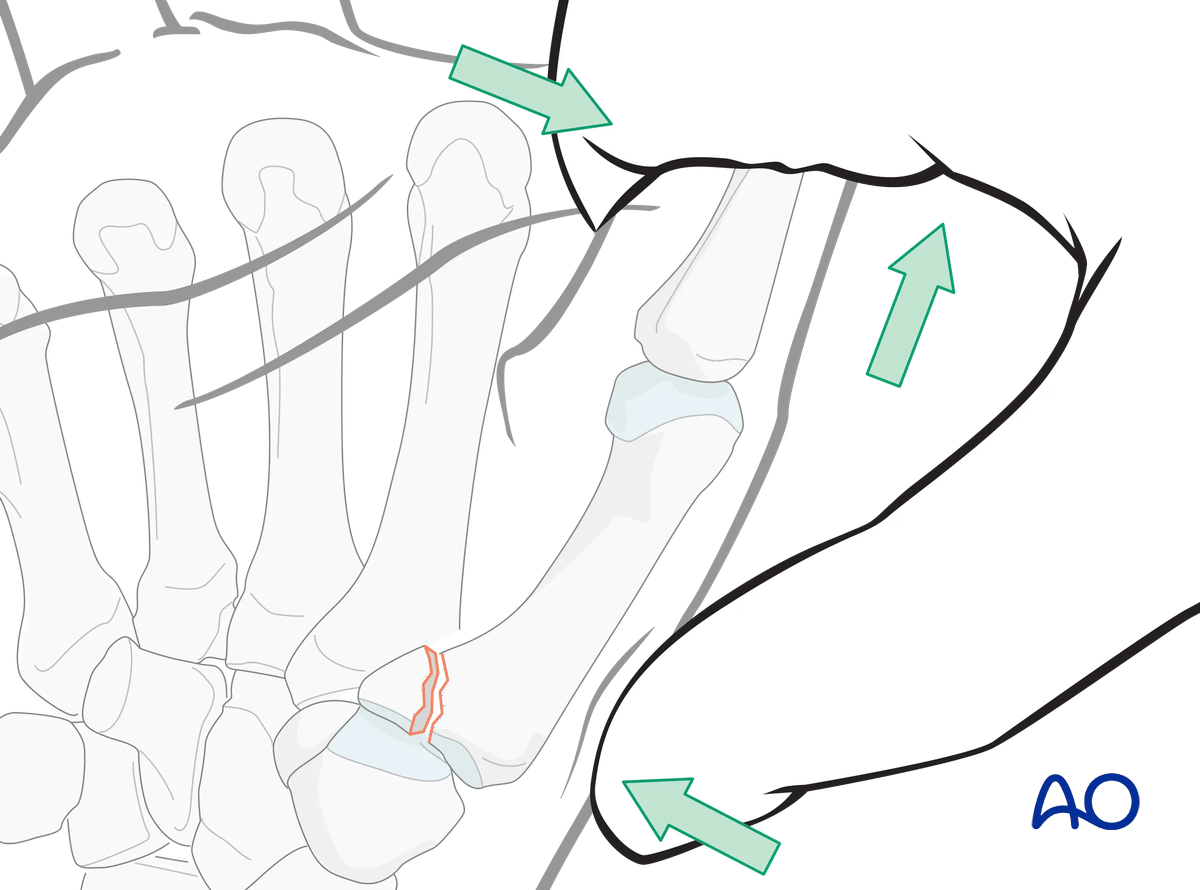
Closed reduction is performed by a combination of:
- Longitudinal traction
- Pronation of the metacarpal
- Pressure at the thumb metacarpal base
Confirm correct restoration of the articular surface using image intensification.
If closed reduction is unsuccessful, proceed with an open reduction with a radiopalmar approach.
5. Open reduction
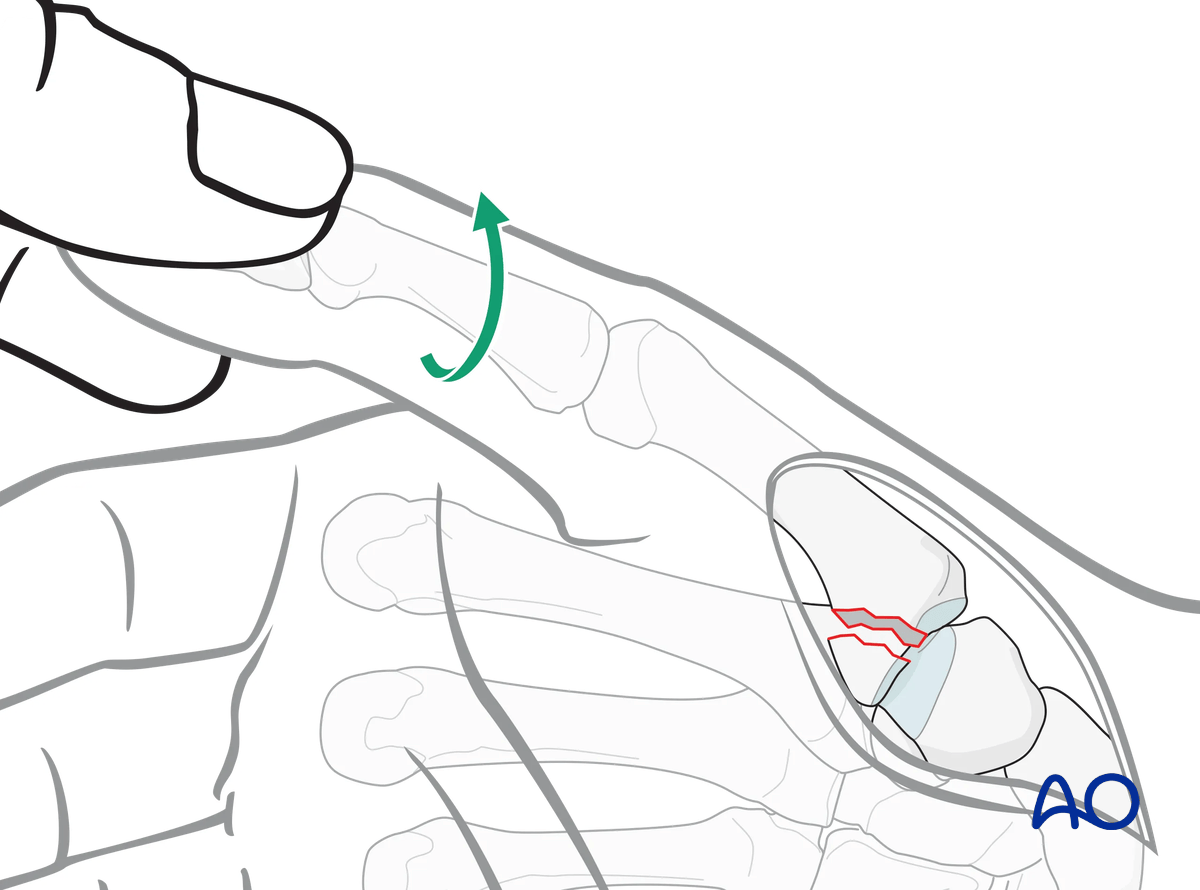
Inspection of the joint
To determine the exact geometry of the fracture and correct placement of the screws, it may be helpful to open the fracture plane by exerting traction and supination on the thumb.
The fracture surfaces must be irrigated for better visualization.
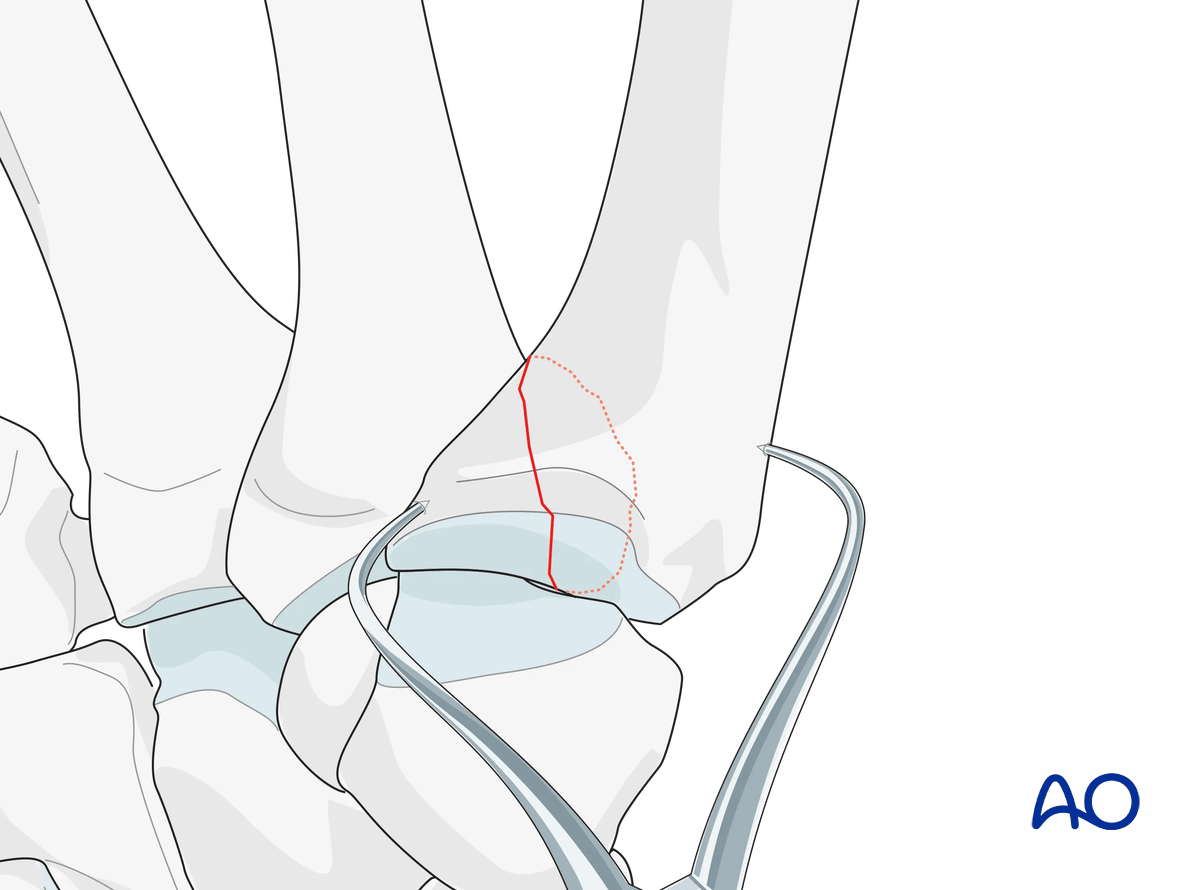
Reduce the fracture by pronation of the metacarpal and hold the reduction with pointed reduction forceps.
Under direct vision, check that the joint surface is anatomically reduced, and adjust as necessary.
6. Position-screw insertion
Screw-size selection
The exact size of the diameter of the screws used will be determined by the fragment size and the fracture configuration.
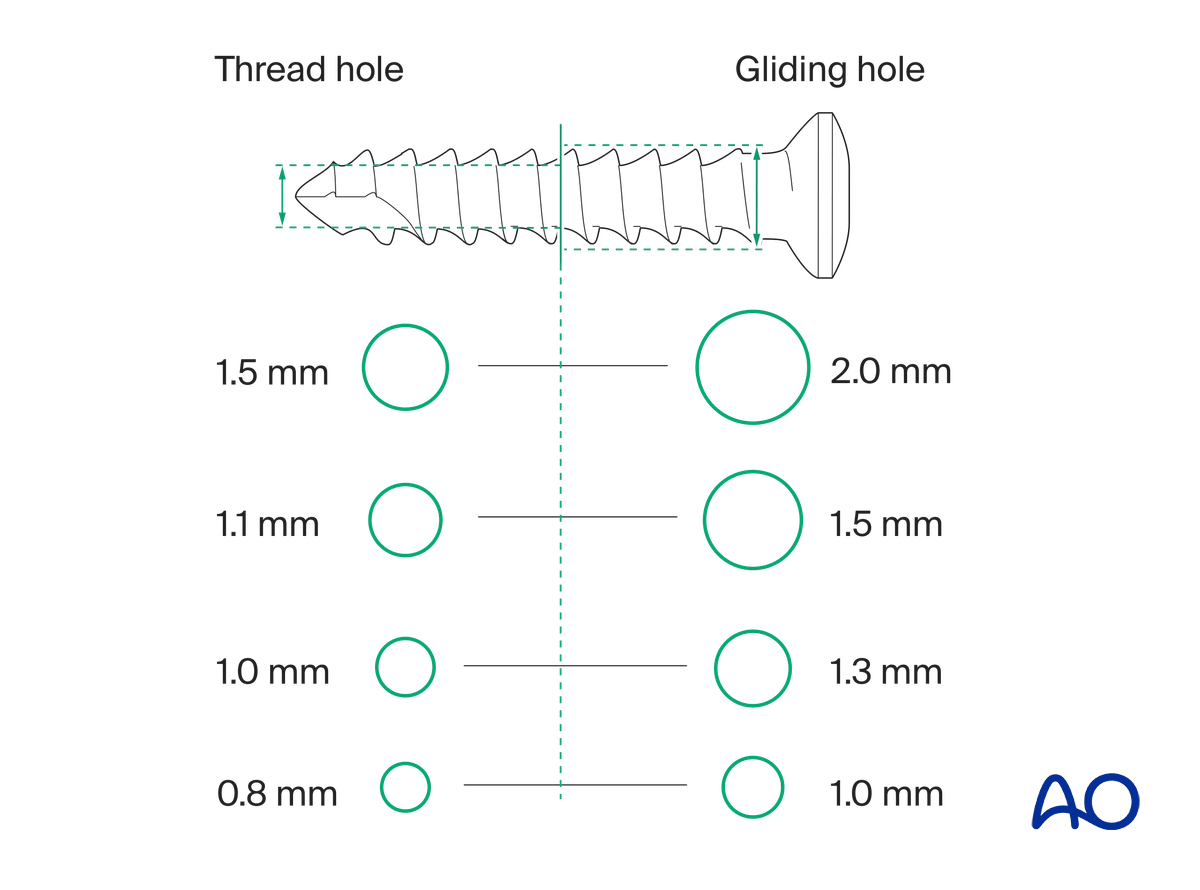
The various gliding and thread hole drill sizes for different screws are illustrated here.
Drilling for the screws
Use 2.0 mm screws. With smaller marginal fragments, it may be necessary to use 1.5 mm screws.
Since the fracture is in the metaphyseal region, position screws with extrinsic compression may be used for fixation.
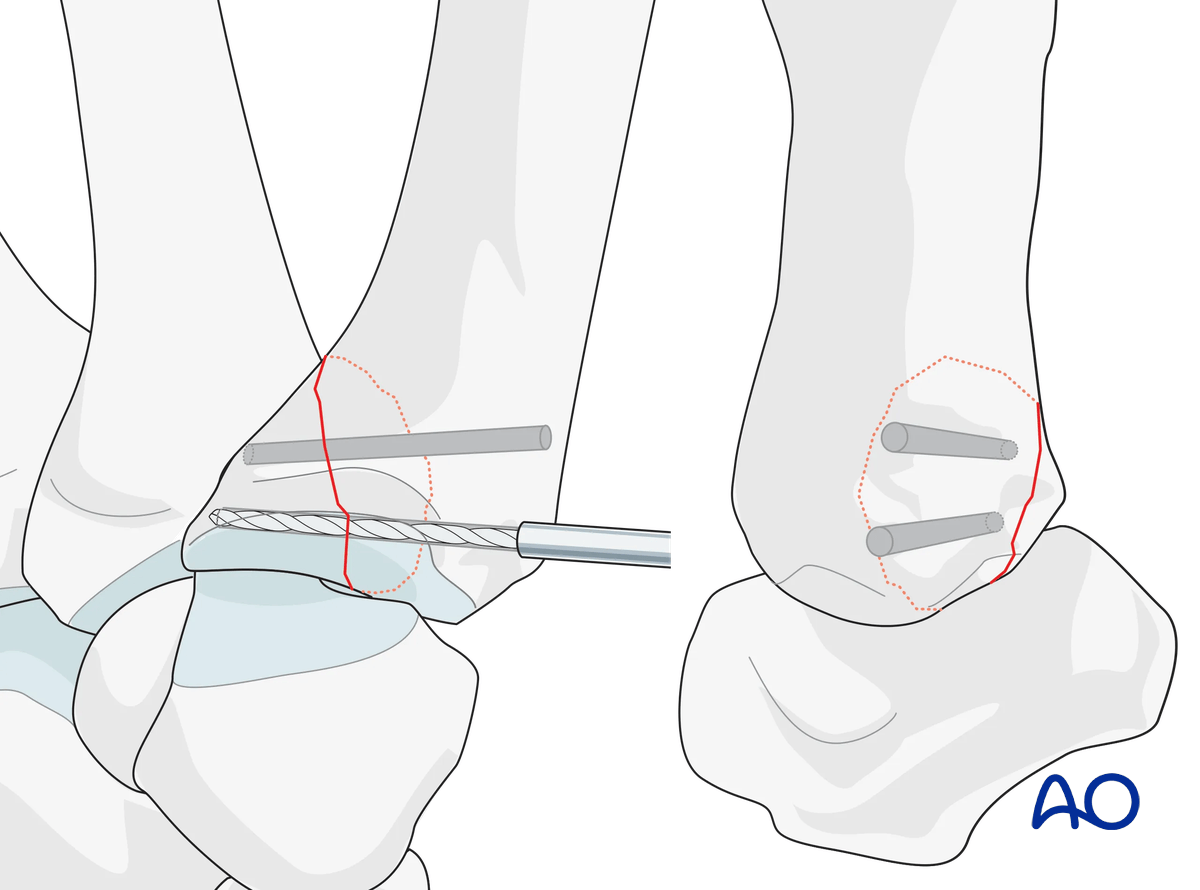
Drill two holes in a dorsopalmar direction parallel to each other and to the articular surface through both fragments. Aim to the ulnopalmar corner of the metacarpal base.
Screw insertion
Insert the first screw and carefully tighten it.
Confirm position using image intensification.
Insert the second screw.
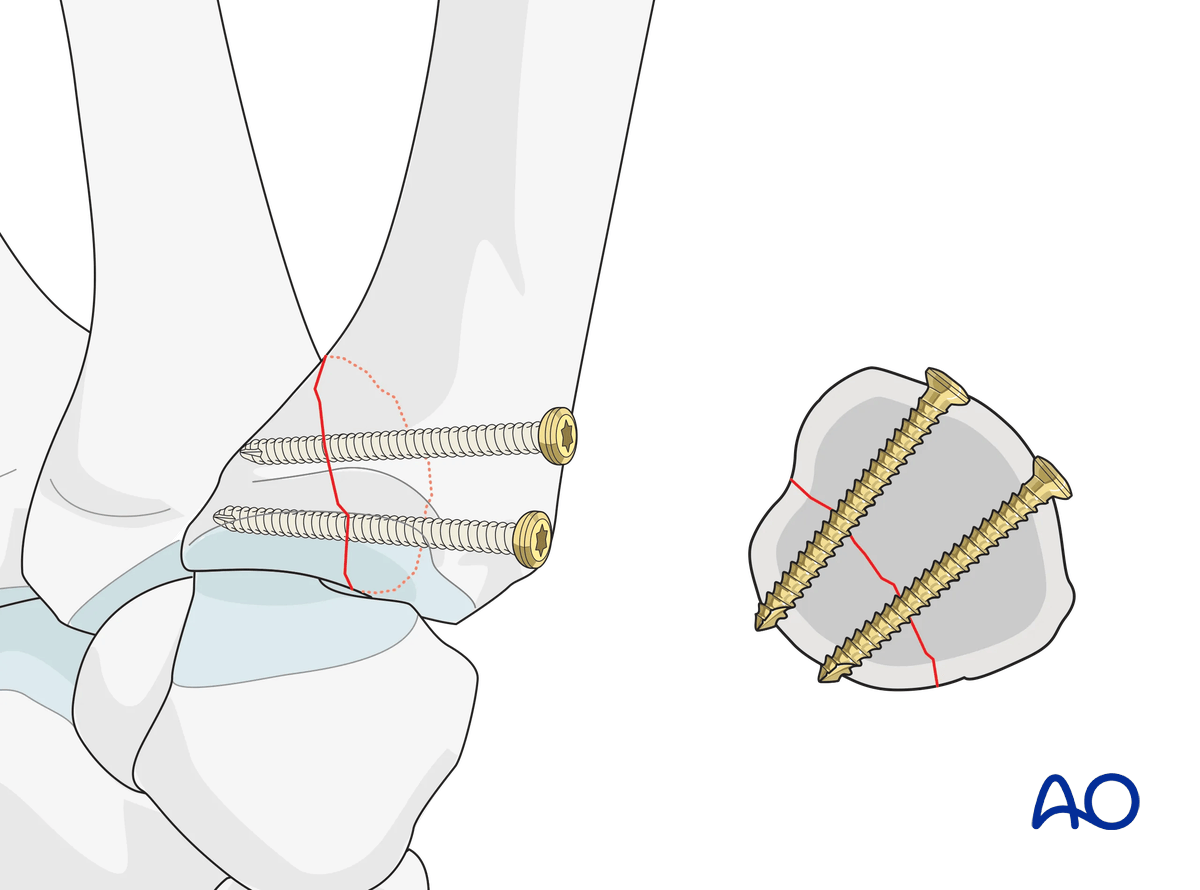
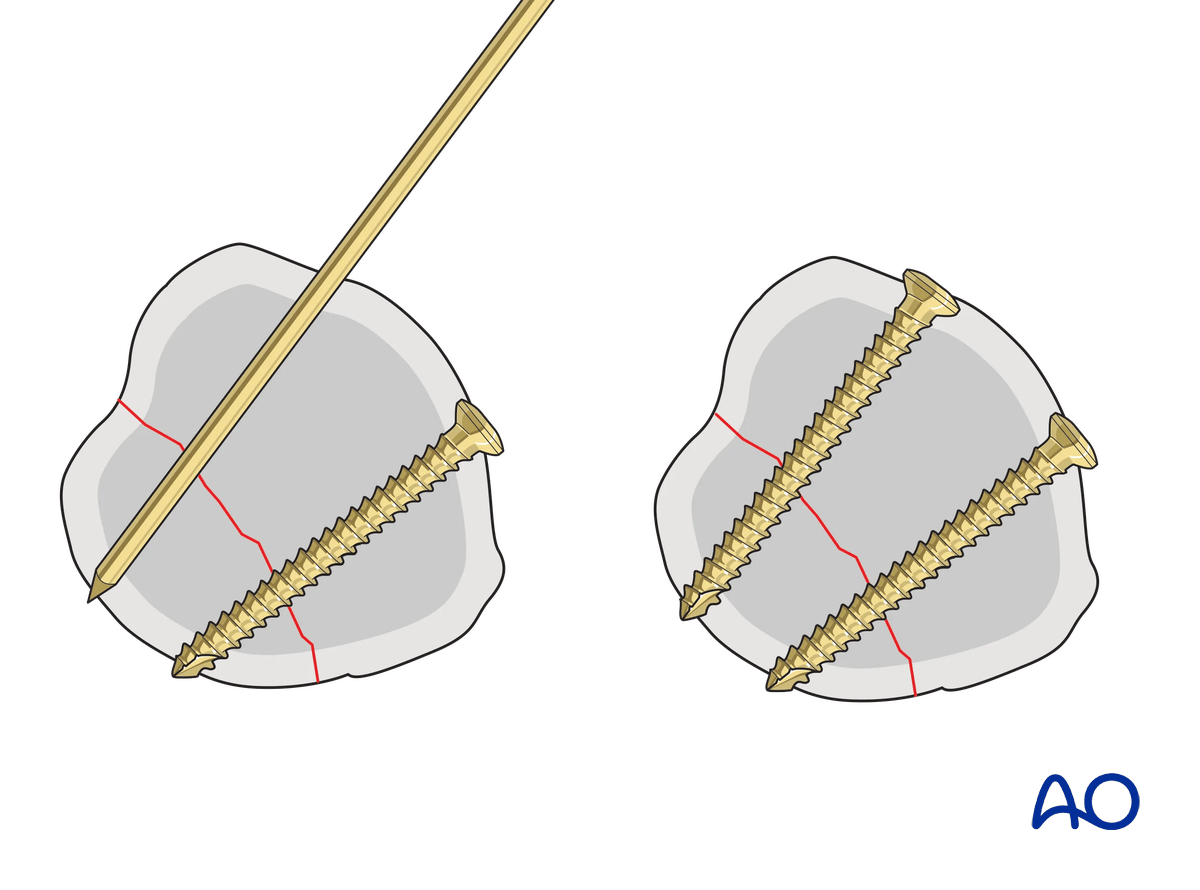
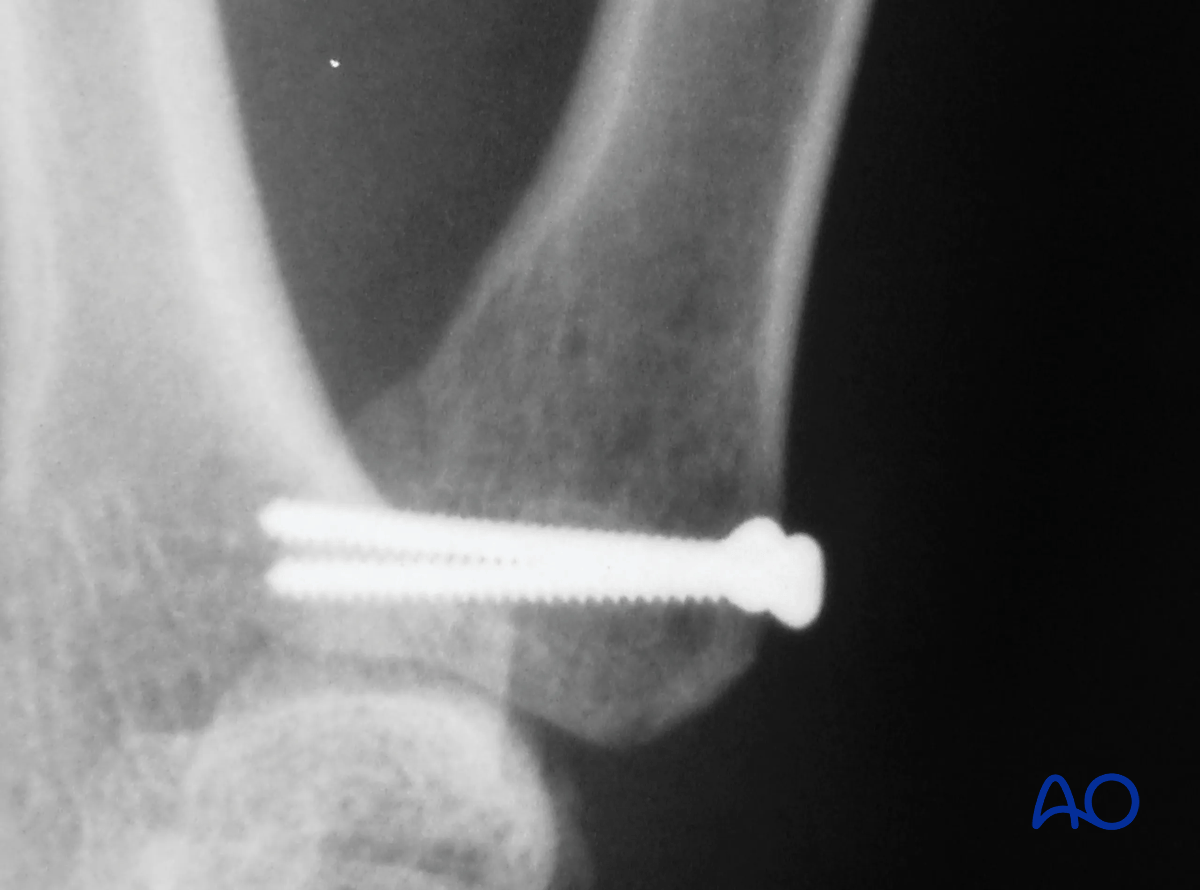
Confirm position and stability using image intensification.
Also assess the stability of the fixation under direct vision.
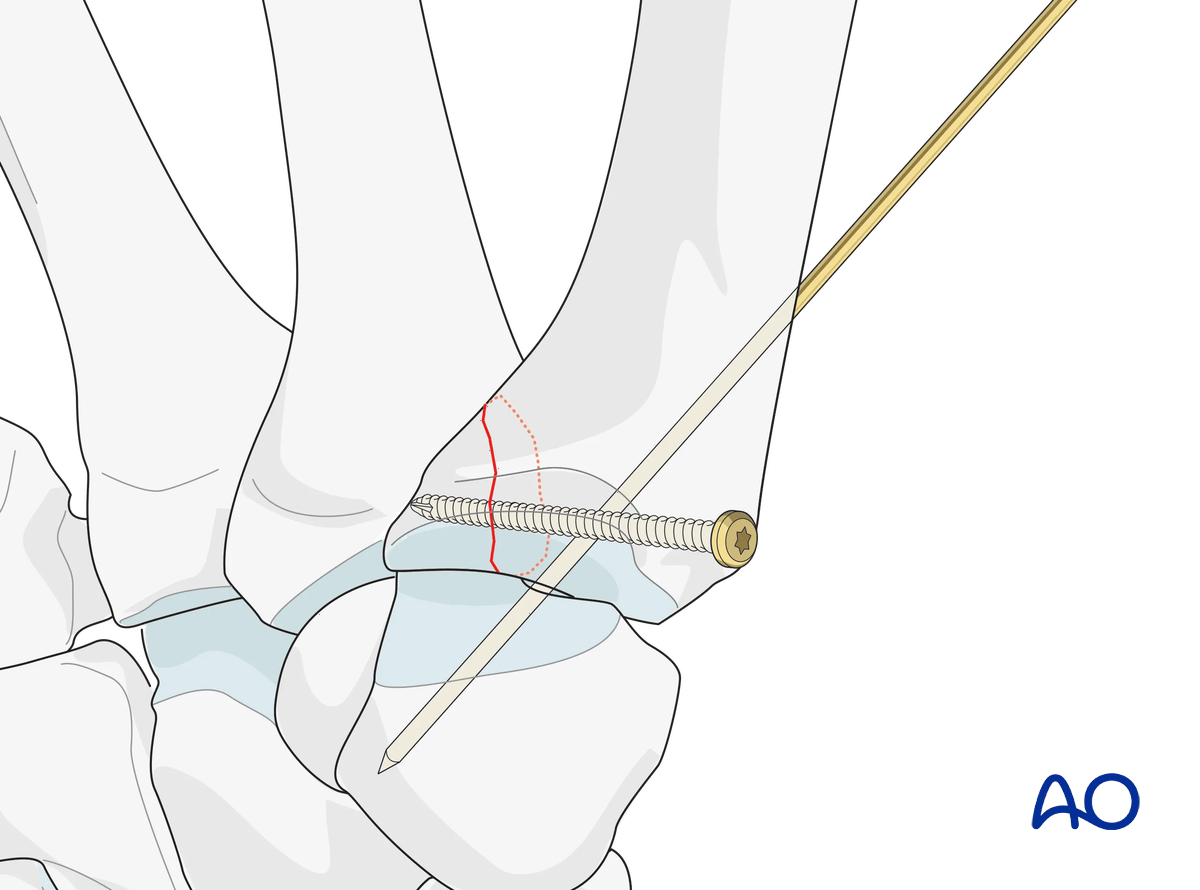
Carpometacarpal K-wire fixation
If additional stabilization is required to protect the screw fixation, insert a temporary K-wire through the CMC joint.
7. Insertion of headless compression screw(s)
In a small fragment, only one screw can be inserted.
If the fragment is large enough, plan for two screws.
Guide-wire insertion
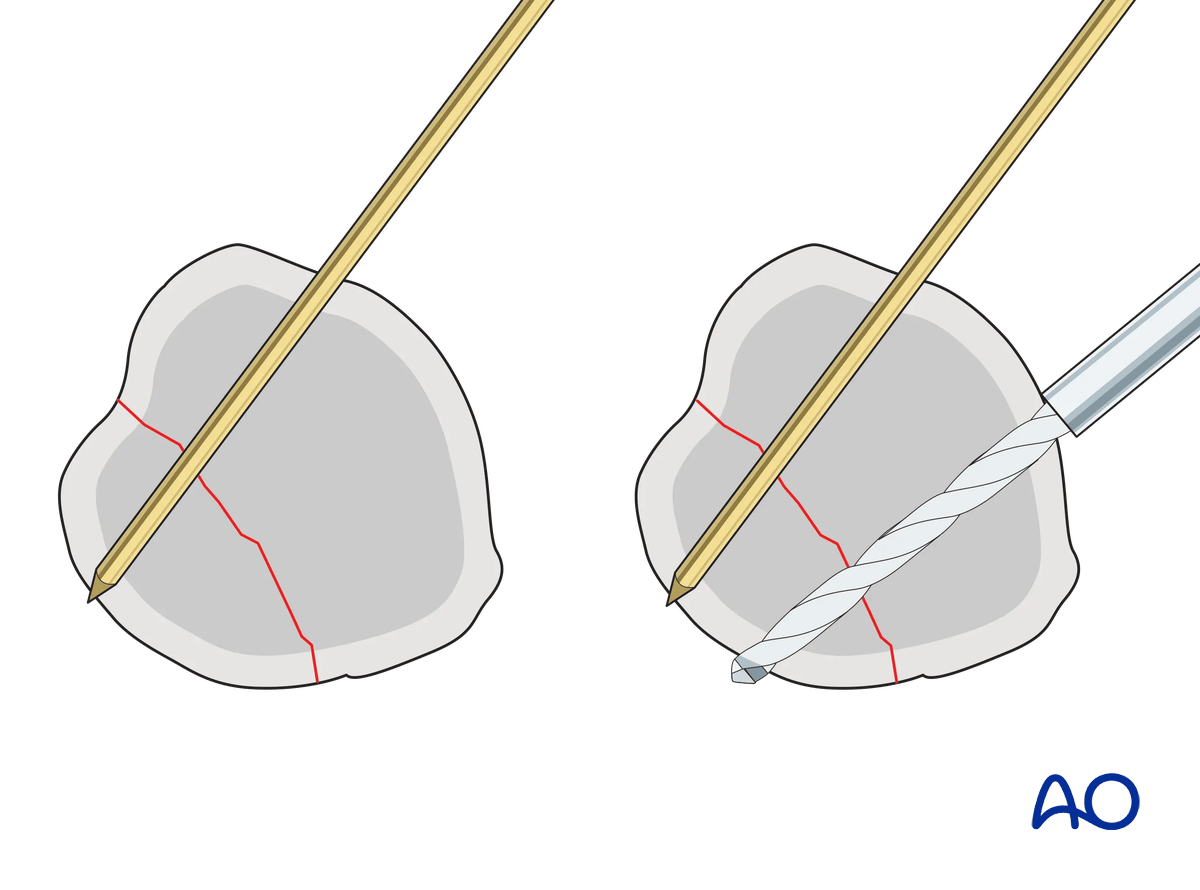
Insert a guide wire up to the fragment in a dorsopalmar direction parallel to the articular surface aiming slightly ulnarly.
Check the position with an image intensifier in a lateral view. This will confirm the correct trajectory (-ies) of the wire(s).
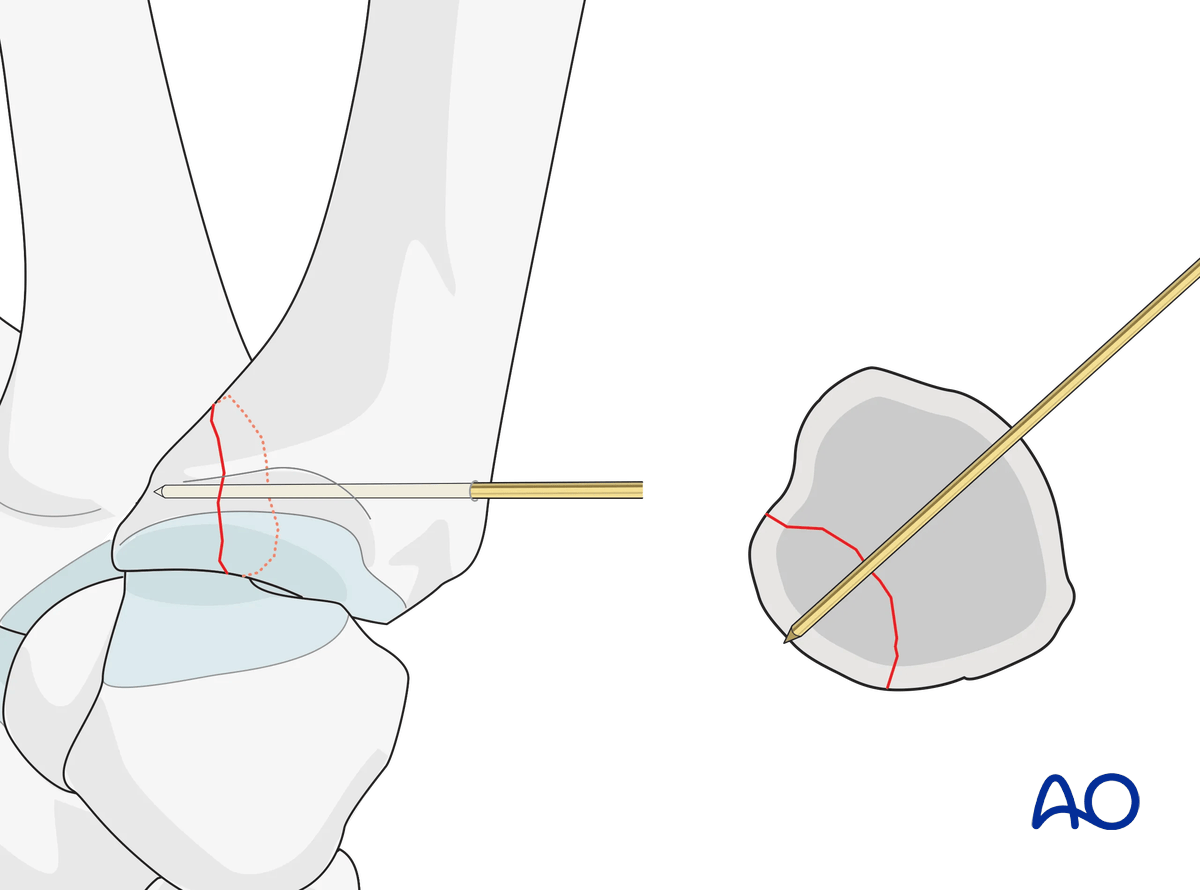
Insert the headless compression screw in a standard manner over the guide wire.
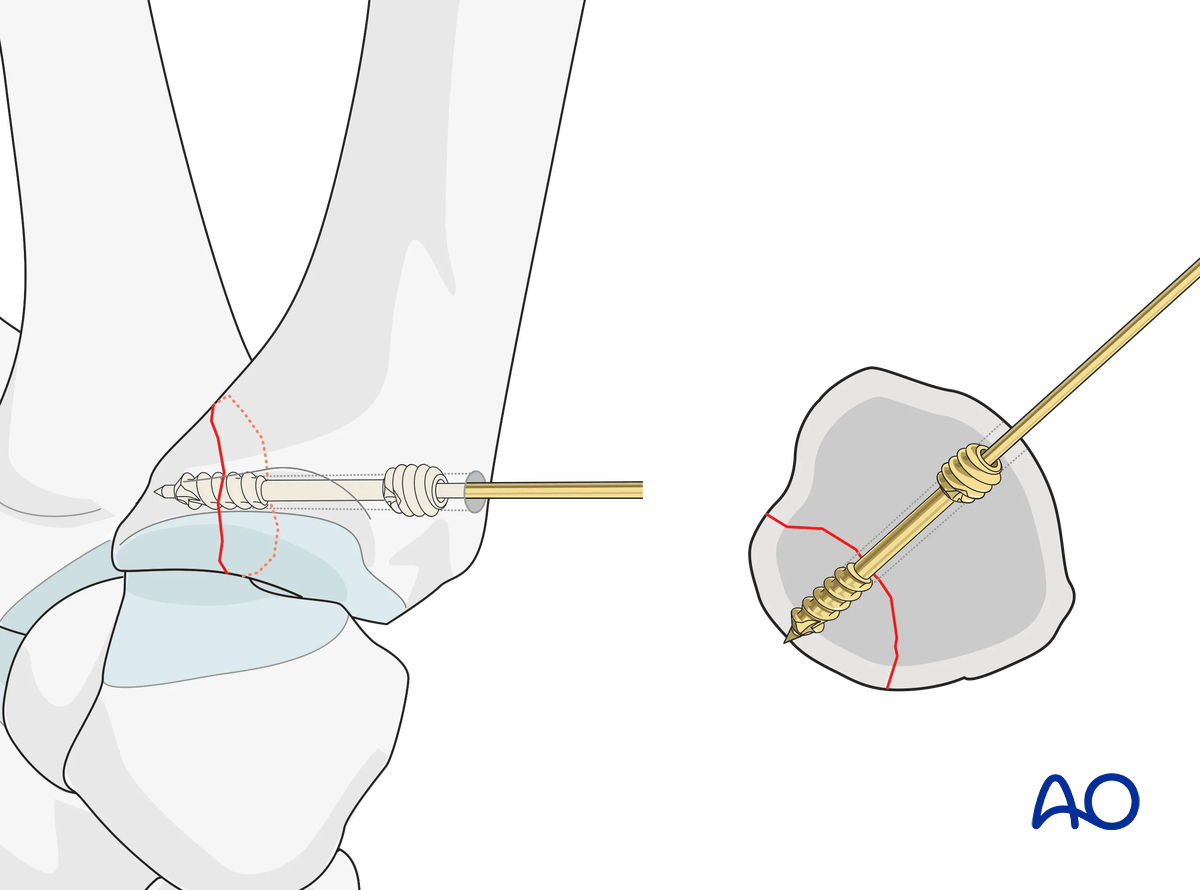
Confirm position and stability using image intensification.
Also assess the stability of the fixation under direct vision.
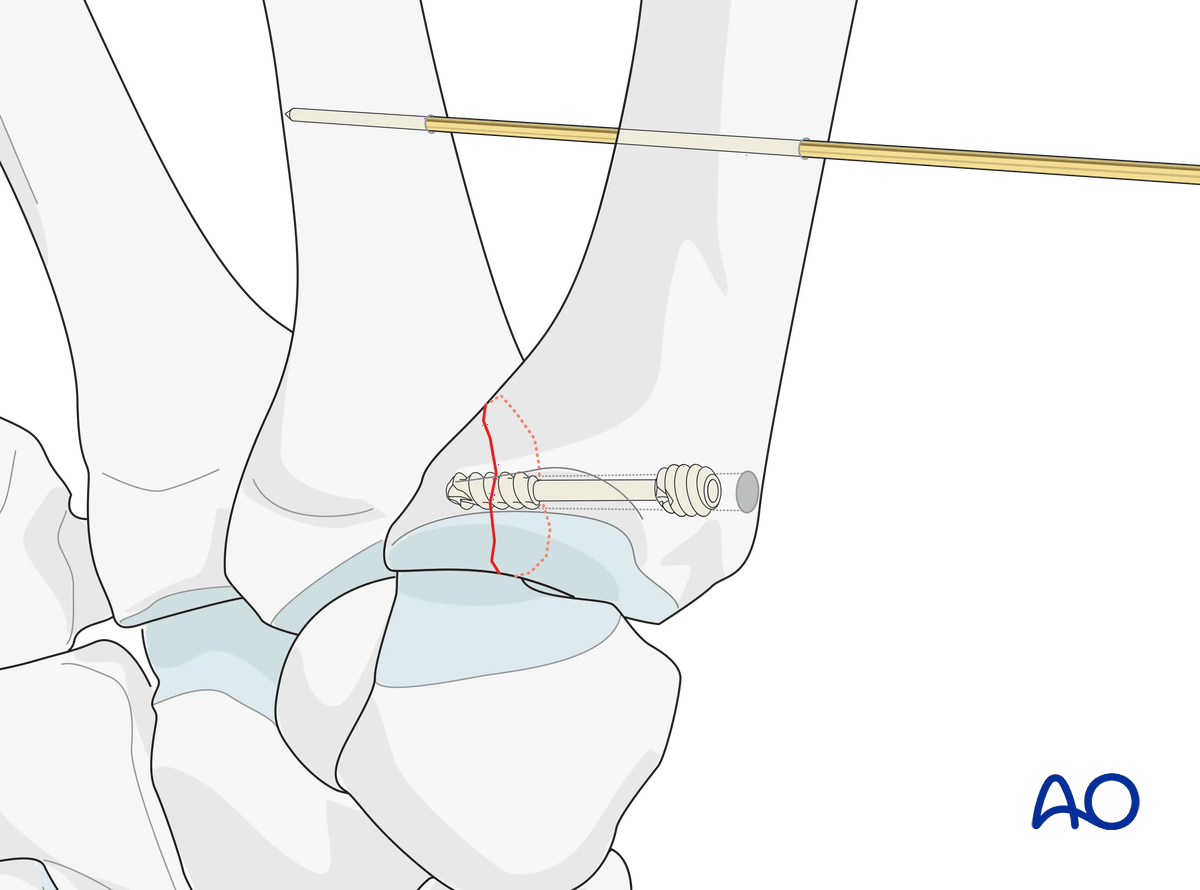
Intermetacarpal K-wire fixation
If additional stabilization is required to protect the screw fixation, insert a temporary K-wire through the 1st and 2nd metacarpal. It is important to keep the first webspace open.
8. Aftercare
Healing phases
The aftercare can be divided into four phases of healing:
- Inflammatory phase (week 1–3)
- Early repair phase (week 4–6)
- Late repair and early tissue remodeling phase (week 7–12)
- Remodeling and reintegration phase (week 13 onwards)
Full details on each healing phase can be found in the chapter Postoperative treatment of thumb injuries.
Postoperative care
Early range of motion, without load bearing, in the hand is important for optimal outcome.
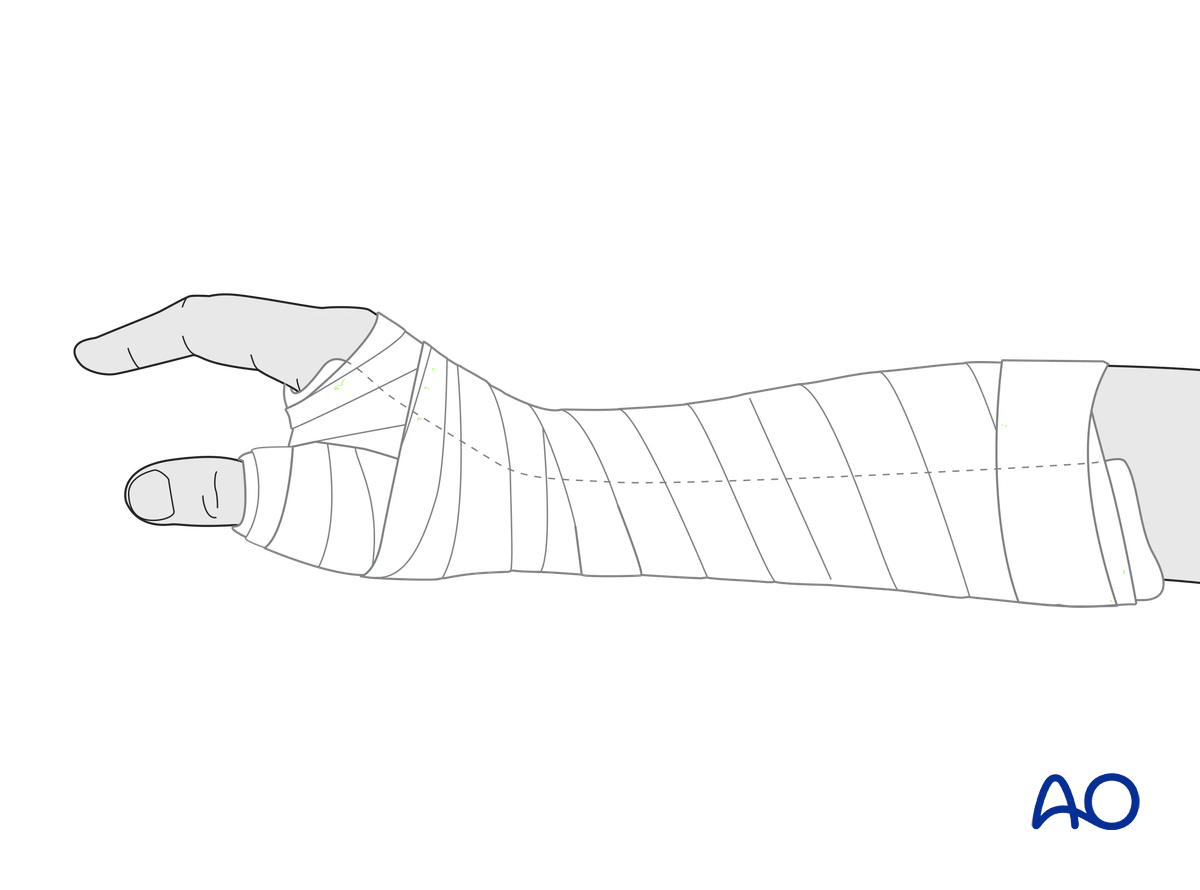
Immediately postoperatively, a temporary plaster splint is applied. This also helps with swelling and pain control.
The plaster splint can be switched to a custom-made thermoplastic splint after a week. The splint should be worn until fracture healing has been confirmed.
Hand therapy should be initiated as soon as possible.
The arm should be actively elevated to help reduce any swelling.
Mobilization
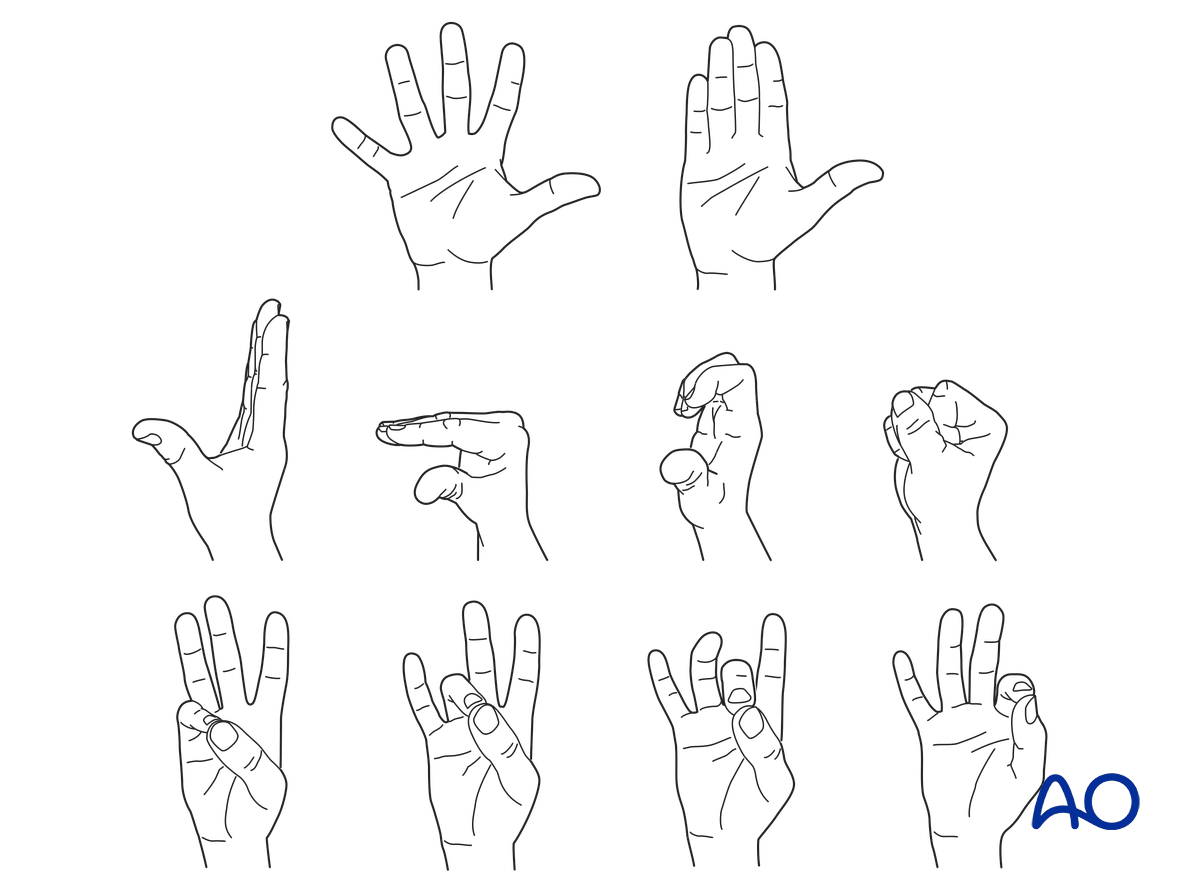
To prevent joint stiffness, the patient should be instructed to begin active motion (flexion and extension) of all nonimmobilized joints of the hand immediately after surgery.
In compliant patients with stable fixation, the splint can be removed under the supervision of a hand therapist, and early active motion exercises started after a few days.
Weight bearing should be avoided until fracture healing is confirmed.
Follow-up
The surgical wound is checked as necessary depending on soft tissue status. The wound is monitored for evidence of infection.
To allow for early joint mobilization and to prevent wound dehiscence, leave the sutures for 2 weeks.
Confirm fracture healing clinically and radiologically after about 5–6 weeks (depending on the fracture configuration).
Implant removal
If a K-wire was used, remove it at the same time as the thermoplastic splint.


