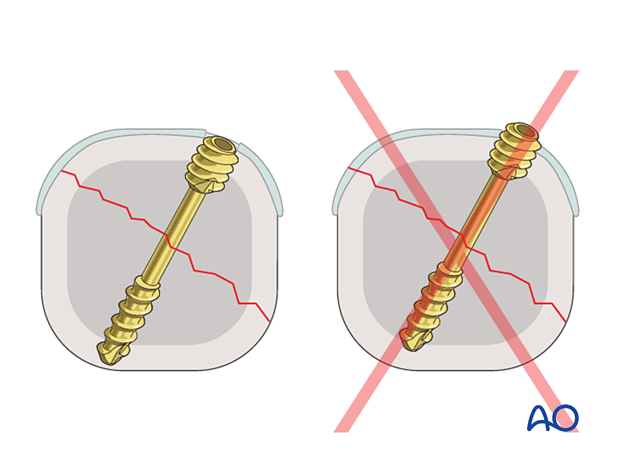
Headless compression screw insertion
1. Principles
Introduction
A headless compression screw may be used to stabilize fractures of and around joint surfaces, especially articular and periarticular fragments to which ligaments are attached.
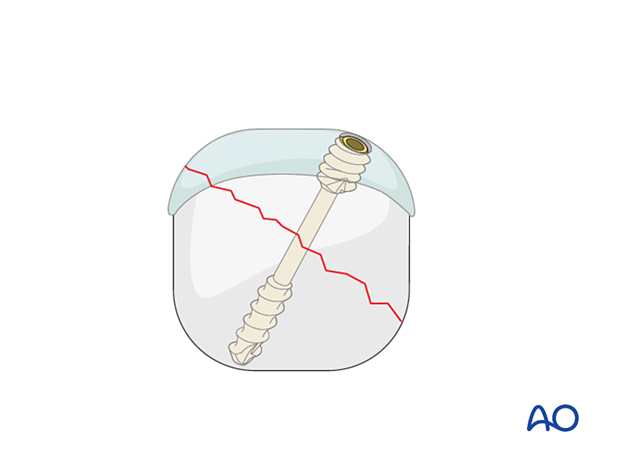
Its head is sunken or flush with the joint surface to avoid impingement.
The screw may be inserted percutaneously through a stab incision or via an open approach.
Screw types
Most headless compression screws are cannulated and require the use of a guide wire.
A variety of headless screws are available. The screw usually has two threads that differ in pitch and/or width at the tip and the head. One such type of screw is known as the Herbert screw.
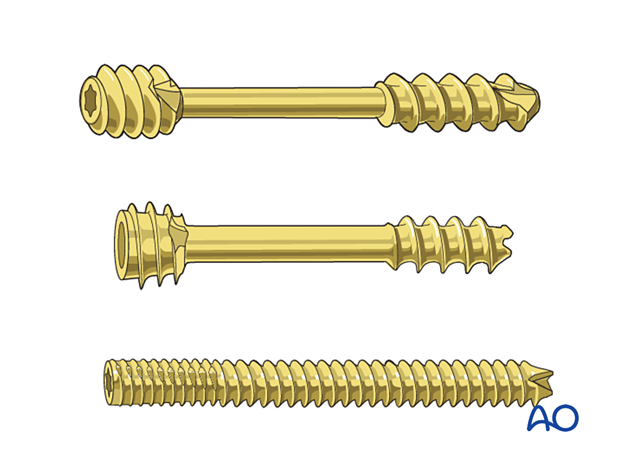
To allow for interfragmentary compression, some screws come with the following design features:
- Partially threaded screw shaft (leading thread in the tip)
- Wider thread with lower pitch around the screw head (trailing thread)
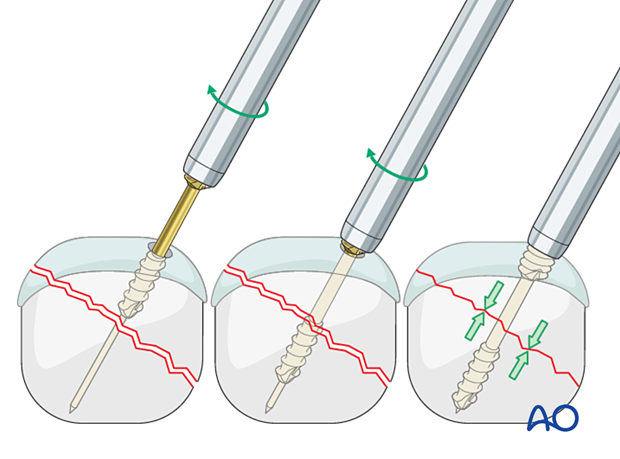
During screw insertion, the leading thread crosses the fracture plane and gets hold only in the far fragment. Once the trailing thread starts to engage the near cortex, compression is achieved as the screw does not advance as fast in the near fragment as it does in the far fragment.
The length of the leading thread may vary and should be selected so that it only gets hold in the far fragment.
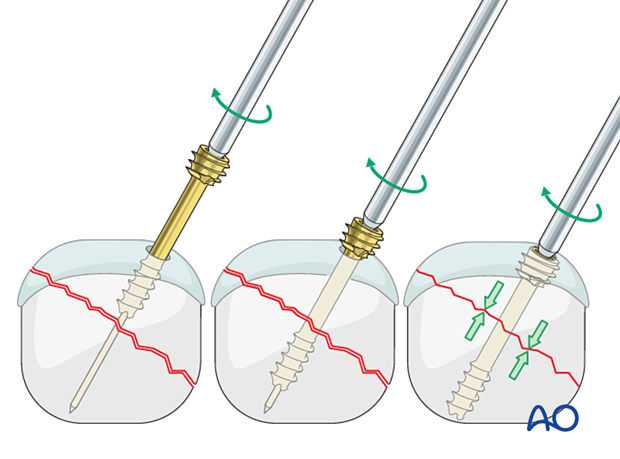
Other screw types require extrinsic compression applied through a sleeve before the trailing thread is advanced into the bone below the articular cartilage.
The steps of this technique are shown below.
AO teaching video
Scaphoid-Fracture – Percutaneous Fixation with the 3.0 mm Headless Compression Screw (HCS)
2. Guide-wire insertion
The fracture should be reduced appropriately.
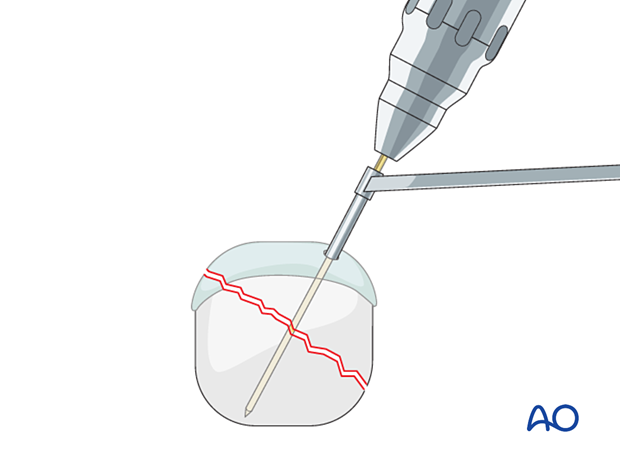
Insert the guide wire at the confirmed entry point through a drill guide in the desired direction and depth.
The position of the wire should be as perpendicular as possible to the fracture plane.
Confirm the correct wire position with an image intensifier.
3. Screw-length determination
Two methods can be employed for measuring the desired screw length.
The measurement can be made by inserting the dedicated measuring device over the guide wire, which must be firmly positioned on the tubercle for a reliable measurement.

If the dedicated measuring device is not available, take another guide wire of the same length and place its tip onto the bone at the insertion point; the difference in length between the protruding ends of the two wires indicates the length of the drill hole for the screw.
Select a screw 2–4 mm shorter than the measured length with an appropriate thread length.

4. Drilling
If self-drilling screws are used, drilling is not mandatory.
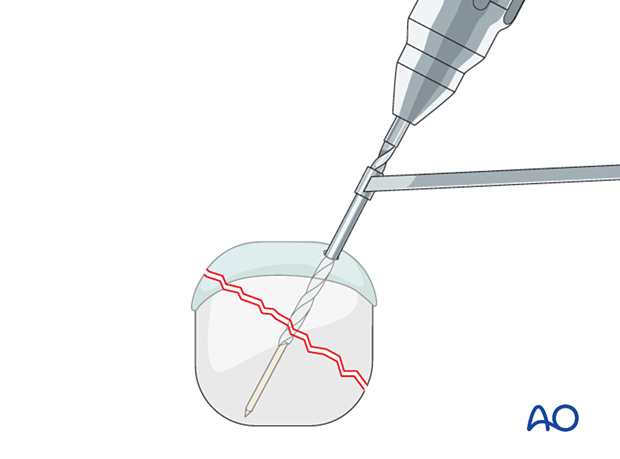
Only use the dedicated drill bit. A power drill will exert a smaller and more controlled force on the fragments than manual drilling and will reduce the risk of displacing the fragments. A small power drill with slow rotation is preferable.
Use irrigation solution to cool the drill bit to minimize thermal injury.
Check the position of the tip of the drill bit with an image intensifier.
5. Screw insertion
Select a partially threaded screw so that all the leading threads are in the far fragment. This will ensure interfragmentary compression.

Mount the screw head onto the compression sleeve.
Insert the screw manually over the guide wire by turning the sleeve until the leading thread engages the far fragment.
When the sleeve gets in contact with the bone, further turning of the sleeve will close and compress the fracture.
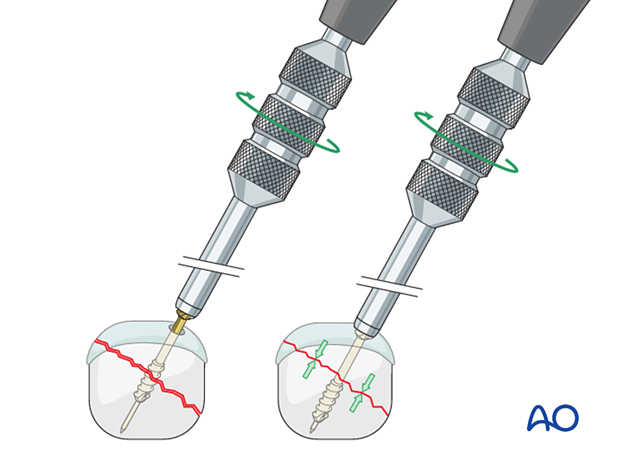
Insert a screwdriver into the compression sleeve.
Hold the sleeve to maintain compression while advancing the screw until its head is flush with the bone.
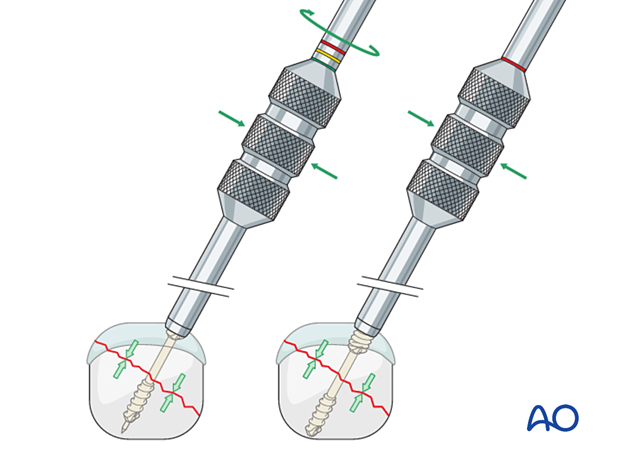
Ensure the trailing threads are fully buried in the bone at the insertion site.
Check the final position of the screw with an image intensifier.
Remove the guide wire.
