Open reduction, screw fixation
1. Preliminary remarks
Introduction
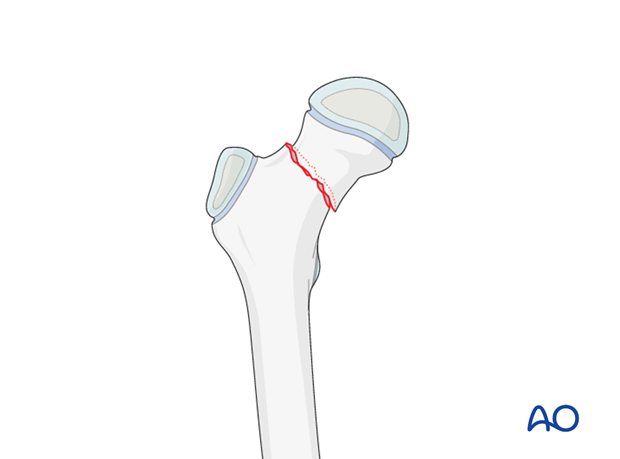
Children's hip fractures have historically had a bad prognosis. Accurate stable fixation has been one of the factors identified to improve the outcome.
Stable fractures have a better prognosis than displaced fractures.
The main problems have been avascular necrosis (AVN) due to disruption of the blood supply, nonunion and malunion due to unstable fixation.
The objective is timely fixation without disruption of the blood supply.
Equipment selection
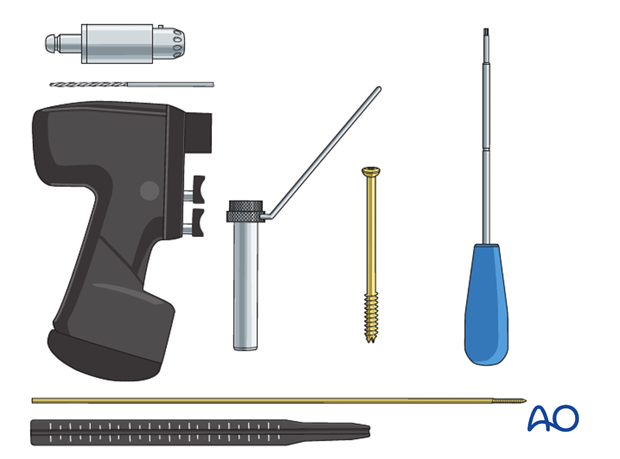
6.5, 7.0, or 7.3 mm cannulated screws are used for adolescents.
4.5, or 4.0 mm cannulated screws may be selected for younger children. Be aware that these screws are considerably weaker and prone to breakage if used in too heavy a child.
Washers are optional depending on the strength of the bone.
Implant insertion
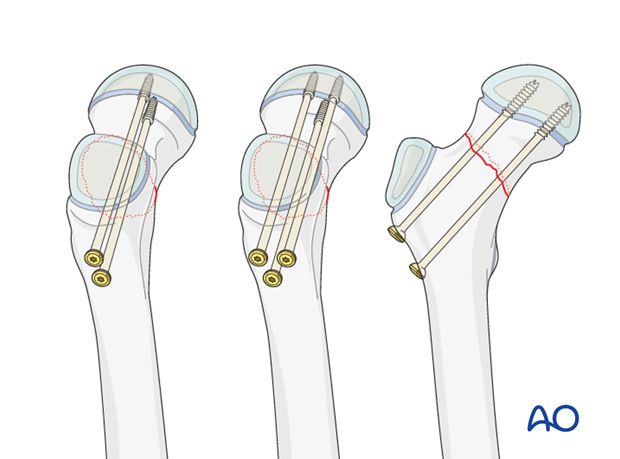
Typically, two screws separated vertically are inserted. This configuration may be more suitable in smaller bones.
An alternative is three screws used in an apex-distal, triangular configuration, with the lower central screw abutting the calcar.
Inserting a single central screw does not provide rotational stability and is, therefore, less applicable for fractures, even though it is a common choice for SCFE.
The combination of the child's age and the position and orientation of the fracture line will determine whether lag screw fixation can be obtained.
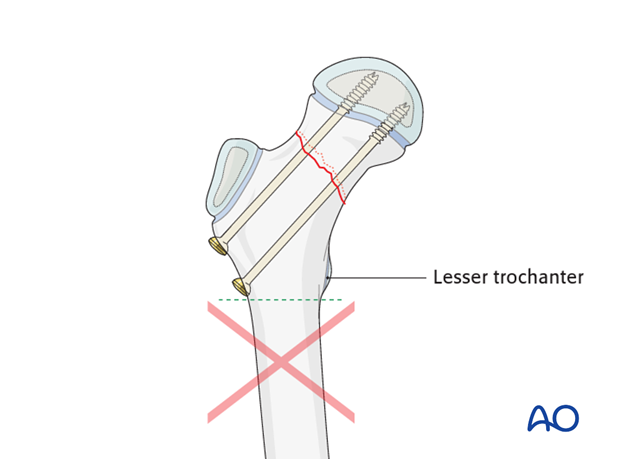
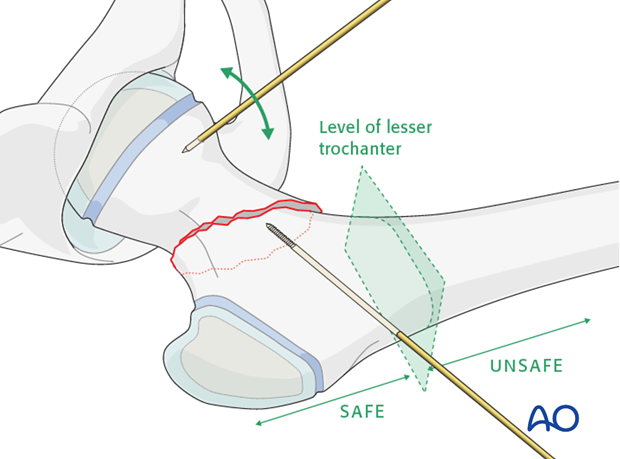
Pitfall: Secondary subtrochanteric fractures may occur if screws are placed below the level of the lesser trochanter.
For children with 4 or more years of growth remaining, techniques that allow continuous growth of the physis should be considered.
These techniques include:
Metaphyseal only fixation if the fracture pattern allows
Fixation across the growth plate with threaded screws that are removed promptly after fracture healing
Note: It is more important to achieve fracture stability than to avoid crossing the physis.
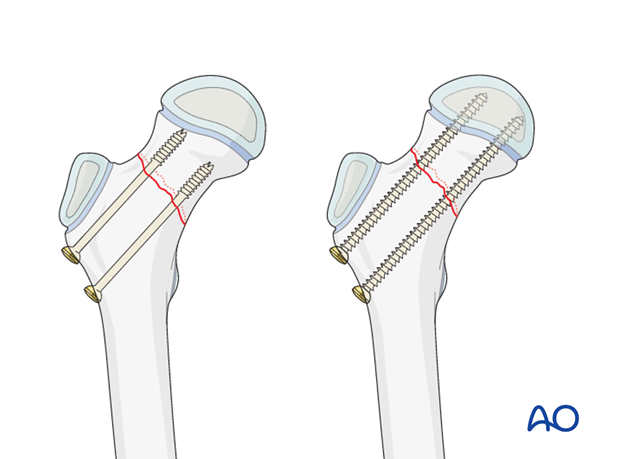
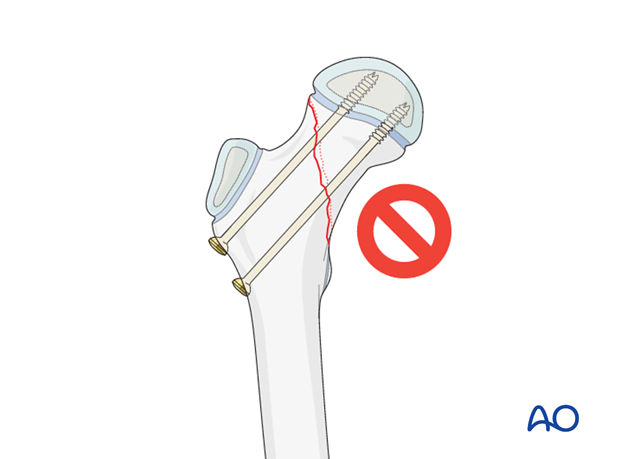
Cannulated screws alone may not provide adequate stability for a vertically oriented fracture line. A pediatric hip locking plate is a better construct if the fracture line is more vertical.
2. Patient preparation and approaches
Approaches
For this procedure the following approaches may be used:
3. Reduction
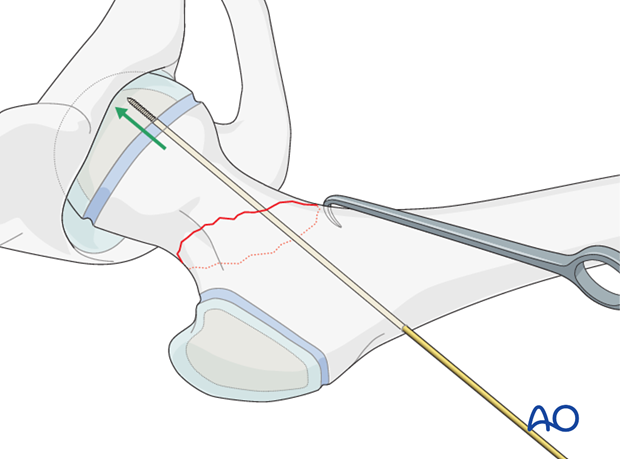
A guide wire is inserted through the lateral cortex of the femur just above the level of the lesser trochanter and advanced to the fracture line.
If necessary, manipulation of the femoral head is achieved using a small K-wire, inserted into the proximal fragment, as a joystick.
The femoral neck is manipulated gently into position, usually by lifting with a bone hook and manipulating the wires.
Gentle reduction maneuvers are essential in order to prevent secondary damage to the femoral head blood supply.
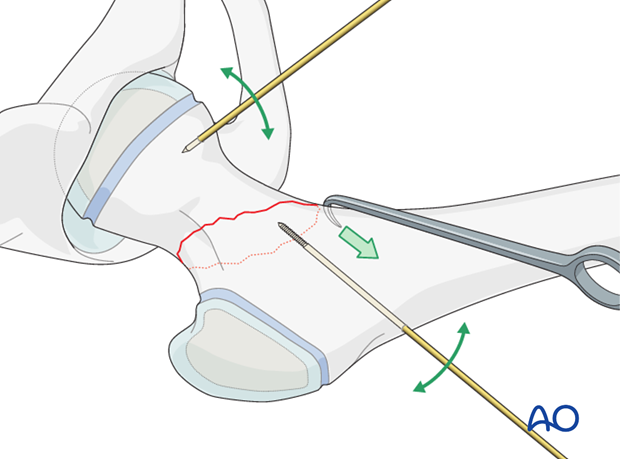
When acceptable reduction has been obtained, the first wire is advanced across the fracture and into the femoral head. Overpenetration into the hip joint should be avoided.
4. Fixation
Insertion of additional guide wires
Additional guide wires are inserted under x-ray control using image intensification according to the two, or three screw configuration desired.

X-ray control
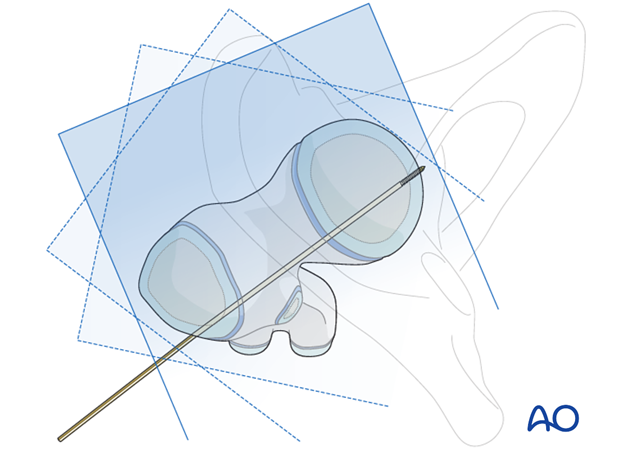
The guide wire positions are confirmed on AP and lateral x-rays, using image intensification.
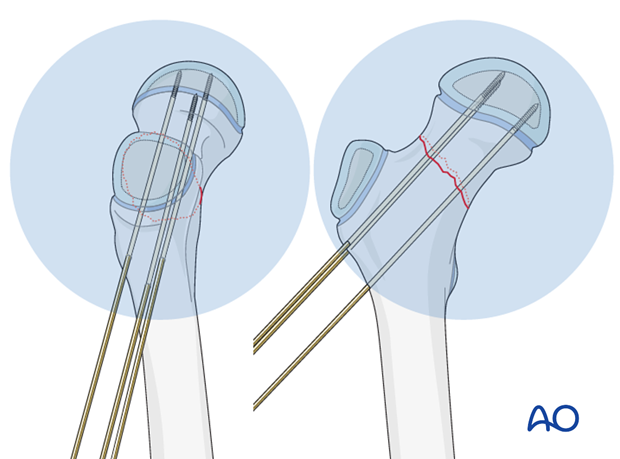
If using a regular radiolucent table, the guide wire fixation is generally stable enough to allow "frog" lateral view.
The guide wires are repositioned if necessary.

Images at multiple angles are used to confirm that the guide wires do not penetrate into the hip joint.
Measuring screw length
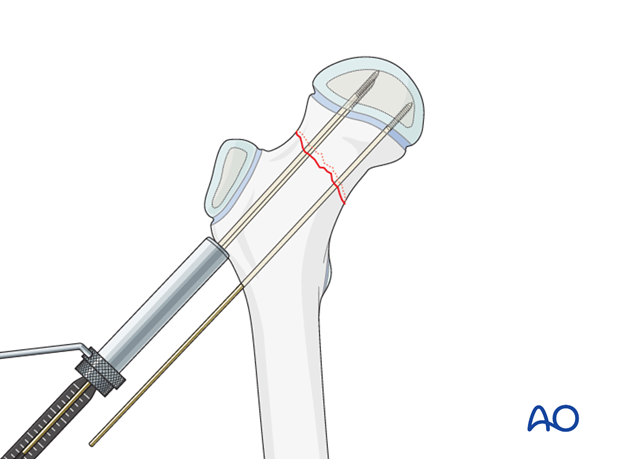
A depth gauge is used to measure screw length.
If a dedicated cannula/depth gauge set is not available, then a K-wire, of the same length as that inserted, is placed onto the lateral cortex adjacent to the inserted wire, and the difference measured to determine the screw length.
If the screw is being used to lag against the lateral cortex, 5mm is subtracted to avoid screw overpenetration.
Drilling screw holes
The guide wires are overdrilled with the appropriately sized cannulated drill bit.
Adolescents in particular have very dense bone in the metaphysis near the growth plate and predrilling of both sides of the fracture line is recommended.
If cannulated screws are not available, then guide wires should be removed one at a time and an appropriate drill used.
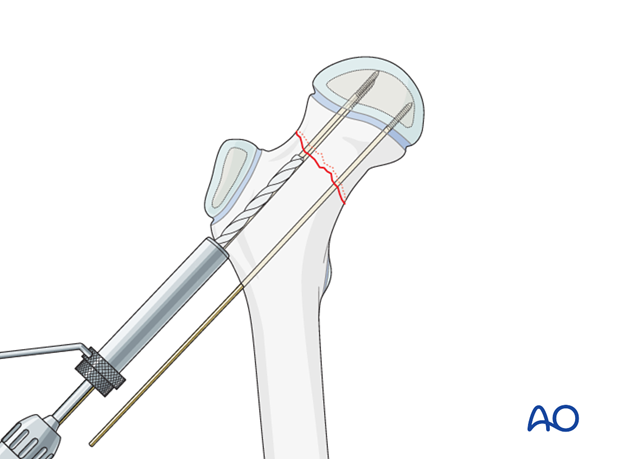
Screw insertion
Two or three cannulated screws are inserted over the guide wires.
The use of washers is optional.
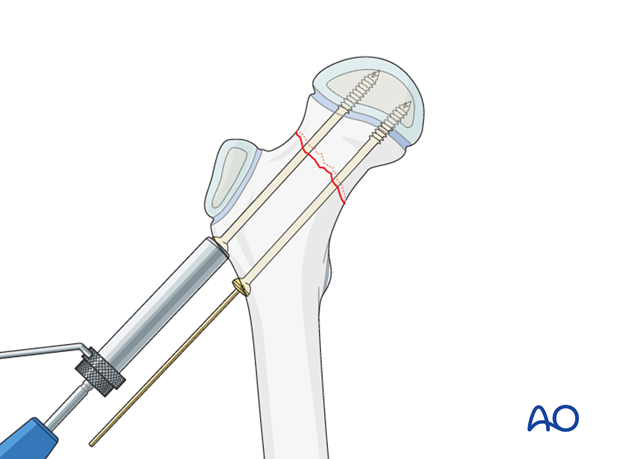
X-ray control
Image intensification is used to confirm that the screw tip does not penetrate into the hip joint.
Typically, 5 mm of epiphyseal bone/cartilage should remain between the screw tip and joint surface.
Pitfall: Screw penetration can occur, especially with eccentrically placed screws, even if not apparent on AP or lateral x-rays.
Dynamic, real-time image intensification, with a full range of internal and external rotation at different degrees of flexion, is useful to see how close the screw-tip is to the joint surface of the femoral head.
Observing an approach/withdrawal of the screw tip helps in judging its position. Some surgeons supplement this examination with 3-D image intensification for confirmation.
Arthrography is useful to confirm correct screw placement in the younger patient.
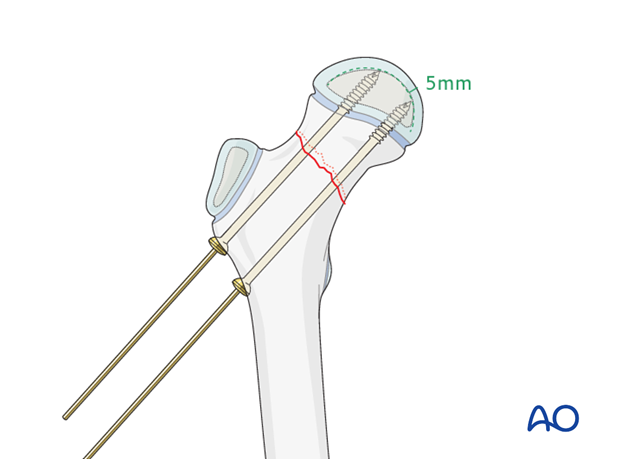
Guide wire removal
Guide wires are removed.
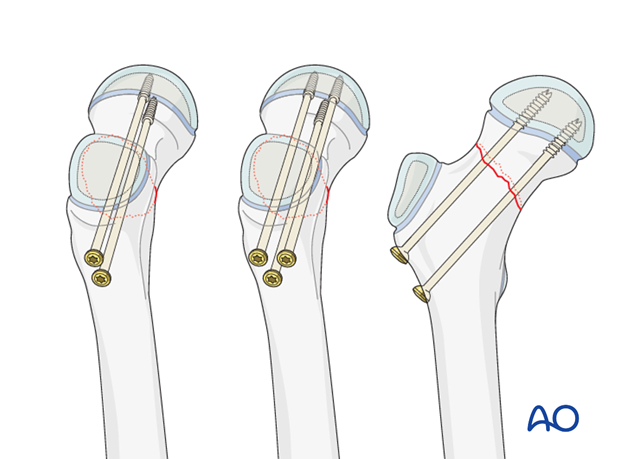
5. Hip spica
If solid fixation has been obtained with screws, and the patient/family can reliably comply with toe-touch weight bearing, then a cast is not necessary.
For patients below 5 years of age, a hip spica cast can be used if needed.
Click here for details of hip spica application.
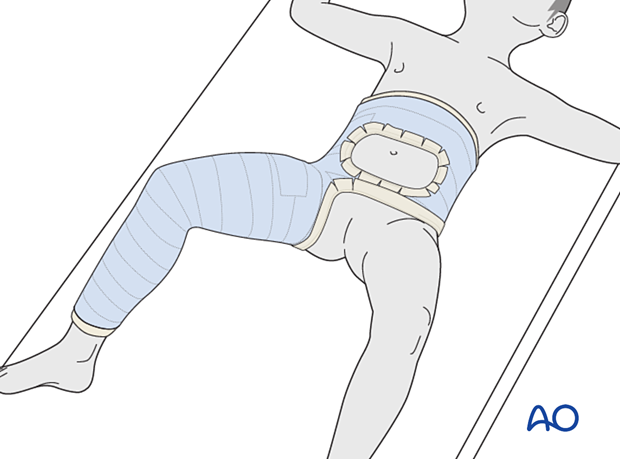
Aftercare following hip spica application
After application, the spica should be trimmed to allow adequate space for bodily functions. The edges of the spica should be padded and waterproofed.
Generally, a hip spica should allow space for a small diaper inside the plaster and a large one outside the plaster. The diapers should be positioned to prevent soiling of the spica.
The spica is not waterproof. Bathing and showering should not be attempted. Hair washing should be done very carefully.
No skin products should be put inside the spica. Only skin that can be seen should be moisturized.
6. Aftercare
Introduction
After surgical stabilization, the construct should be sufficiently robust to allow protected weight bearing. Smaller children may not be able to comply with this and may need immobilization.

Infection
See the additional material on postoperative infection.
Mechanics
Forces through the hip are less with toe-touch weight bearing than with non-weight bearing. Therefore, toe-touch is normally recommended for initial mobilization. This needs to be taught to children by a physiotherapist.
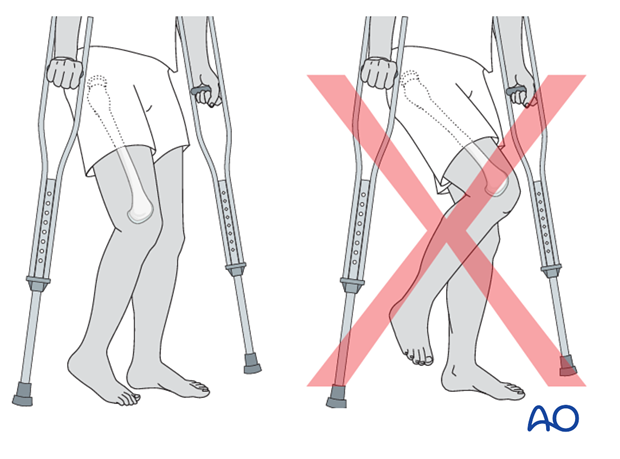
Range of movement
Range-of-movement exercises should start in the immediate postoperative period to prevent stiffness. Surgeons should indicate if any extremes of movement are forbidden.
Weight bearing
Having started with toe-touch weight bearing, children progress to partial weight bearing and then to full weight bearing according to their age and the predicted rate of healing of their fracture.
Even older adolescents should be fully weight bearing without aids at three months.
Sports
Swimming can be allowed as soon as partial weight bearing is permitted.
Contact sports should be avoided for at least six months.
Follow-up x-rays
X-rays are generally taken immediately after the surgery and at 6 and 12 weeks.
Implant removal
Implants that cross the physis should be removed if there is significant growth remaining. The fracture should be healed and consolidated prior to removal (see Healing times).
Implants in young children should always be removed to prevent them from being covered by bony overgrowth.
Implant removal is not compulsory in adolescents.


