Open reduction, pediatric hip locking plate
1. Preliminary remarks
Introduction
Children's hip fractures have historically had a bad prognosis. Accurate stable fixation has been one of the factors identified to improve the outcome.
The main problems have been avascular necrosis (AVN) due to disruption of the blood supply, nonunion, and malunion due to unstable fixation.
The objective is timely fixation without disruption of the blood supply.
Angularly stable fixation is the solution to malunion. This is the rationale for using a pediatric hip locking plate.
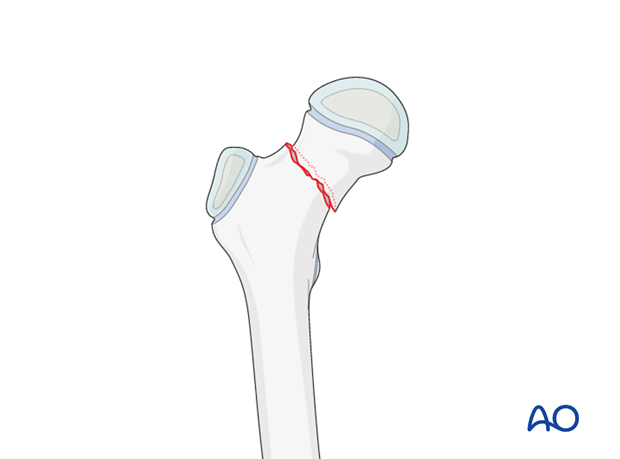
Implant selection
The choice of implant size depends on the age and weight of the child.
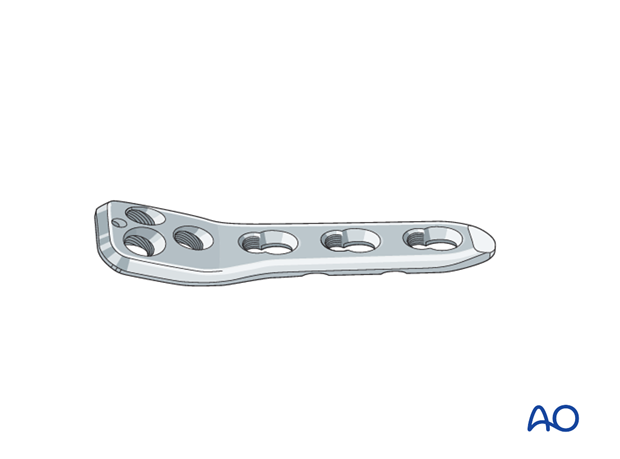
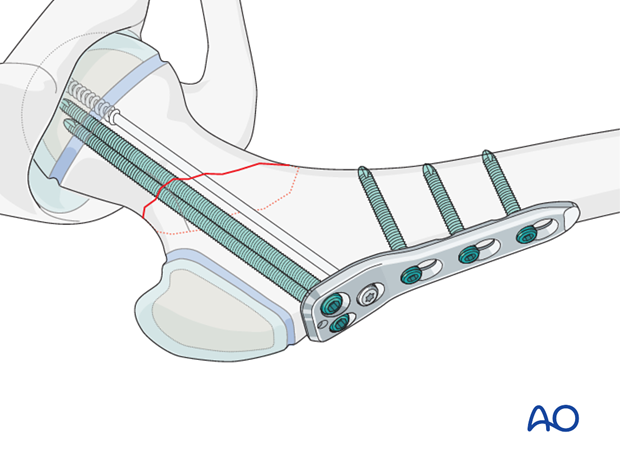
Generally, a 130˚ angled plate is appropriate for fracture fixation as it corresponds most closely to the child's femoral neck-shaft angle. It offers the possibility of three parallel screws into the neck.
A plate with three shaft holes is sufficient for intracapsular fractures.
Longer locking screws, not included in the standard pediatric hip locking plate set, may be required.
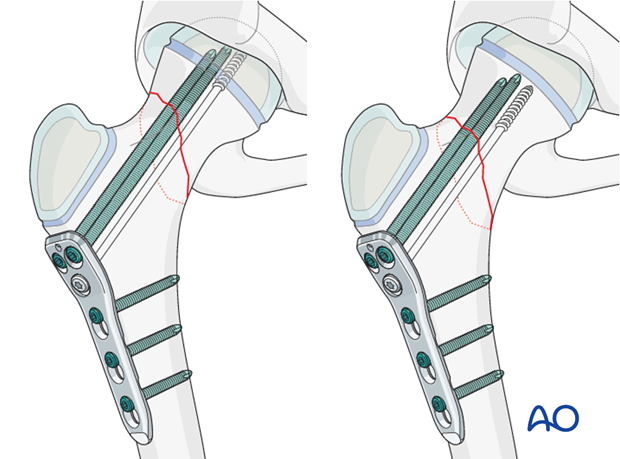
Hardware placement
During preoperative planning, a decision should be made whether fixation needs to cross the physis. This decision will depend on the level of the fracture.
Note: It is more important to stabilize the fracture than to avoid crossing the physis.
2. Patient preparation and approaches
Approaches
For this procedure the following approaches may be used:
3. Reduction
The first step, after capsulotomy, is to reduce the fracture.
Reduction is achieved by a combination of gentle traction, leg position, and direct reduction.
Reduction is facilitated by traction with a hook in line with the femoral neck.
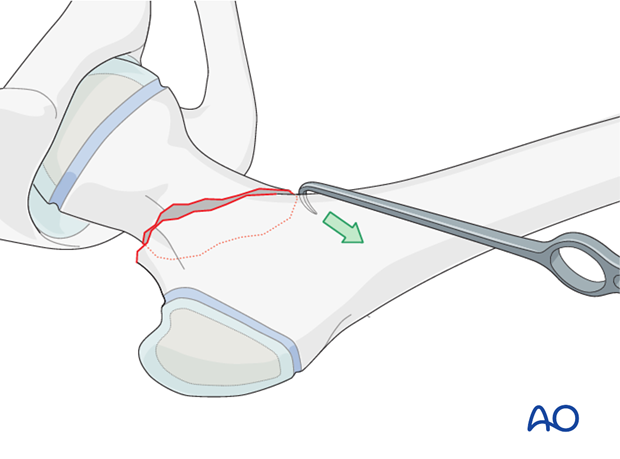
The use of one or two joysticks in the proximal fragment allows this to be aligned correctly.
Two joysticks at 90° to each other allows the proximal fragment to be moved in all planes.
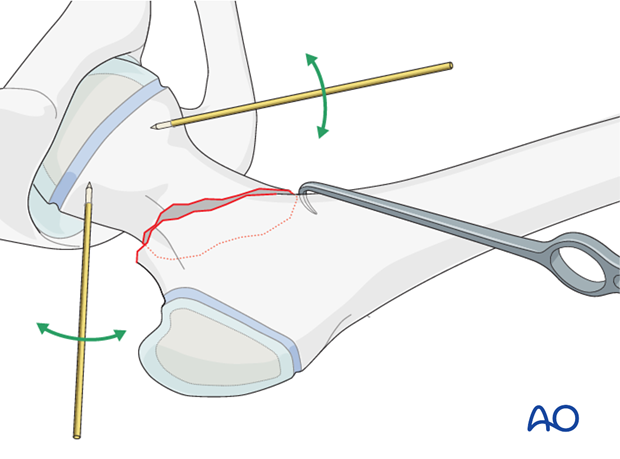
A pointed reduction forceps can also be placed carefully across the fracture avoiding the piriform fossa.
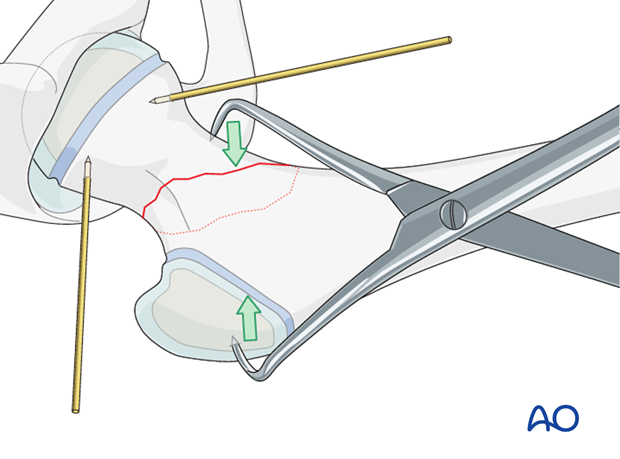
Temporary K-wire stabilization with two divergent wires is useful at this stage. Care must be taken that the temporary K-wire(s) does not prevent insertion of the definitive wires.
Once the fracture has been stabilized with two temporary wires, the joystick wires can be removed.
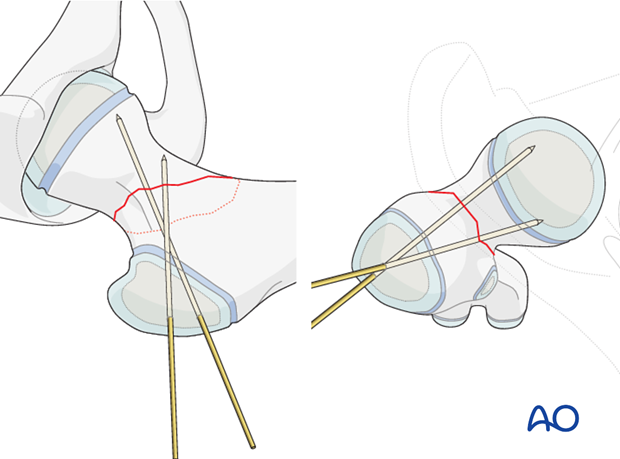
4. Fixation
Insertion of guide wires
After reduction, the guide wires for the pediatric hip locking plate are inserted.
This can be done using the dedicated angled guide, or by placing the wires through the plate with the screw-in guides attached to it.
An anteversion wire along the front of the femoral neck can be useful.
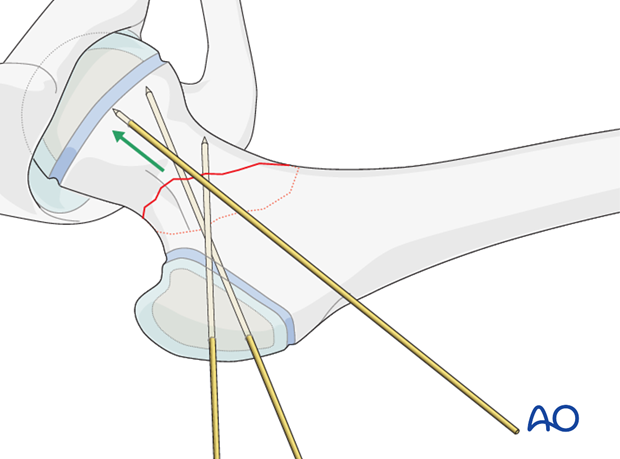
A 2.0 mm guide wire should be inserted high in the neck starting at least 5 mm below the trochanteric apophysis. This wire can be inserted using the angled guide, or freehand.
The position should be checked radiologically. On the lateral view, the wire should be in the middle of the femoral neck.
After insertion of the initial guide wire for the pediatric hip locking plate, it may be necessary to remove one or more temporary K-wires to facilitate use of the angled guide.
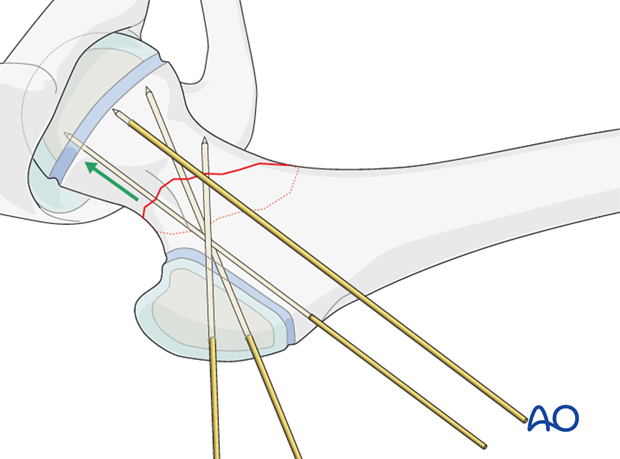
After the initial 2.0 mm wire, two 2.8 mm wires will be inserted using the dedicated angled guide.
The 2.8 mm wires will sit just above the mid-point of the femoral neck on the AP view.
Once these two wires are inserted, the temporary fixation wires should be removed.
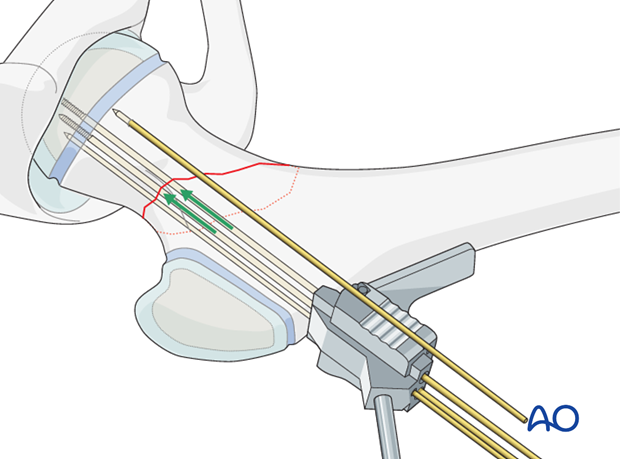
Alternatively, these wires can be inserted through the plate with the locking guides attached.
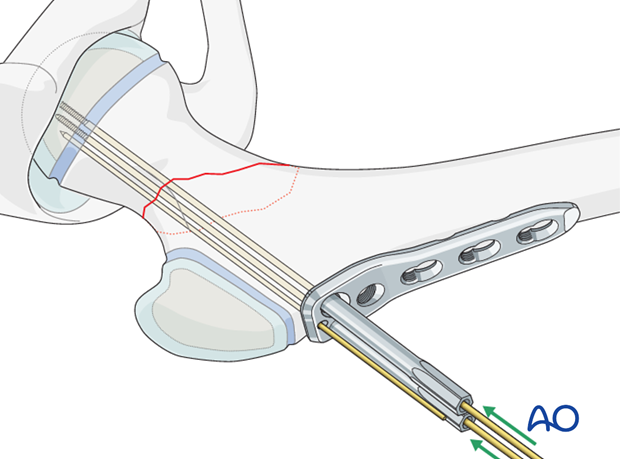
Plate application
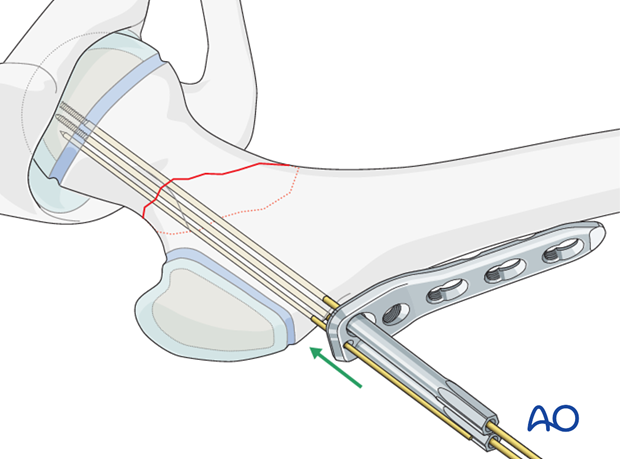
With the three wires in place, the plate with locking guides can be slid over the wires onto the side of the femur.
Screw insertion
The length of the screws is measured using a direct measuring device over the wire on the locking guide.
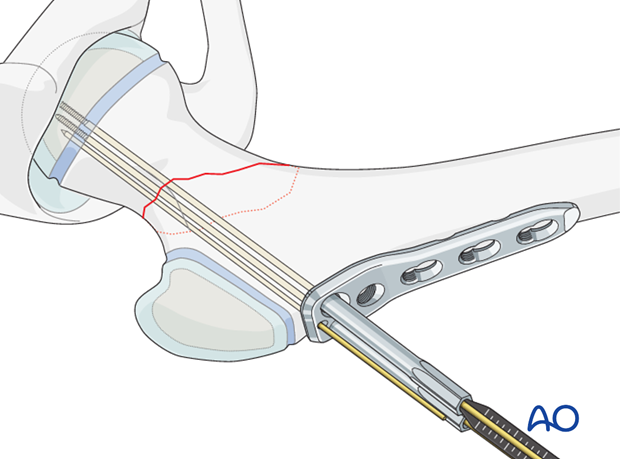
At this stage, a decision should be made whether a compression screw is required. If it is, it should be inserted through the third hole in the proximal part of the plate before any other screws are inserted. The compression screw can be a cortical lag screw. The hole for this screw should be drilled parallel to the 2.8 mm K-wires.
Note: A compression screw, if used, must be inserted before any locking screws.
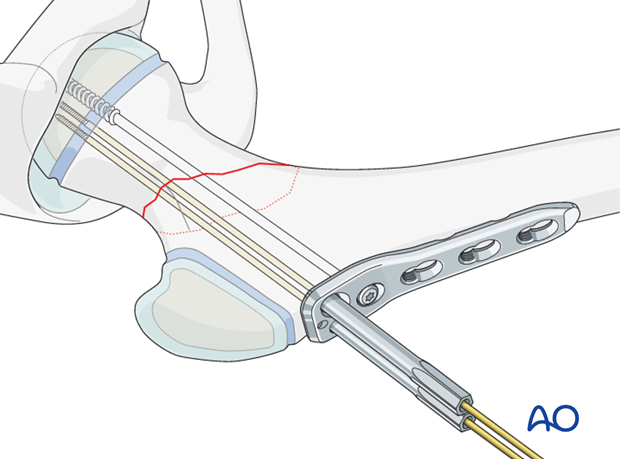
After insertion of the compression screw, the locking screws should be inserted.
The guide wires are removed and replaced by locking screws one at a time. This ensures that fracture reduction is maintained by at least two wires, or screws, at all times.
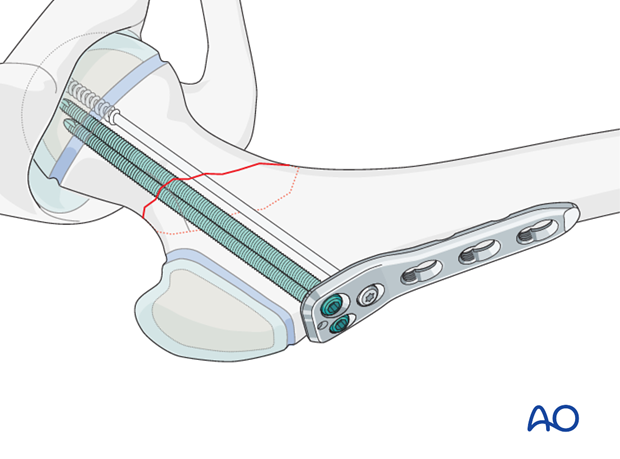
If a compression screw has not been used, the third hole in the proximal part of the plate can be used to insert a further locking screw.
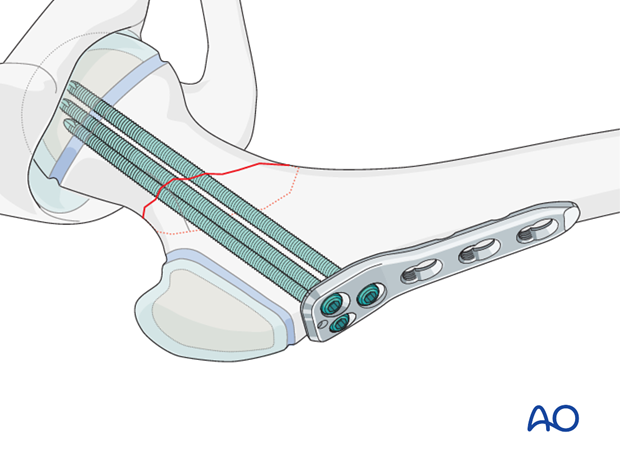
The plate should be secured to the shaft using two or three locking screws. This prevents any disruption of the fracture fixation.
Definitive radiological images should be taken.
Closure
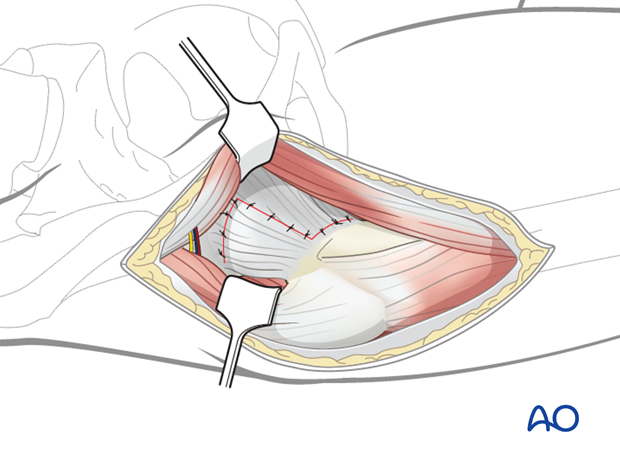
The capsule should be closed loosely to prevent a hemarthrosis forming under pressure which can compromise the blood supply.
Routine closure is performed for the remainder of the wound, according to the surgeon’s preference.
5. Aftercare
Immobilization and weight bearing
If the fixation is stable, no external immobilization is required.
Range-of-movement exercises should start in the immediate postoperative period to prevent stiffness.
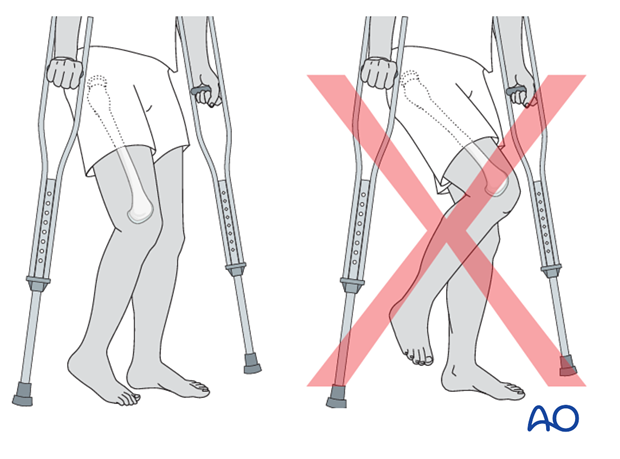
After a day or two of bed rest, the patient can be mobilized toe-touch weight bearing using crutches or a frame. This needs to be taught to children by a physiotherapist and surgeons should indicate if any extremes of movement are forbidden.
Increased weight bearing can be introduced as the fracture is judged to be healing depending on patient age. In an adolescent, partial weight bearing at 6 weeks and full weight bearing at 12 weeks would be typical.
Infection
See the additional material on postoperative infection.
Sports
Swimming can be allowed as soon as partial weight bearing is permitted.
Contact sports should be avoided for at least six months.
Follow-up x-rays
X-rays are generally taken immediately after the surgery and at 6 and 12 weeks.
Implant removal
Implants that cross the physis should be removed if there is significant growth remaining. The fracture should be healed and consolidated prior to removal (see Healing times).
Implants in young children should always be removed to prevent them from being covered by bony overgrowth.
Implant removal is not compulsory in adolescents.


