ORIF - Compression plating
1. Principles
Indications
Nonoperative treatment
Transverse fractures of the tibial diaphysis can be treated nonoperatively if the initial displacement is small, there is <1cm shortening, and there is at least 50% bone contact between the fragments.
Furthermore, satisfactory closed reduction of any initially displaced transverse fracture, with adequately supportive cast, can provide good stability. These higher-energy fractures may heal slowly, possibly with delayed secondary loss of alignment.
Operative treatment with a nail
Nailing is usually a good option for tibial shaft fractures. It allows fixation, usually with minimal additional fracture-site trauma.
Operative treatment with plate and screws
For the treatment of simple transverse fractures in the diaphyseal area, absolute stability is recommended. For this, anatomical reduction and interfragmentary compression are necessary. This requires open exposure with increased risk of wound-healing complications.
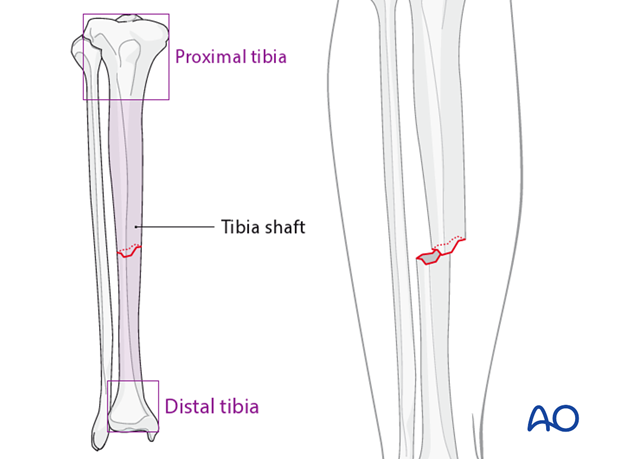
Axial compression plating
The objective of axial compression plating is to produce absolute fracture stability, by pre-loading the fracture to eliminate interfragmentary motion.
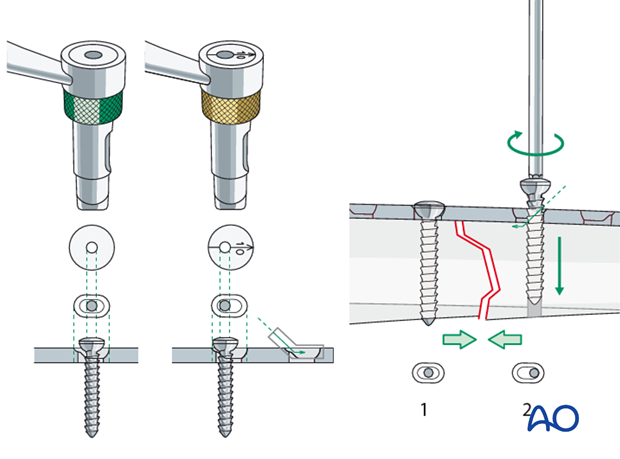
Axial compression plating is useful in two-part transverse fracture patterns, where the bone fragments can be compressed. The fracture orientation prevents use of a lag screw. Compression of the fracture is usually achieved by eccentric screw placement through one or more of the dynamic compression plate holes. The sides of these holes are inclined so that the screw head can translate the plate to produce compression.
Compression can also be applied with the AO articulated tension device.
2. Preoperative planning
Planning the plate position
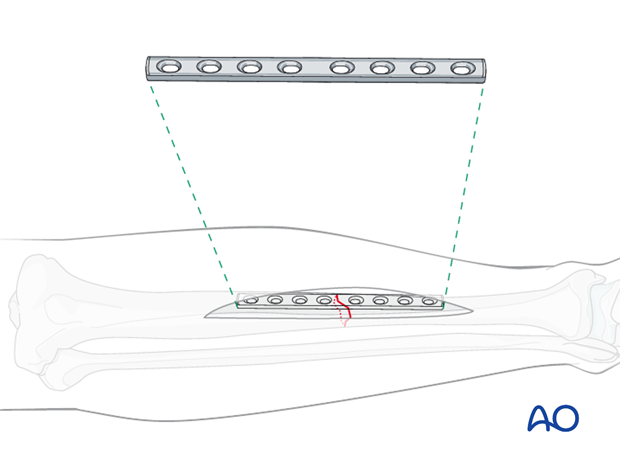
The center of the plate should be over the fracture line. Choose an 8-hole narrow 4.5 mm DCP that allows 4 screws in each fragment.
Overbending the plate
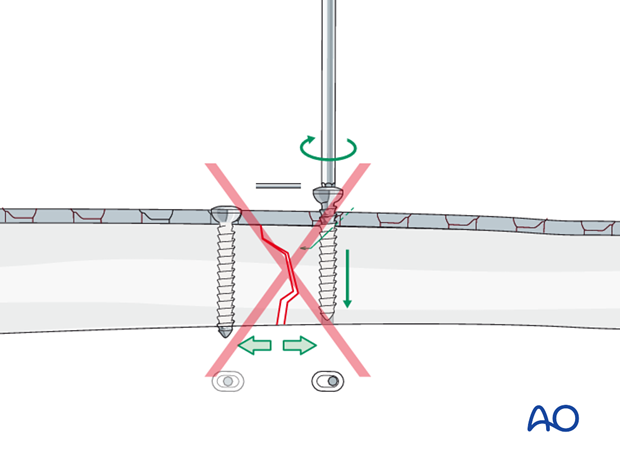
To compress the opposite cortex, the plate should be slightly overbent (more convex) at the fracture, so there is a small gap between plate and bone. This causes the cortex opposite the plate to be compressed first, as the eccentrically placed plate screws are tightened. With further tightening, the near cortex of the fracture subsequently becomes compressed. This short, convex (away from the bone) bend can be made with the handheld bending pliers, or a pair of bending irons.
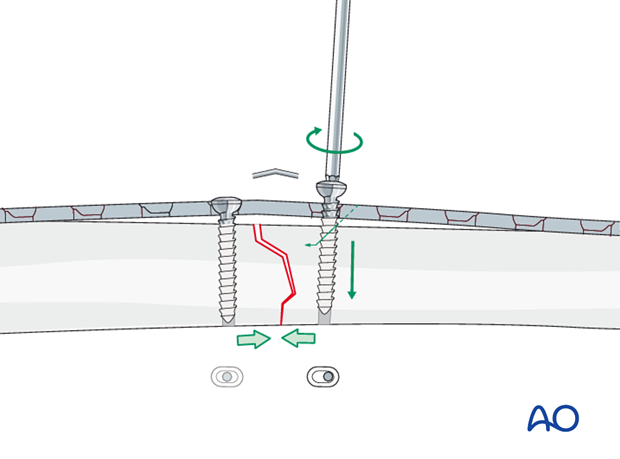
If axial compression is applied in a transverse fracture with a plate that is not overbent, compression first occurs at the cortex under the plate. This causes a gap in the fracture opposite the plate, with resulting instability. Such a gap must be avoided.
3. Patient preparation
Depending on the approach, the patient may be placed in the following positions:
4. Approaches
Anteromedial approach
The anteromedial approach is used most commonly for fractures of the distal third tibial shaft. However, it can be used to expose the entire anteromedial surface.
It is also useful for debridement and irrigation of open fractures when an incision on the injured subcutaneous surface is to be avoided.
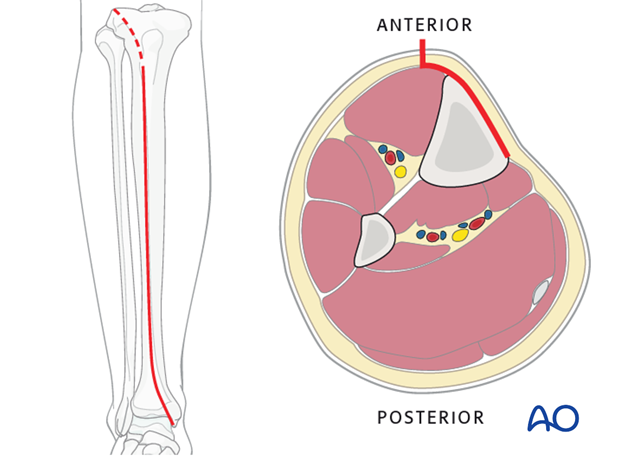
Anterolateral approach
The anterolateral approach is used uncommonly, but may be necessary when the medial soft tissues are compromised.
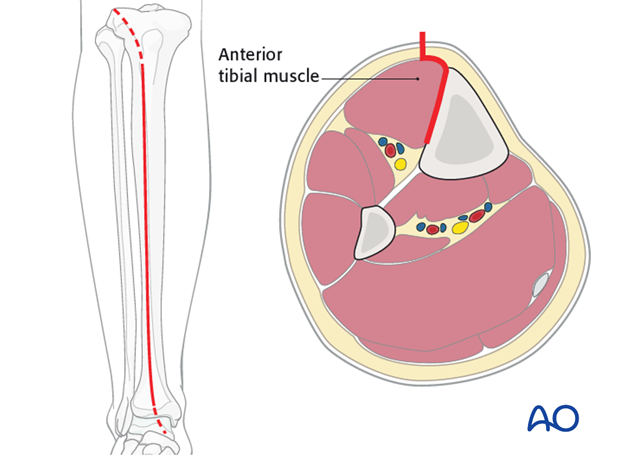
Posterolateral approach
The posterolateral approach can be used for open plate fixation of the tibia on its posterior surface. This may be necessary when the anterior soft tissues are compromised.
This approach is often also utilized for treatment of non-unions with posterolateral bone grafting. It allows access to both the tibia and fibula.
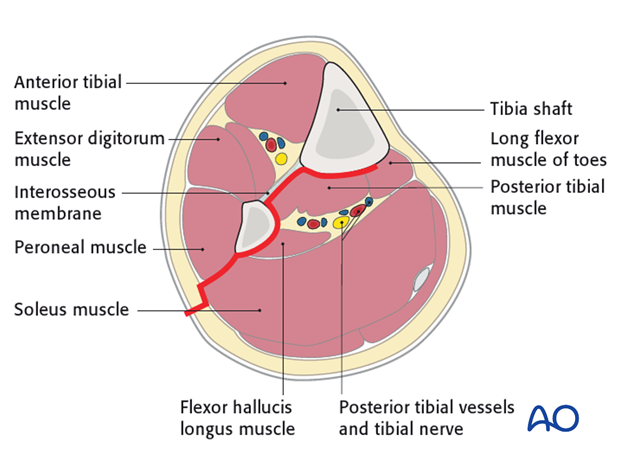
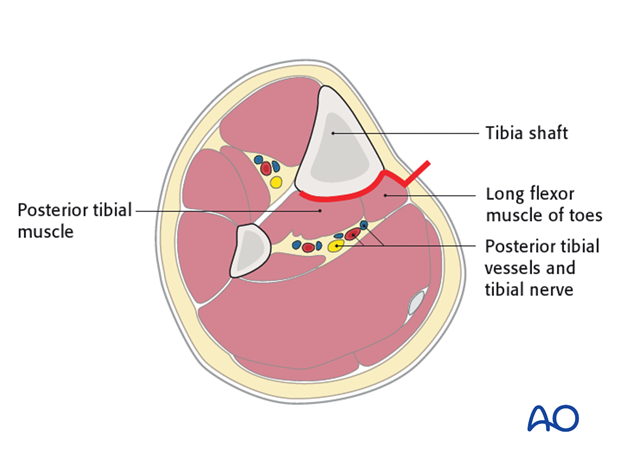
Posteromedial approach
The posteromedial approach can be used for open plate fixation of the tibia on its posterior surface. Typically, this approach would be chosen, when direct exposure for ORIF is desired, but only the posteromedial soft tissues are safe to incise.
Note that this incision is also the one that might be used for a medial fasciotomy for compartment decompression.
5. Open reduction
Introduction
As anatomical reduction is necessary, open, or direct, reduction is needed.
Mobilize just enough of the periosteum around the fracture edges to control the reduction. Take care to protect the periosteum wherever possible.
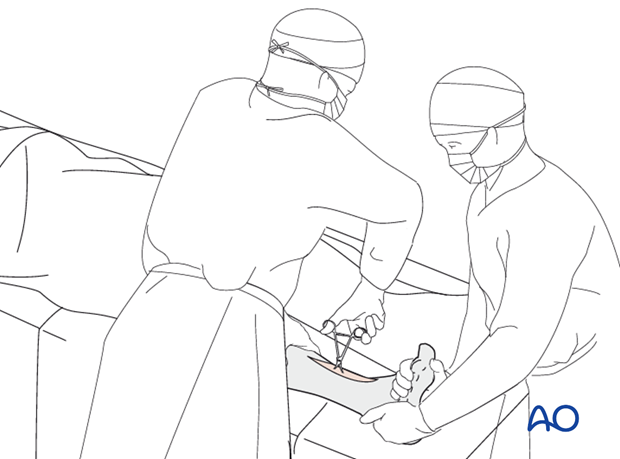
Because they do less damage to the soft tissues, pointed reduction forceps are best used.
Reduction of the fracture
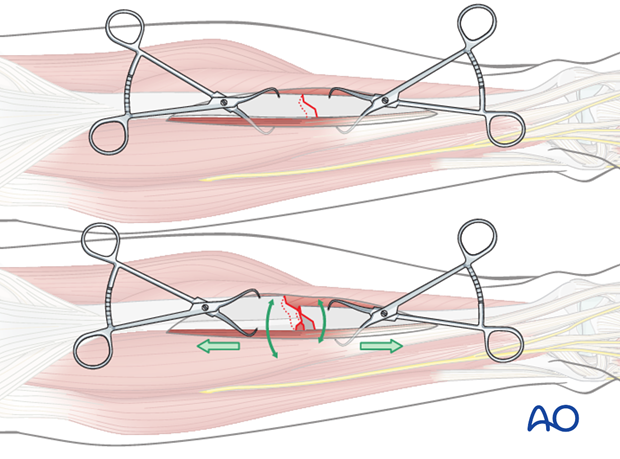
As the fracture is reduced by pointed reduction forceps, it is also rotated into anatomic position.
Noncomminuted transverse fractures are often stable enough for the plate to be applied without provisional fracture fixation. Make sure that the reduction remains satisfactory before drilling and inserting screws for the plate.
6. Fixation
Insert the first screw
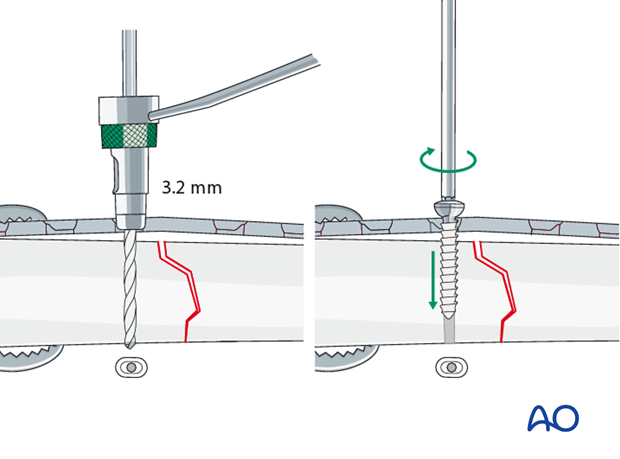
Drill with a 3.2 mm drill bit and drill guide centrically through the plate hole as close as possible to the fracture line. Measure for screw length, tap with a 4.5 mm tap and a protective sleeve and insert the first screw, but do not fully tighten it yet.
An alternative is to drill this hole in the optimal pre-planned location without the overlying plate.
Axial compression with eccentric screw
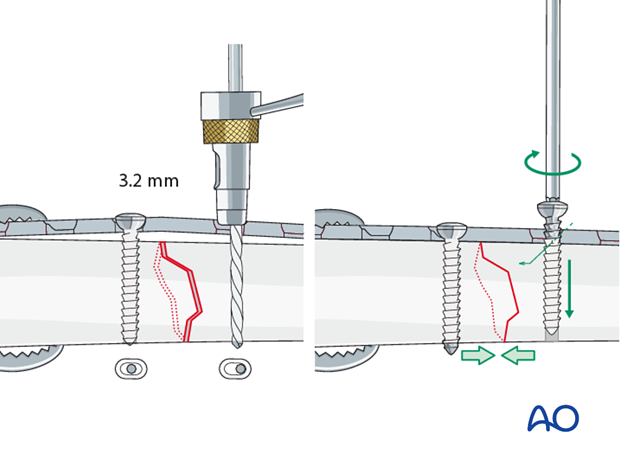
With the plate properly positioned, drill eccentrically for the second screw in the opposite fragment, using the eccentric drill guide (gold ring). Measure and tap, as above.
Insert the eccentric screw and alternately tighten both screws. Confirm adequate compression and reduction.
Insert second eccentric screw
To increase axial compression, a second screw can be placed eccentrically next to the first (neutral) screw.
When the second eccentric screw is tightened, the first (neutral) screw needs to be loosened to allow the plate to slide on the bone.
Insertion of remaining screws
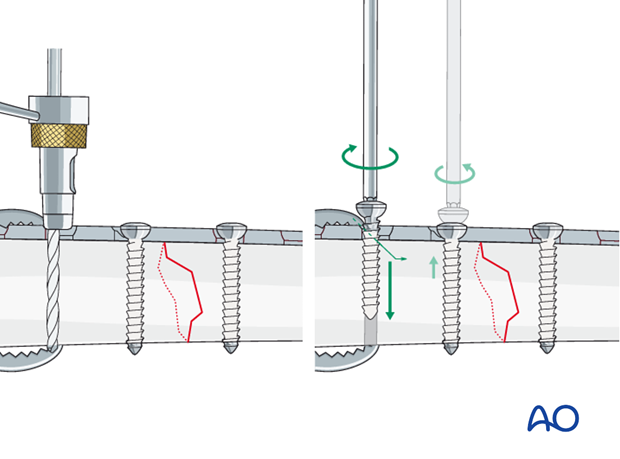
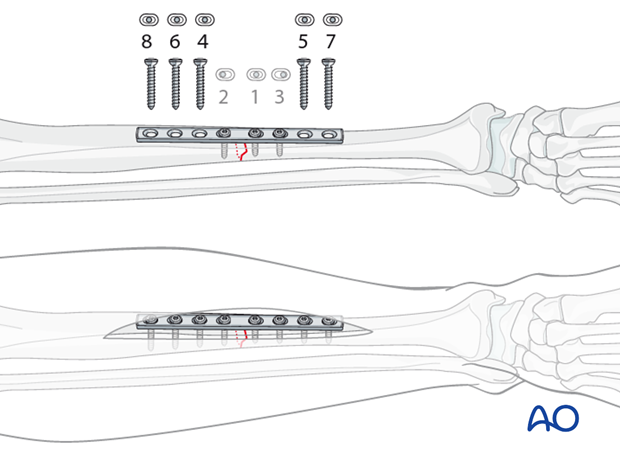
All other screws are inserted centrically (drill sleeve with green ring). They will not add to compression. Insert the screws alternating between the proximal and distal fragments. Start with the screws closest to the fracture plane and work your way outwards.
At least 4 screws should be used on either fragment.
Using cortical screws for the diaphysis, with the following steps:
- Drill both cortices using drill sleeve with green ring to ensure a central drill hole with the 3.2 mm drill bit.
- Measure for screw length.
- Tap both cortices using the 4.5 mm tap and appropriate drill sleeve.
- Insert the screw.
7. Alternative: Compression with the ATD
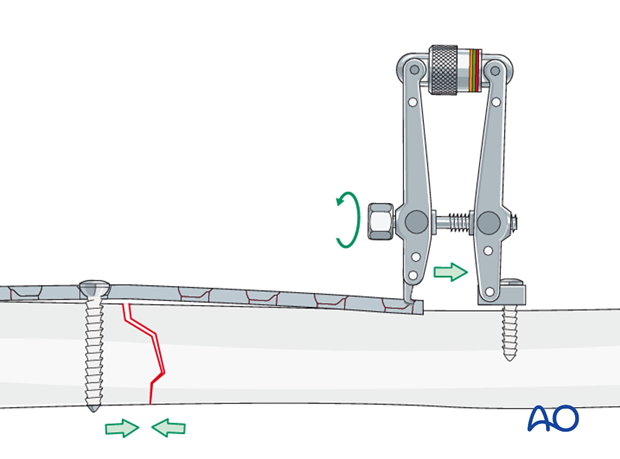
Adequate compression of the fracture can also be achieved with the help of the articulated tension device (ATD). The ATD can also be reversed to push on the plate and regain length, if needed.
Note
If too much tension is applied and/or the plate has not been prebent, there is a risk of causing the opposite side of the fracture to open, with instability and/or angulation.
8. Postoperative care
Perioperative antibiotics may be discontinued before 24-48 hours.
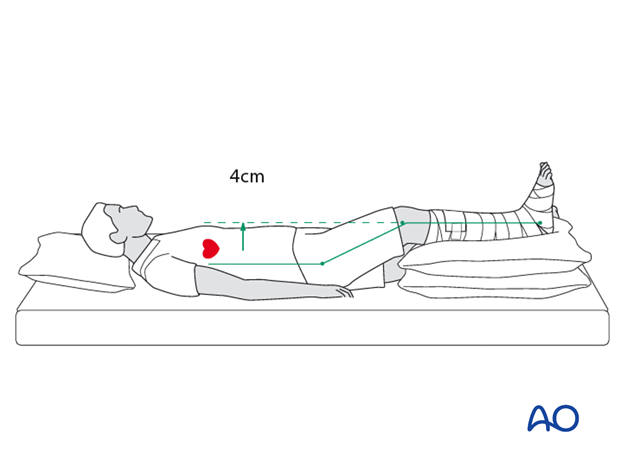
After surgery, the patient’s leg should be slightly elevated, with the leg placed on a pillow, 4 cm above the level of the heart.
Attention is given to:
- Pain control
- Mobilization without early weight bearing
- Leg elevation when not walking
- Thromboembolic prophylaxis
- Early recognition of complications
Soft-tissue protection
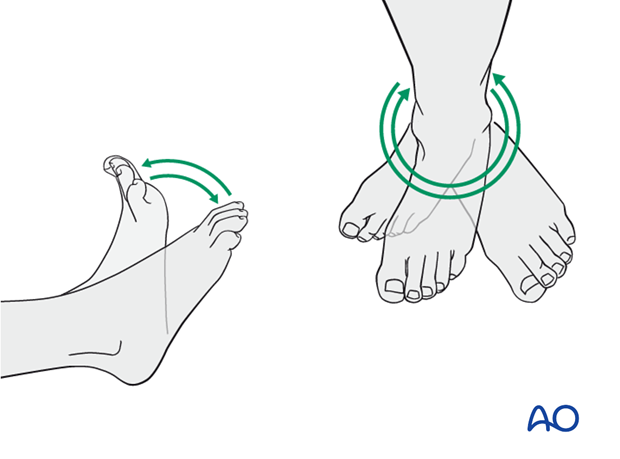
A brief period of splintage may be beneficial for protection of the soft tissues, but should last no longer than 1–2 weeks. Thereafter, mobilization of the ankle and subtalar joints should be encouraged.
Mobilization
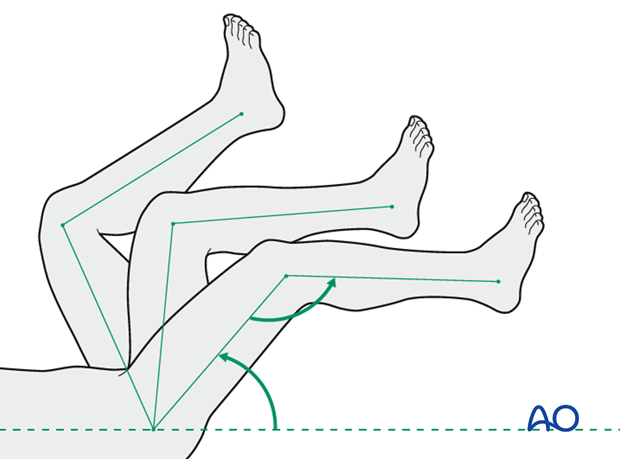
Active and assisted motion of all joints (hip, knee, ankle, toes) may begin as soon as the patient is comfortable. Attempt to preserve passive dorsiflexion range of motion.
Weight bearing
Limited weight-bearing (15 kg maximum), with crutches, may begin as tolerated, but full weight bearing should be avoided until fracture healing is more advanced (10-12 weeks).
Follow up
Follow-up is recommended after 2, 6 and 12 weeks, and every 6-12 weeks thereafter until radiographic healing and function are established. Depending on the consolidation, weight bearing can be increased after 6-8 weeks with full weight bearing when the fracture has healed by x-ray.
Implant removal
Implant removal may be necessary in cases of soft-tissue irritation by the implants. The best time for implant removal is after complete bone remodeling, usually at least 24 months after surgery. This is to reduce the risk of refracture.


