ORIF - Plate fixation (proximal 1/3)
1. Principles
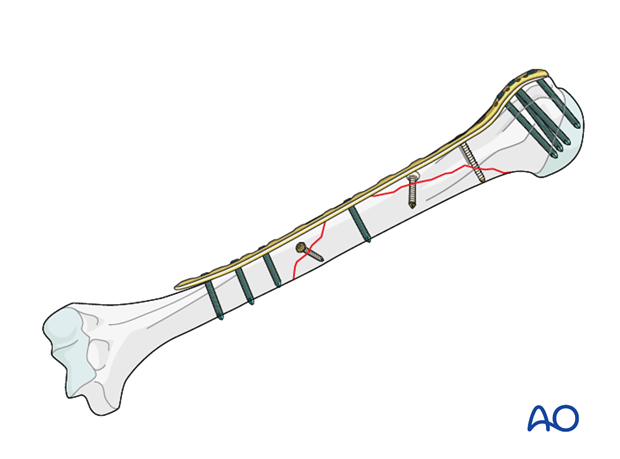
Plating of proximal 1/3 fractures
In fractures with markedly displaced proximal, metaphyseal fragmentation it is crucial to still achieve anatomic or almost anatomic reduction. The older the patient, the more important this is, to prevent nonunion and regain optimal function.
To achieve this, the plate should provide sufficient fixation points in the proximal humerus/humeral head. It also should be long enough. Typically, 6 cortical fixation points distal to the fracture zone are sufficient.
Bridge plating alone does not address grossly displaced fragments. In the elderly patient this may lead to delayed or nonunion. Therefore, consider adding techniques such as cerclage or lag screw fixation of large fragments, or choose a different treatment.
Open fractures in the humeral shaft
Adequate surgical debridement is the crucial first step in the care of any open fracture.
Read more about the treatment of open fractures in the humeral shaft.
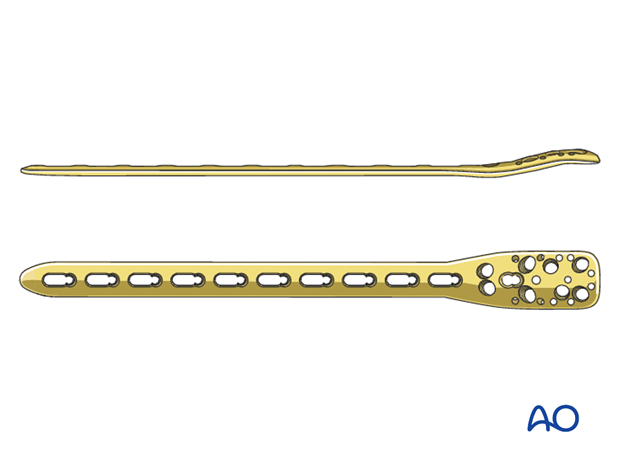
Choice of plate
3.5 mm locking plate systems, such as PHILOS-Long are suitable and shown in this procedure.
2. Patient preparation and approaches
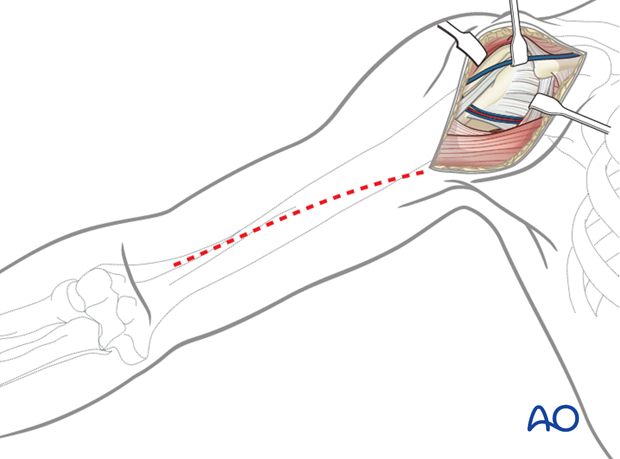
Depending on the proximal fracture morphology and surgeon’s preference a deltopectoral, extended anterolateral or lateral approach may be used in a beach chair or supine position.
In this procedure, the deltopectoral approach is shown. The principles of fixation remain the same regardless of the approach used.
3. Reduction and lag screw fixation
Reduction
It is important to restore axial alignment and rotation.
In osteoporotic bone anatomic reduction should be achieved as callus formation is poor.
Anatomic reduction and internal fixation follows the principle of reducing the numbers of fragments from 3 to 2 and 2 to 1.
Alternatively, a bridging technique may be used.
Lag screw fixation
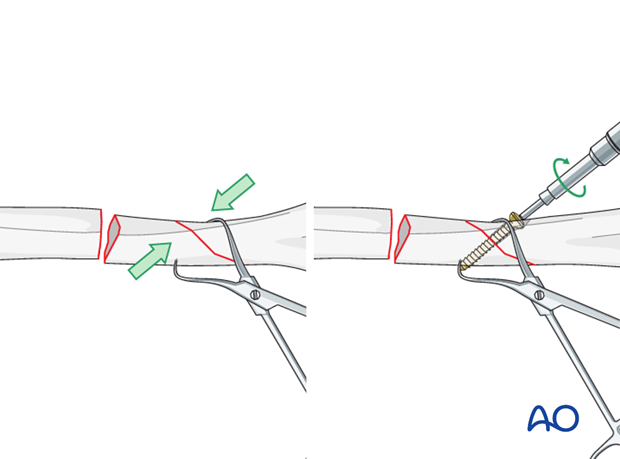
If the fracture planes are suitable, the segment may be reduced and held with lag screws or cerclage.
Where there is an oblique fracture, reduce the segment to the main fragment of the humerus, hold it with a pointed reduction forceps and fix it with a lag screw.
If the other fracture plane is transverse finalize the reduction with the plate. Ensure correct rotational alignment.
4. Plate fixation
Plate position
The plate may be applied either in the lateral or the anterolateral position.
Lateral positionFor the lateral position the plate has to be passed through a funnel under the deltoid muscle.
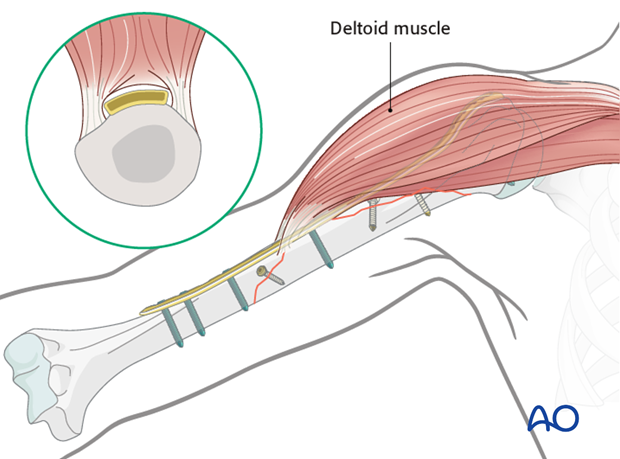
The aim of the anterolateral position is to protect the deltoid insertion as much as possible and not to interfere with the course of the long head of the biceps.
The proximal portion of the plate is placed on the lateral surface and the distal portion is placed on the anterior surface of the humerus. This requires the plate to be twisted to form a helix, with sufficient twist to allow the plate to pass anteriorly to the deltoid insertion.

Plate contouring
For anterolateral plate positioning twist the distal end of the plate internally to match the orientation of the anterolateral surface of the distal humerus.
A malleable template is helpful for matching contours of proximal and distal segments. Alternatively, a rod can be used to estimate the amount of twisting.
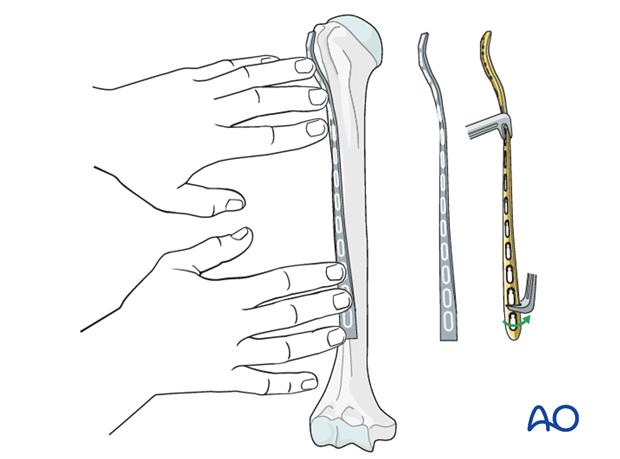
Plate application
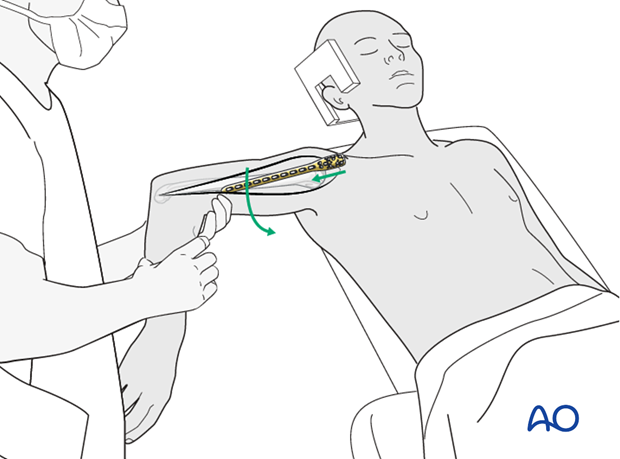
Abduct the arm to release the tension of the deltoid. If the stability of the initial fixation is adequate, slight internal rotation and retrotorsion of the arm makes proximal access easier.
If the anterior proximal deltoid insertion still interferes with the plate position it may be released.
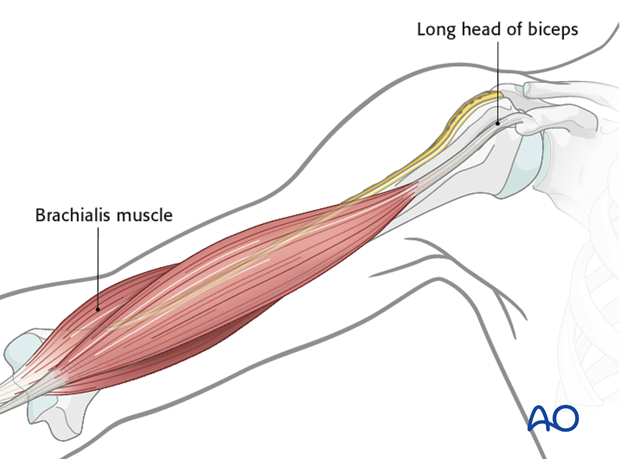
Take care not to interfere with the long head of biceps.
If the plate has been twisted the distal end of the plate should lie in an interneurovascular split of the brachialis muscle.
Confirm the plate position by palpation and under image intensification. Check that the plate is:
- Not positioned too high (risk of impingement)
- Nicely aligned to the axis of the humerus
- Providing sufficient fixation points distal to the fracture zone
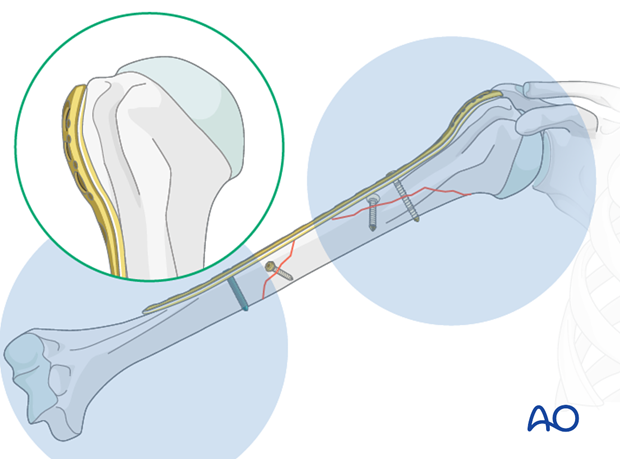
Plate fixation to humeral head
The number of screws depends on the bone quality. In osteoporotic bone a higher number of screws may be required.
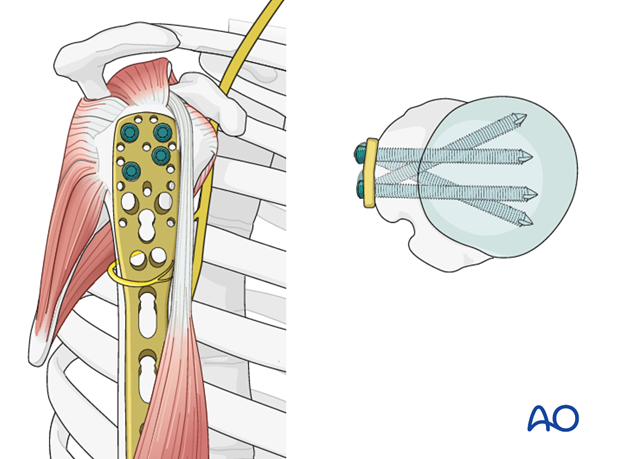
If possible, start with a bicortical nonlocking screw through the elongated hole of the PHILOS in the meta/diaphyseal area. This allows fine tuning of the plate position.

Use the guide block with drill sleeves to drill holes for the proximal screws. Do not drill through the subchondral bone and into the shoulder joint.
Follow the manufacturer’s technique guide.
Two drilling techniques help to avoid drilling into the joint.
- “Woodpecker”-drilling technique (as illustrated): Advance the drill bit only for a short distance, then pull the drill back before advancing again. Keep repeating this procedure until subchondral bone contact can be felt. Take great care to avoid penetration of the humeral head.
- Particularly in osteoporotic bone, one can drill only through the near cortex. Push the depth gauge through the remaining bone until subchondral resistance is felt.
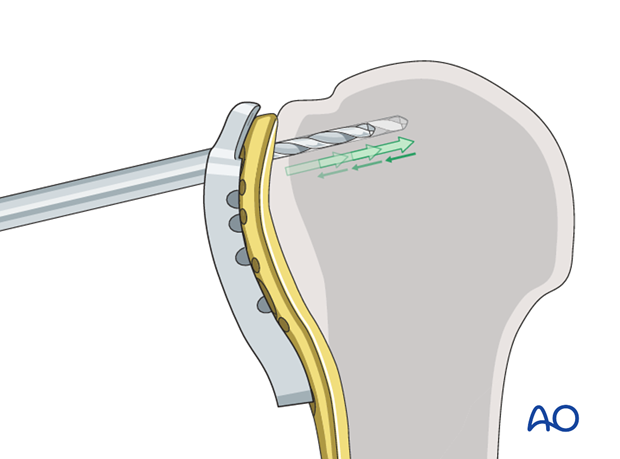
The intact subchondral bone should be felt with an appropriate depth gauge or blunt pin to ensure that the screw stays within the humeral head. The integrity of the subchondral bone can be confirmed by palpation or the sound of the instrument tapping against it. Typically, choose a screw slightly shorter than the measured length.
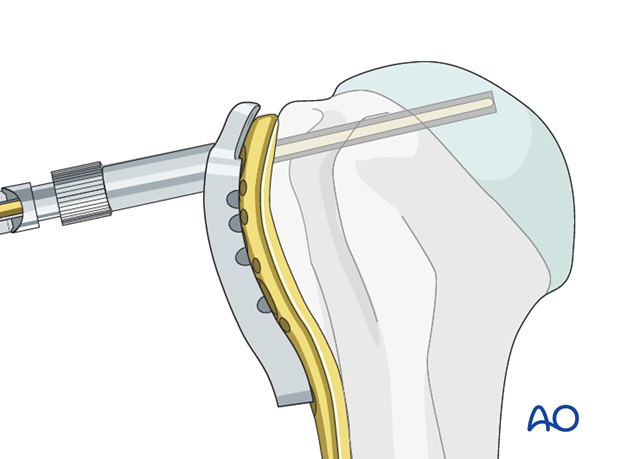
Insert a locking head screw through the screw sleeve into the humeral head. The sleeve aims the screw correctly. Particularly in osteoporotic bone, a screw may not follow the hole that has been drilled.
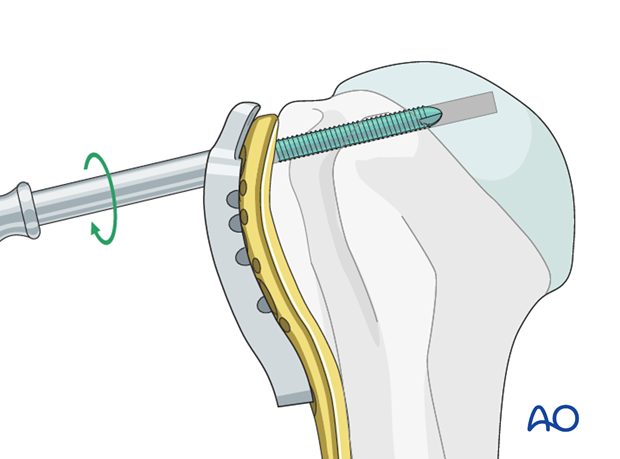
Place a sufficient number of screws into the humeral head.
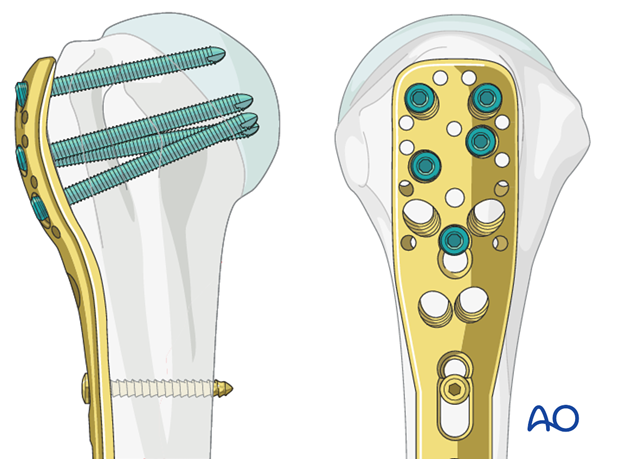
Plate fixation to humeral shaft
Distally locking screw fixation is preferred. Again, the number of cortical fixation point depends on the fracture morphology and bone quality.
Insert at least three screws into the humeral shaft, distal to the fracture zone, with appropriate, percutaneously placed screw insertion sleeves.
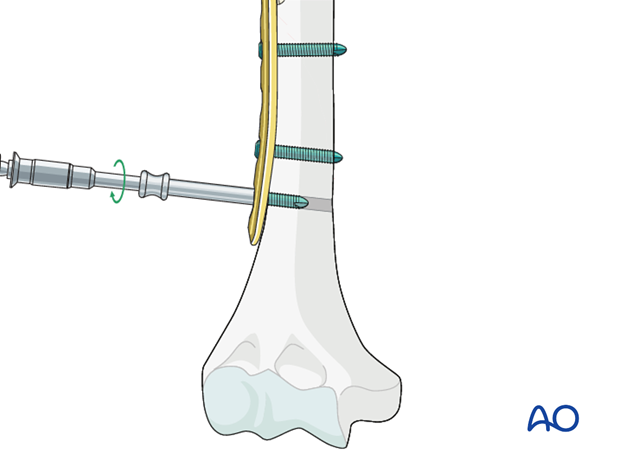
This illustration shows the completed osteosynthesis.

5. Final check of osteosynthesis
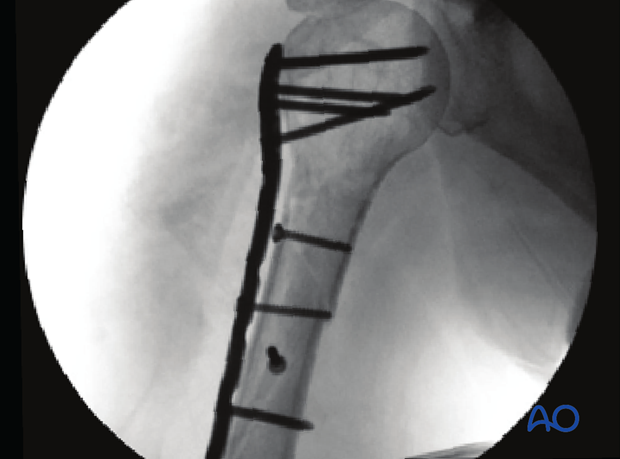
Using image intensification, carefully check for correct reduction and fixation (including proper implant position and length) in various arm positions. Ensure that screw tips are not intraarticular.
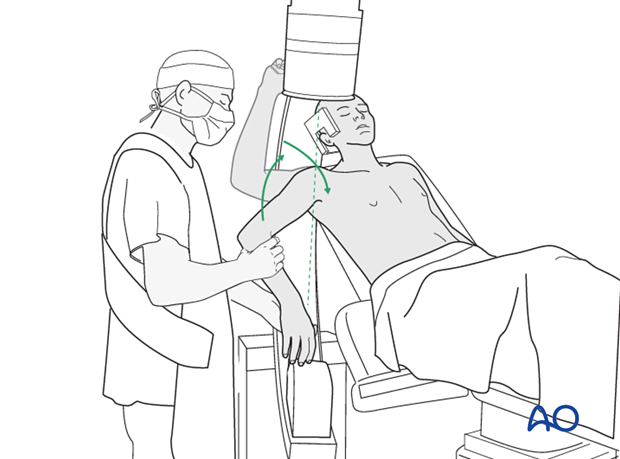
X-ray of osteosynthesis with PHILOS and lag screws
6. Aftercare
Principles
The aim of any surgical fixation of humeral shaft fractures is a stable osteosynthesis of the fracture allowing early passive and active motion. This is crucial to prevent elbow stiffness.
The rehabilitation regimen should take account of any damage to soft tissues, either as a result of the injury or due to the surgery. It also needs to take account of the security of the fixation.
Immediate postoperative care
Carefully examine the patient for neurological deficits and pulses.
Early treatment
In the beginning lymph drainage and elastocompressive bandages may be helpful.
Consider a sling for pain relief within the first days.
Treatment for refixation of deltoid detachment
If the deltoid was detached and reattached, active deltoid contraction should be delayed for the first six weeks.
Mobilization
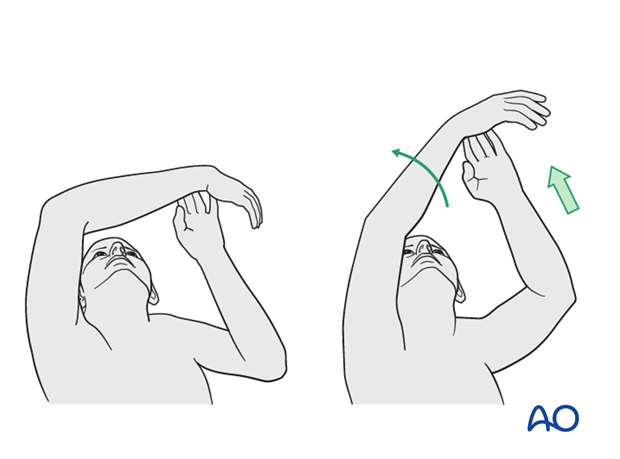
In the early phase the rehabilitation consists of classic maneuvers eg overhead motion exercises.
Rehabilitation should address the entire upper limb.
Exercise against resistance
Depending on the bone quality and compliance of the patient, exercise against resistance might be limited.
Follow-up
Clinical and radiological follow-up should be scheduled at least 6 weeks, 12 weeks and 6 months after surgery and continued until a bony healing is confirmed.
Hardware removal
Typically, humeral plates are left in situ indefinitely.
If removal is considered, bony healing should be confirmed. Plates are not normally removed for at least one year after surgery.
Be aware of the risk to the various nerves when dissecting the soft tissues to gain access to the distal humerus for removing anterior or anterolateral plates.
As the radial nerve runs over a posterior plate, removing this plate should only be considered with great caution, and the patient must be well informed about the risks. The original operation note should describe the relation of the nerve to the plate and should be reviewed before plate removal.


