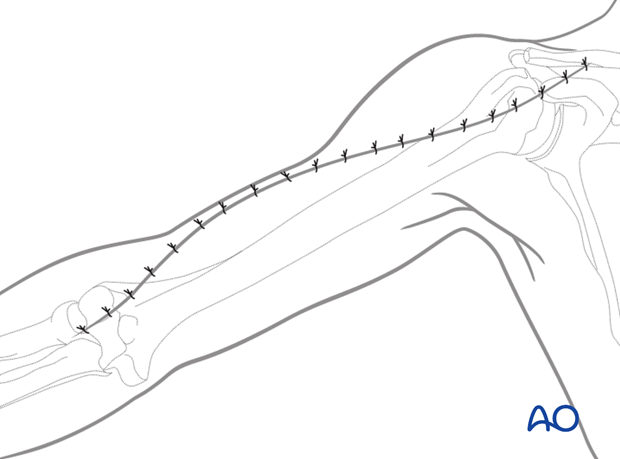
Anterolateral approach to the humerus (after Henry)
1. Introduction
Plating of proximal humeral shaft fractures may be performed through the anterolateral approach.
This approach can be extended distally for midshaft fractures.
2. Skin incision
The complete incision is illustrated here. Depending on the fracture and its location, a smaller section might be used.
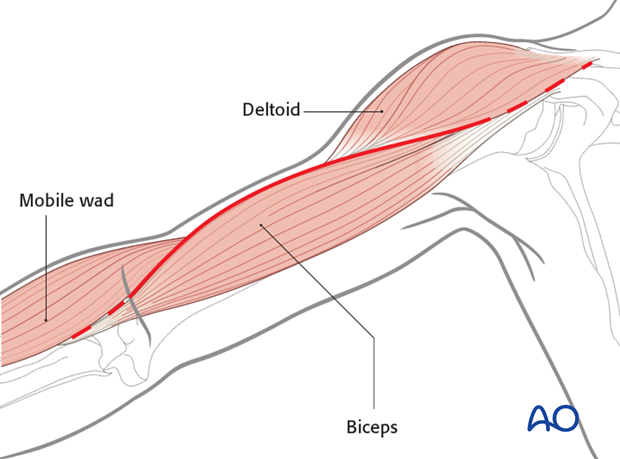
The incision follows a line extending from the interval distally between biceps and the mobile wad (brachioradialis and the wrist extensors) to the deltopectoral interval proximally, following the lateral edge of biceps and the anterior edge of the deltoid. The incision may also be performed from proximally to distally.
Minimize any detachment of subcutaneous tissue from the muscular fascia.
3. Superficial dissection
Incise the fascia carefully between biceps/brachialis and the mobile wad and extend proximally.
Look for the lateral cutaneous nerve of the forearm crossing distally. The radial nerve is deeper. Identify the nerve in the interval between biceps and the mobile wad and followed proximally as the incision is developed.
Proximally, look for the cephalic vein in the deltopectoral interval. If it is retracted with the deltoid, muscular tributaries are less likely to be torn.
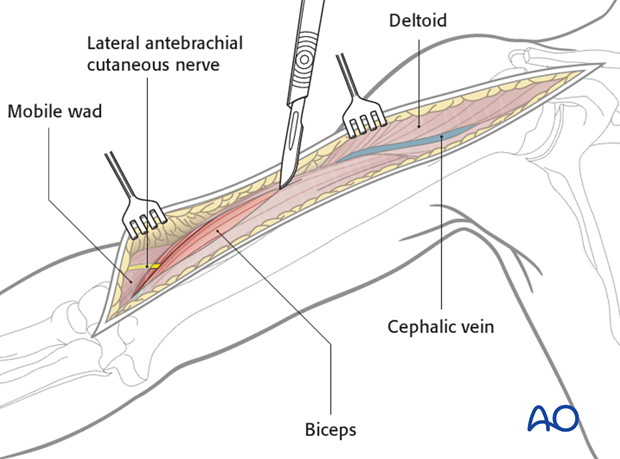
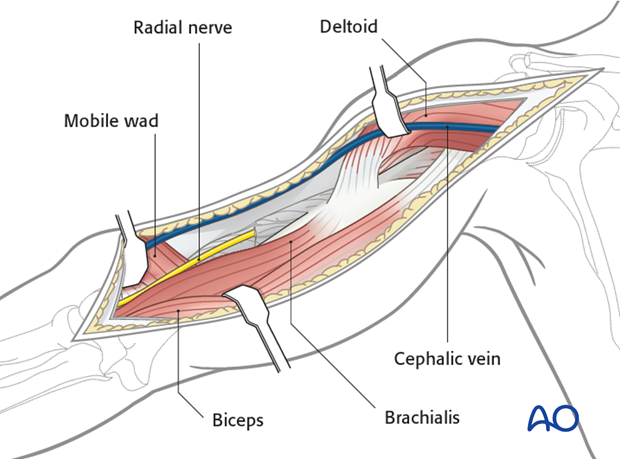
Retract the biceps medially, and the mobile wad laterally to identify the radial nerve. The brachialis is now exposed.
4. Deep dissection
Dissect the brachialis within the neurovascular plane between the radial and the musculocutaneous nerves to maintain innervation of the brachialis.
If necessary, release some of the muscle attachment proximally to allow the plate to lie on the bone.
Extend the dissection proximally, as needed, to the anterior border of the deltoid and along the deltopectoral interval.

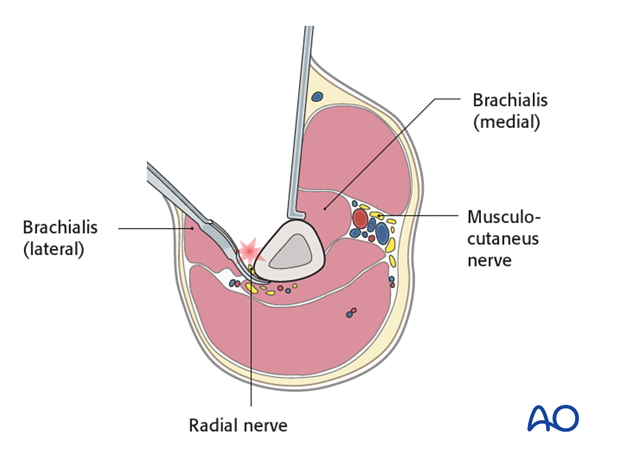
Alternatively, the brachialis may be retracted medially. Beware that this injures the radial nerve branch to the brachialis.
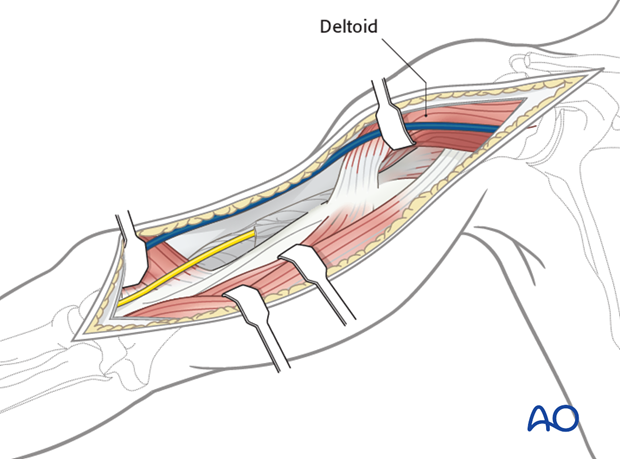
Partially release the deltoid insertion anteriorly, if necessary, and retract laterally to access the proximal humerus.
Alternatively dissect bluntly under the central deltoid insertion to allow for plate placement.
Leave as much muscle attached to bone as possible to preserve vascularity and reattach the released portion at the end of the procedure.
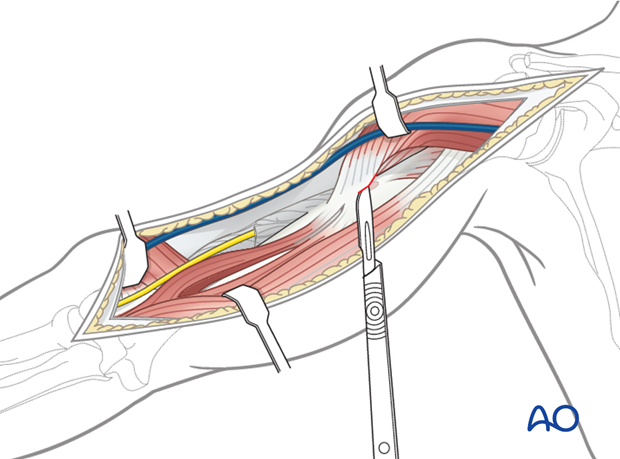
Distally, the anterior humerus has been exposed to the elbow joint, between the mobile wad and brachialis.
Mobilize the radial nerve, as needed, to access the bone. Follow the nerve to the point where it passes through the lateral intermuscular septum.

5. Pitfall: injury to the radial nerve
The radial nerve enters the anterior compartment by perforating the lateral intermuscular septum. The use of Hohmann retractors in the distal 2/5 of the humerus carries a high risk of iatrogenic nerve injury and should therefore be avoided.
6. Wound closure
Irrigate the wound. Placement of a drain underneath the deltoid muscle might be considered.
Close the subcutaneous tissues and the skin in layers in a standard manner.
