Lag-screw fixation
1. General considerations
Introduction
Short oblique fractures (unicondylar) can be fixed with a lag screw.
For long oblique fractures, fixation with two or three lag screws is recommended.
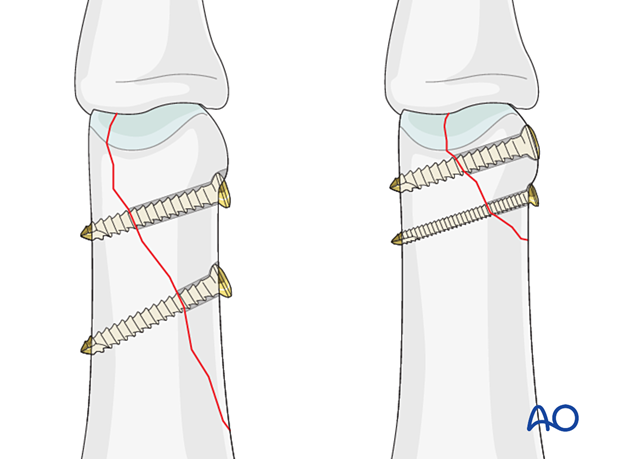
Caveat: changing fracture plane
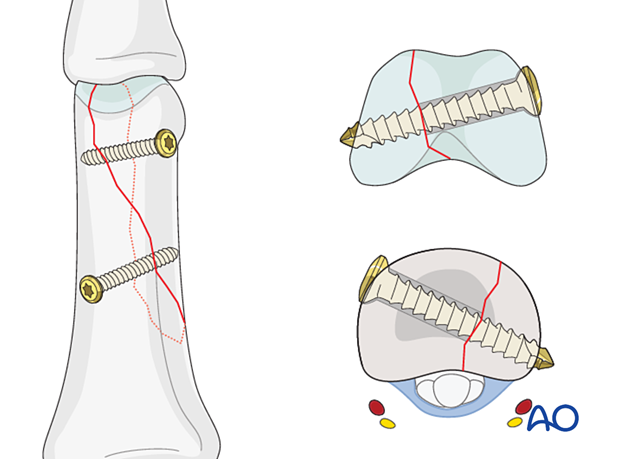
Anatomical reduction mandatory
Articular fractures must be reduced anatomically. Otherwise, the articular cartilage may be damaged, leading to painful degenerative joint disease and digital deformity.
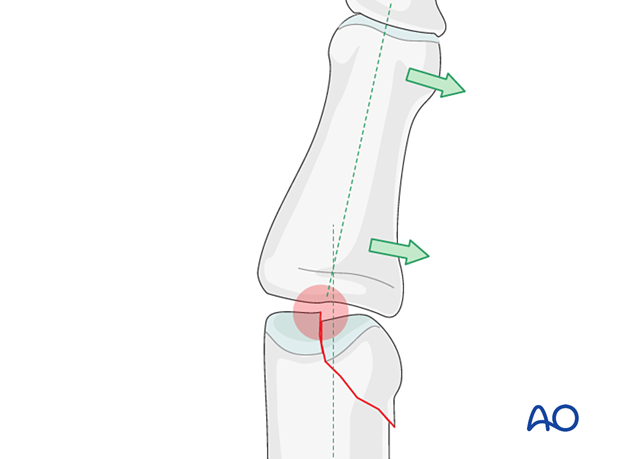
This illustration shows how even slight unicondylar depression may lead to angulation of the finger.
Percutaneous vs open reduction and fixation
Percutaneous reduction and fixation may be performed with acute fractures.
The advantages are:
- Lowered risk of necrosis
- Shorter operation time
- Less soft-tissue damage
- Faster mobilization
This treatment option needs some skills and experience and special reduction forceps to avoid impingement of swollen soft tissue (atraumatic technique).
If a percutaneous reduction is not achievable, the treatment can be changed to open surgery.
Open reduction and fixation may be used in acute and delayed cases.
2. Patient preparation
Place the patient supine with the arm on a radiolucent hand table.

3. Approach
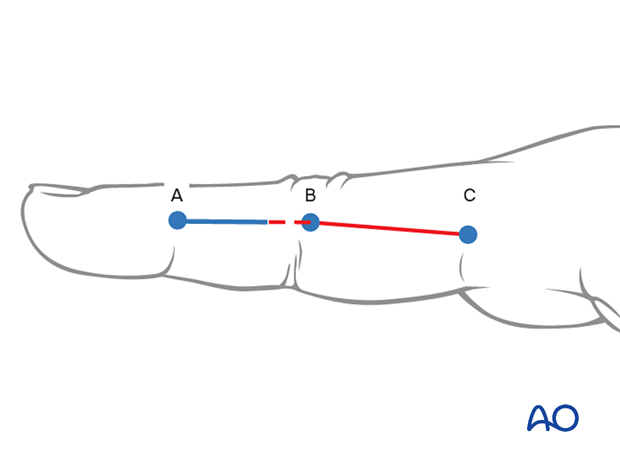
For this procedure, a midaxial approach to the proximal phalanx is typically used.
4. Reduction
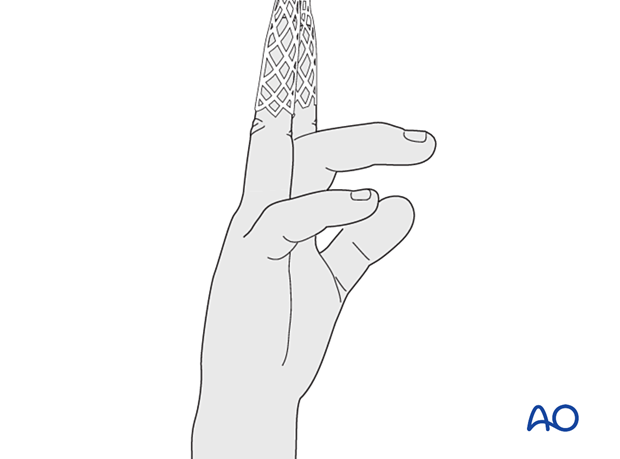
Reduction by ligamentotaxis
Often, the fracture can be reduced by applying traction via finger traps.
Indirect reduction
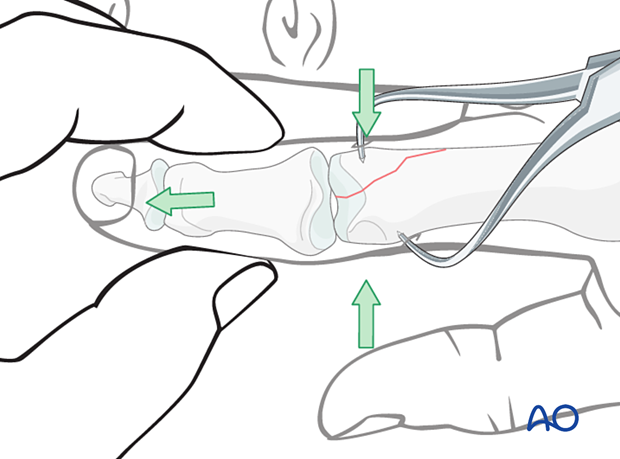
Reduction starts with traction to restore length.
Exert lateral pressure with your thumb and index finger or with dedicated percutaneous reduction forceps to reduce the fracture.
Confirm reduction with an image intensifier.
Open reduction
If closed reduction is not successful or in a nonacute case, proceed with an open reduction.
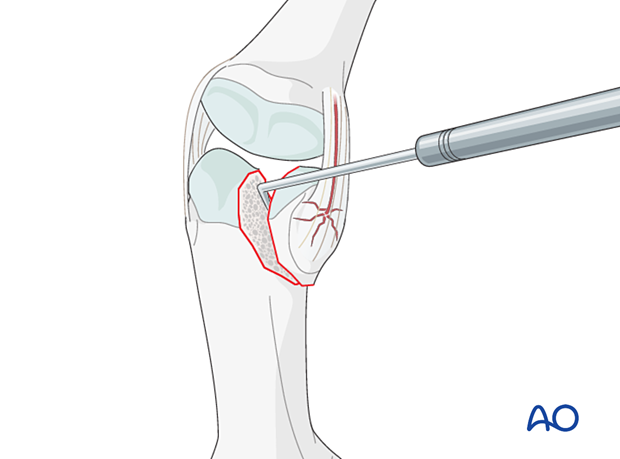
Use a dental pick to gently explore the fracture site to assess its geometry. The pick can also be used carefully to reduce small fragments. Take great care to avoid comminution of any fragment.
It is important to maintain the vascularity of tiny fragments attached to the collateral ligament, to avoid osteonecrosis.
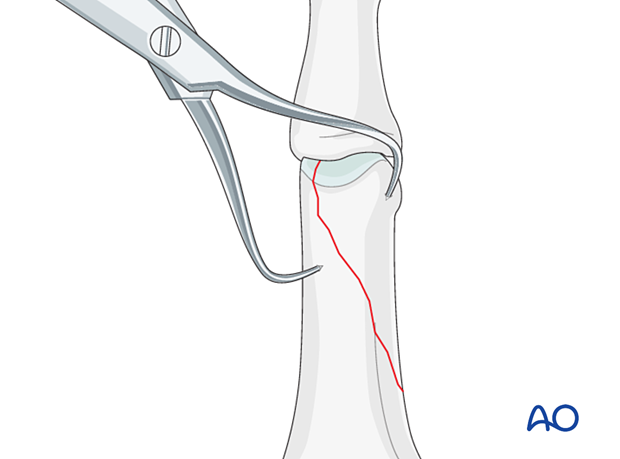
Small pointed reduction forceps can be used for larger fragments gently to rock the fracture from side to side. Be careful not to apply excessive force, which can lead to fragmentation.
Confirm reduction using image intensification.
Preliminary K-wire fixation
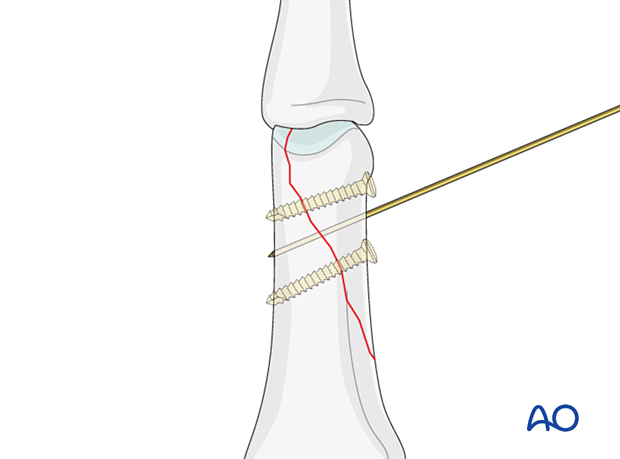
Long oblique fractures can be preliminarily fixed by inserting a K-wire. Be careful to place it so it will not conflict with later screw placement.
Avoid inserting a K-wire into small fragments, as they are in danger of fragmentation.
5. Fixation of a small fragment
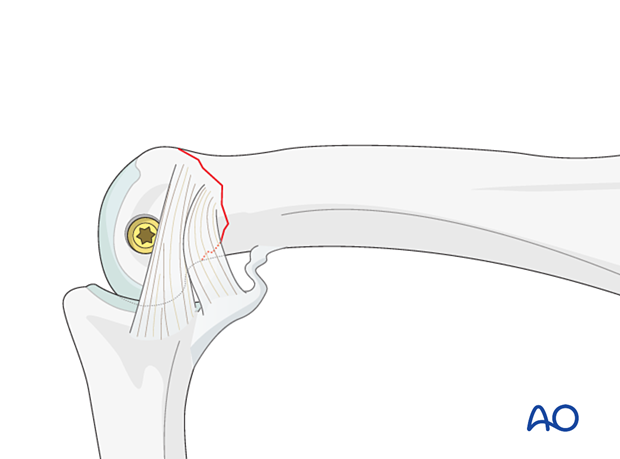
Screw positioning in a small fragment
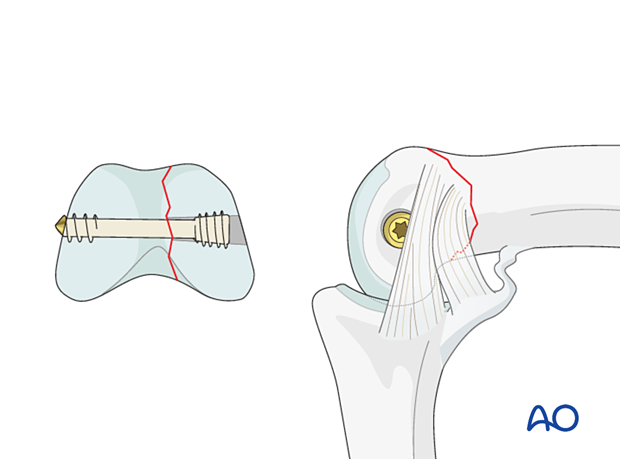
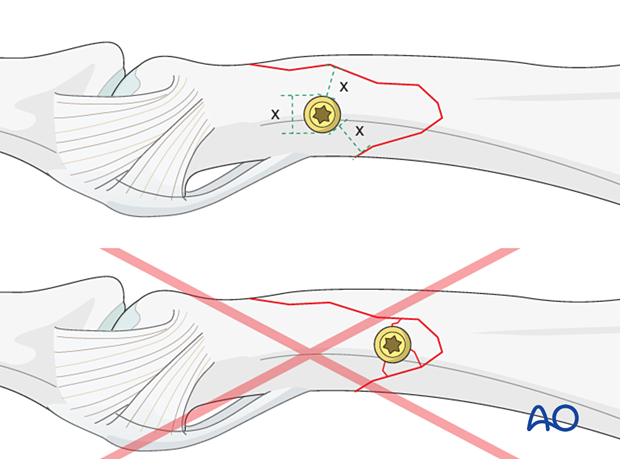
If only one screw can be inserted into a small fragment, it will have to be placed within the joint cavity but through the nonarticular face of the condyle, distal to the collateral ligament.
The lateral aspect of the phalangeal head, which is safe for screw placement, can be approached by flexing the proximal interphalangeal (PIP) joint.
A headless cannulated screw is recommended to avoid ligament irritation due to a protruding screw head and eventual joint stiffness.
Determining screw size
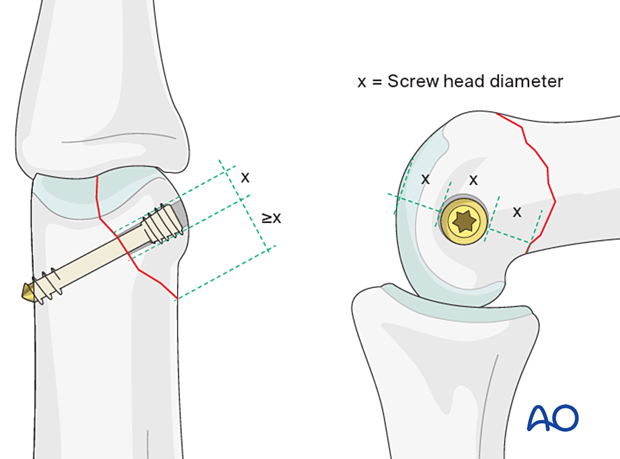
The screw length needs to be adequate for the screw just to penetrate the opposite cortex.
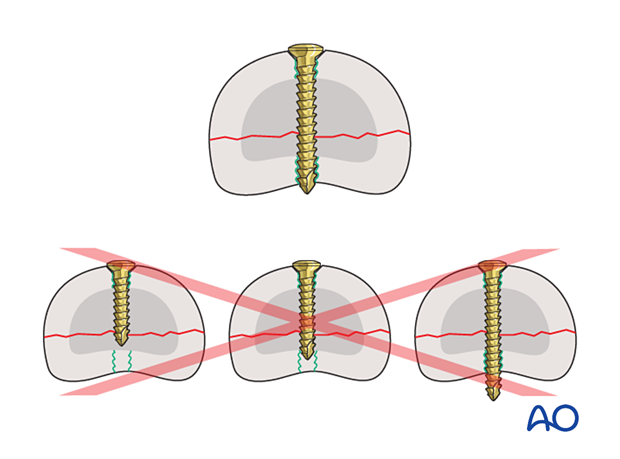
Keep in mind that at the apex of the fragment, the minimal distance between the screw head and the fracture line must be at least equal to the diameter of the screw head. If necessary, a screw of a smaller diameter will have to be chosen.
Preparation for drilling
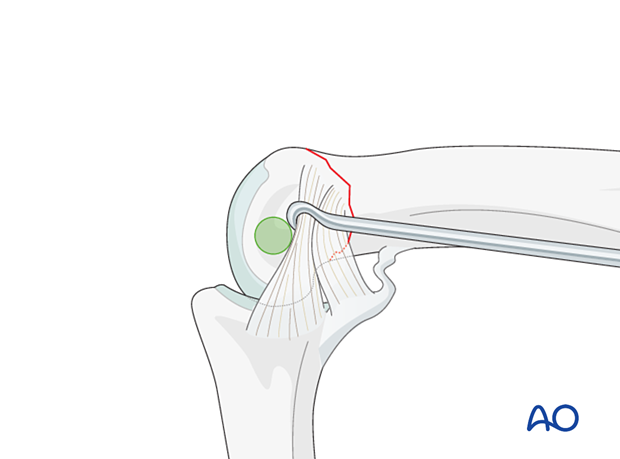
The optimal way to approach the outer surface of the phalangeal head is by flexing the PIP joint and retracting the collateral ligament in a volar direction.
Lag-screw insertion
Insert the headless screw and gently tighten it to compress the fracture.
6. Fixation of a large fragment
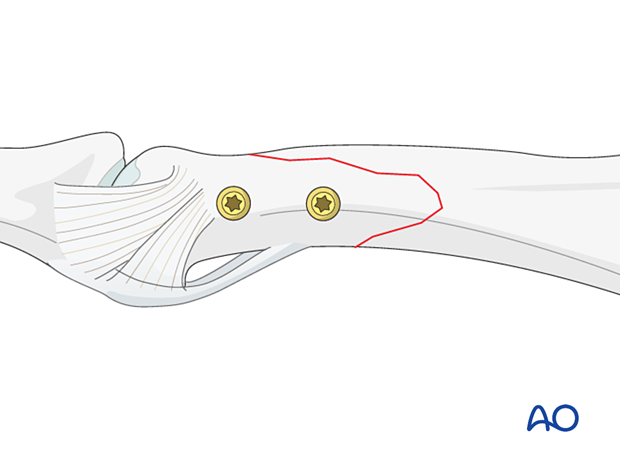
Screw positioning in large fragments
In large fragments, all screws can be placed safely proximal to the collateral ligament.
Screw size selection
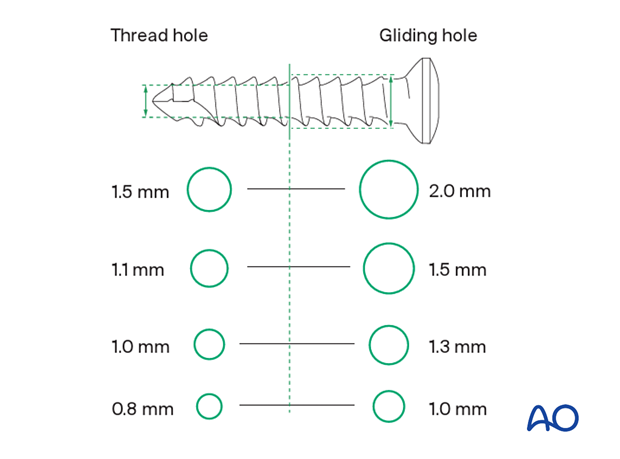
The exact size of the diameter of the screws used will be determined by the fragment size and the fracture configuration.
The various gliding and thread hole drill sizes for different screws are illustrated here.
Pitfall: countersinking
Screw length pitfalls
- Too short screws do not have enough threads to engage the cortex properly. This problem increases when self-tapping screws are used due to the geometry of their tip.
- Too long screws endanger the soft tissues, especially tendons and neurovascular structures. With self-tapping screws, the cutting flutes are especially dangerous, and great care has to be taken that the flutes do not protrude beyond the cortical surface.
Pitfall: screw too close to the fracture
Pitfall: beware of fissure lines
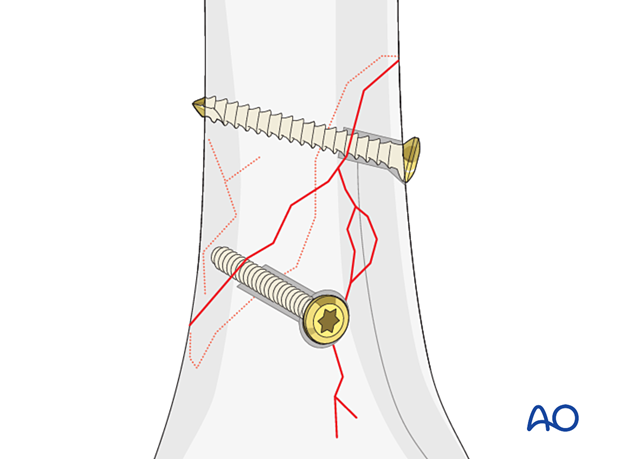
Screw insertion
Insert the distal screw first.
Alternate tightening of the two lag screws helps avoid tilting the fragment and applies even compression forces over the whole fracture surface.
Confirm anatomical reduction and correct screw placement with an image intensifier.
Check stability of the fixation by passive flexion and extension of the PIP joint and by applying gentle lateral and rotational motion. This will help to determine stability to establish strategies for rehabilitation.

7. Final assessment
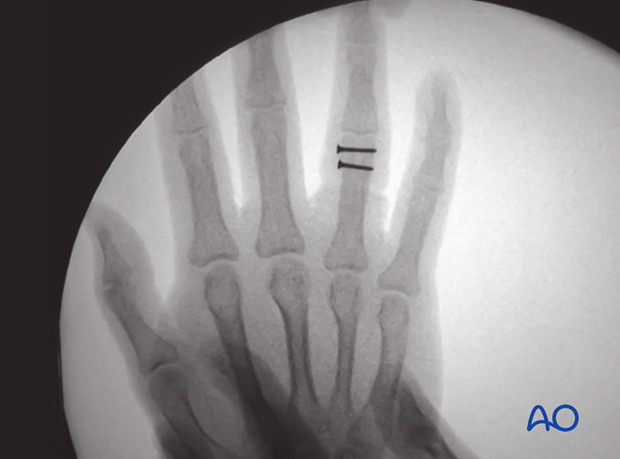
Confirm anatomical reduction of the articular surface and correct screw placement with an image intensifier.
8. Aftercare
Postoperative phases
The aftercare can be divided into four phases of healing:
- Inflammatory phase (week 1–3)
- Early repair phase (week 4–6)
- Late repair and early tissue remodeling phase (week 7–12)
- Remodeling and reintegration phase (week 13 onwards)
Full details on each phase can be found here.
Postoperative treatment
If there is swelling, the hand is supported with a dorsal splint for a week. This would allow for finger movement and help with pain and edema control. The arm should be actively elevated to help reduce the swelling.
The hand should be splinted in an intrinsic plus (Edinburgh) position:
- Neutral wrist position or up to 15° extension
- MCP joint in 90° flexion
- PIP joint in extension
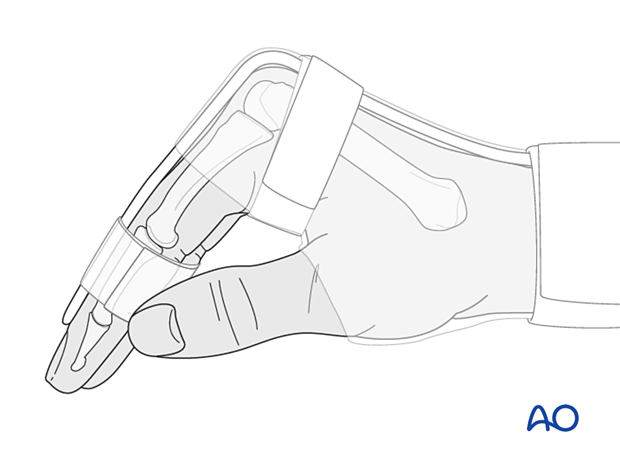
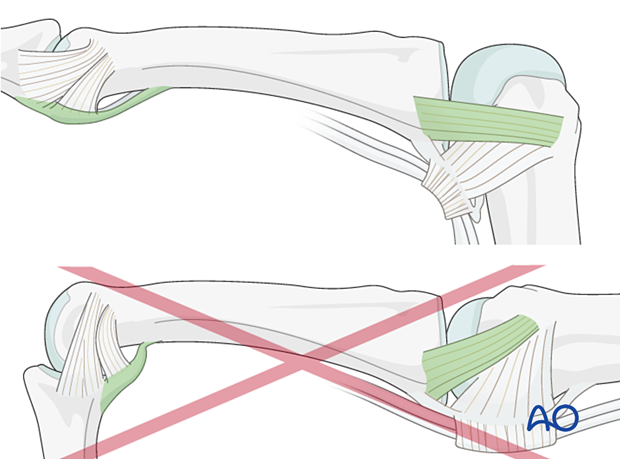
The reason for splinting the MCP joint in flexion is to maintain its collateral ligament at maximal length, avoiding scar contraction.
PIP joint extension in this position also maintains the length of the volar plate.
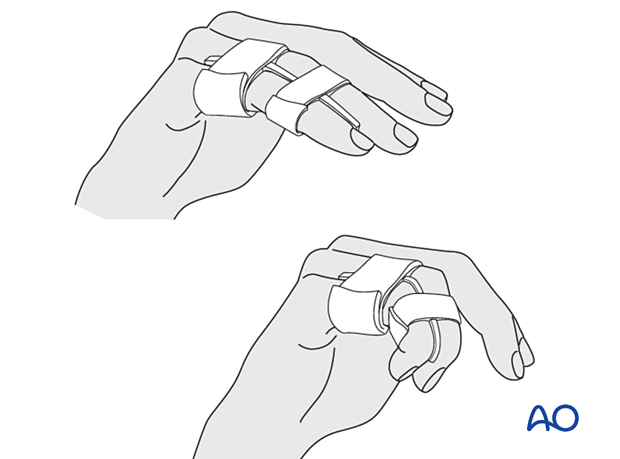
After subsided swelling, protect the digit with buddy strapping to a neighboring finger to neutralize lateral forces on the finger.
Functional exercises
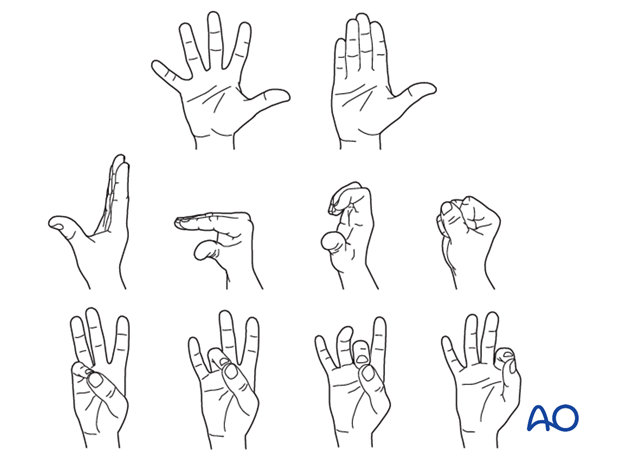
To prevent joint stiffness, the patient should be instructed to begin active motion (flexion and extension) immediately after surgery.
Follow-up
See the patient after 5 and 10 days of surgery.
Implant removal
The implants may need to be removed in cases of soft-tissue irritation.
In case of joint stiffness or tendon adhesion restricting finger movement, arthrolysis or tenolysis may become necessary. In these circumstances, the implants can be removed at the same time.


