ORIF - Plate fixation
1. General considerations
Introduction
Plating with precontoured periarticular locking plates provides angular-stable fixation and is the most commonly used method of distal humeral fracture fixation.
Treatment principle
In this fracture, both columns and the articular block are fractured in a simple way.
This can be stabilized by interfragmentary compression with a plate for each column.
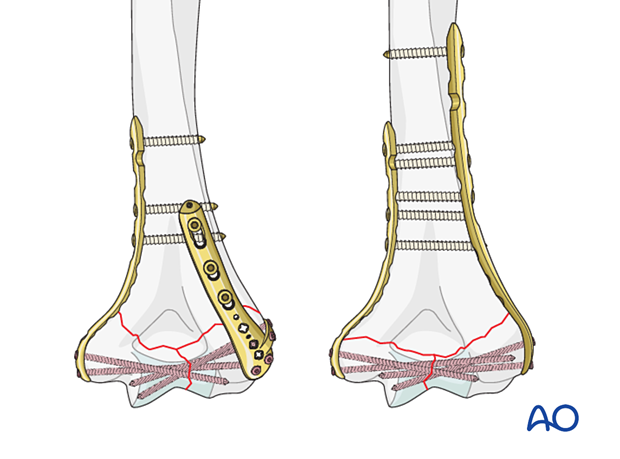
Triangle-of-stability concept
The mechanical properties of the distal humerus are based on a triangle of stability, comprising the medial and lateral columns and the articular block (see also the anatomical concepts).
In principle, the intraarticular fracture is fixed first. Thereby the fracture is converted to an extraarticular fracture and treated likewise. The less complex column is then addressed next.

Parallel vs perpendicular plating
There is little biomechanical evidence from in vitro studies to suggest that one has more advantages than the other. However, in clinical practice, a specific fracture pattern may indicate a specific plate construct.
In a very low transverse fracture, ie, exiting at or below the level of the olecranon fossa, the articular block does not provide enough hold for the application of a dorsolateral plate.
An alternative is a dorsolateral plate with lateral tab. This permits insertion of screws from lateral-to-medial into the articular block as well as posterior-to-anterior into the capitellum.
Plate selection
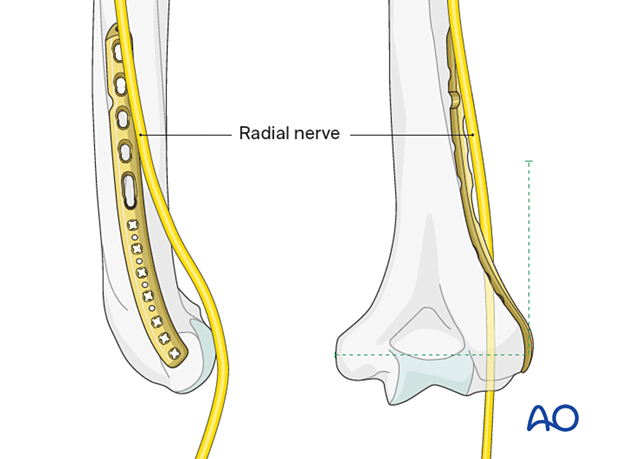
Precontoured anatomical plates have been designed. If these are not available, a reconstruction plate is used both on the medial and the lateral sides. If a stronger plate is required, a small-fragment compression plate may be used, but this is more difficult to contour.
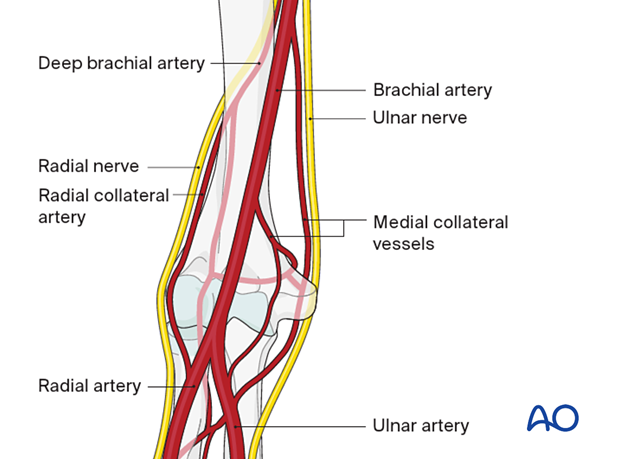
Note: radial nerve at risk
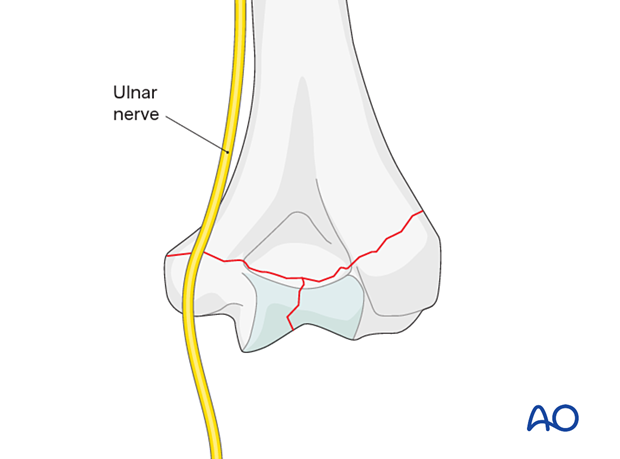
Note: ulnar nerve at risk
2. Patient preparation and approaches
Patient positioning
This procedure is usually performed with the patient either in a prone position or lateral decubitus position.
Approaches
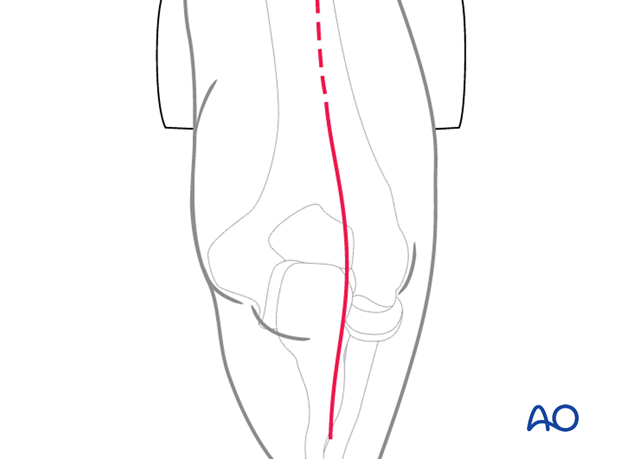
A posterior triceps-elevating approach is preferred. However, triceps-on or olecranon osteotomy approaches may be used depending on surgeon’s preference.
The triceps-split approach does not allow for accurate control of the articular block and column fixation and is therefore not recommended.
3. Preparing the fracture site
In principle, preserve all fracture fragments attached to soft tissue in situ if possible.
Keep removal of hematoma to the minimum necessary to facilitate the exposure of the fracture.
4. Reduction and fixation of articular block
Articular reduction
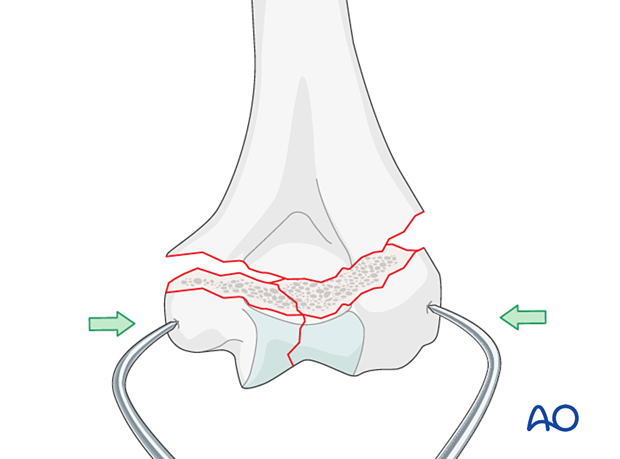
Reduce the articular fragments manually, with K-wire joysticks or pointed reduction forceps.
Hold the reduced articular block with pointed reduction forceps. Thereby extrinsic interfragmentary compression is gained.
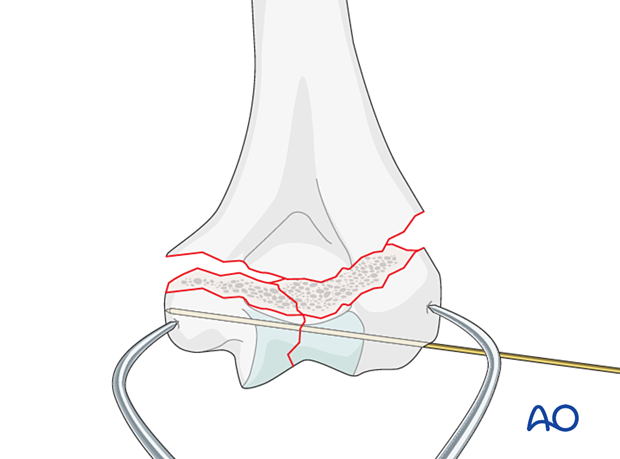
Temporarily fix the fragments with a K-wire.
With a K-wire, interfragmentary positioning is achieved but no compression.
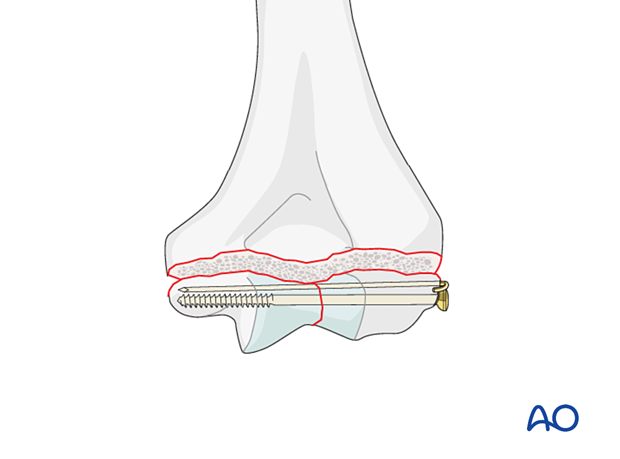
Fixation of articular block
In poor-quality bone, interfragmentary compression is undesirable, and therefore interfragmentary alignment is gained with a position screw.
If the bone quality allows, interfragmentary compression is gained by either extrinsic or intrinsic techniques.
There are two options for definitive fixation with compression, which may be combined:
- Lag screw outside a plate
- Lag screw through the plate
- Compression with forceps and holding it with a locking screw through a plate
Lag screw fixation outside plate
Use a lag screw (a partially threaded 4.0 cancellous screw, or a fully threaded 2.7 or 3.5 cortical screw with overdrilling the near fragment) to obtain interfragmentary compression.
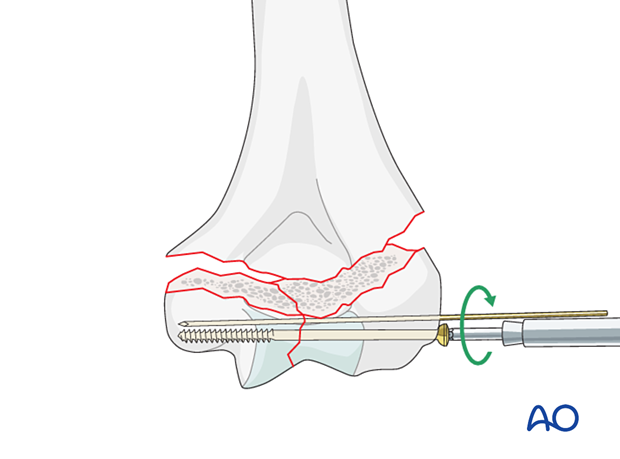
In very distal fractures, the positioning K-wire can be retained to maintain rotational stability.
5. Supracondylar reduction and fixation
Basic techniques
The basic technique for application of anatomical plates is described in:
If precontoured anatomical plates are not available, see the basic technique for application of reconstruction plates.
Reduction and temporary fixation
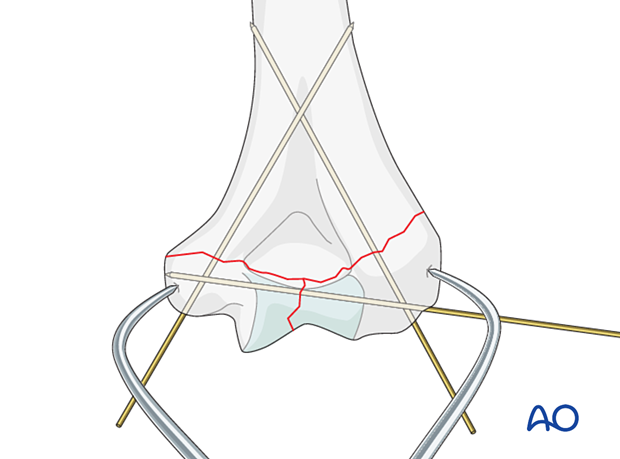
Reduce the reconstituted articular (condylar) block to the metaphysis and use K-wire(s) for preliminary fixation.
To avoid risk to the ulnar nerve, parallel K-wires from laterally may be preferred.
It is recommended to check alignment under image intensification.
Application of the first plate
Apply the first plate to the column which is easier to fix. This is usually the lateral column.
Provisionally fix the plate to the bone with a cortical position screw through a slotted combihole proximal to the fracture.
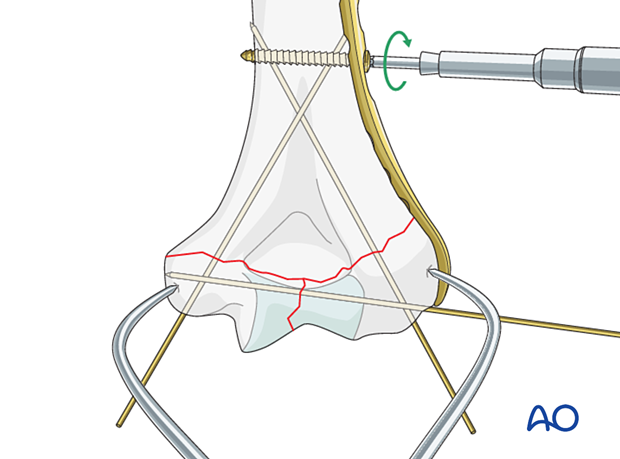
Place a long locking screw through the plate into the articular block to hold the compression. If possible, use two long locking screws.
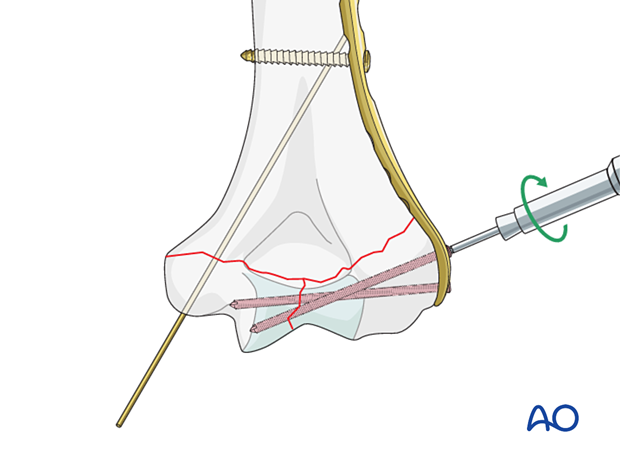
Application of the second plate
Apply the second plate to the other column in the same fashion.
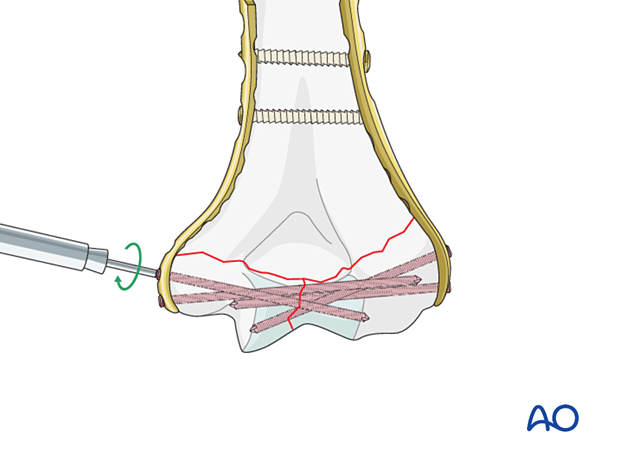
Supracondylar compression
On the lateral side, release the positioning screw slightly and insert a bicortical cortical screw eccentrically in a more proximal plate hole for compression in the plane of the plate. Then tighten the positioning screw.
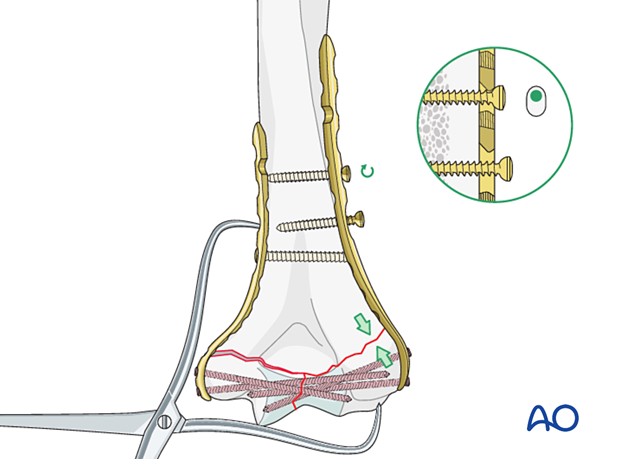
Repeat this step on the other side.

Insertion of remaining screws
Insert remaining screws.
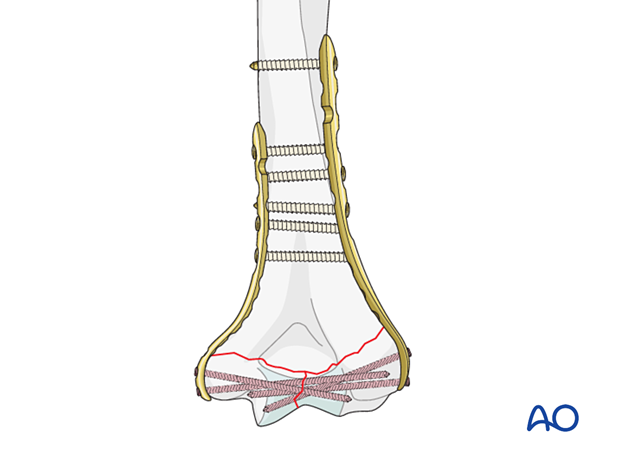
In poor-quality bone, insert further locking screws in the diaphyseal segment.
The screw density should be similar on both columns.
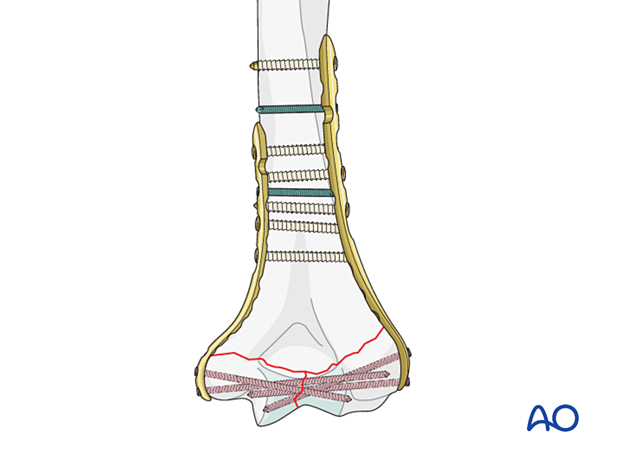
6. Final assessment
Visually inspect the fixation and manually check for fracture stability.
Repeat the manual check under image intensification.
Ensure the ulnar nerve is not unstable or tethered on implants throughout a full range of motion.
7. Aftercare
Introduction
The rehabilitation protocol consists usually of three phases:
- Rehabilitation until wound healing
- Rehabilitation until bone healing
- Functional rehabilitation after bone healing
Immediate aftercare
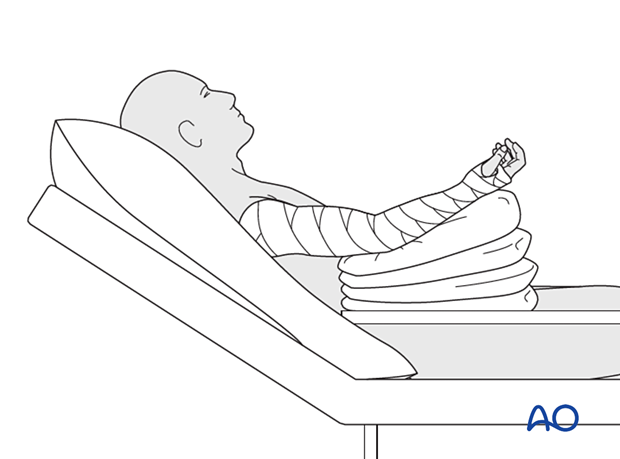
The arm is bandaged to support and protect the surgical wound.
The arm is rested on pillows in slight flexion of the elbow so that the hand is positioned above the level of the heart.
Short-term splinting may be applied for soft-tissue support.
Neurovascular observations are made frequently.
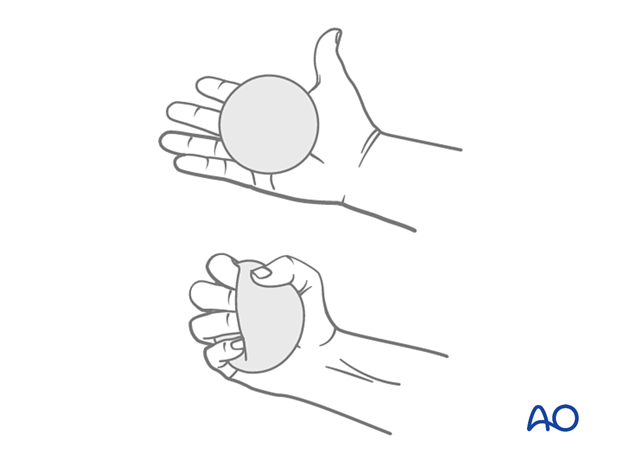
Hand pumping and forearm rotation exercises are started as soon as possible to reduce lymphedema and to improve venous return in the limb. This helps to reduce postoperative swelling.
Mobilization until wound healing
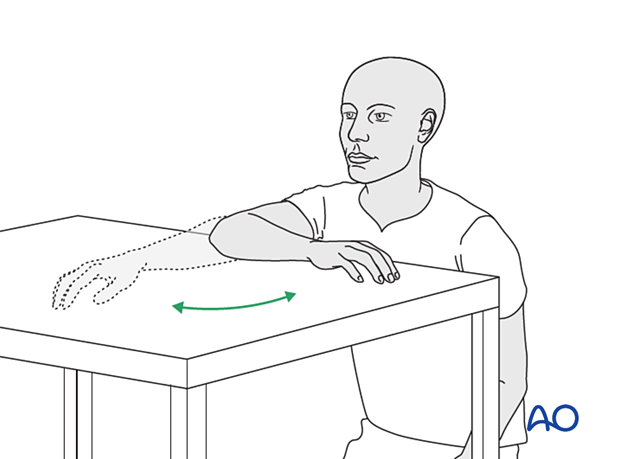
Gravity-eliminated active assisted exercises of the elbow should be initiated as soon as possible, as the elbow is prone to stiffness:
- The bandages are removed, and the arm rested on a side table
- Flexion/extension of the arm at the elbow is encouraged in a gentle sweeping movement on the tabletop as far as comfort permits (as illustrated)
- Full pronation and supination in protected arm position is encouraged
- Exercises are performed hourly in repetitions, the number of which is governed by comfort
- Between periods of exercise, the elbow is rested in the elevated position for at least the first 48 hours postoperatively
- Keep the arm elevated between periods of exercise until the wound has healed
Rehabilitation until bone healing
Active patient-directed range-of -motion exercises should be encouraged without the routine use of splintage or immobilization.
Avoid forceful motion, repetitive loading, or weight-bearing through the arm.
A simple compressive sleeve can provide proprioceptive feedback which can help regain motion and avoid cocontraction.
No load-bearing (ie, pushing, pulling, or carrying weights) or strengthening exercises are allowed until early fracture healing is established by x-ray and clinical examination.
This is usually a minimum of 8–12 weeks after injury. Weight-bearing on the arm should be avoided until bony union is assured.
The patient should avoid resisted extension activities, especially after a triceps-elevating approach or olecranon osteotomy.
Rehabilitation after bone healing
When the fracture has united, a combination of active functional motion and kinetic chain rehabilitation can be initiated.
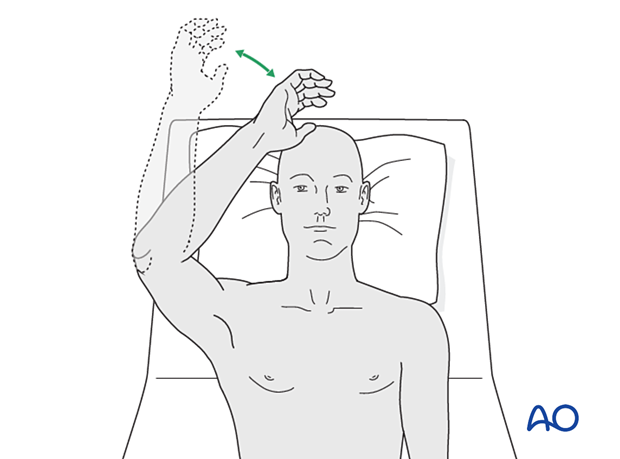
Active assisted elbow motion exercises are continued. The patient bends the elbow as much as possible using his/her muscles while simultaneously using the opposite arm to gently push the arm into further flexion. This effort should be sustained for several minutes; the longer, the better.
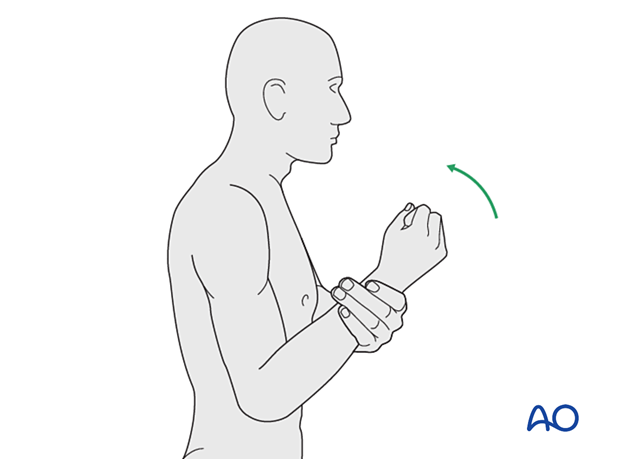
Next, a similar exercise is performed for extension.

If the patient finds it difficult to accomplish these exercises when seated, then performing the same exercises when lying supine can be helpful.
Implant removal
Generally, the implants are not removed. If symptomatic, hardware removal may be considered after consolidated bony healing, usually no less than 6 months for metaphyseal fractures and 12 months when the diaphysis is involved. The avoidance of the risk of refracture requires activity limitation for some months after implant removal.


