Posterior instrumentation without release
1. Introduction
Preoperative planning
- Review patient's clinical data and blood exams.
- Estimate the surgical blood loss and determine the need for blood transfusion or the use of cell saver.
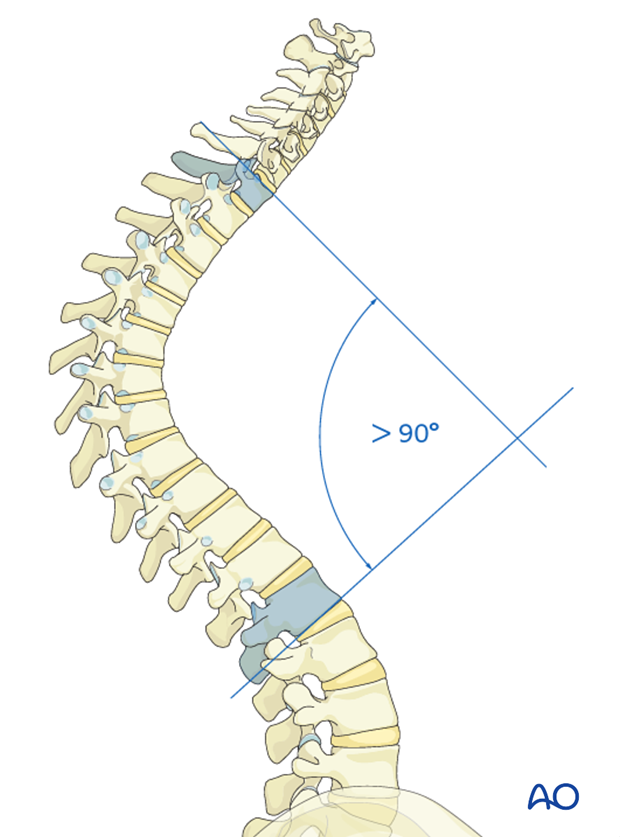
- Estimate the correction to be around 40-50° or 50% of the curve in deformities above 90°
- Check X-rays for possible pedicle abnormalities and draw the surgical strategy on a template
Selection of upper instrumented level
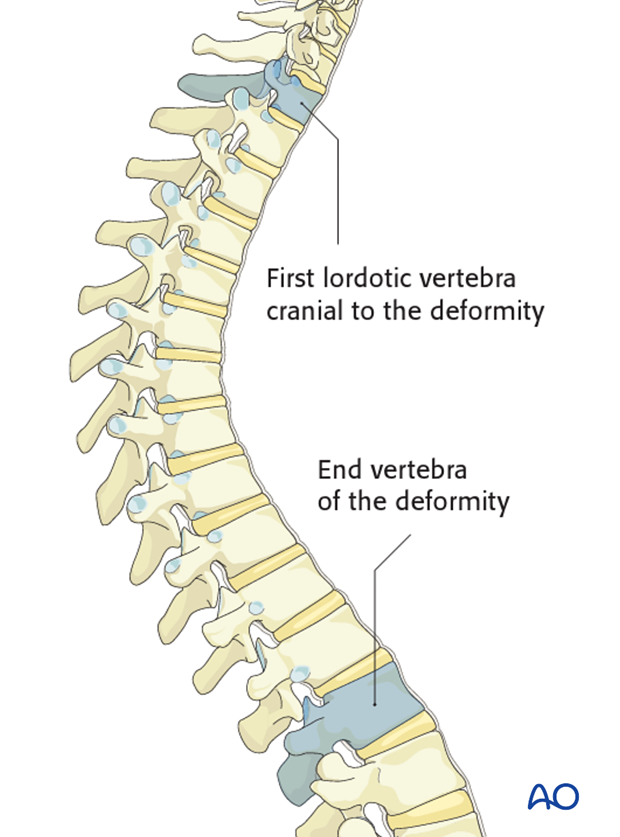
There are currently two commonly used options for the upper instrumented level.
- End vertebra of the deformity
- The first lordotic vertebra cranial to the deformity
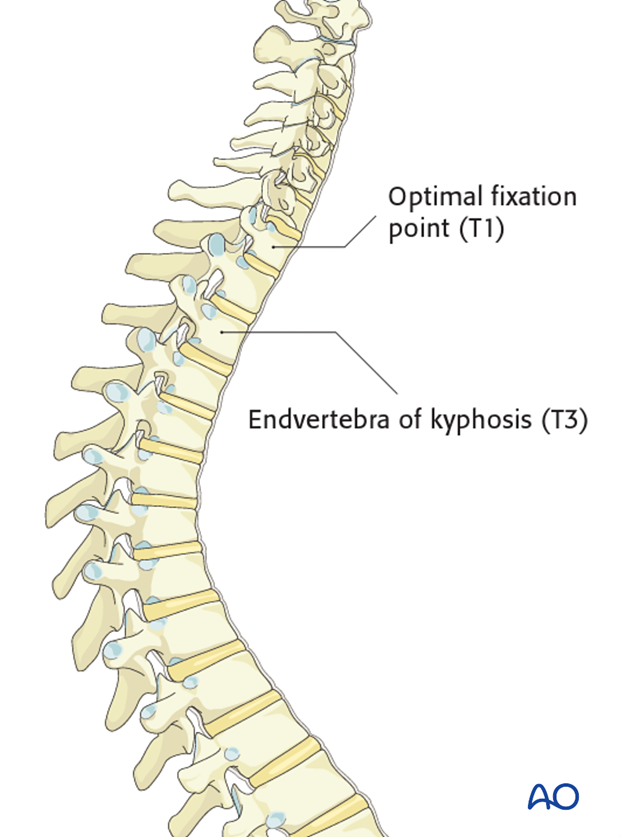
Using the first lordotic vertebra will reduce the risk of getting junctional kyphosis. However, insertion of pedicle screws at the cervico thoracic junction is technically demanding.
In the case illustrated the end vertebra of the kyphosis is T3, while the optimal fixation point is at T1, the first lordotic vertebra cranial to the deformity.
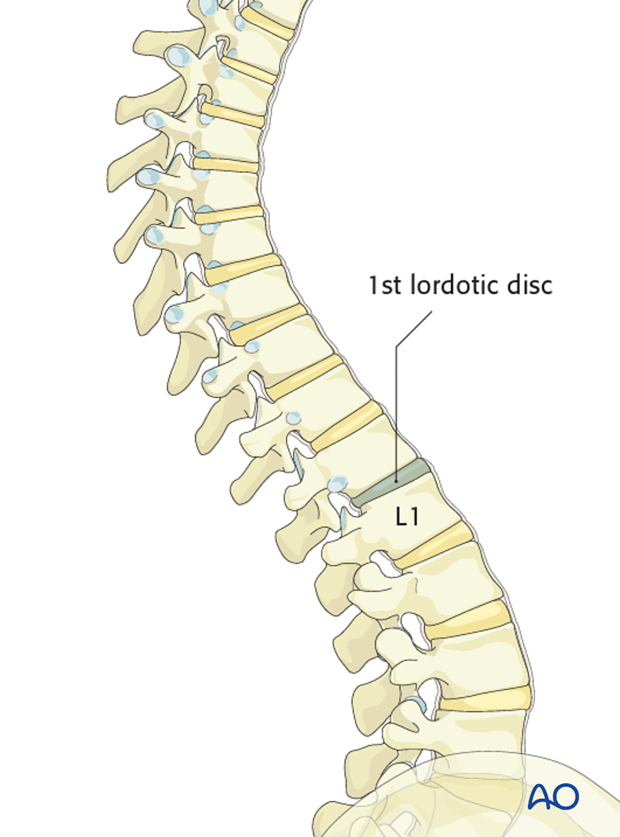
Selection of lower instrumented level
The distal point of fixation has traditionally been the vertebra below the first lordotic disc in the lumbar area, usually L1 or L2
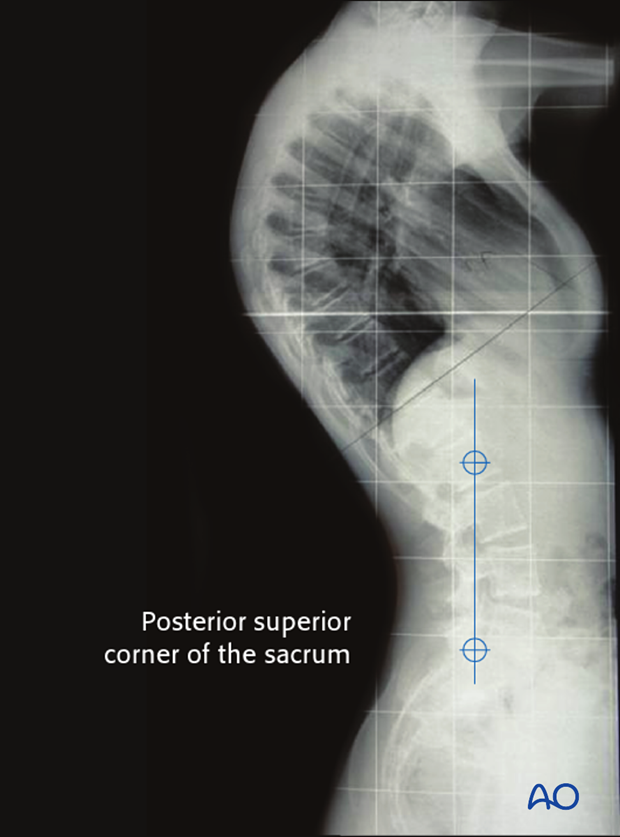
Another option is to use the most proximal vertebra touched by a line drawn vertically from the posterior superior corner of the sacrum on the lateral radiographs.
Release
Curves more than 90° or smaller curves which do not correct more than 50% in hyperextension films will require a release. This may be an anterior release, a posterior osteotomy, or a combination of both.
Most cases can be managed with a posterior osteotomy and pedicle screw instrumentation. The main indications for anterior release is advanced disk degeneration and anterior osteophytes.
2. Approach and preparation
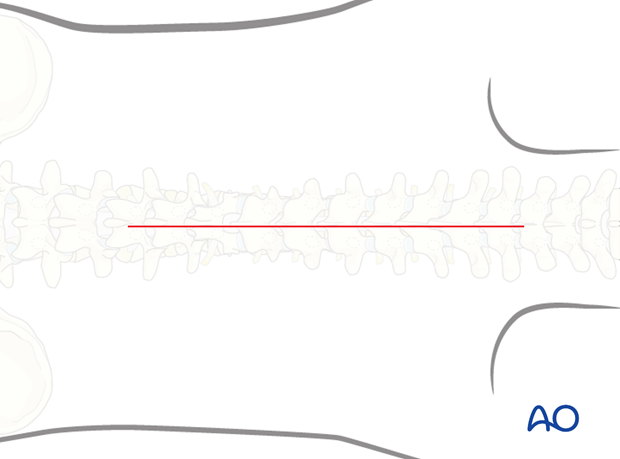
The procedure is performed through a posterior approach with the patient in the prone position. The lengths of the incision will depend on the levels being fused.
3. Pedicle screw insertion
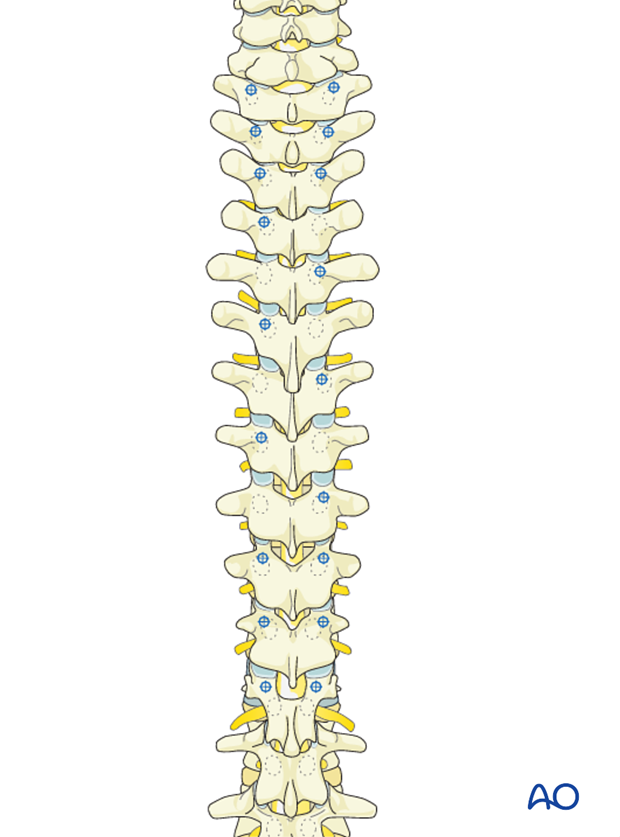
Bilateral pedicle screws are inserted at the three cranial and caudal vertebrae. This is performed prior to any posterior osteotomies to reduce the risk of accidental injury to the spinal cord during screw insertion.
On the remaining vertebrae, unilateral pedicle screws may be used switching sides at each level.
Alternatively, either laminar or transverse hooks can be inserted at the upper end of the construct.
At the most caudal levels reduction screws may be inserted to facilitate rod insertion and deformity correction.
4. Reduction of the deformity
The rod curvature should approximate the planned correction (to achieve 40-50° of kyphosis).
Overcorrection will increase the risk of decompensation either proximal or caudal.
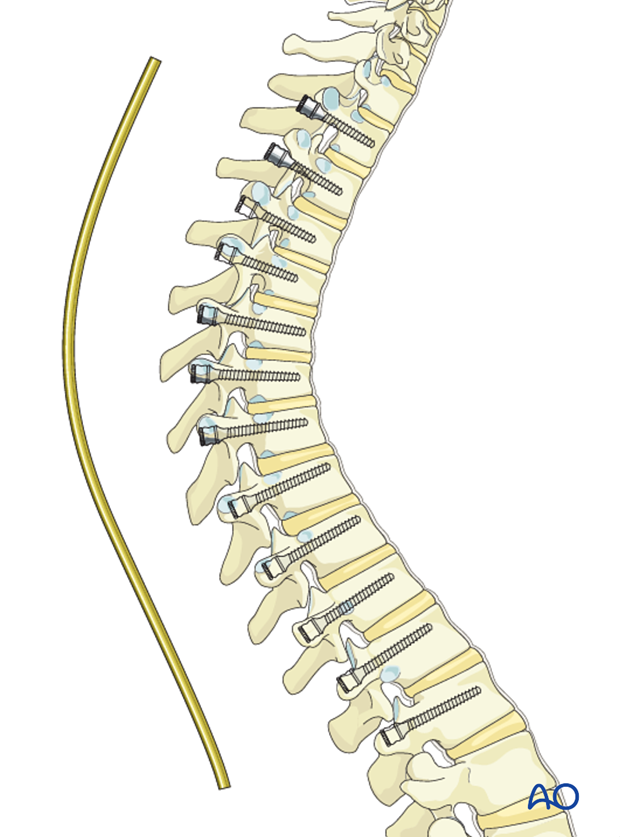
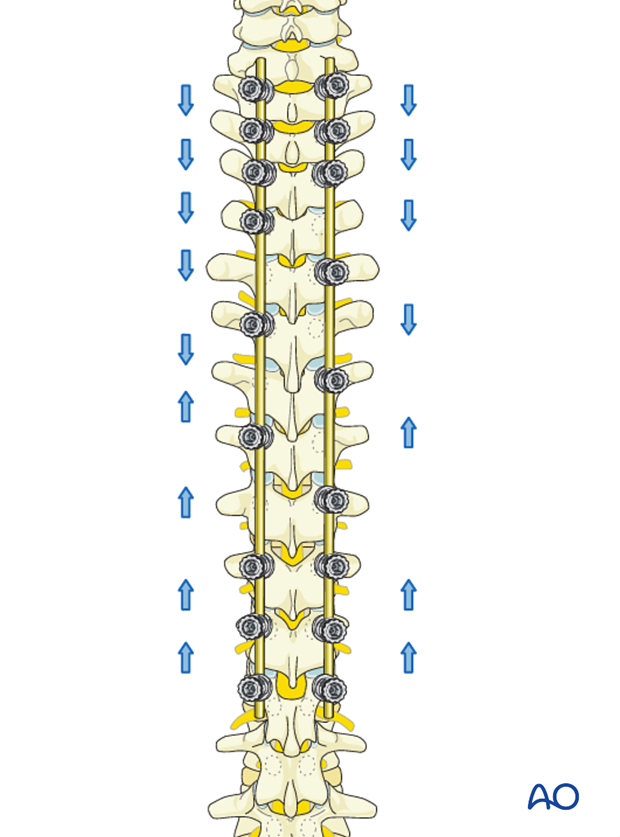
After rod insertion is completed, gradual compression between the screws towards the apex of the deformity will provide further correction.
The goal of compression is to close the osteotomy sites and to reduce the posterior length of the spine.
5. Spinal fusion
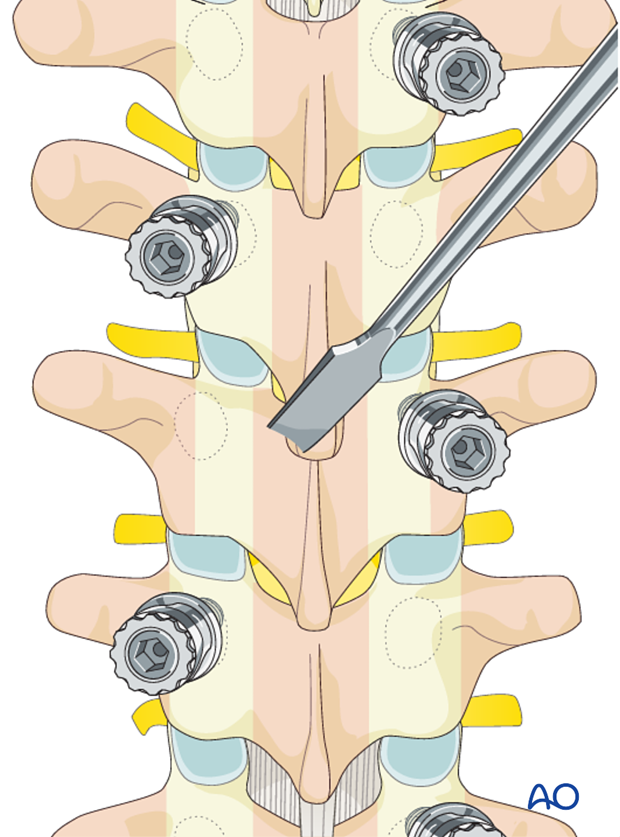
The laminae and the transverse processes are decorticated with an osteotome.
Care should be taken to always point the osteotome away from the spinal canal.
Alternatively, the decortication may be performed with a powered burr.
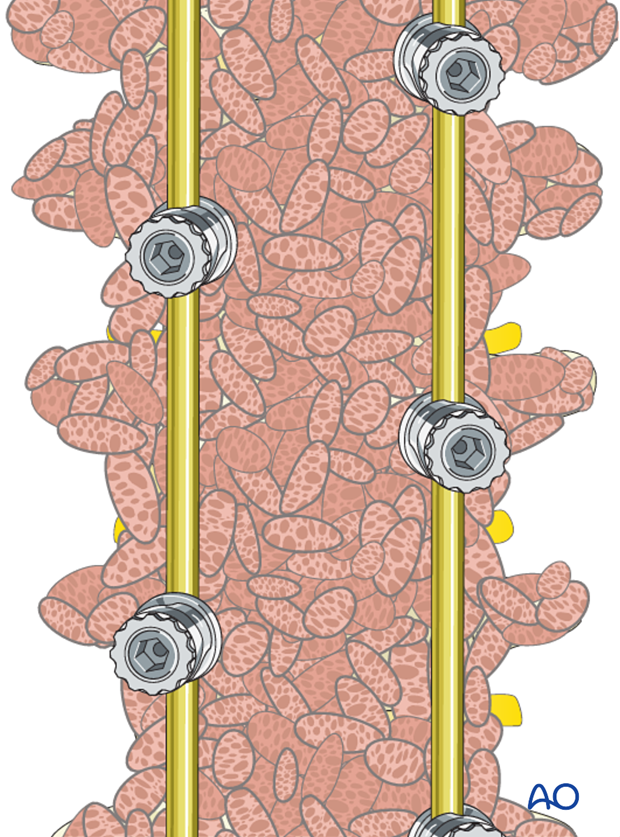
Bone graft (allograft, autograft, or bone substitutes) is copiously placed over the entire decorticated area.
Optional: Vancomicin powder (1gram) is distributed over the surgically exposed area.
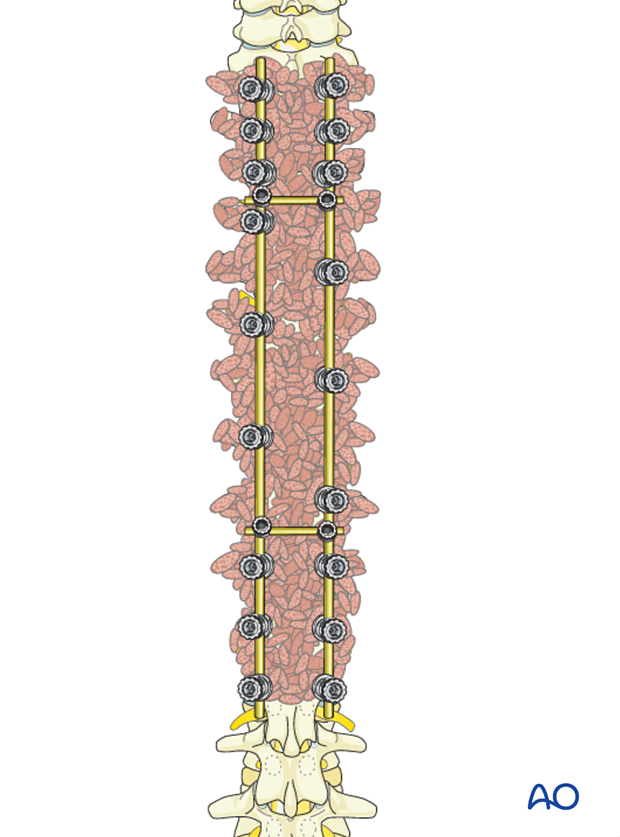
Transverse connectors may be inserted one at each end of the construct at the surgeons discretion.
6. Intraoperative imaging
Prior to wound closure intraoperative imaging should check:
- Fusion levels
- Screw position
- Overall coronal and sagittal correction and alignment
7. Aftercare following correction of spinal deformity
Immediate postoperative medication
Intravenous antibiotics are administrated for at least 24 hours, depending on hospital protocol. The use of an epidural pain catheter vs. intravenous patient controlled analgesia (PCA) are utilized for acute pain management.
Mobilization
Early mobilization out of bed, is preferably started the day after surgery. Generally a postoperative brace/orthosis is not required.
Postoperative imaging
It is appropriate to obtain upright PA and Lateral xrays of the patient at some point early postoperative either before the patient is discharged from the hospital or at the 1st postoperative visit as an outpatient
Restriction of activities
To allow the bone to heal and form a solid arthrodesis, some restriction of sports activities, especially contact sports, is usually advised for 6 months.
Postoperative complications
Early postoperative complications include:
- Postoperative wound infection
- Urinary tract infection
- Respiratory complications such as pneumonia
Late postoperative complications include:
- Pseudarthrosis with loss of correction
- Late deep wound infections
- Proximal junctional failure may occur, and usually is more cosmetic (goose neck appearance) than clinical. Caution is needed specially if progressive kyphosis or fracture above the instrumentation is noted.
- Distal junctional failure is less common if the guidelines are followed, but shorter fixations may need revision if a symptomatic thoracolumbar kyphosis develops bellow the instrumentation.
- Implant failure or other implant related complications
In the long term adjacent segment degenerations above and below the instrumented spine may occur.


