Revision of an anatomic all polyethylene glenoid component
1. Introduction
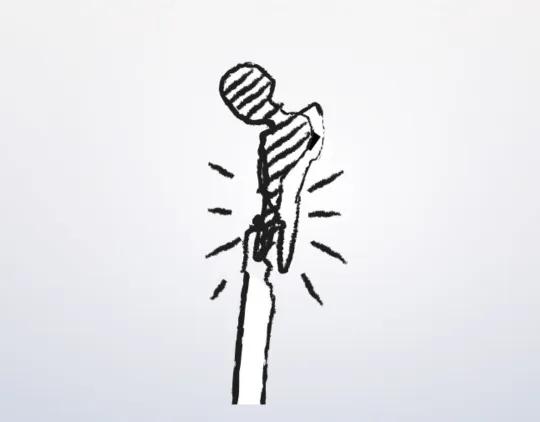
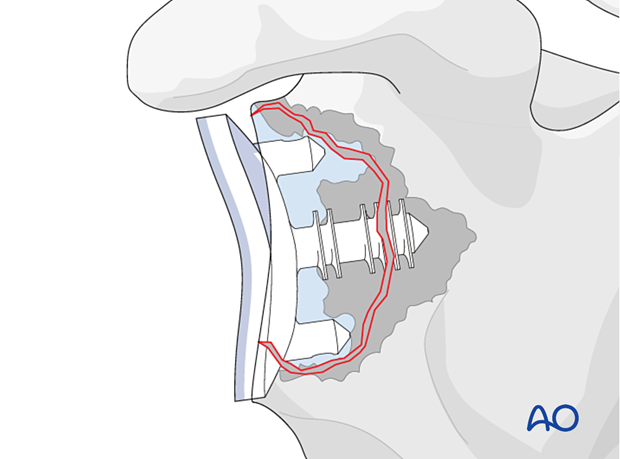
Periprosthetic glenoid fractures are usually the result of bone weakened through osteolysis caused by polyethylene wear resulting in contained or non-contained defects with or without medialization. Traumatic periprosthetic glenoid fractures are very rare.
Preoperative planning
Preoperative planning should include the decision to consider:
- Revision to another anatomic implant
- Conversion to a reverse arthroplasty
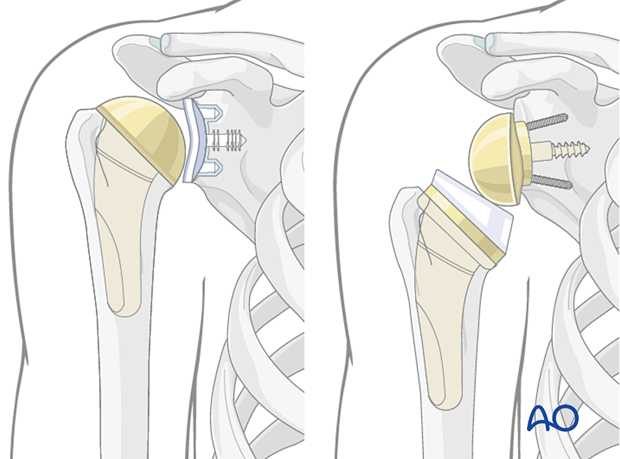
The principles of the procedures described below are applicable to onlay, inlay, and inset cemented glenoid polyethylene keeled and pegged components.
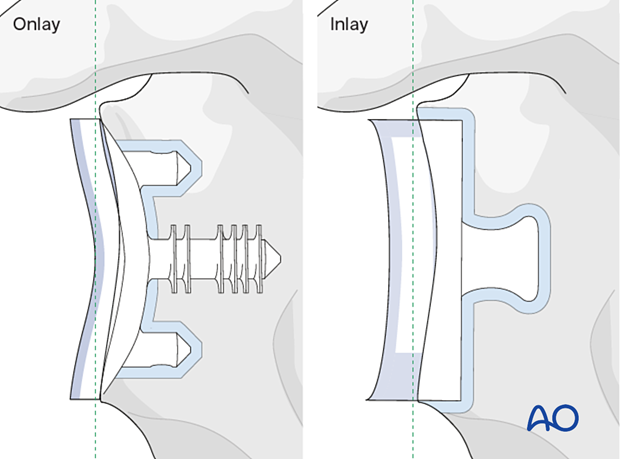
These principles are applicable for stemless, short, and standard stems.
Further details about prosthesis design can be found here.
A short stem configuration is shown in this description.
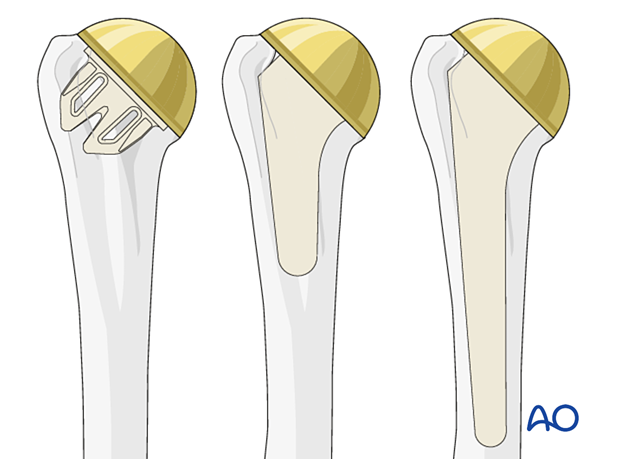
The decision about glenoid component revision will determine the type of humeral component used. It is important to analyze the potential convertibility of the humeral implant from an anatomic to a reverse configuration. In cases of non-convertible stems humeral stem revision will require additional surgical techniques and implants.
2. Preparation
The standard patient position is the beach chair position with inclination of about 30°. An arm holder may be helpful but is not essential.
Intraoperative fluoroscopy can be helpful.
Patient positioning should be discussed with the anesthetist.

Bone graft
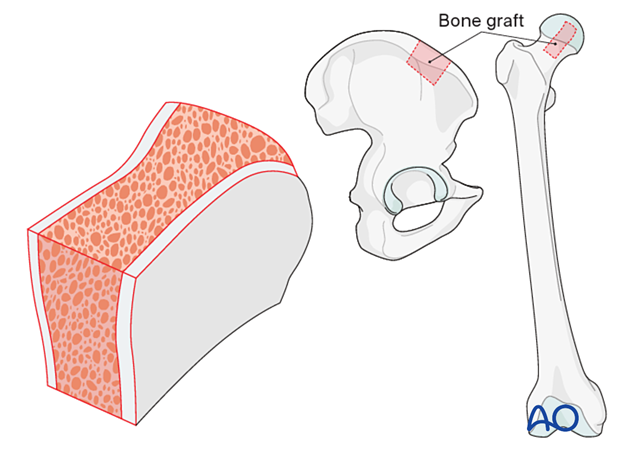
If augmentation or reinforcement of the glenoid fracture or defect is required, bone allograft may be utilized. Structural bulk allograft or morselized allograft are indicated for specific conditions of the glenoid.
If allograft is not available be prepared to take cortico-cancellous or cancellous graft from the iliac crest (autograft) as shown.
The procedure is done under perioperative antibiotics.
3. Approach
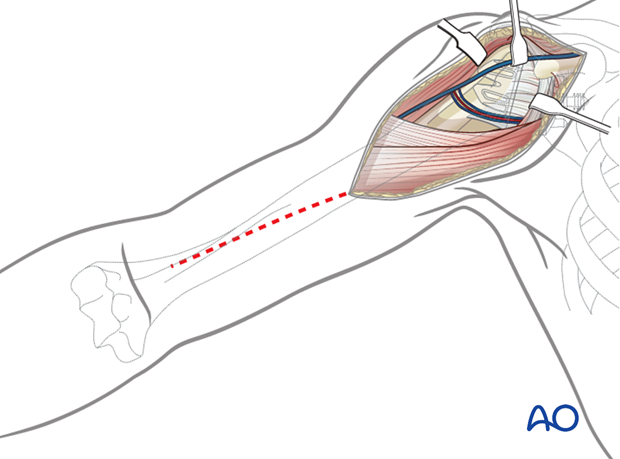
The standard approach used is the deltopectoral approach, which can easily be extended proximally and distally.
Previous incisions should be used if this approach was performed correctly during the primary operation. Do not hesitate to perform a new skin incision if the approach used in the primary was inaccurate.
Soft-tissue management
Be prepared for extensive soft-tissue release and a more difficult subscapularis takedown technique before executing the arthrolysis needed to access the glenoid. Take biopsies for cultures.
4. Revision of an anatomic implant
Revision of an anatomic implant to another anatomic implant is very rare in cases of fatigue glenoid fractures with substantial loss of bone substance. In these cases, an intact rotator cuff, in particular the subscapularis, is mandatory for a successful outcome.
Humeral head removal
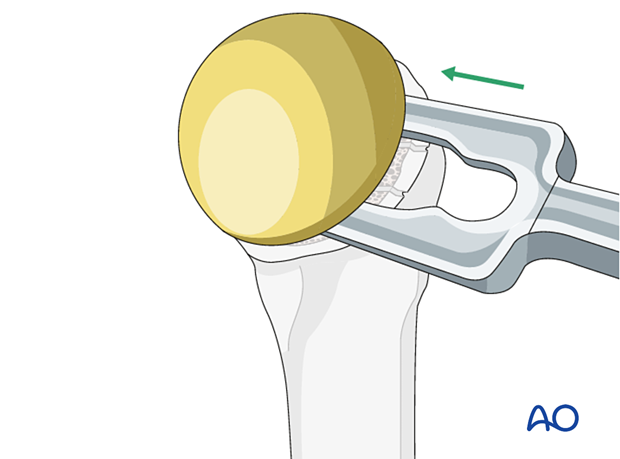
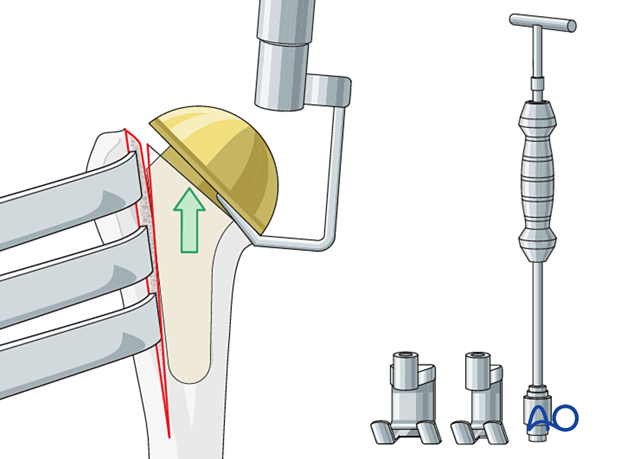
Access and exposure of the glenoid is facilitated by humeral head removal. Remove the humeral head using standard instruments for the specific implant.
Glenoid exposure and exchange
After exposing the glenoid, remove the glenoid component. This is usually loose.
Debride the remaining glenoid, removing all abnormal soft tissues, remaining component material, and cement.
Examine the remaining glenoid bone stock.
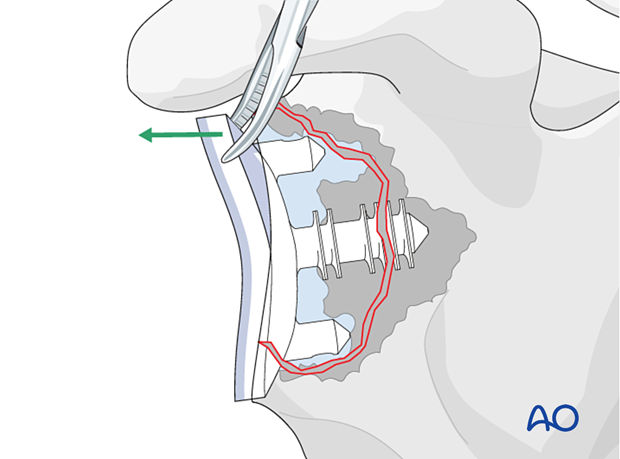
If sufficient bone stock is available implantation of a new anatomical glenoid component can be performed.
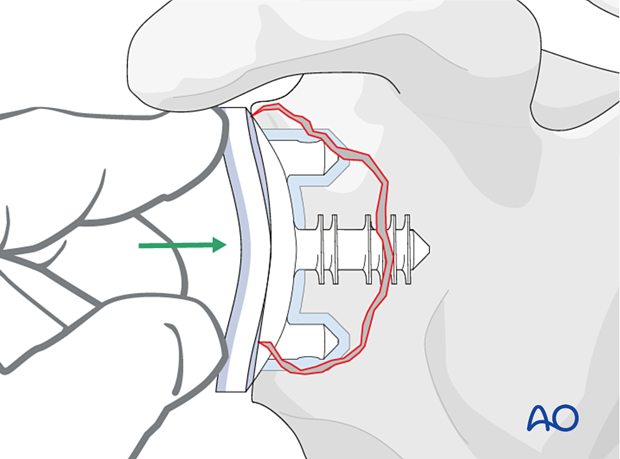
In cases where the rotator cuff is insufficient, revision of an anatomic to another anatomic is contraindicated.
After placement of the glenoid component, a new humeral head component is inserted.
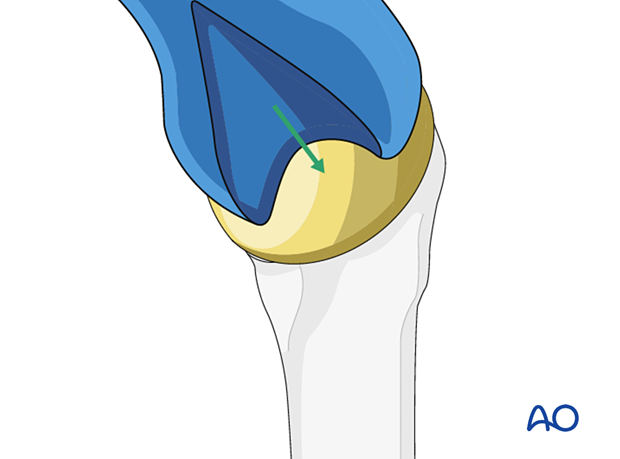
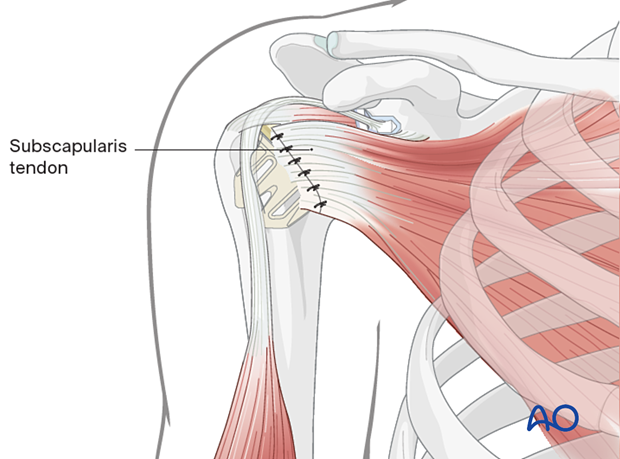
The humerus is reduced, and the subscapularis tendon is reattached.
5. Revision to a reverse arthroplasty
The decision to carry out a revision to a reverse arthroplasty is based on a number of factors including:
- Status of the rotator cuff
- Shoulder function
- Patient age
Soft-tissue management
Be prepared for extensive soft-tissue release and a more difficult subscapularis takedown technique before executing the arthrolysis needed to access the glenoid. Take biopsies for cultures.
Humeral head removal during revision
Access and exposure of the glenoid is facilitated by humeral head removal. Remove the humeral head using standard instruments for the specific implant.

Convertible humeral stems
In this scenario the stem can be retained. The articular component is converted to a reverse after the glenoid is reconstructed.
Non-convertible humeral stems
In this scenario the stem must be removed.
Remove the humeral stem with the specific revision instruments for the arthroplasty.
Humeral component removal during revision
Depending on the humeral component design, different strategies for implant extraction are available. More information on implant extraction is provided here.
Glenoid exposure and removal
After exposing the glenoid, remove the glenoid component. This is usually loose. Then examine the remaining glenoid bone stock.

Management of the glenoid bone loss is closely related to the configuration of the remaining glenoid vault.
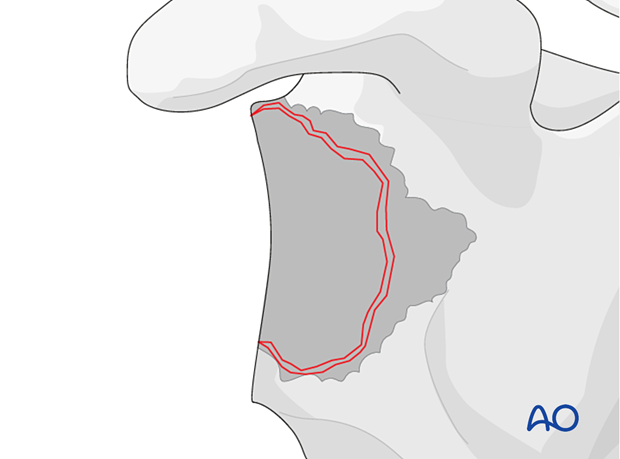
To facilitate stable fixation of a reverse baseplate, it may be necessary to reconstruct the glenoid vault using bone graft.
Glenoid reconstruction
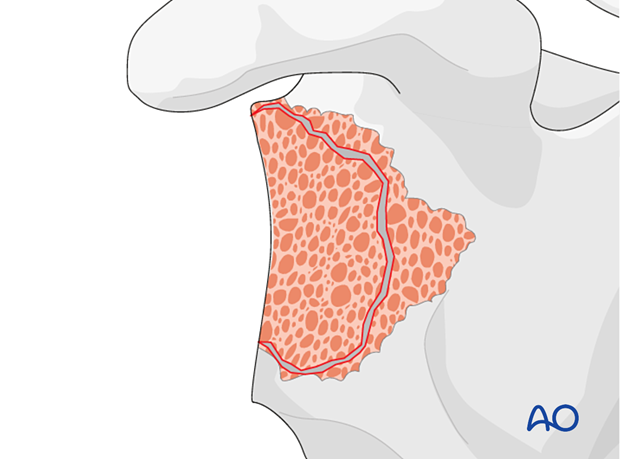
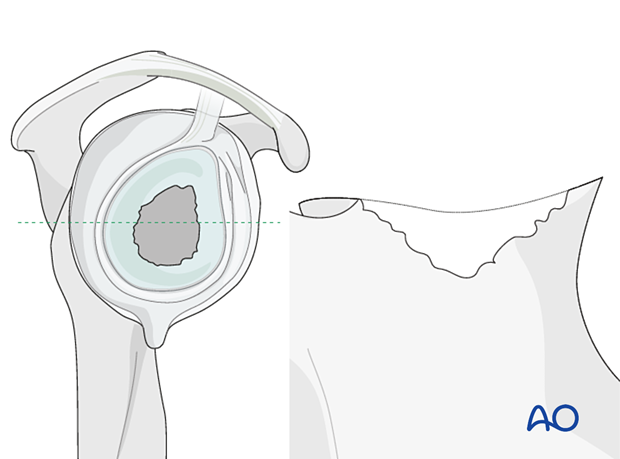
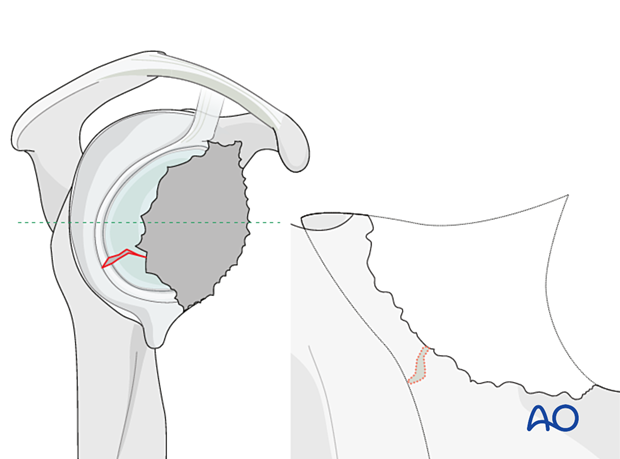
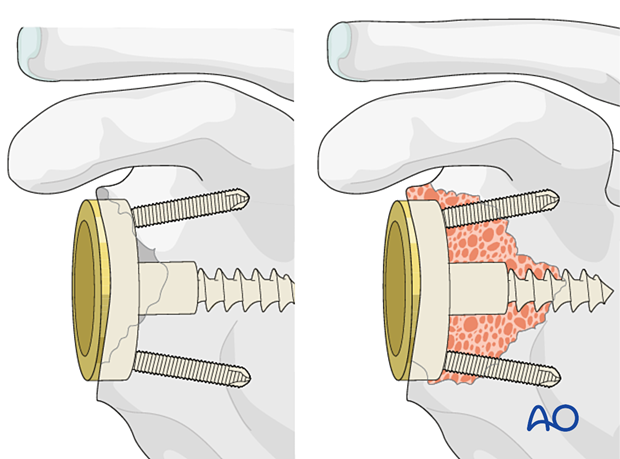
Using bone – contained defectsIn cases of mild glenoid contained defects (Type 1 according to Gohlke) impaction bone grafting is performed and a reverse base plate is implanted.
The illustration on the left is a representative cross section of the glenoid vault shown in the right diagram.
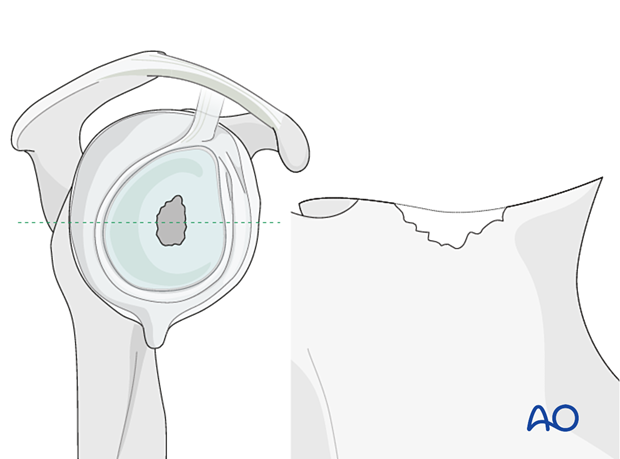
In cases of large, contained defects (Type 2) a structural allograft or autograft is impacted followed by implantation of the base plate.
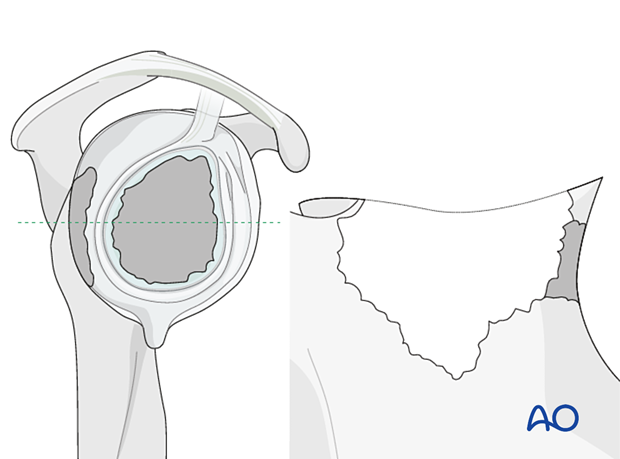
In non-contained defects with either anterior or posterior wall insufficiency (Type 3) a structural allograft or autograft is used and fixed with two or three screws.
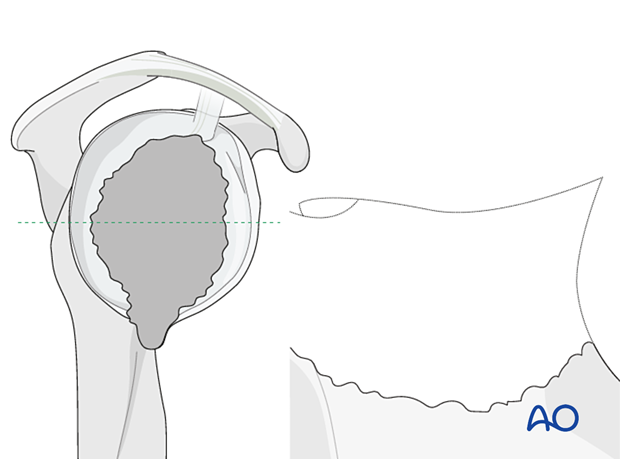
In non-contained defects with severe medialization (Type 4) the same technique is applied.
The decision to perform a one versus two-stage base plate implantation depends on several factors:
- Initial size of the defect
- Primary stability of graft fixation
- Specific implant features
- Surgical experience
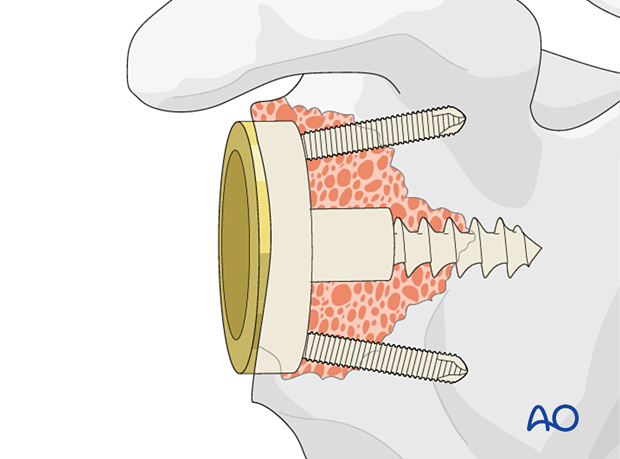
In all cases it is important to gain primary fixation in native bone. A reverse baseplate is shown with a central screw fixed into native bone with peripheral anti-rotation screws.
In Type 5 defects with loss of the glenoid vault bony reconstruction should always be performed as a two-stage operation.
Custom implants are often required.
Off-the-shelf augmented base plates may be used in isolation or with bony reconstruction to achieve optimized fixation to the scapula.
Customized implants are not uniformly available and evidence for their role remains to be established.
Advantages include:
- Single-stage procedure
- Personalized to the patient and structural defect
- Optimized function
- Durability
- Time zero structural support
- No risk of graft reabsorption
Disadvantages include
- Lack of availability
- Cost
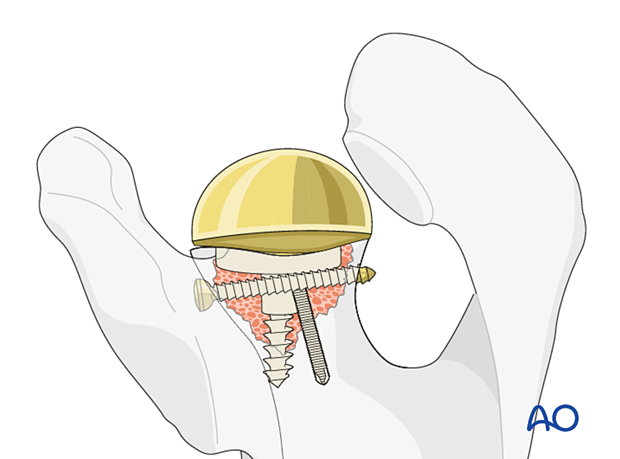
A glenosphere is impacted on the baseplate.
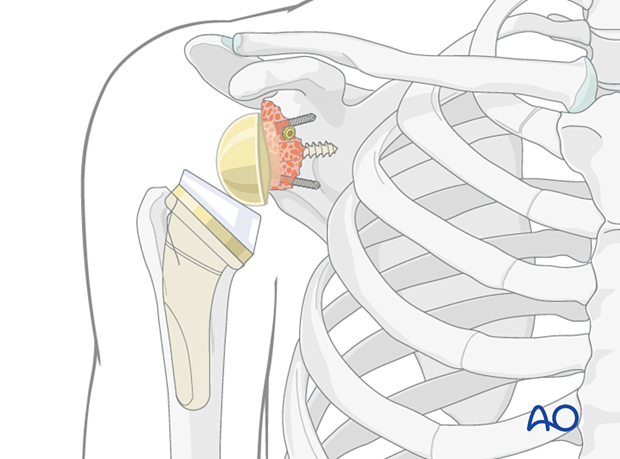
In cases where a convertible stem has been used, the metaphyseal component including the polyethylene liner is impacted. In cases where the stem has had to be removed a new stem is implanted. The shoulder is then reduced.
6. Aftercare
Postoperative phases
The aftercare can be divided into four phases of healing:
- Inflammatory phase (week 1–3)
- Early repair phase (week 4–6)
- Late repair and early tissue remodeling phase (week 7–12)
- Remodeling and reintegration phase (week 13 onwards)
Full details on each phase can be found here.
