Open reduction; plate fixation
1. Introduction
General considerations
Plating is the standard technique for treating forearm fractures in adults and is therefore best considered for skeletally mature or nearly mature children.
Children with open physes have thick active periosteum favoring stability and rapid healing with the ESIN method. Where such techniques are unavailable plating may be used in younger children.
If technically possible, ESIN is biologically favored. If plating is used, soft-tissue and periosteal stripping should be minimized.
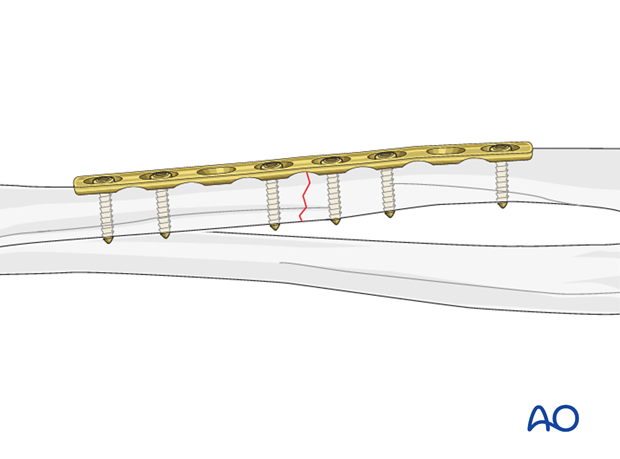
Plating of transverse forearm shaft fractures
Plating of pediatric forearm shaft fractures follows the technique for plate fixation in adults.
For transverse forearm shaft fractures, interfragmentary compression can be achieved with a compression plate.
This results in improved fracture stability.
2. Principles
Instruments and implants
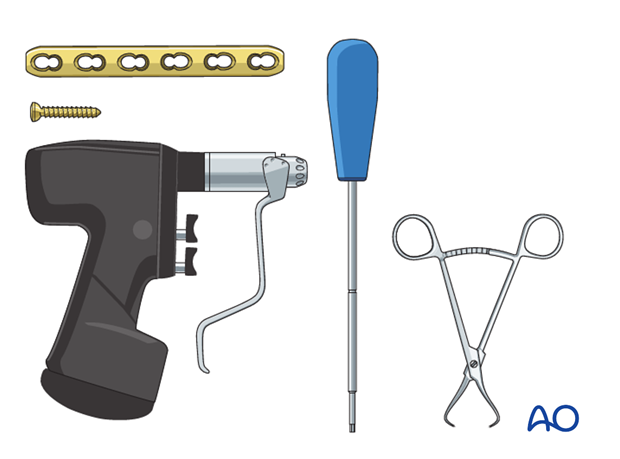
A small fragment set consists of:
- 2.7 or 3.5 mm plates and screws
- Power driver
- 2.7 or 3.5 mm insertion set
Compression
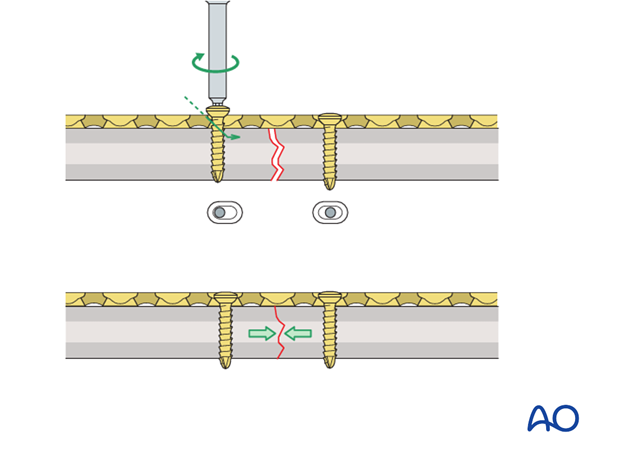
Axial compression results from eccentric screw (load screw) insertion with compression plates.
Prebending the plate
If the axial compression plate is exactly contoured to the anatomically reduced fracture surface, there will be gapping of the opposite cortex when the load screw is tightened.
The solution is to “over-bend” the plate so that its center stands off 1-2 mm from the anatomically reduced fracture surface.
When the neutral side of the plate is applied to the bone, slight gapping of the cortex will occur directly underneath the plate.
As the load screw is tightened, the tension generated in the plate compresses the fracture evenly across the full diameter of the bone.
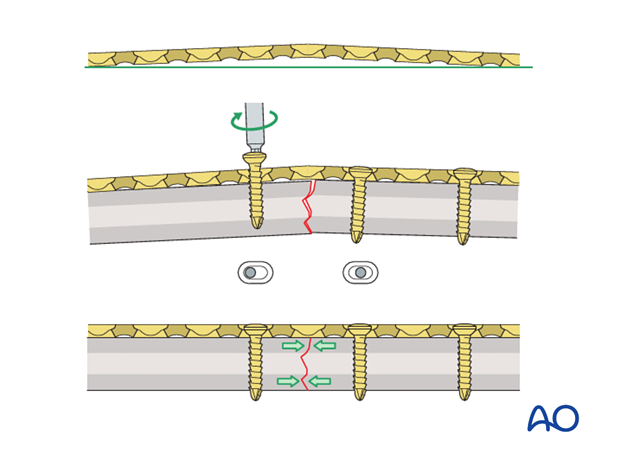
Plate position
Depending on the surgical approach, the plate will be applied to either the anterior or posterior surface of the radius.
In the following example, a plate applied to the anterior surface is illustrated.
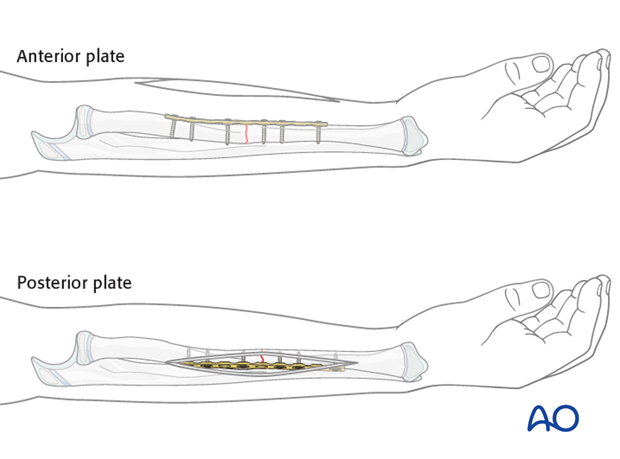
Plate contouring
The plate may need to be contoured to conform to the morphology of the radial shaft.
Choice of approach
For proximal radial shaft fractures, the anterior approach (Henry) is most often used to minimize the risk of damage to the posterior interosseous nerve, which crosses the proximal radius within the supinator.
In mid and distal radial shaft fractures, either the anterior approach (Henry) or posterolateral approach (Thompson) can be used, depending on the surgeon’s preference.
3. Patient preparation
This procedure is normally performed with the patient in a supine position.
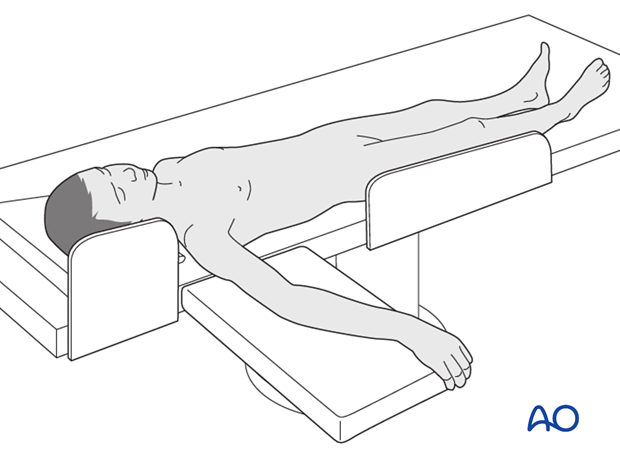
4. Reduction
Reduction and fracture stability in children
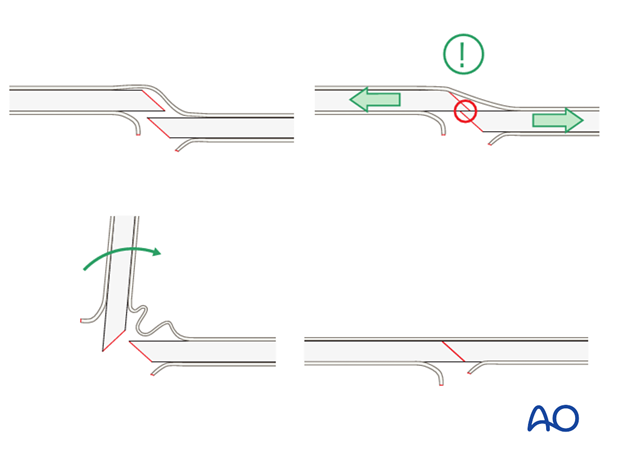
Children’s periosteum is thick, tough tissue and is often intact on the concave (compression) side of a fracture.
Reduction maneuvers should be gentle to take advantage of the stability of an intact periosteum.
Exaggeration of the fracture deformity may be required to loosen the periosteum and allow gentle reduction.
In pediatric fractures there is often a combination of patterns of bone failure. Residual plastic deformity may prevent anatomical reduction of some of the fracture edges. Provided the alignment of the bone is anatomical and overall reduction is stable it is not necessary to perfectly reduce the entire fracture.
Open reduction
Reduce the fracture anatomically, using a reduction forceps on each main fragment.
The use of blunt, as opposed to pointed, reduction forceps can be helpful, particularly if greater forces are required.
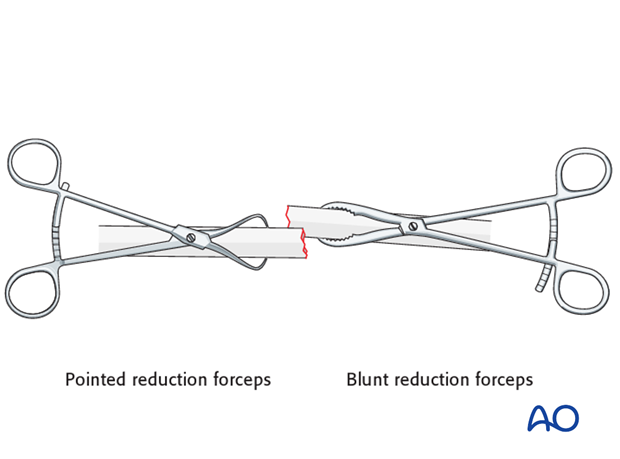
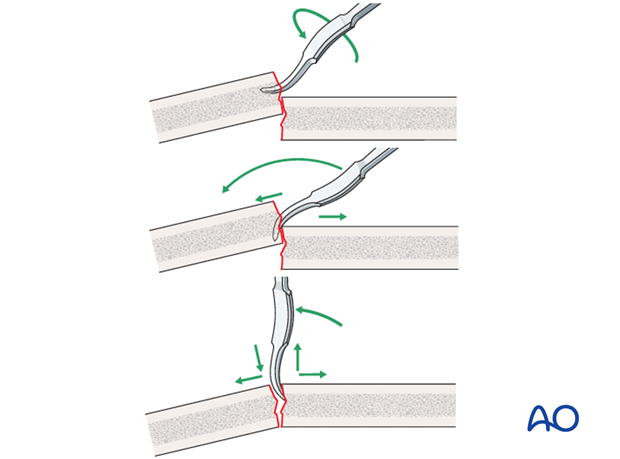
Pearl: small bone lever
A small bone lever can be used to reduce transverse, or short oblique, fractures as illustrated.
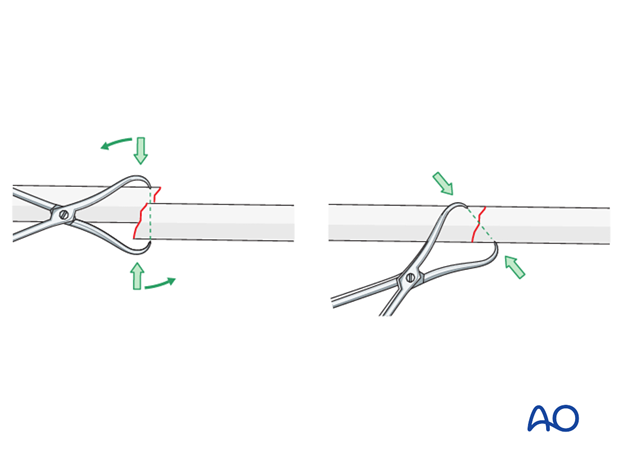
Pearl: twisting a reduction forceps
Reduction of overlapping short oblique fractures can be achieved by twisting a reduction forceps, thereby lengthening the fracture.
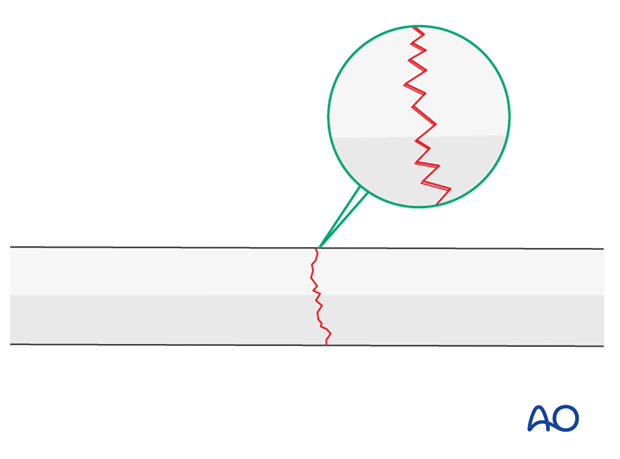
Maintaining fracture reduction
A reduced transverse fracture cannot be maintained with reduction forceps alone.
However, transverse fractures are usually dentate and are intrinsically stable after anatomical reduction.
In children, interdigitation of the fracture fragments may be prevented by plastic deformity of the bone ends.
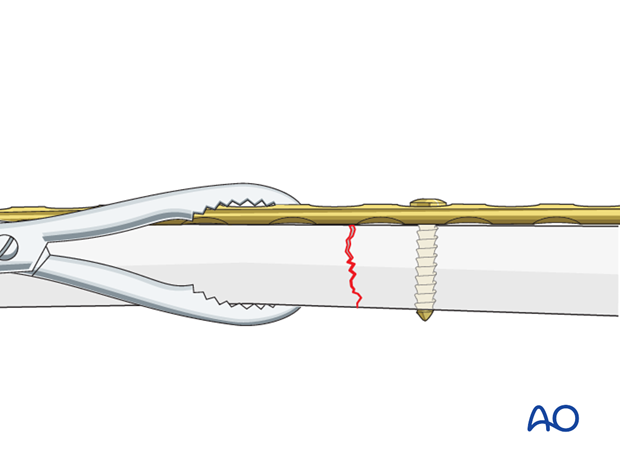
If unstable, fix the plate to one fragment and then reduce the other fragment onto the plate.
5. Plate length and number of screws
In the forearm, three bicortical screws are suggested in each main fracture fragment due to the high torsional stresses.
Not every plate hole needs to be occupied by a screw.
In short oblique forearm shaft fractures an empty plate hole may be necessary at the level of the fracture.

6. Fixation
Prebending the plate
After the plate has been contoured anatomically to the reduced bone surface, prebend it with the handheld bending pliers, or a pair of bending irons, as explained in the principles section.
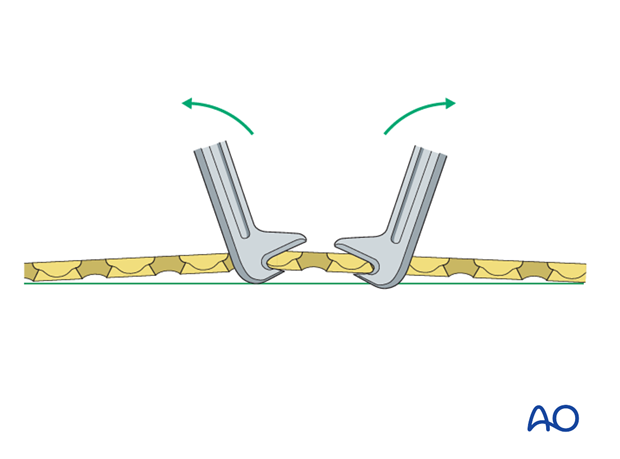
Plate positioning
Make sure that the plate is seated on the bone without any soft-tissue interposition, apart from periosteum which should not be stripped.
In rare cases, the posterior interosseous nerve is visible. In such cases it is recommended that the position of the nerve in relationship to the plate be noted and documented in the operation report.
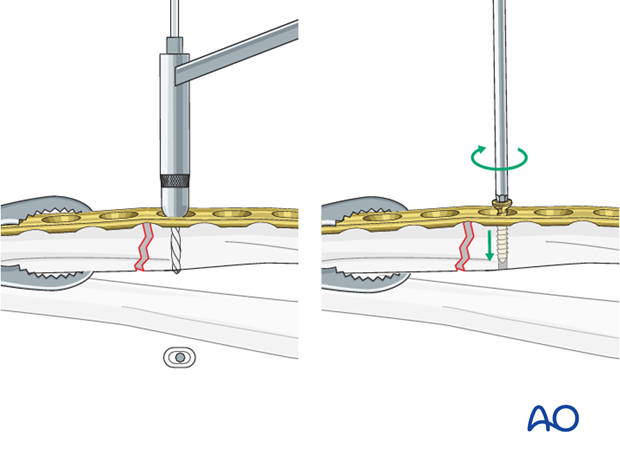
Insertion of 1st screw
Fix the prebent plate to one of the main fragments with a screw in neutral mode.
Place a reduction forceps on the opposite fragment to hold it in the reduced position against the plate.
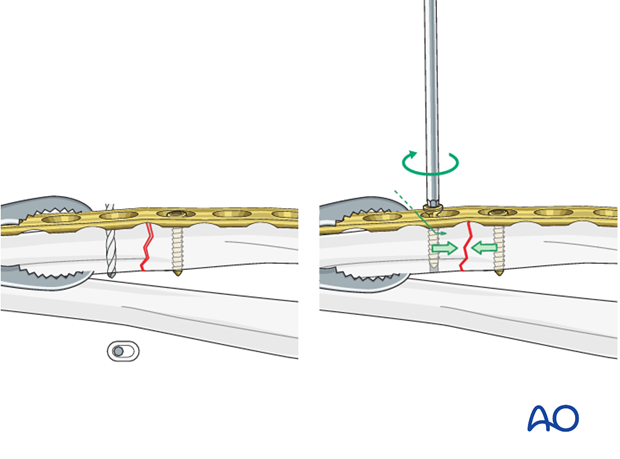
Insertion of 2nd screw eccentrically
Insert a second screw eccentrically into the opposite fragment.
By tightening the eccentrically inserted screw, axial compression is achieved.
Insertion of additional screws
Additional screws in each fragment are usually inserted in a neutral position.
However, should it be necessary to increase the axial compression, a second screw can be inserted eccentrically into either fragment.
As the second eccentric screw is tightened, the first screw in the same fragment should be loosened slightly to allow the plate to slide on the bone.
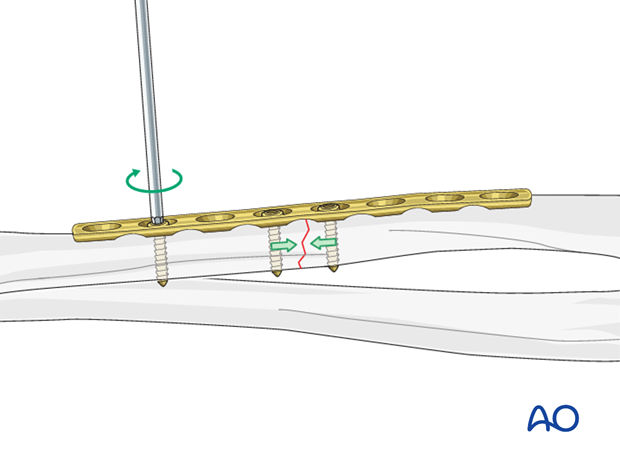
Completed osteosynthesis
Before inserting additional screws check reduction of the fracture and rotation of the forearm.
All other screws are inserted in a neutral position and do not produce additional compression.

7. Final assessment
Check the completed osteosynthesis with image intensification. These images should be retained for documentation or alternatively an x-ray should be obtained before discharge.
Make sure that the plate is at the correct location, the screws are of appropriate length and the desired reduction has been achieved.
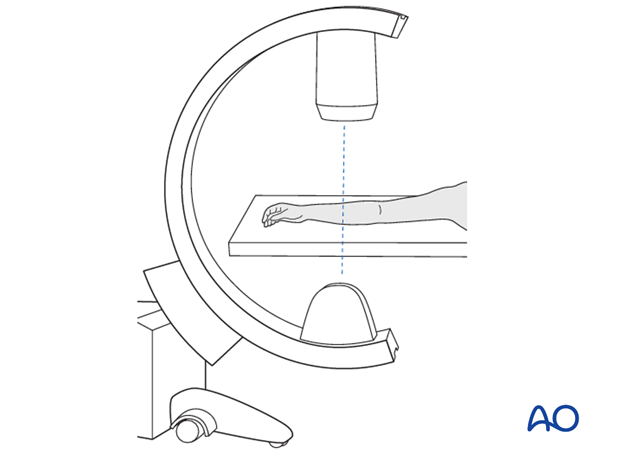
Stabilize the elbow at the epicondyles and check the forearm rotation.

8. Aftercare following plating
Immediate postoperative care
Whilst the child remains in bed, the forearm should be elevated on pillows to reduce swelling and pain.

Casting or Splinting
Plate fixation of forearm fractures is intrinsically stable and supplementary casting or splinting is therefore not required.
Some surgeons prefer a long or short splint for 2-3 weeks postoperatively for comfort.
Analgesia
Ibuprofen and paracetamol should be administered regularly during the first 4-5 days of injury, with additional oral narcotic medication for breakthrough pain.
If the level of pain is increasing the child should be examined.
Neurovascular examination
The child should be examined regularly, to ensure finger range of motion is comfortable and adequate.
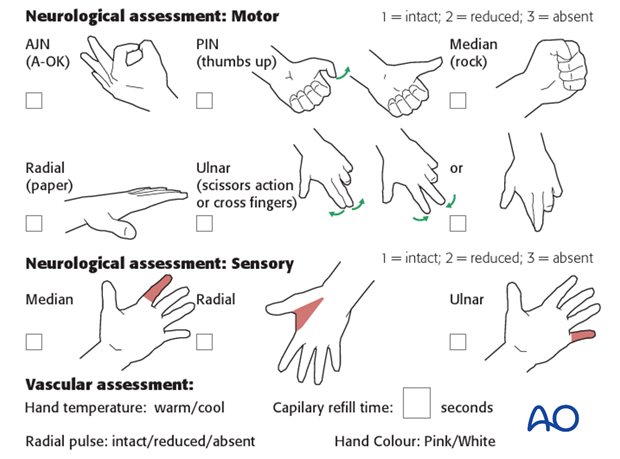
Neurological and vascular examination should also be performed.
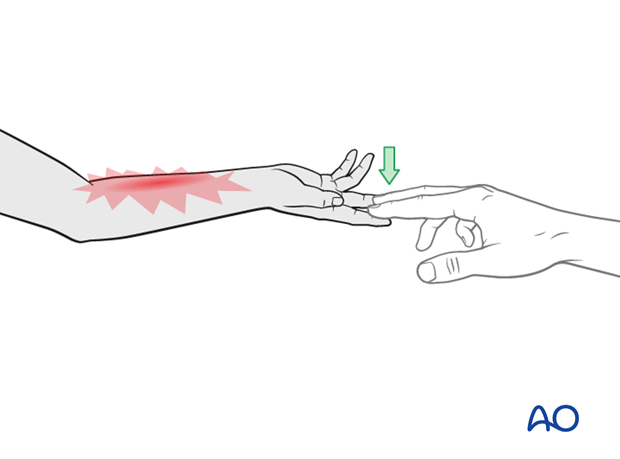
Compartment syndrome should be considered in the presence of increasing pain, especially pain on passive stretching of muscles, decreasing range of active finger motion or deteriorating neurovascular signs, which are a late phenomenon.
See also the additional material on postoperative infection.
Compartment syndrome
Compartment syndrome is a possible early postoperative complication that may be difficult to diagnose in younger children.
The presence of full passive or active finger extension, without discomfort, excludes muscle compartment ischemia.
If there are signs of a compartment syndrome:
- If the child is in a cast, split the cast, along its full length down to skin level.
- Elevate the limb.
- Encourage active finger movement.
- Reexamine the child after 30 min.
If a definitive diagnosis of compartment syndrome is made, then a fasciotomy should be performed without delay.
Discharge care
Discharge from hospital follows local practice and is usually possible after 1-3 days.
The parent/carer should be taught how to assess the limb.
They should also be advised to return if there is increased pain or decreased range of finger movement.
It is important to provide parents with the following additional information:
- The warning signs of compartment syndrome, circulatory problems and neurological deterioration
- Hospital telephone number
- Information brochure
For the first few days, the elbow and forearm can be elevated on a pillow, until swelling decreases and comfort returns.
The arm can be placed in a sling for a few days until the patient is pain free. Many children are more comfortable without support.
Mobilization
Early movement of the forearm should be encouraged as soon as the patient is pain free.
Formal physiotherapy is normally not indicated, but children should have a sheet of exercises to stimulate mobilization.
Follow-up
The first clinical and radiological follow-up depends on the age of the child and is usually undertaken 4 weeks postoperatively.
At this point, the child should be able to move the forearm almost fully.
AP and lateral x-rays are required.
See also the additional material on healing times.
Plate removal
Plate removal is delayed for at least 6 months.
An asymptomatic plate that does not interfere with forearm rotation can be left in place minimizing complications associated with implant removal.


