External fixation
1. General considerations
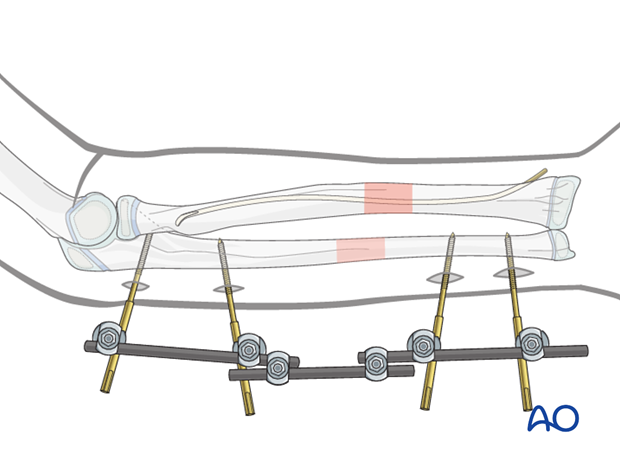
External fixation of both bones is uncomfortable and technically demanding but occasionally indicated particularly with crush injuries with extensive soft-tissue damage and skin loss.
The external fixator may be applied to a single bone with the second bone stabilized with ESIN.
External fixation of the ulna is less demanding with accessible safe zones.
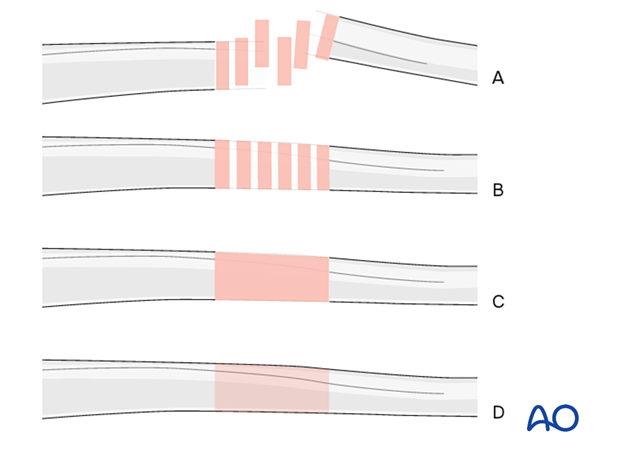
Throughout this section generic fracture patterns are illustrated as:
- Unreduced
- Reduced
- Reduced and provisionally stabilized
- Definitively stabilized
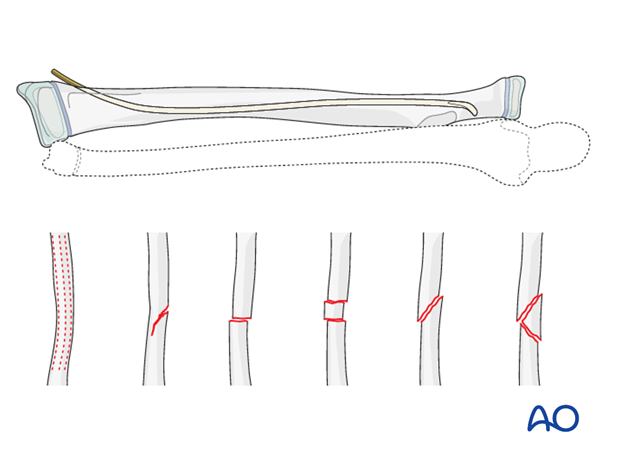
ESIN fixation of the radius
The steps required for radial fracture fixation are described in the ESIN procedures for each fracture type:
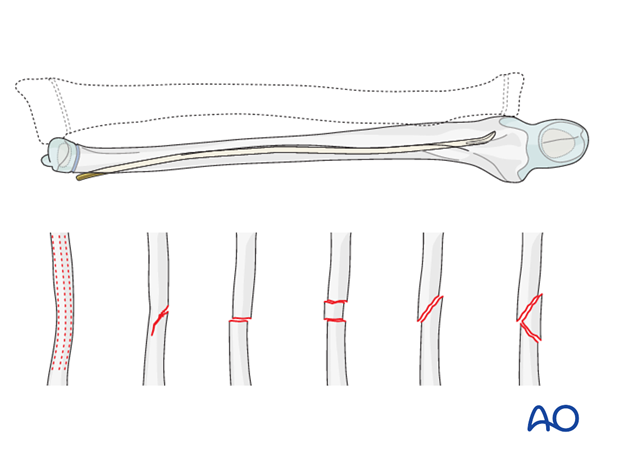
ESIN fixation of the ulna
The steps required for ulnar fracture fixation are described in the ESIN procedures for each fracture type:
2. Principles of modular external fixation
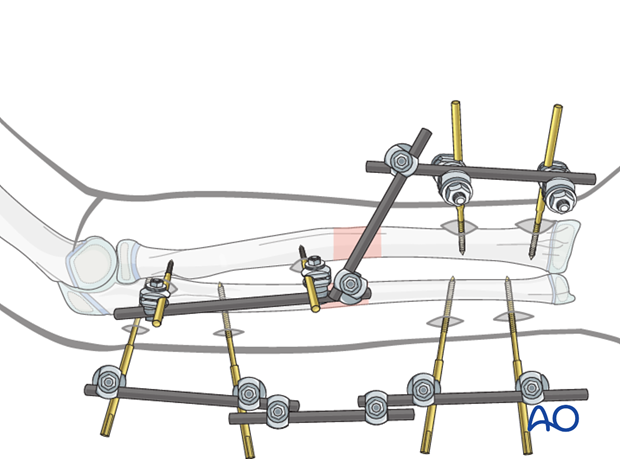
Modular external fixator
The versatility of a modular external fixator is an advantage in the management of children’s fractures and can accommodate age specific variations in fracture biology and anatomy.
An external fixator may be used for definitive management of forearm fractures in children due to the short healing time.
Practical considerations are illustrated in detail in the Basic technique for application of modular external fixator in children.
Specific considerations for the forearm shaft are given below.
Other types of external fixator
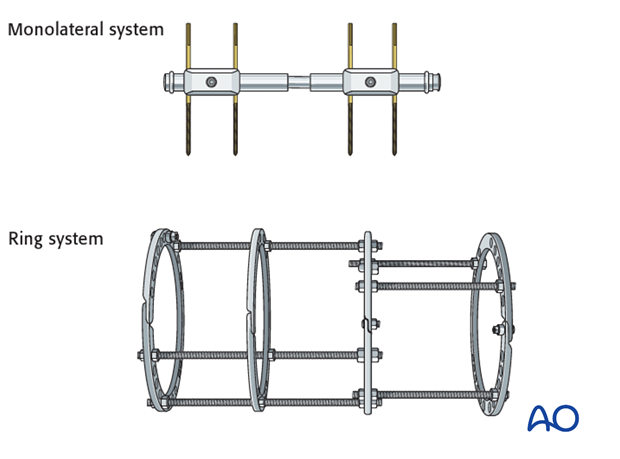
Alterative configurations are available and include monolateral or ring systems.
Disadvantages of these systems in children include:
- Fixed distance of pin insertion defined by the clamp
- Excessively stiff construct
Pin size in forearm fractures
External fixation is suitable for all ages, but the pin diameter must be appropriate to the size of the bone.
Pins with a thread diameter of 2.5-4.0 mm are suitable for forearm fractures and should be about 1/3 of the bone diameter.
Sequence of pin insertion
Determined by:
- Fracture morphology
- Personal preference
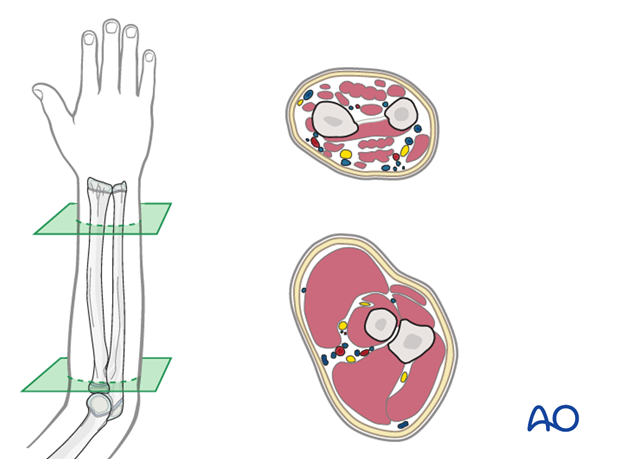
Safe zones for pin placement
The forearm anatomy is complex due to the presence of three major neurovascular bundles. Pin placement should avoid these structures.
Read more about
3. Patient preparation
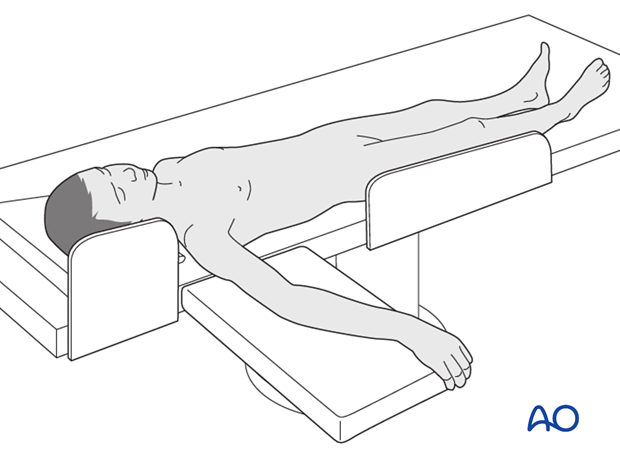
This procedure is normally performed with the patient in a supine position.
4. Sequence of fixation (forearm shaft)
In both bone fractures, it is usually more straightforward to apply the initial external fixator to the less complex fracture.
This series illustrates external fixation of the ulna before the radius.
For clarity, the external fixator on the ulna is omitted from the illustrations of fixation of the radius.

5. Frame construction on the ulna
Proximal pin insertion
Insert the proximal ulnar pins through the subcutaneous cortex of the posterior border of the ulna between the extensor and flexor muscle masses.
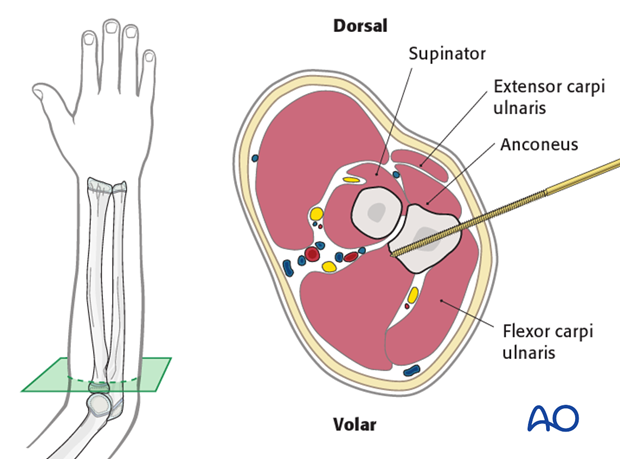
Make an 8-10 mm skin incision over the site of pin insertion.
Use an artery clip for blunt dissection down to the bone, protecting important anatomical structures.
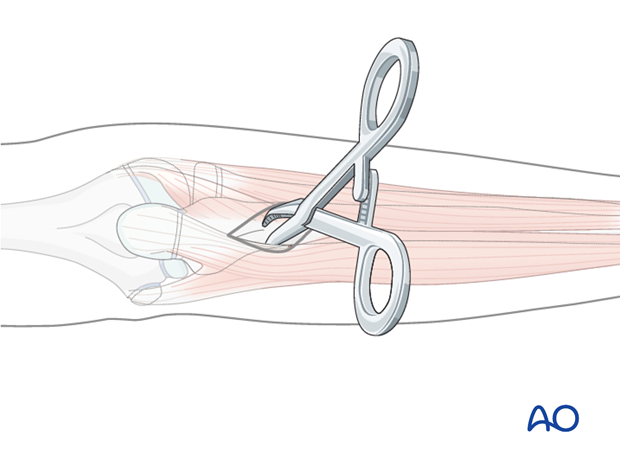
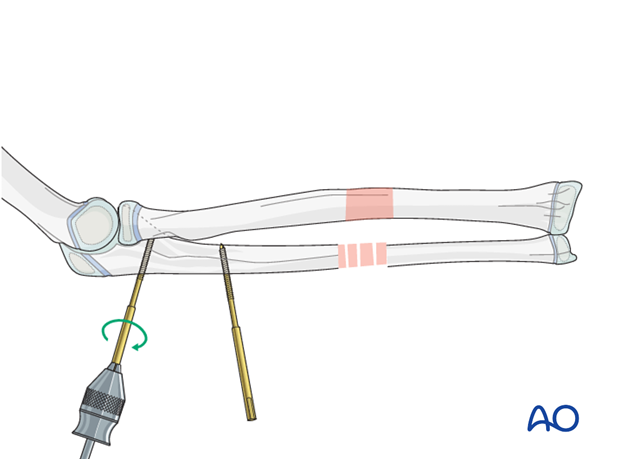
The posterior border of the ulna is subcutaneous and offers the best access.
Insert the pin in the near cortex and through the center of the bone into the far cortex.
Take care not to advance the tip of the pin beyond the far cortex to avoid damage to neurovascular structures.
Pins should not be placed closer than 1 cm to the physis.
Distal pin insertion
Safe access to the subcutaneous dorsomedial cortex is improved with the elbow flexed and the forearm in mid-supination.
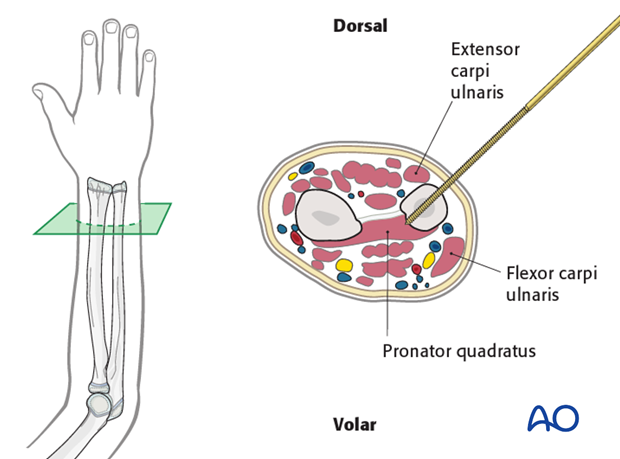
Make an 8-10 mm skin incision over the site of pin insertion.
Use an artery clip for blunt dissection down to the bone, protecting important anatomical structures.
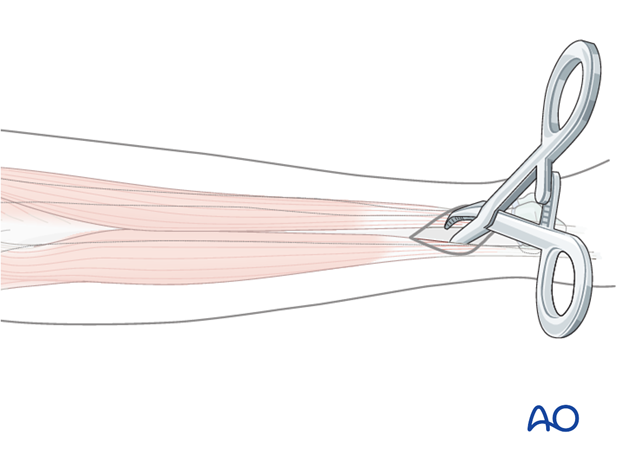
Insert the distal ulnar pins from dorsomedially between the extensor carpi ulnaris and flexor carpi ulnaris.
As the distal ulna in children has a small diameter, oblique pin placement improves bony contact.
Pins should not be placed within 1 cm of the physis.
6. Frame construction on the radius
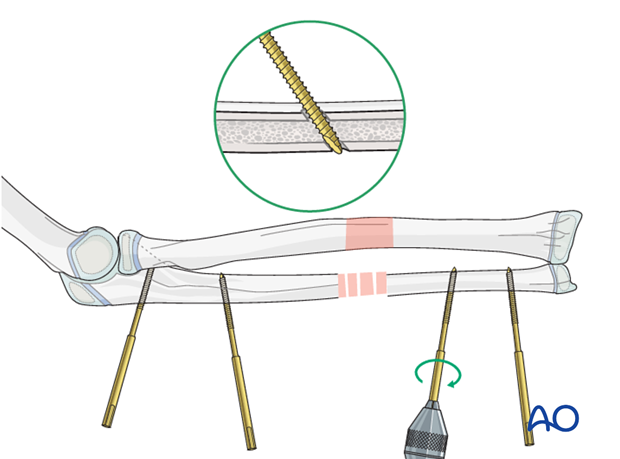
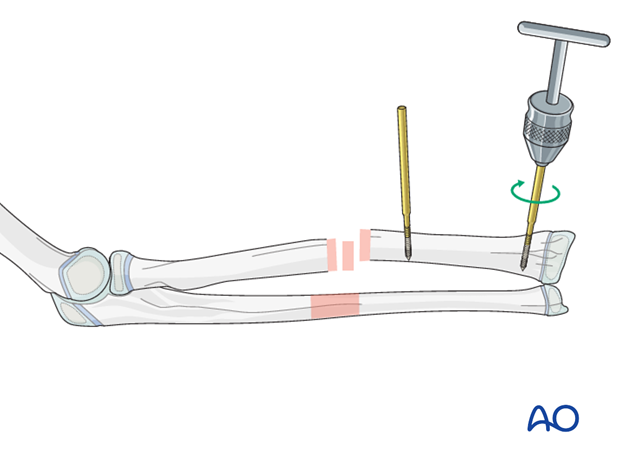
Distal pin insertion
In the distal 1/3 of the forearm, the pin is inserted via a dorsolateral incision with blunt dissection to bone. Pins are inserted under direct vision, using retractors to avoid the superficial branch of the radial nerve. The pin passes between the extensor pollicis longus (EPL) and the extensor carpi radialis or more laterally between extensor carpi radialis and the tendon of brachioradialis.
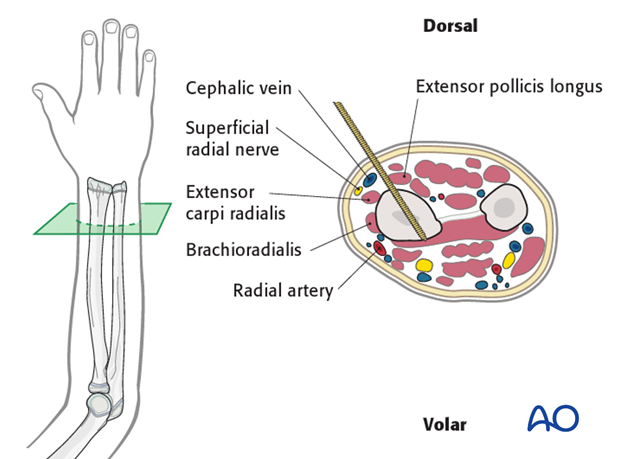
Make an 8-10 mm skin incision over the site of pin insertion.
Use an artery clip for blunt dissection down to the bone protecting important anatomical structures.
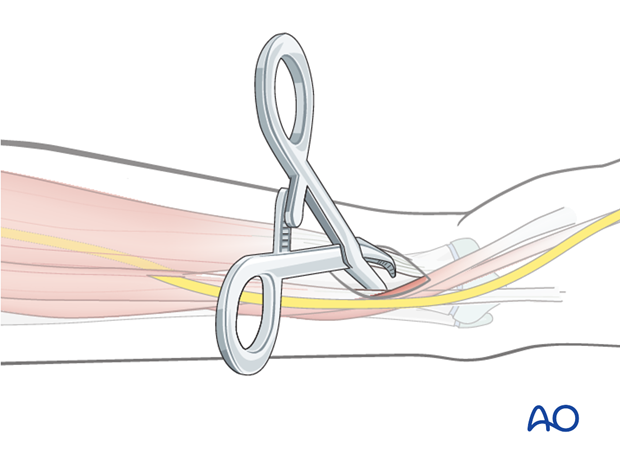
Insert the pin in the near cortex and through the center of the bone into the far cortex.
Take care not to advance the tip of the pin beyond the far cortex to avoid damage to adjacent neurovascular structures.
Pins should not be placed within 1 cm of the physis.
Proximal pin insertion
The most critical anatomical consideration in the proximal 1/3 of the radius is the position of the posterior interosseous nerve, a continuation of the deep branch of the radial nerve, which perforates the supinator.
The dissection for the pin must be distal to the radial tuberosity and pass between the extensor carpi ulnaris and the mobile wad, penetrating the supinator muscle near its ulnar insertion.
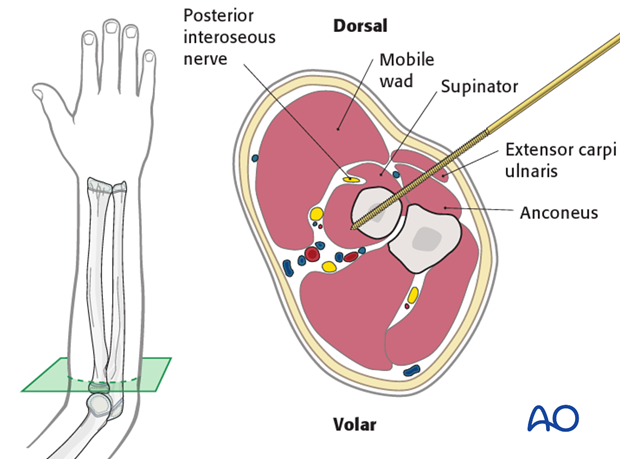
A longer incision and blunt dissection to the bone is recommended to avoid damage to the posterior interosseous nerve.
Make a 1-2 cm skin incision over the site of pin insertion.
Use an artery clip for blunt dissection down to the bone, protecting important anatomical structures with small retractors.
Depending on the length of the proximal fragment, the distal pin may be positioned distal to the insertion of the supinator. This pin should also be inserted under direct vision.
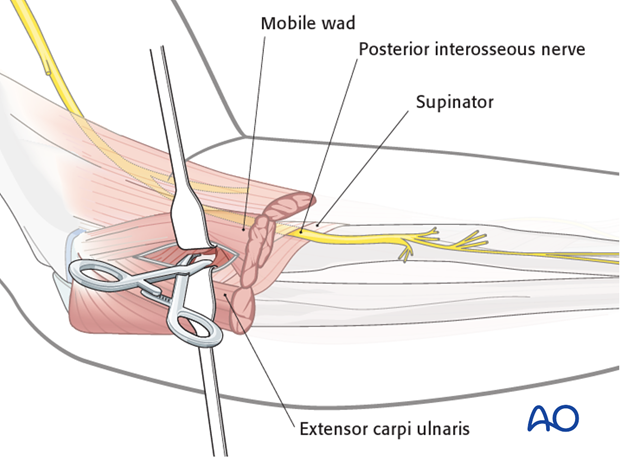
Insert the pin in the near cortex and through the center of the bone into the far cortex.
Take care not to advance the tip of the pin beyond the far cortex to avoid damage to adjacent neurovascular structures.
Pins should not be placed within 1 cm of the physis.
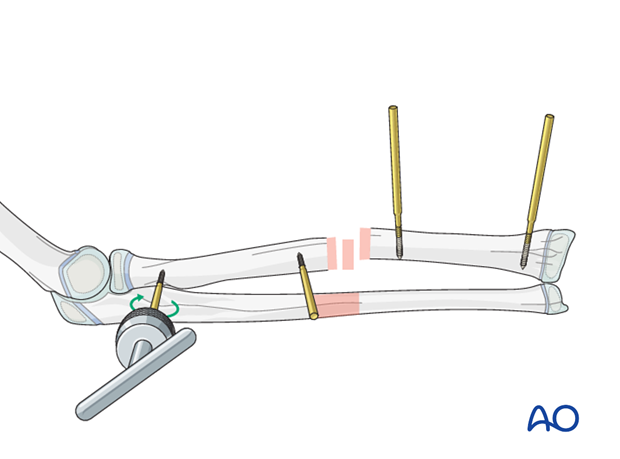
7. Assessment of fracture reduction
Once the fracture is reduced and stabilized, the alignment and position of the pins may be checked with an image intensifier.
8. Aftercare following external fixation
Pin-site care
There is no universally agreed protocol for pin site care.
The following points are however recommended:
- Pin site care should continue until removal of the external fixator.
- The pin sites should be kept clean.
- Crusts or exudates should be removed.
- The pins may be cleaned with water, saline, disinfectant solution or alcohol. The frequency of cleaning varies from daily to weekly.
- Ointments or antibiotic solutions are not recommended for routine pin site care.
- Pin sites do not need to be protected whilst showering or bathing with clean water, but should be dried immediately.
Pin site infection
Initial management is with oral anti-staphylococcal antibiotics.
In case of pin loosening or unresponsive pin site infection, the following steps should be taken:
- Remove all involved pins and place new pins in a healthy location.
- Debride the pin sites in the operating theater, using curettage and irrigation.
- Take specimens for microbiological culture to guide appropriate antibiotic treatment.
Internal fixation following an infected external fixator pin has a high risk of infection and should be avoided unless no reasonable alternative is available.
See also the additional material on postoperative infection.
Compartment syndrome
See the additional material on compartment syndrome.
Mobilization
Elevation is useful in the initial stages. A sling is helpful if fixator configuration allows its application.
The patient should be encouraged to move the wrist and elbow, within the limits of comfort.
Follow-up
The patient should be seen 7-10 days after surgery for a wound check.
X-rays are taken to check stability and alignment.
See also the additional material on healing times.


