External fixator
1. General considerations
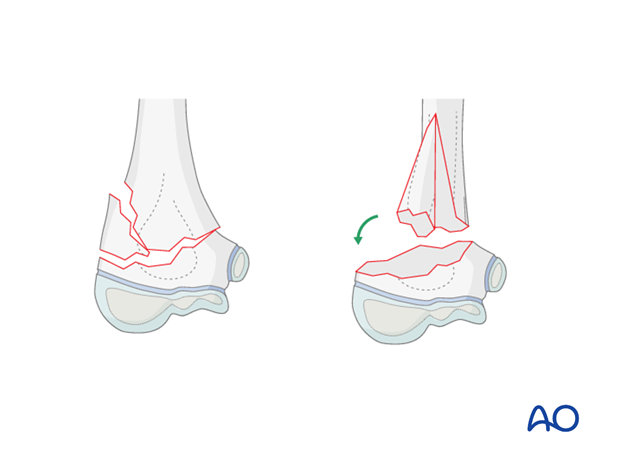
There is general agreement that reduction and fixation of supracondylar fractures types III and IV is necessary, as they are sometimes difficult to stabilize because of an oblique fracture line, or additional fragments.
The use of a small lateral external fixator allows a direct and minimally invasive reduction and fixation of all these types of supracondylar fractures.
This technique:
- Allows early cast-free functional rehabilitation
- Prevents angular redisplacement (especially cubitus varus) even in the presence of residual rotational mismatch
- Is particularly helpful for flexion type fractures
- Can be used in any age group
Removal is no more problematical than removal of percutaneous K-wires.
2. Preparation
Instruments and implants
Depending on the age of the child, the following variations of the technique may be considered.
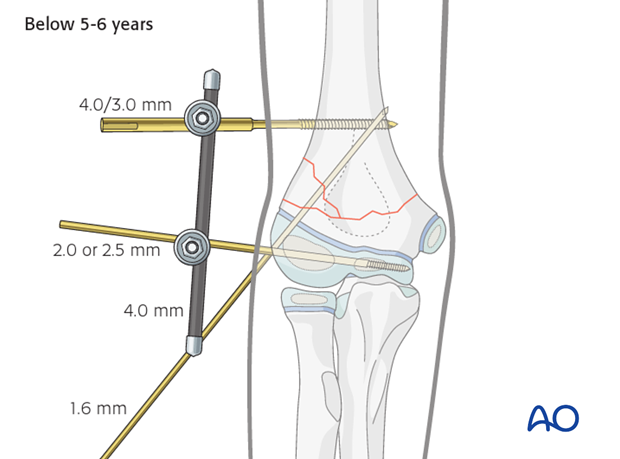
Smaller children, below 5-6 years of age:
- Proximal Schanz screw: 4.0/3.0mm
- Distal anchorage: either 4.0/2.5mm Schanz screw, or if not available, a 2.0 or 2.5 mm K-wire with a short thread
- Antirotation K-wire: 1.6 mm
- 4.0 mm rods (preferably carbon fiber, or stainless steel)
- Appropriately sized standard, or clip-on, clamps
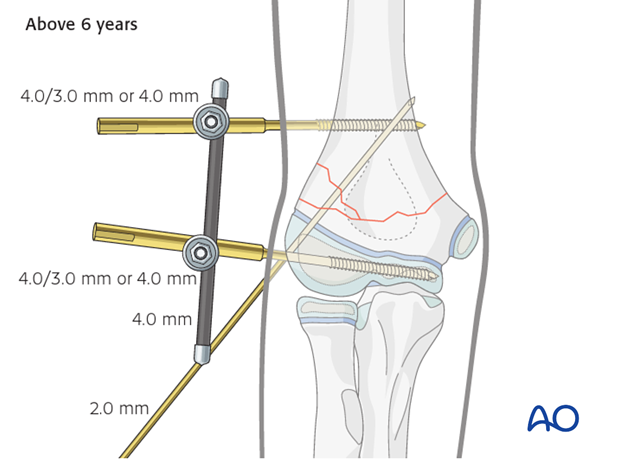
Children above 6 years of age:
- Schanz screws: at least 4.0/3.0 mm, or sometimes 4.0 mm
- Antirotation K-wire: 2.0 mm
- 4.0 mm rods (preferably carbon fiber or stainless steel)
- Standard or clip-on clamps for 4.0 mm rods
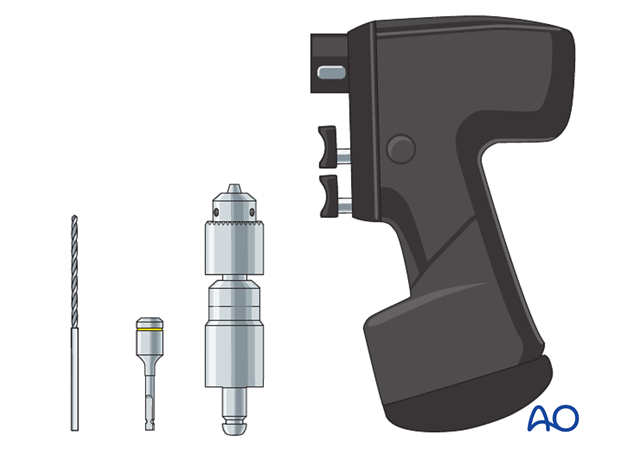
The following instruments are needed:
- Drill with Schanz screw adapter or
- Jacobs chuck
Anesthesia and positioning
There are two possible positions for the C-arm:
- Parallel to the operating table
- Perpendicular to the operating table
Note: After reduction has been achieved, the arm should be moved as little as possible. Images should be obtained by rotating the C-arm and not moving the arm.
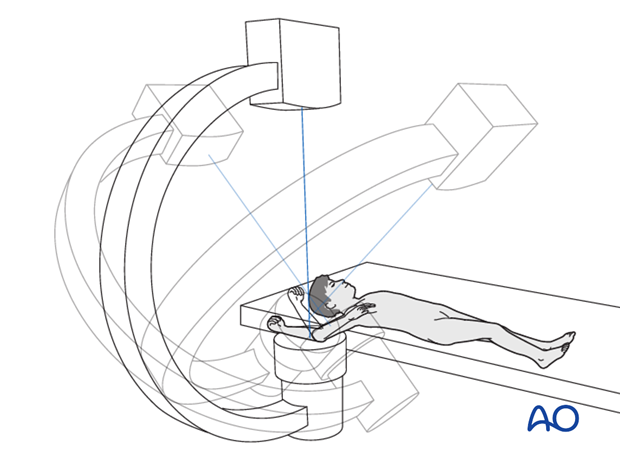
Intubation and muscle relaxation assist manipulation and reduction.
The patient is placed supine with the arm draped up to the shoulder.
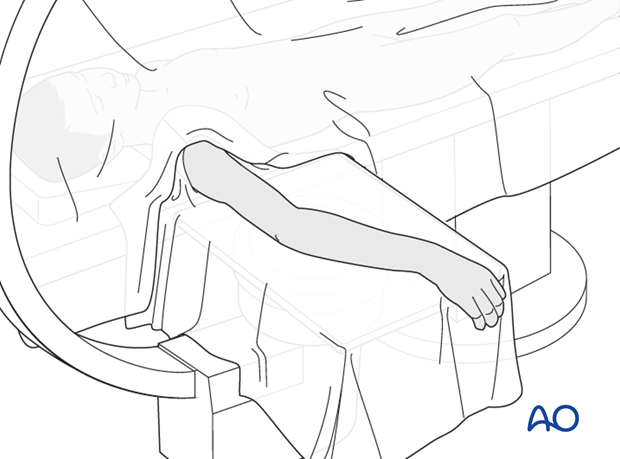
3. Schanz screw insertion
Insertion point for proximal Schanz screw
The proximal fracture level is identified under image intensifier with the help of a K-wire and marked with a semicircular line drawn around the distal humerus.
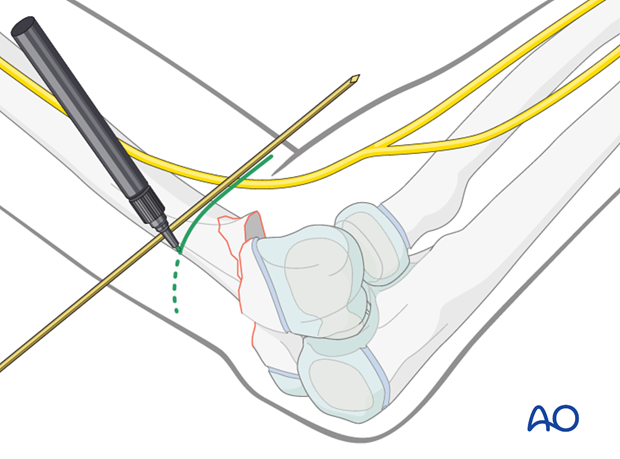
Using this line, indicating the main fracture level, the safe level for screw insertion is above the apex of the lateral wedge. If the wedge is sizeable, the radial nerve is vulnerable with the more proximal insertion.
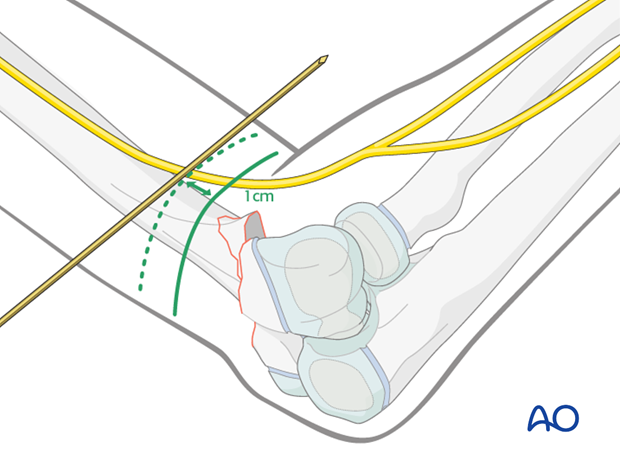
The axis of the humeral shaft is identified in a true lateral view, and a line is drawn along that axis (as illustrated).
The intersection of these two lines marks the safe position for proximal Schanz screw insertion.
Note: It is important to ensure that the distance between the proximal Schanz screw and the fracture line is at least 1 cm.
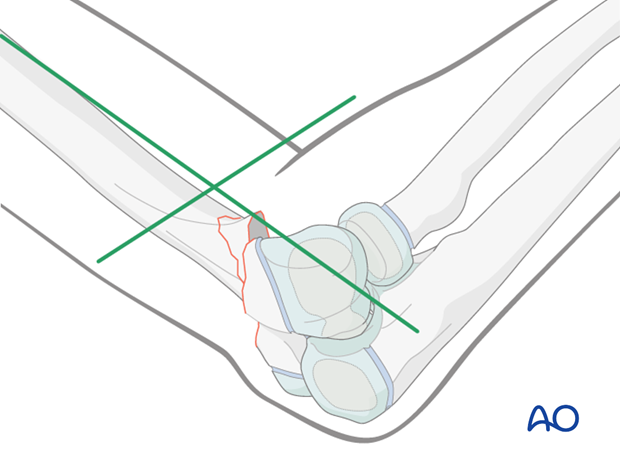
Proximal Schanz screw insertion
A 1-1.5 cm skin incision is made at the planned insertion point and deepened by blunt dissection with a small artery forceps until the lateral border of the humerus can be felt.
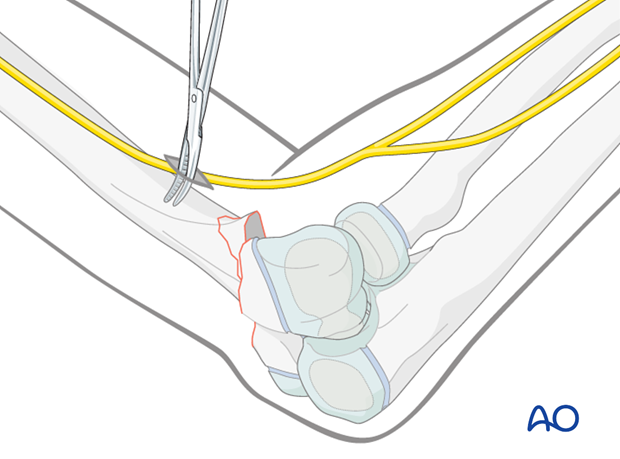
The chosen Schanz screw is inserted by hand onto the anterolateral surface of the humerus and then connected with the drill.
To protect the nerve, the pin is inserted through an appropriate drill sleeve.
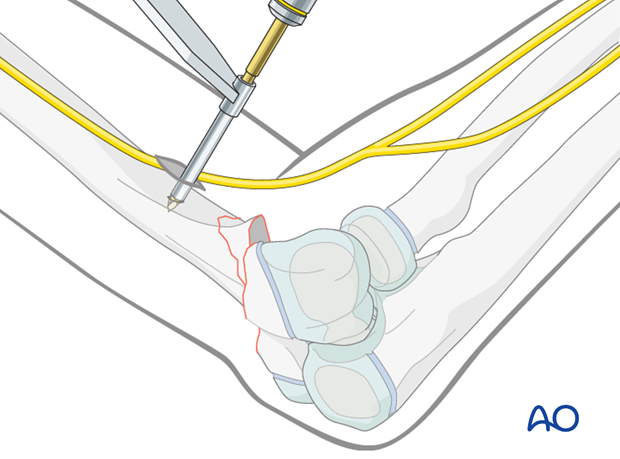
Drilling is started slowly, perpendicular to the humeral surface.
When the screw has obtained good purchase, the drill is tilted so that the screw is inserted parallel to the posterior aspect of the humerus and perpendicular to the humeral axis.
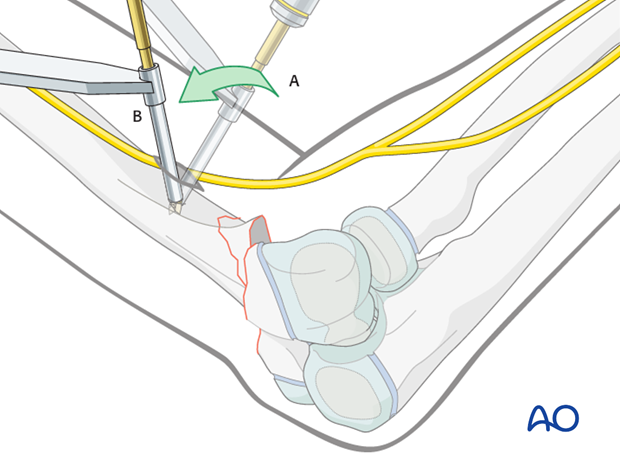
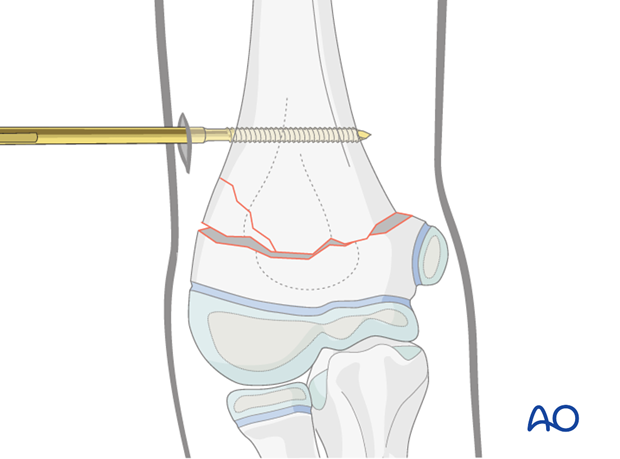
Once the Schanz screw is inserted to approximately 2/3 of the humeral diameter, the arm is rotated to gain a true AP view, to check the length of insertion of the Schanz screw.
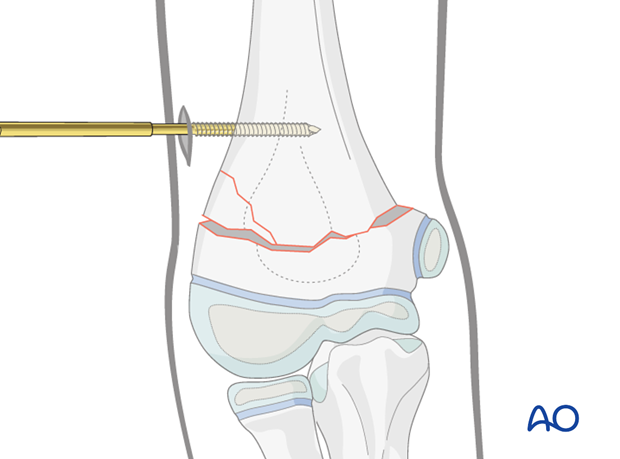
The screw is then advanced to just pierce the medial cortex.
Insertion point for distal Schanz screw
Using the forearm as a joystick, the elbow, together with the distal humeral fragment, is manipulated until a true lateral projection of the capitellum is obtained.
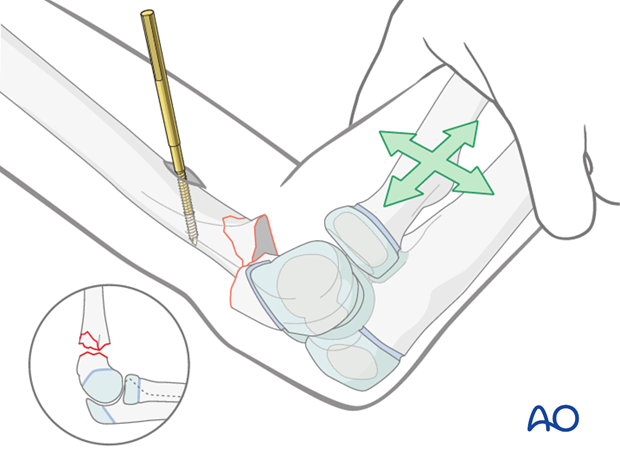
The center of the capitellum is then identified.
Lines are drawn along the radial shaft axis and through the center of the capitellum.
The intersection of these two lines is the correct insertion point for the distal Schanz screw.
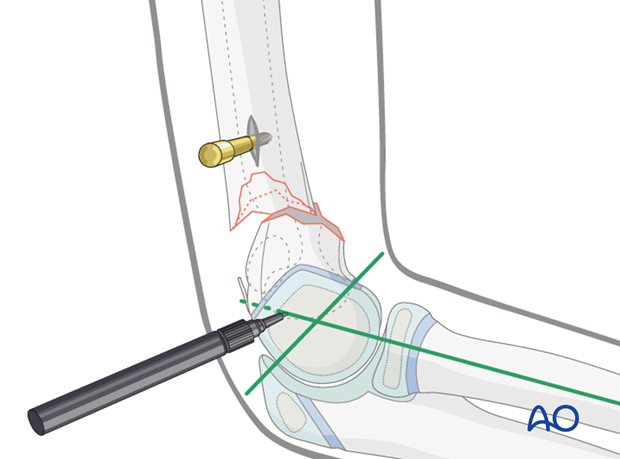
Alternatively, if the distal metaphyseal fragment is long enough for Schanz screw insertion, the insertion point is marked at this level.
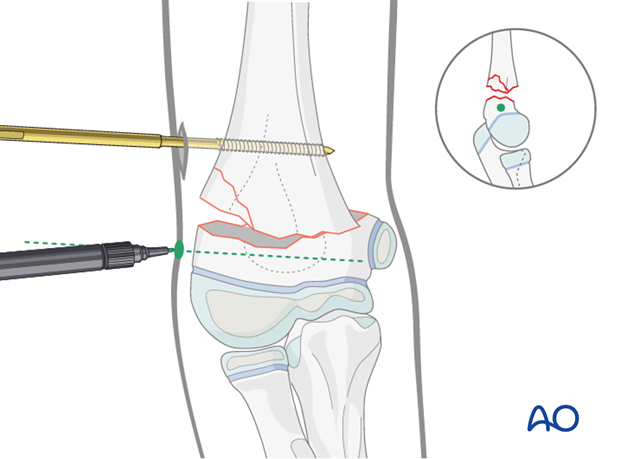
Distal Schanz screw insertion
A 0.5-1 cm skin incision is made at the planned insertion point and deepened by blunt dissection with a small artery forceps until the lateral aspect of the distal fragment can be felt.
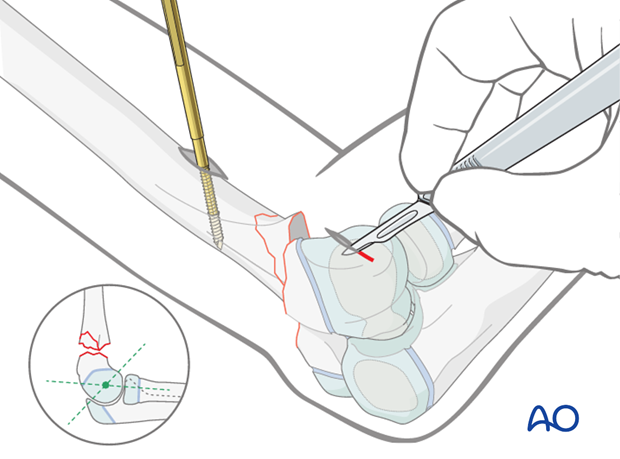
The Schanz screw is inserted by hand and the position is checked using image intensification. It is then connected to the drill and inserted 1-2 cm.
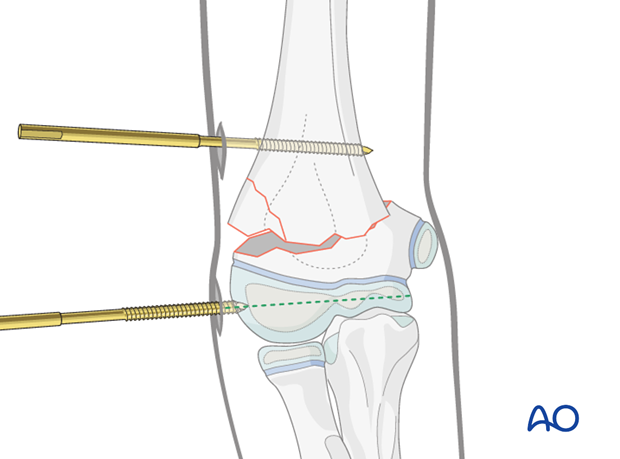
The fragment is rotated into a true AP view using the Schanz screw and drill, and the parallel alignment of the screw in relation to the joint surface is verified.
The Schanz screw is inserted almost to the medial aspect of the distal fragment, under image intensifier control.
Note: When the pin is inserted perpendicular to the humeral shaft but not in a true lateral trajectory it may perforate the cortex anteriorly on the ulnar side. This does not cause any problems if the perforation is no longer than 2-4 mm. Repositioning of the pin to correct such slightly oblique trajectories should be avoided.
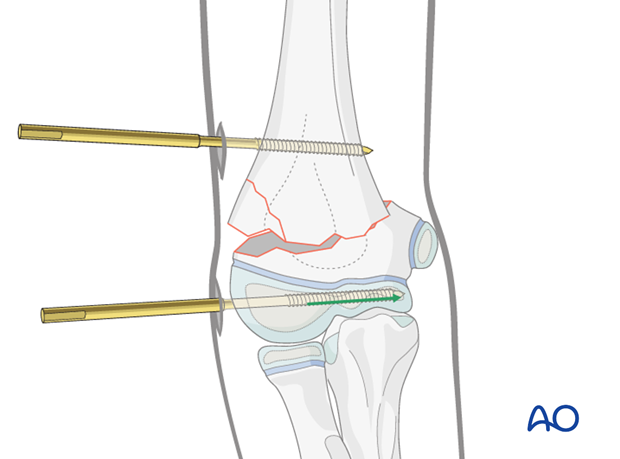
4. Reduction
Preliminary reduction
Gentle longitudinal traction is applied for 2-3 minutes to preliminarily reduce the fragments.
See also the additional material on closed reduction of supracondylar fractures.
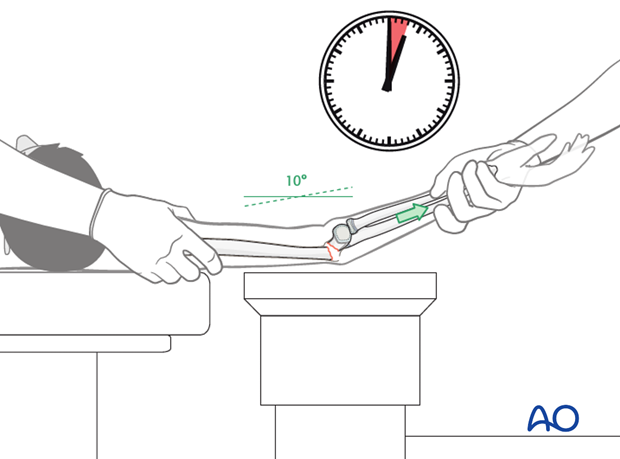
If no bony contact can be felt between the fragments, any entrapped soft tissue can be released by manipulating the Schanz screws under gentle traction.
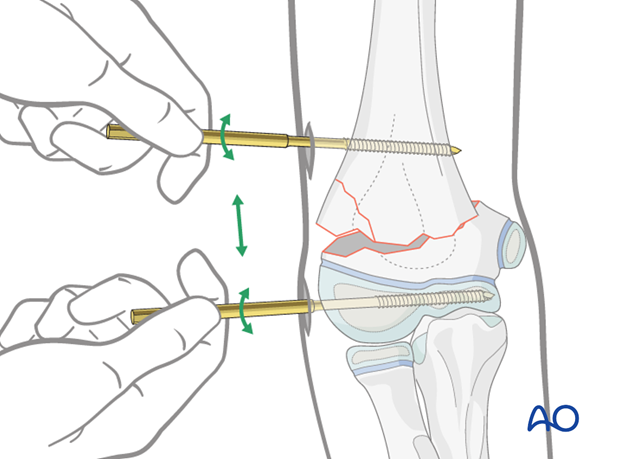
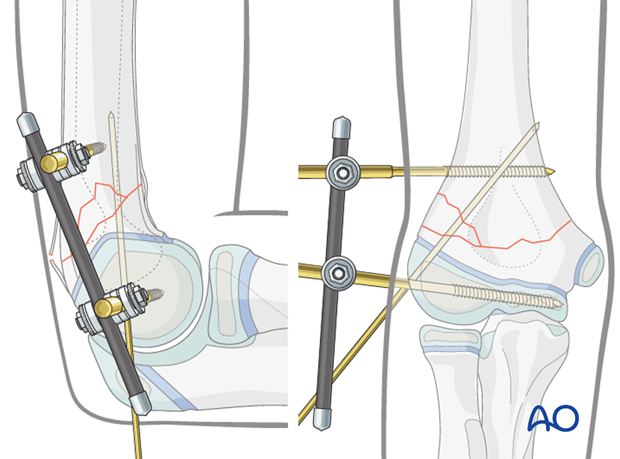
If the proximal Schanz screw has been inserted perpendicularly to the humeral axis, and the distal Schanz screw is parallel to the joint, the fracture will be virtually aligned when the Schanz screws are parallel to each other.
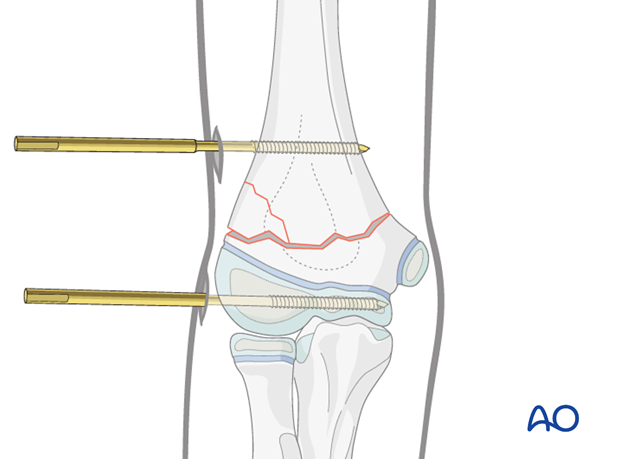
The clamps are attached to the Schanz screws so that the body of the clamp does not obscure radiological control of the fracture in the lateral view.
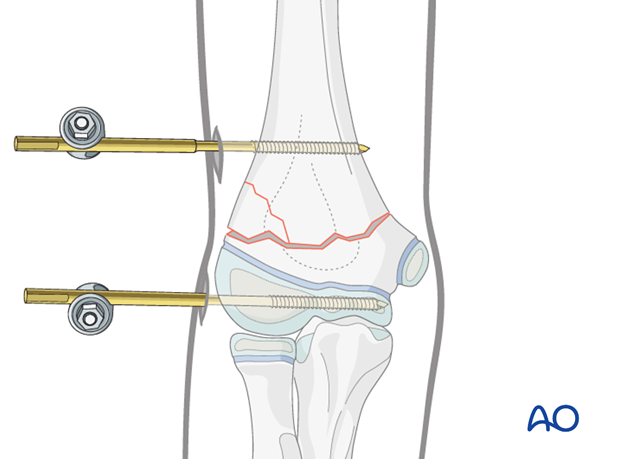
The two clamps are connected using a short 4.0 mm rod and tightened provisionally to enable the fragments to be moved.
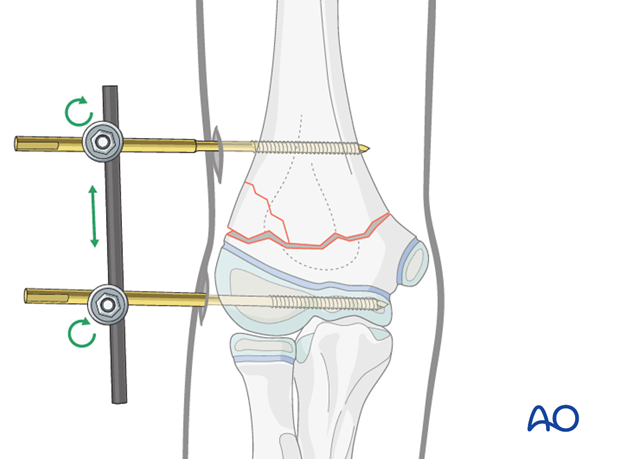
Definitive anatomical reduction
Definitive reduction and fixation are performed using image intensifier control in AP and lateral views.
With the proximal fragment in a true AP view, the distal fragment is manipulated until a satisfactory orientation is obtained.
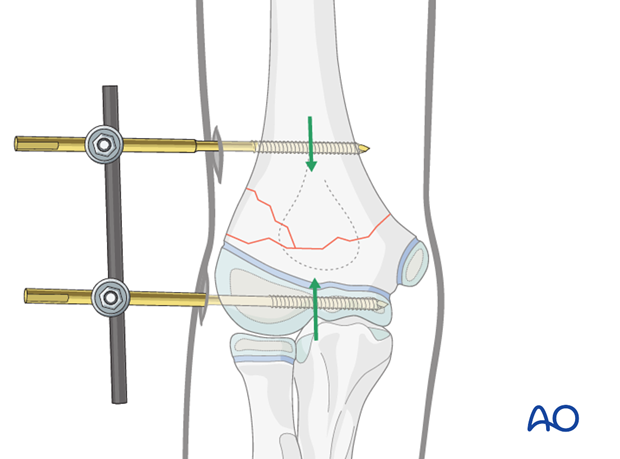
The C-arm and the arm are rotated so that a true lateral view is obtained.
If necessary, the fragments are further manipulated to align the fracture in the lateral view.

With the upper arm held firmly and the elbow at 90°, pulling along the axis of the forearm causes flexion of the distal fragment and pushing causes extension. Using these maneuvers, a correct shaft-capitellum angle can be achieved.
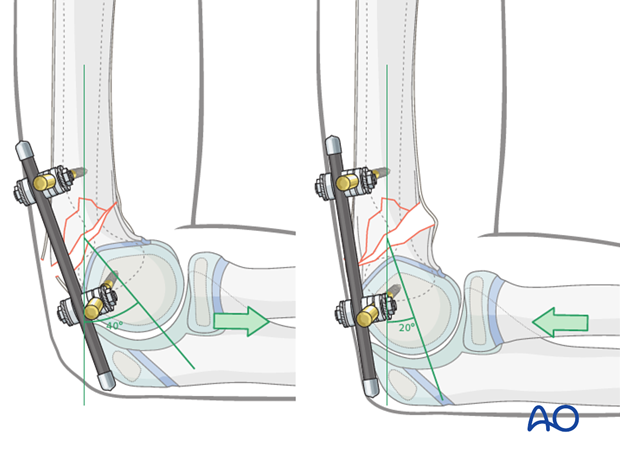
5. Fixation
Once the reduction is accepted, the clamps are fully tightened.
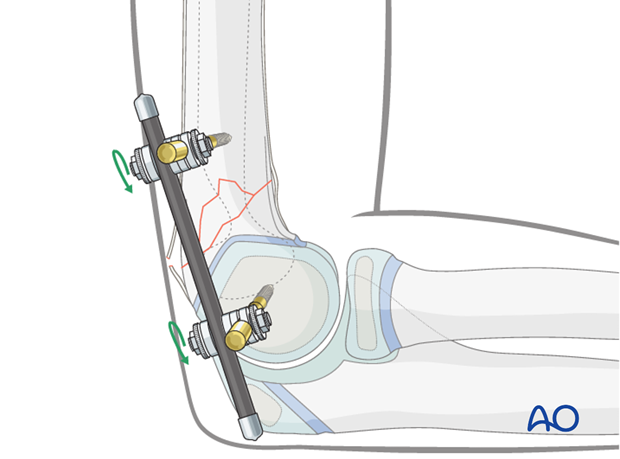
Antirotation K-wire
To prevent rotation at the fracture site, a K-wire is inserted from the distal lateral aspect, posterior to the distal Schanz screw, towards the proximal medial cortex of the humerus, ending anterior to the proximal screw.
This K-wire also functions as an antirotation device in the distal fragment, preventing its twisting around the axis of the distal Schanz screw.
6. Aftercare
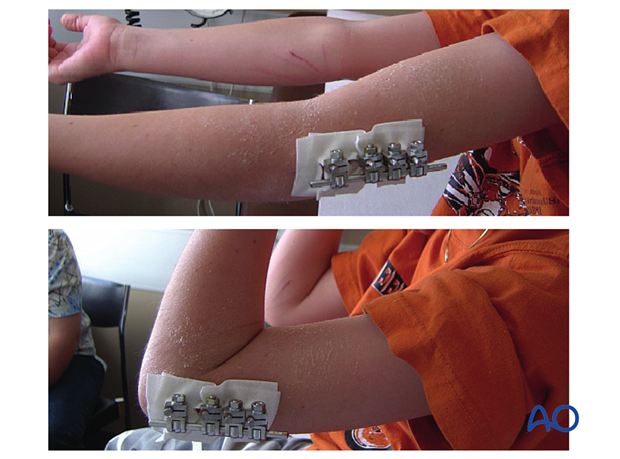
This fixation is sufficiently stable to permit early movement and daily activities. Additional immobilization with a plaster cast or splint is not required.
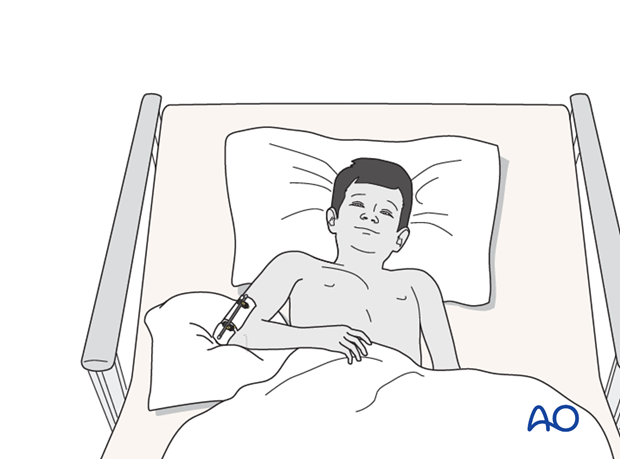
If the child remains for some hours/days in bed, the elbow should be elevated on pillows to reduce swelling and pain.
See also the additional material on postoperative infection and compartment syndrome.
The postoperative protocol is as follows:
- Early postoperative clinical documentation is undertaken
- If postoperative x-ray control shows unsatisfactory alignment, this can be adjusted, usually without further anesthesia
- Pin care according to local practice
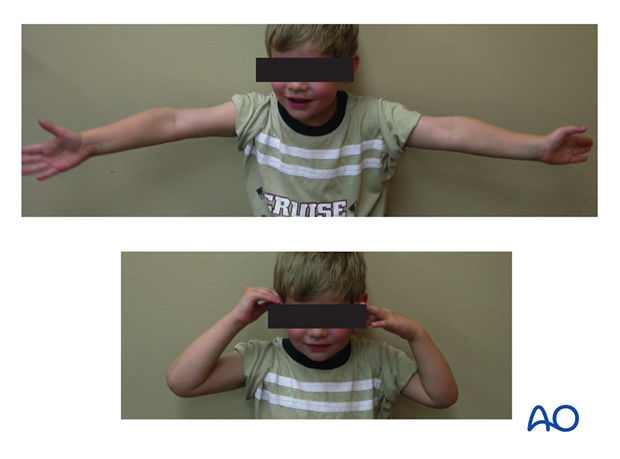
- According to the level of pain, early movement of the elbow should be encouraged
- Discharge from hospital according to local practice (1-3 days)
- First clinical and radiological follow-up is, depending on the age of the child, usually 4-5 weeks postoperatively
- In most cases, the child is able to move the elbow almost fully at this first check-up
- Physiotherapy is normally not indicated
Removal of external fixator
Removal of the external fixator is undertaken according to local practice (sedation/local anesthesia, short anesthesia, or N2O2) after the first x-ray control provided fracture healing is seen.


