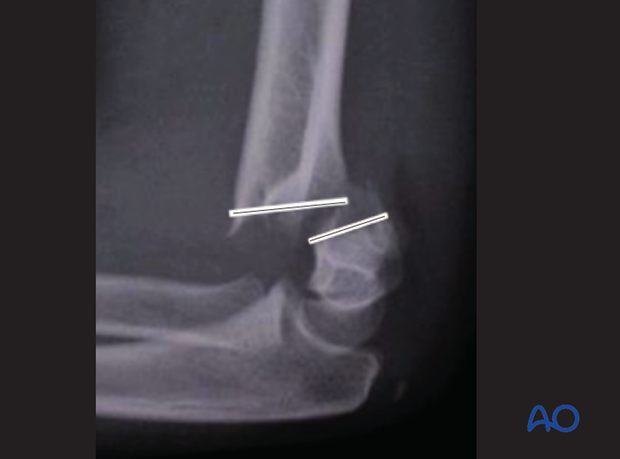
Closed reduction of supracondylar fractures
1. Introduction
The closed reduction technique described in this section can be used for the majority of extension type (type III and IV) supracondylar fractures.
The technique follows the rules that were published in Charnley's textbook "The closed treatment of common fractures", in turn based on the original Blount method, published in 1954 in his "Fractures in Children".
If this technique is applied correctly, the majority (> 95%) of supracondylar humeral fractures can be reduced.
This technique is not suitable for rarer (< 5%) flexion type supracondylar fractures.
An alternative technique for reduction of flexion type fractures will be presented below.
2. Closed reduction of extension type supracondylar fractures (types III and IV)
It is important that the patient be well fixed and prepared, and that the image intensifier and equipment are ready prior to attempting reduction.
Soft tissue reduction
To apply traction, the arm is extended to approximately 10° short of full extension. With an assistant supporting the proximal humerus, progressive traction is applied at the wrist.
Longitudinal traction on the forearm and wrist should be maintained for at least 5-10 minutes.
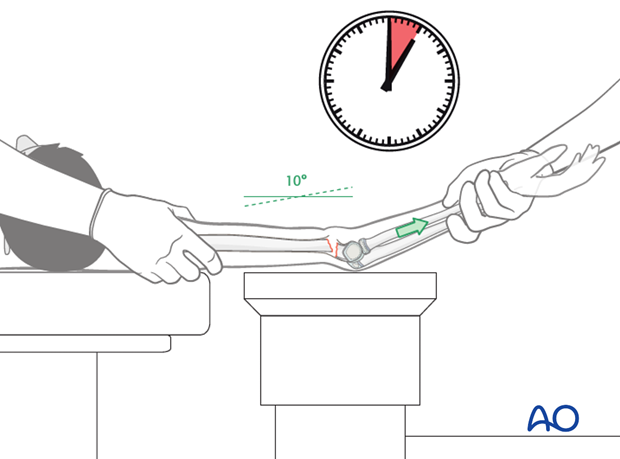
The goal of this maneuver is to align the fragments by disengaging the humeral shaft from the anterior muscles and skin.
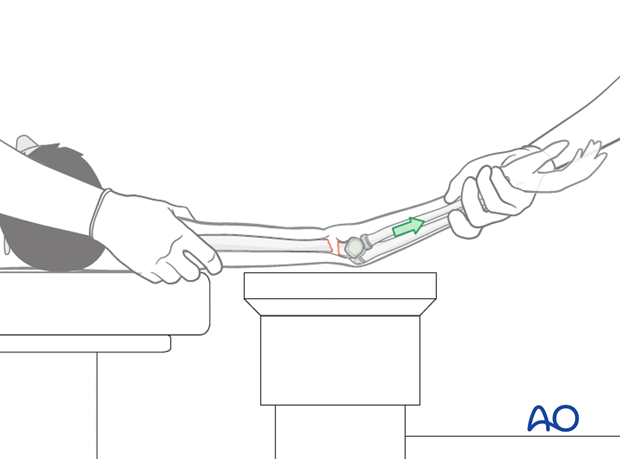
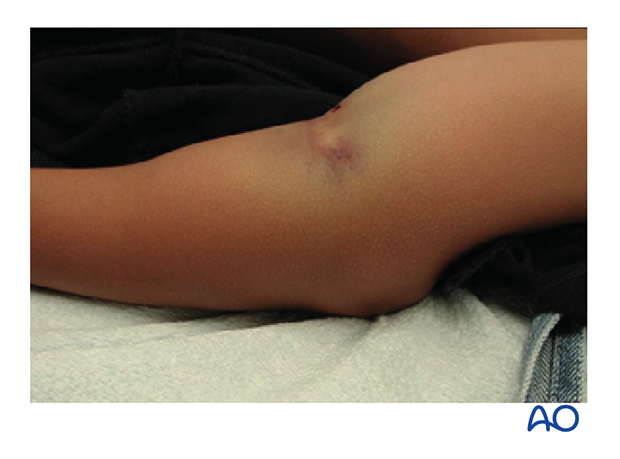
The "pucker sign", if present, will also be visibly reduced.
If reduction cannot be achieved and there is no clear bone contact, the pierced brachialis muscle might be entrapped. A milking maneuver over the muscles (biceps and brachialis muscle), starting in the middle of the humerus and continuing distally, can be done in an attempt to release the muscle. This maneuver must be done repeatedly in order to reduce the soft tissue around the shaft.
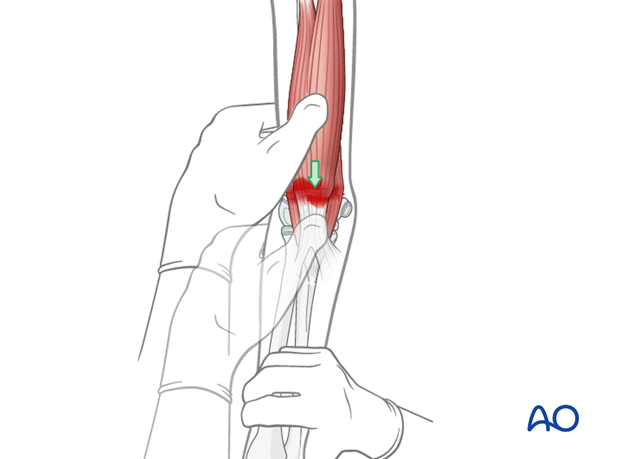
Once the fracture is aligned, and all soft tissue entrapment is released, the first C-arm check is performed with the arm extended.
The fracture must be out to length and rotationally aligned as indicated by the visible olecranon fossa and the aligned lateral and medial columns.
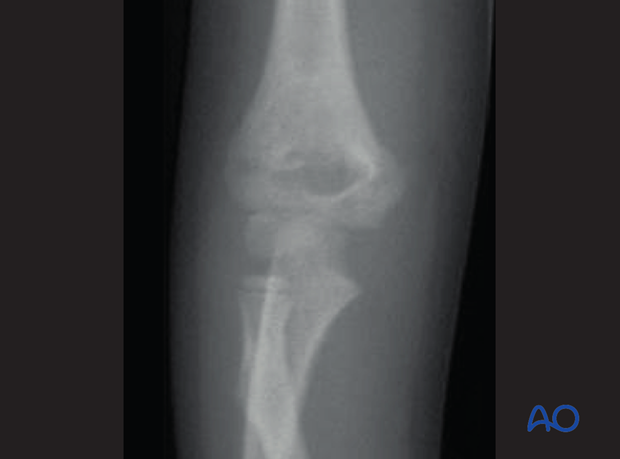
Correction of medial/lateral translation and varus/valgus deformity
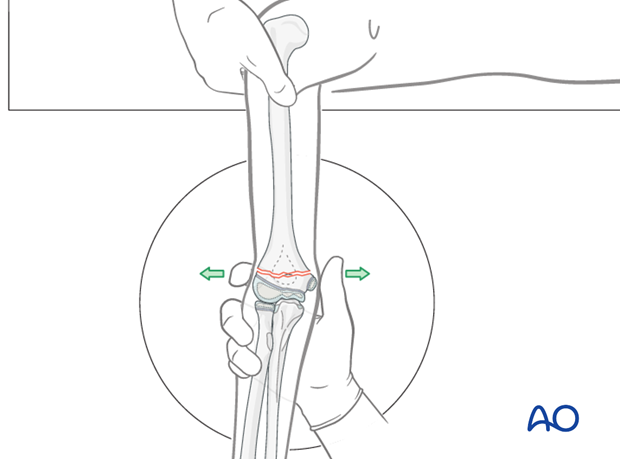
Correction of medial/lateral translation and varus/valgus deformity should be done if visible on x-ray.
Angulation and translation are corrected by direct manipulation, using a thumb and index finger on the epicondyles. The correction is verified using an image intensifier.
Correction of any internal or external malrotation noted on a true lateral x-ray should also be performed at this point.
Reduction of extension angulation
While maintain the correction of rotational, varus/valgus, and/or translational displacement, the elbow is flexed with the hand in supination.
For this maneuver, the thumb is placed on the olecranon and pushes it anteriorly while the rest of the hand fixes the humerus.
The fracture is reduced only if the elbow can be flexed more than 120°. If the elbow cannot be flexed more than 120°, it is a sign that the distal fragment still remains posterior, that the complete length has not been regained, or there is muscle entrapment.
If a complete reduction cannot be assured, the maneuver has to be repeated.
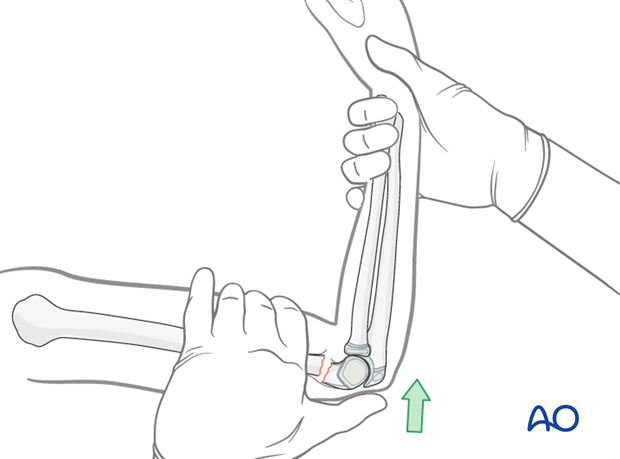
Note: During the flexion maneuver, the forearm should be rotated so that it is fully pronated when the arm reaches full flexion. The pronation helps to tilt the distal fragment out of any varus position and also assists in stabilizing the fracture.
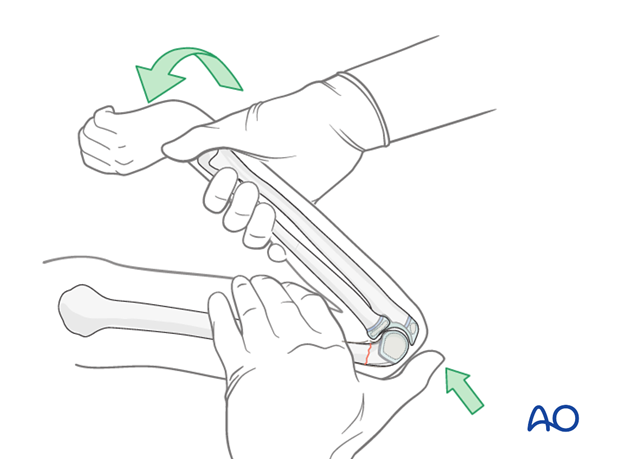
The elbow is maintained in full flexion and the reduction is verified on AP and lateral image intensifier views.
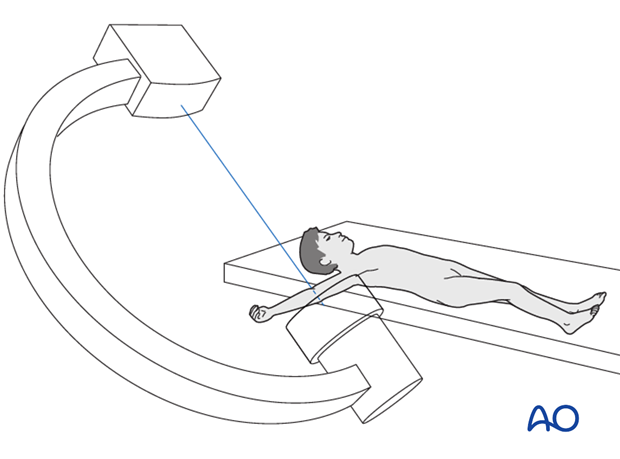
The reduction maneuver will need to be repeated if the distal fragment remains posterior. It is common to make small refinements to the reduction until a satisfactory position is obtained.
Anatomical closed reduction is commonly obtained even in badly displaced fractures. A minimal amount of medial/lateral or posterior translation and extension can be accepted, but they make intraosseous pinning very difficult.
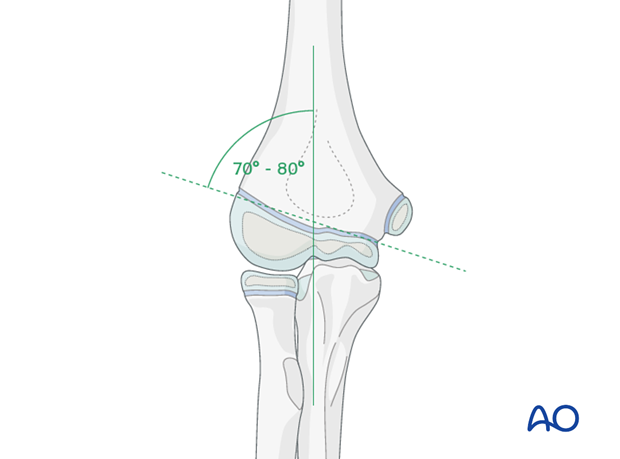
Varus should not be accepted. Baumann's angle should match the contralateral elbow (70-80°) at this stage.
Correction of rotational deformity
On the lateral image intensifier view, mismatch between the apparent widths of the proximal and distal fragments indicates that rotational malalignment is still present.
This malalignment is visible in the lateral view as a so-called rotational nose.
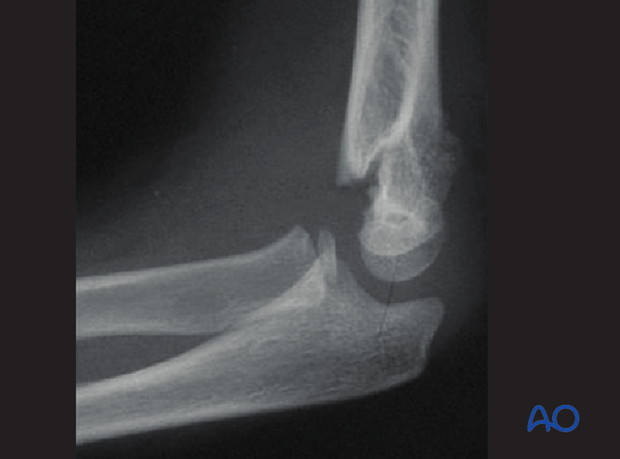
Rotational malalignment may well require adjustment, as it markedly narrows the corridor for intraosseous pinning.
The most displaced column is generally the medial side.
Dynamic visualization under image intensification might be helpful to recognize if the incongruence is medial or lateral.
Note: Rotational failure together with insufficient stabilization is the main reason for cubitus varus.
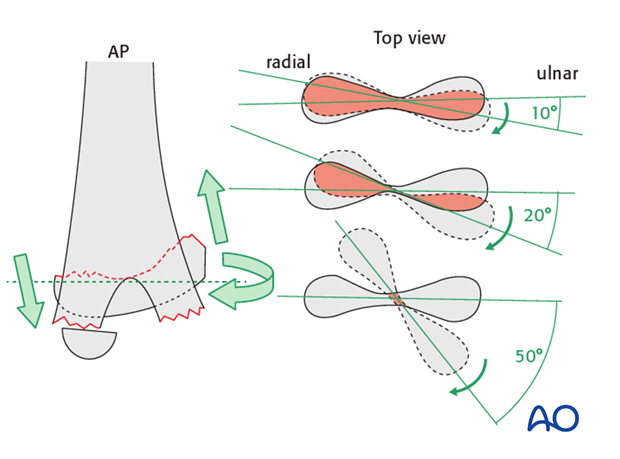
Restoration of the hourglass appearance of the olecranon fossa in the lateral view is a good indication that there is correct rotational alignment.
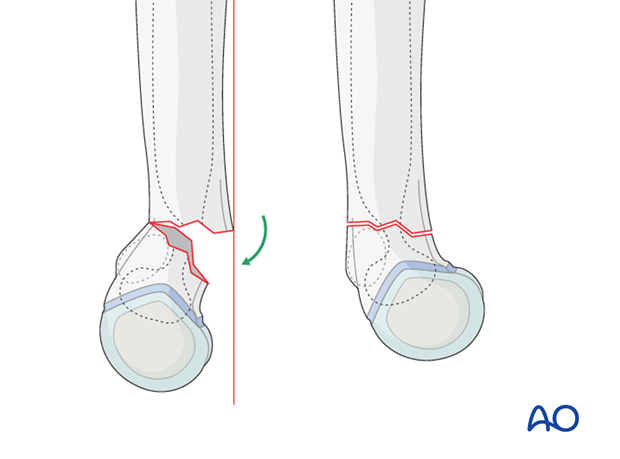
How the periosteum can aid reduction
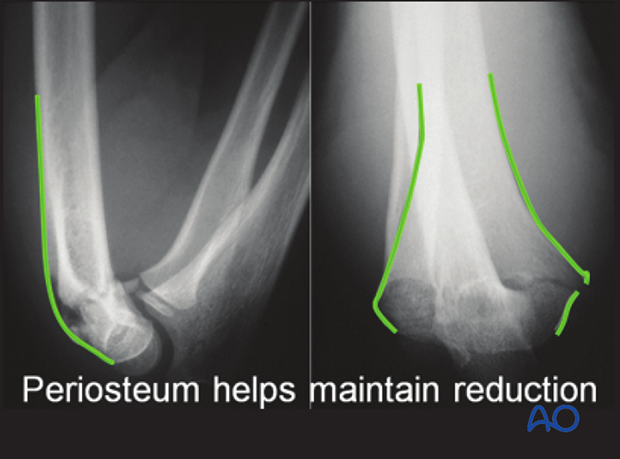
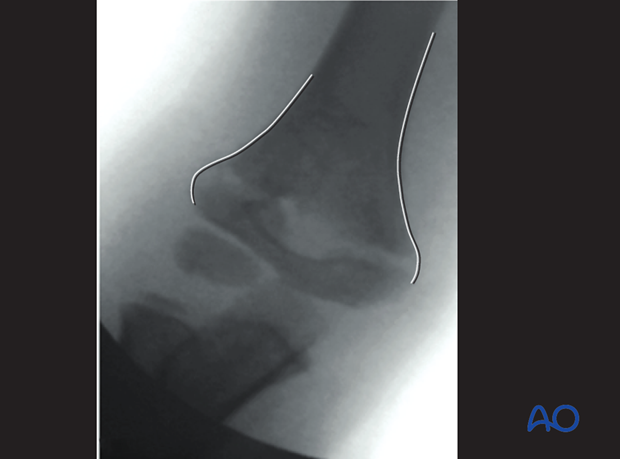
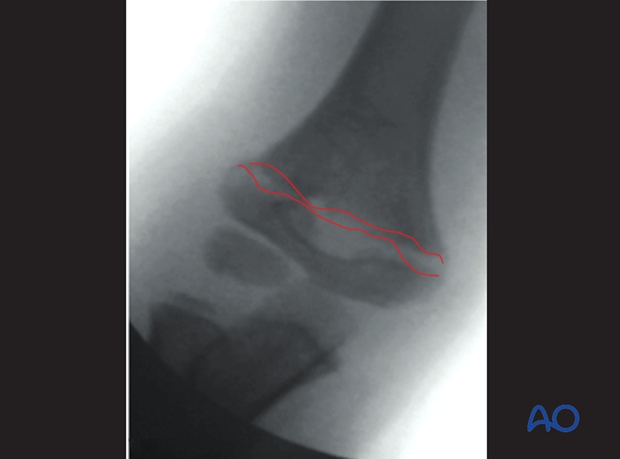
The majority of all extension type supracondylar fractures show a rupture of the anterior (cubital) and medial periosteum (as shown in these x-rays).
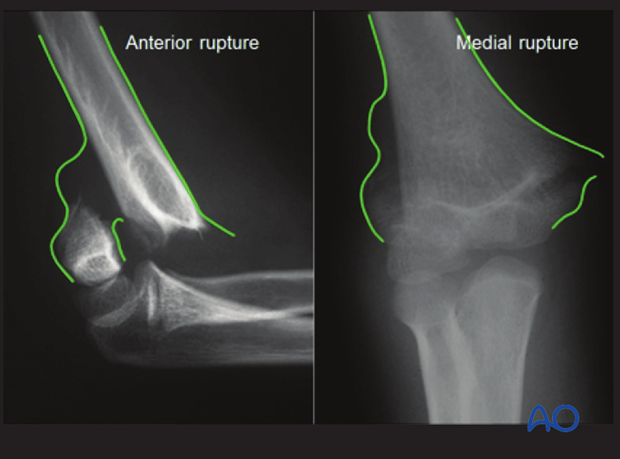
The integrity of the posterior periosteum should be preserved, because it helps to reduce and stabilize the fracture.
These x-rays, taken after reduction, demonstrate this effect.

3. Closed reduction of flexion type supracondylar fractures
Closed reduction of flexion type supracondylar fractures
Flexion type supracondylar fractures account for less than 5% of all supracondylar fractures.
In this type of fracture, the traditional closed reduction maneuver, as described for extension type supracondylar fractures, cannot be used as the traditional hyperflexion of the elbow and dorsal pressure of the distal fragment displaces the fracture farther.
Be aware that, in the case of flexion type supracondylar fractures, the posterior periosteum is ruptured whereas the anterior periosteum is mostly intact.
In principle, the maneuver of reduction must be one of hyperextension. Once a good reduction has been obtained, it is best to stabilize the fracture with two K-wires. This allows the elbow to be brought back into a flexed position for cast immobilization. If the fracture is not fixed with K-wires, the elbow would have to be immobilized in uncomfortable hyperextension.
No single closed reduction technique is going to be universally successful. However, the modifications described below to the standard closed reduction technique will help in certain settings.
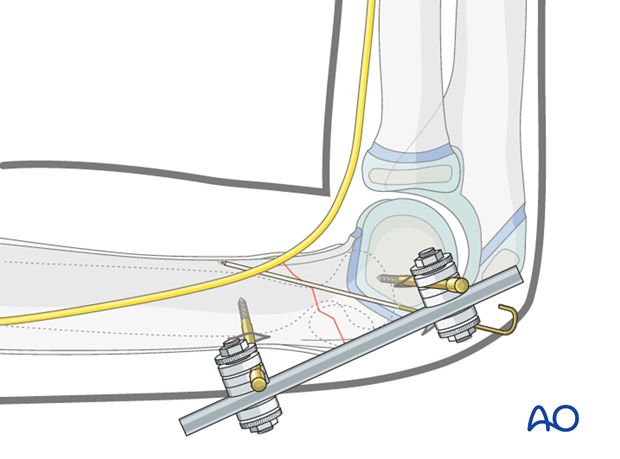
Note: An alternative method for reduction and fixation is the use of a lateral external fixation technique.

Reduction maneuver
Applying a variety of gentle techniques which are appropriate for the unique fracture pattern is recommended before proceeding to an open reduction.
Strong traction and forceful maneuvers are not recommended as they may cause additional soft tissue damage.
Gentle longitudinal traction is applied for 4-5 minutes.

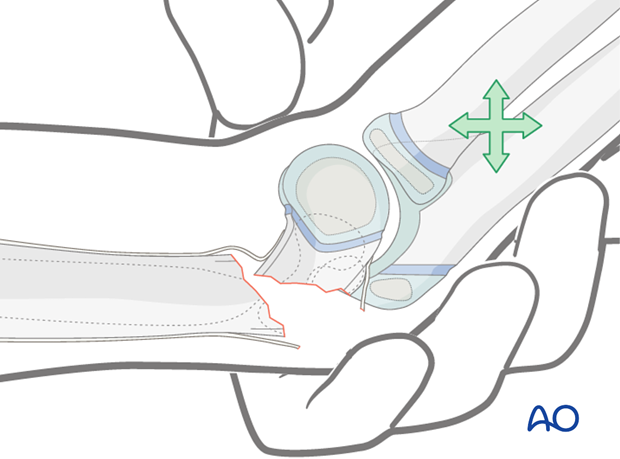
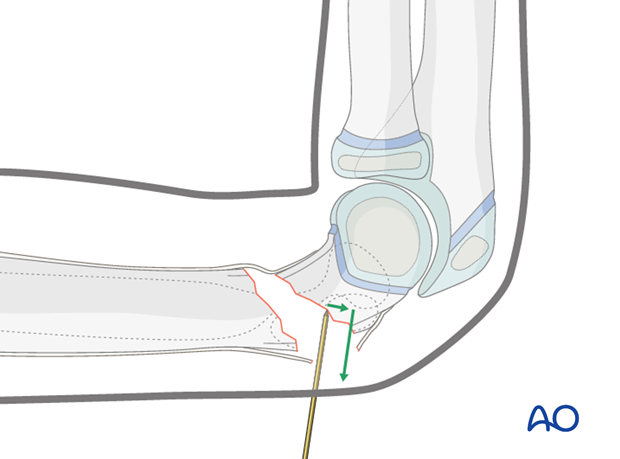
A good reduction should be attempted through direct manual manipulation of the distal fragment, which is anteriorly displaced.
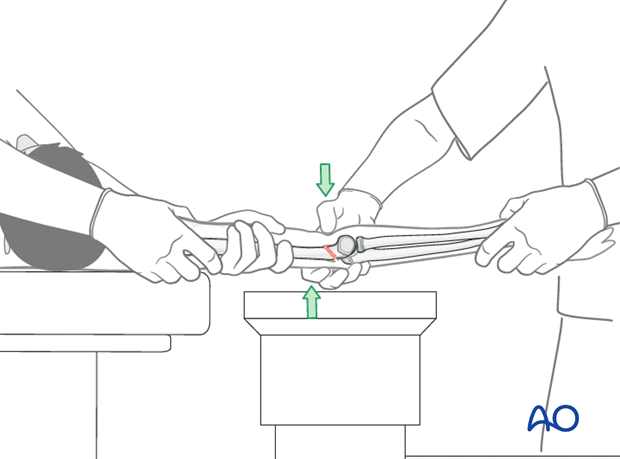
This detailed view shows direct manipulation of the distal fragment with the thumb pressing down.
The length and alignment are verified using image intensification.
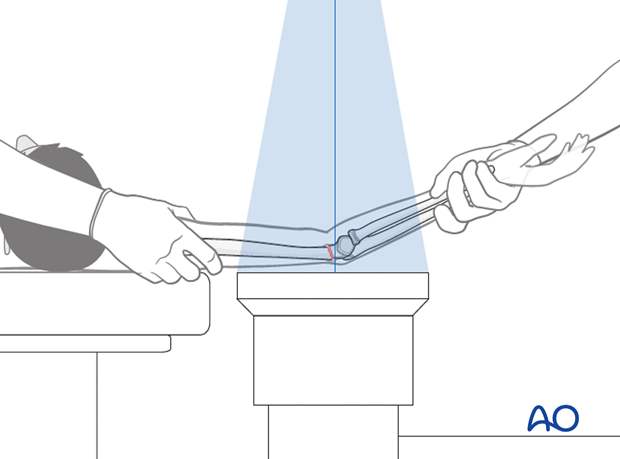
Pearl: AP view is easy to obtain since the arm is extended. However, a lateral view in extension is very difficult. It is, therefore, recommended to rotate the C-arm around the arm to prevent a redisplacement of the fragment.

If alignment is not achieved, the maneuver should be repeated.
Should a second maneuver fail, select lateral external fixation.
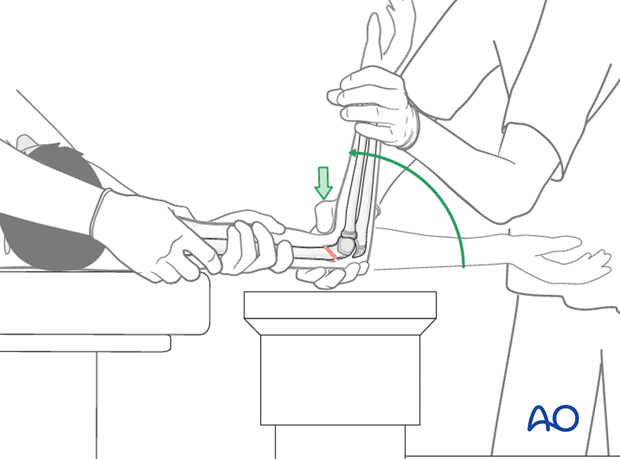
Once the fracture has been reduced, the elbow can be flexed to 90°, while maintaining the thumb pressure over the distal fragment.
The alignment must be checked under image intensification in a lateral view.
If lateral and rotational alignments are perfect, internal fixation by K-wires is recommended.
Note: K-wire fixation in this type of fracture can be difficult as these fractures are often oblique.
Pearl: If the reduction maneuver described above fails, a joystick technique (using a K-wire) from posterior can be used to help to reduce the distal fragment.
If the fracture still cannot be reduced, reduction and fixation can be attempted using a lateral external fixator, prior to proceeding to an open reduction technique.
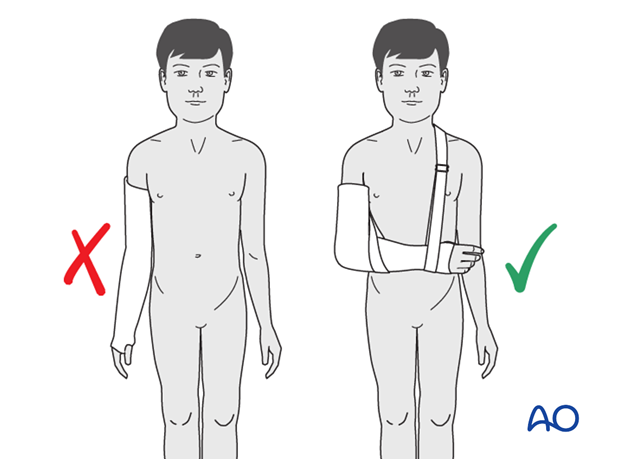
Even if a good reduction is achieved, a nonoperative treatment requires immobilizing the fracture in a fully extended long arm cast that includes the wrist and thumb. This fixation is nowadays not acceptable for a child and should be avoided.
4. Radiological signs of a good reduction
AP view after initial traction
The olecranon fossa should be elliptical.
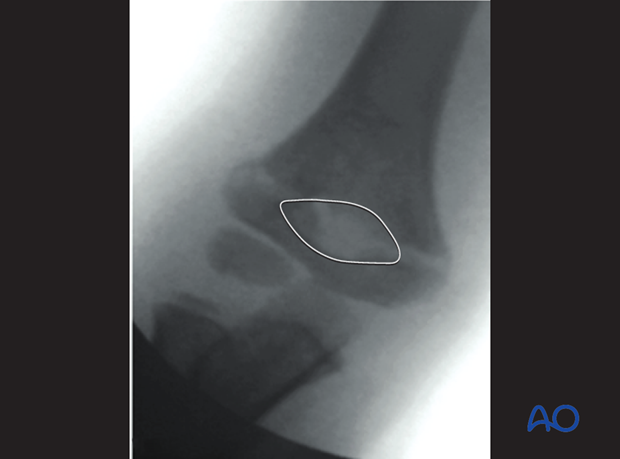
The medial and lateral columns must be perfectly aligned.
There should be no mismatch between the proximal and distal fragment lines.
Lateral view after initial traction
In a true lateral view, the cortex of the olecranon fossa, together with the depression on the anterior part of the distal humerus, gives a virtual hourglass form. If the shape is perfectly aligned, this is a safe sign for a perfect rotational and angular reduction.
The line along the anterior cortex of the humeral shaft (Roger's line) should intersect the capitellum.
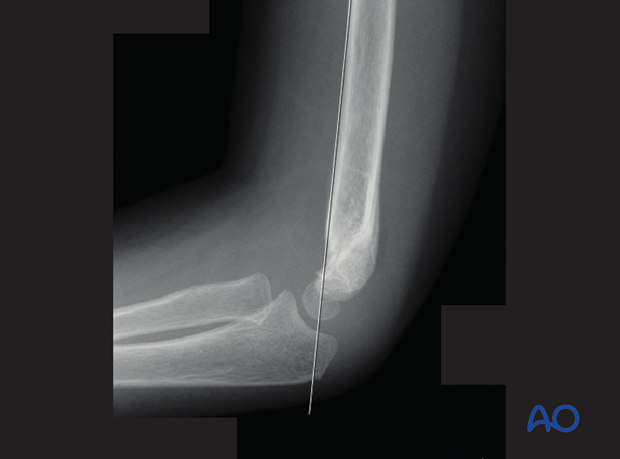
In younger children, the true size of the capitellum on a lateral view is estimated by placing a circle, equal in diameter to that of the humeral shaft, concentrically over the visible ossific center.
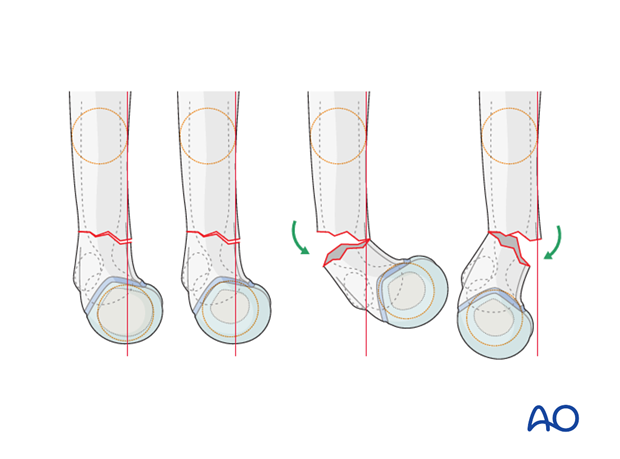
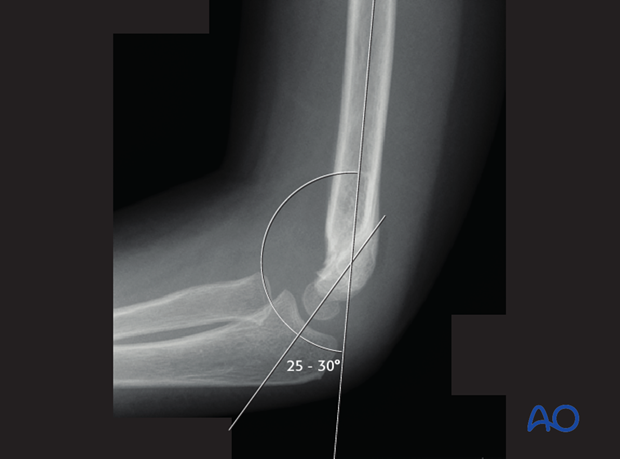
Correct shaft/capitellar angle should be obtained (25-30°).
Flexion or extension malalignment is still present if this angle is more or less than 25-30°.
In a true lateral view, the proximal and distal fracture lines have to be congruent and of the same length.
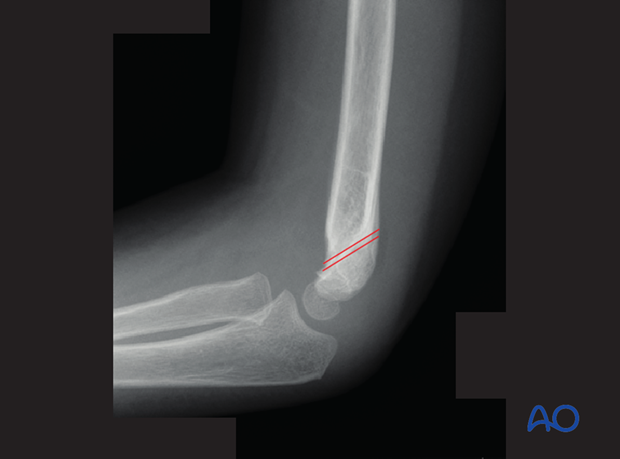
If the proximal and distal fracture lines are not congruent, there is:
- Remaining transverse displacement
- Rotational malalignment
