ESIN
1. Introduction
General considerations
An alternative fixation method using elastic stable intramedullary nails (ESIN) can be used for all patterns of type III and IV fractures.

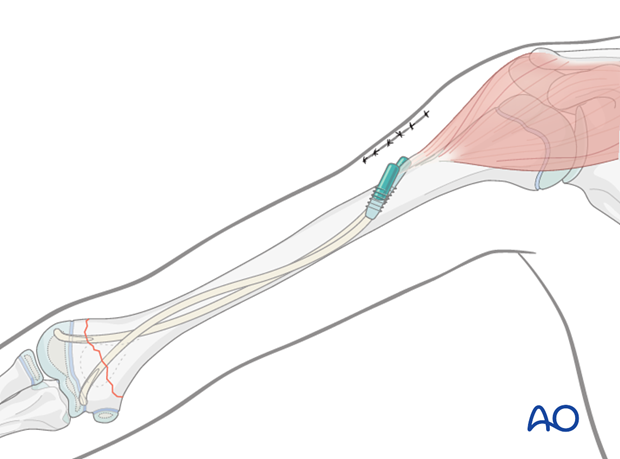
A monolateral, antegrade, intramedullary nail technique is described, in which both nails are inserted from the lateral aspect of the humerus at the level of the deltoid muscle insertion. This was first introduced by Metaizeau in 1990.
As the medial and lateral columns of the distal humerus are very narrow, once both nails have been advanced into the distal fragment, the degree of stabilization permits cast-free functional rehabilitation.
This technique requires a high level of experience with the ESIN. This method can be used in any age group.
2. Preparation
Instruments and implants
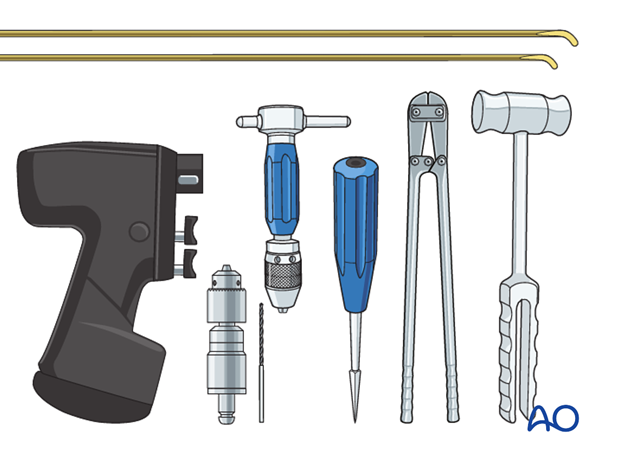
Use the standard ESIN nails and instruments consisting of:
- 2.5 or 3.0 mm nails
- Awl
- Inserter chuck
- Hammer
- Nail cutter
- Drill
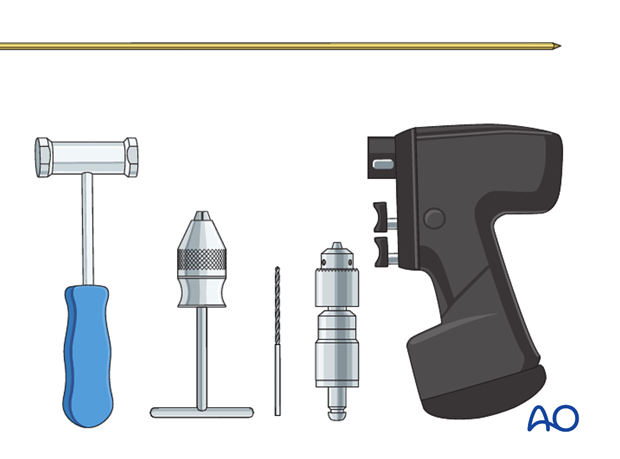
Should these instruments and implants not be available, the following instruments can be used instead:
- 2.5 or 3.0 mm K-wires (30 cm long) that have to be shaped like titanium elastic nails (TEN)
- A standard drill for perforation of the bone
- Standard T-handle and hammer for nail manipulation/handling
Anesthesia and positioning
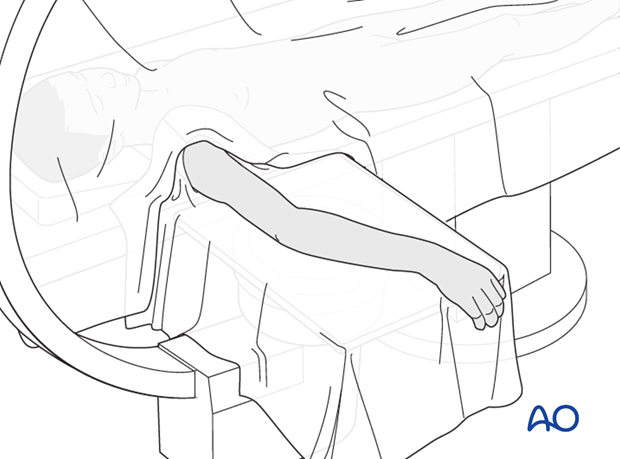
There are two possible positions for the C-arm:
- Parallel to the operating table
- Perpendicular to the operating table
Note: After reduction has been achieved, the arm should be moved as little as possible. Images should be obtained by rotating the C-arm and not moving the arm.

Intubation and muscle relaxation are mandatory, in order to facilitate manipulation and reduction.
The patient is placed supine with the arm draped up to the shoulder.
3. Technique
Preliminary reduction
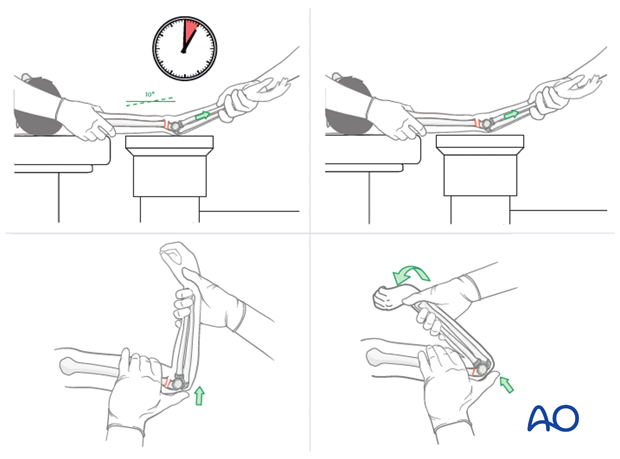
The fracture is reduced using traditional reduction techniques.
Note: It is mandatory to demonstrate, at this point, that an anatomical reduction is achievable; otherwise the nails cannot be advanced into the distal fragment and an alternative fixation technique has to be used.
In the ESIN technique, opening the fracture site should be avoided whenever possible.
See also the additional material on closed reduction of supracondylar fractures.
Planning of the entry points
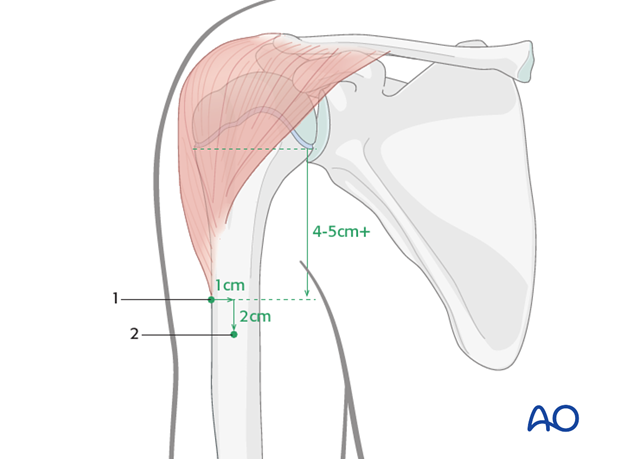
The first entry point is on the lateral aspect of the humerus, just below the insertion of the deltoid muscle. If the deltoid insertion is not palpable, the entry point must be at least 4-5 cm (depending on the size of the child) distal to the proximal growth plate. Mark this entry point on the skin.
The second entry point is 2 cm distal and 1 cm anterior to the first entry point.
Note: If the holes are too close, the humeral shaft can fracture during nail insertion.
Skin incision
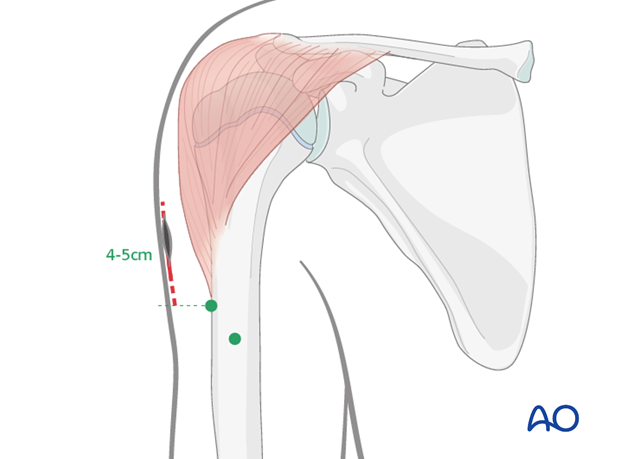
The incision starts at the level of the proximal entry point and runs 4-5 cm proximally.
Approach to the bone
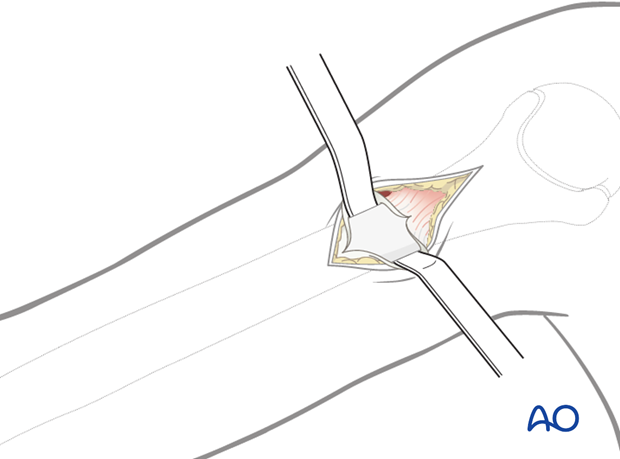
The subcutaneous tissue is divided by blunt dissection until the lateral cortex of the humerus is reached. It is important to visualize the bone.
The periosteum is incised and two Hohmann lever retractors are inserted subperiosteally.
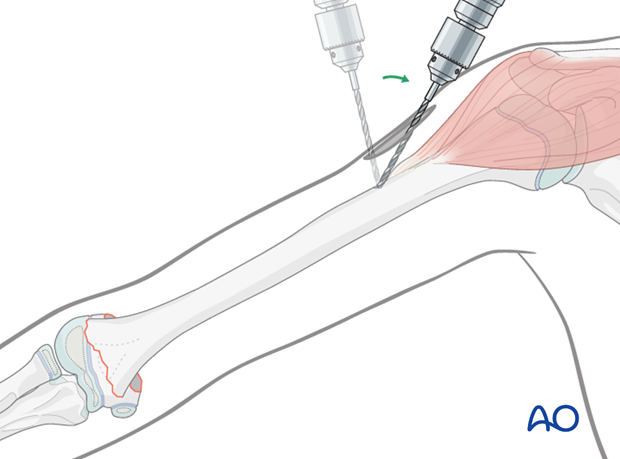
Because of the hard cortex at this level, the bone is normally perforated using a drill, which is started perpendicular to the bone surface in order to prevent its tip from slipping. The drill, while still running, is then angulated up to 45° to the humeral axis.
If the entrance canal is too perpendicular to the bone axis, it is difficult to introduce the nails.
If an awl is used to perforate the lateral cortex of the bone, it should also start perpendicularly and then be tilted.
A hammer is used initially to tap the awl and create a small starter hole in the cortex.
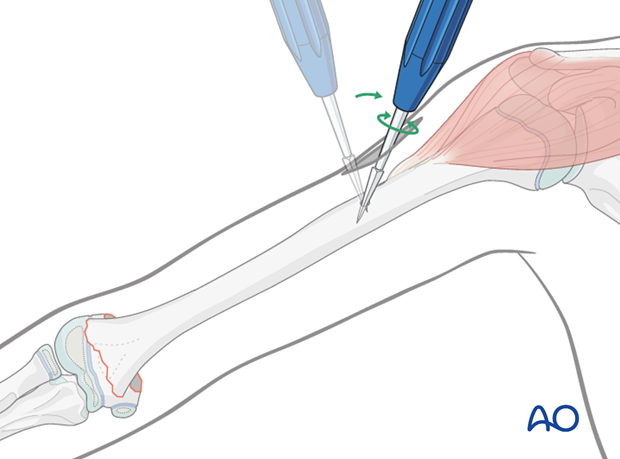
Then, the awl is angulated 45° to the shaft axis and advanced to produce an oblique canal.
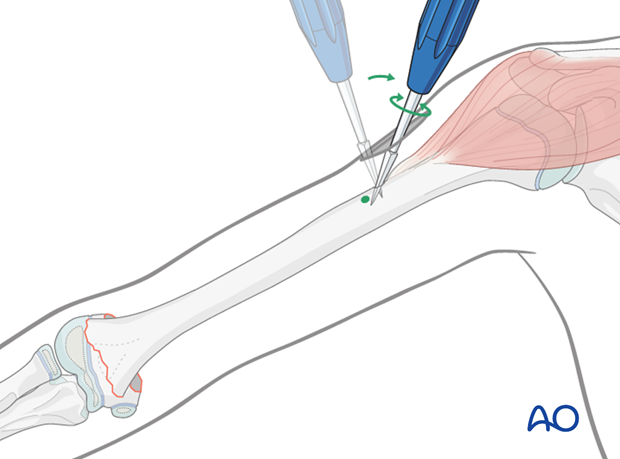
The second hole is made in a similar manner.
Nail insertion
The first nail is precontoured into a C-shape over the length of the humerus.
Note: Because of the hard cancellous bone in the distal humerus, it is sometimes difficult to advance the nails into the distal fragment. It is, therefore, recommended to sharpen the nail tips, or to use sharp 30 cm K-wires as nails.
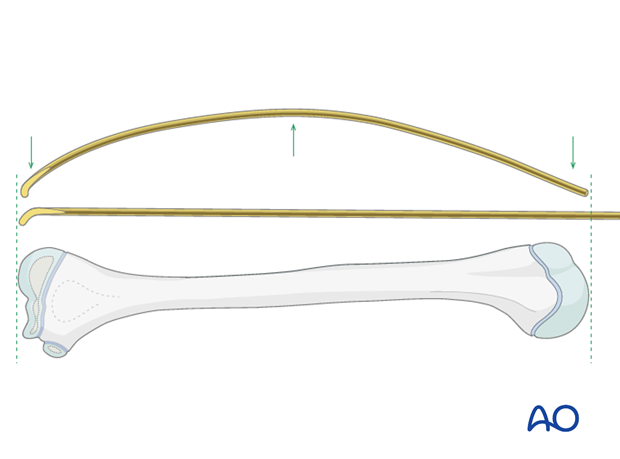
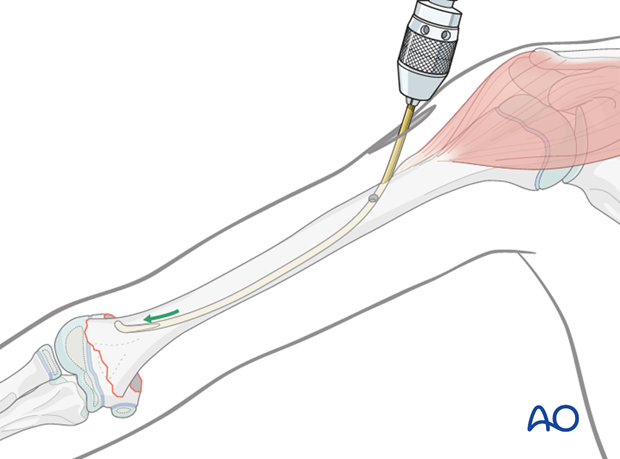
The nail is fixed into the inserter, passed into the proximal hole and advanced manually as far as the fracture using an oscillating maneuver.
The nail is brought into a "waiting position" - with its tip orientated towards the lateral cortex.
The lower third of the second nail is precontoured into a C-shape and fixed into the inserter.
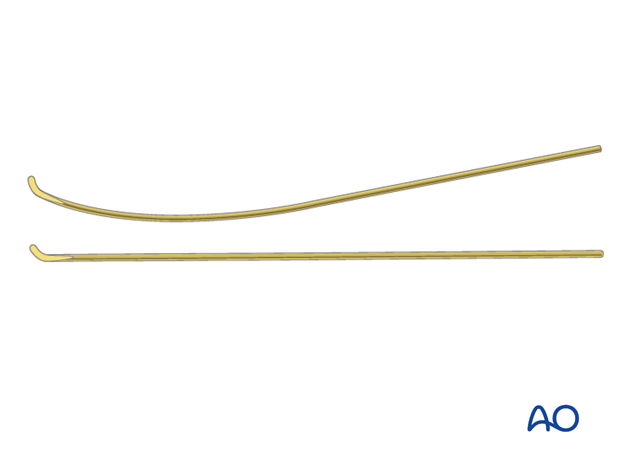
The second nail is inserted into the distal/anterior hole and then advanced as far as the distal third of the humerus, where the medullary canal flares.
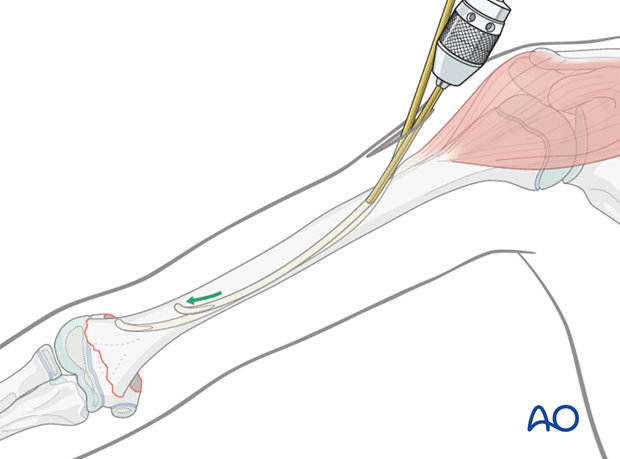
The nail is then rotated 180° clockwise or counter-clockwise, depending on the position of the first nail. The direction of rotation is chosen in order to avoid a spiral entanglement of the nails. The positions should be verified using image intensification.
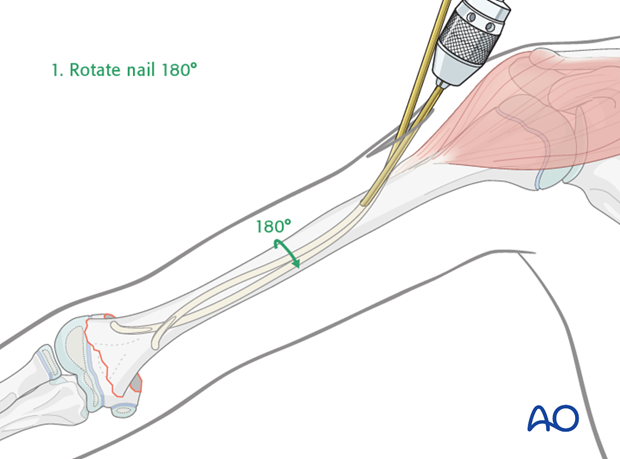
Once the tip of the second nail is orientated towards the medial cortex, the nail is bent downwards outside the bone. This creates an S-shaped contour of the nail.
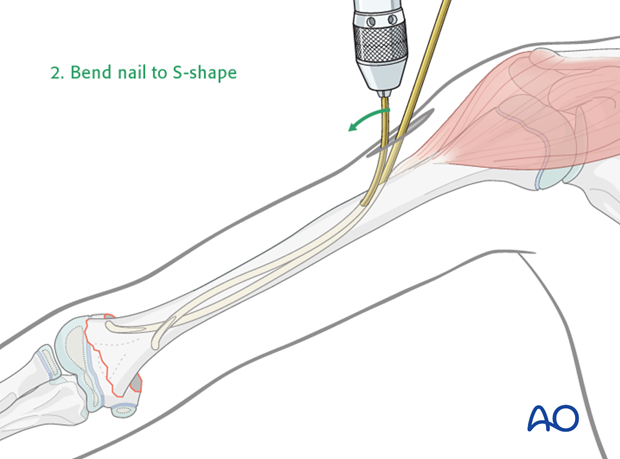
This nail tip is then advanced to the level of the other nail tip and left in a "waiting position".
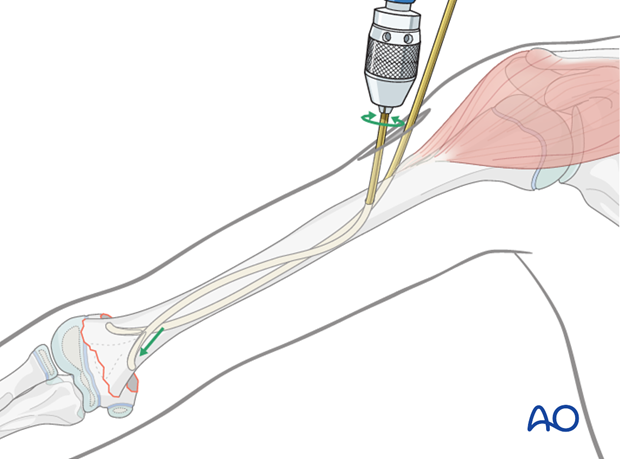
According to the position and shape of the distal fragment, the nail tips should at this point be orientated to point forwards in a lateral view.
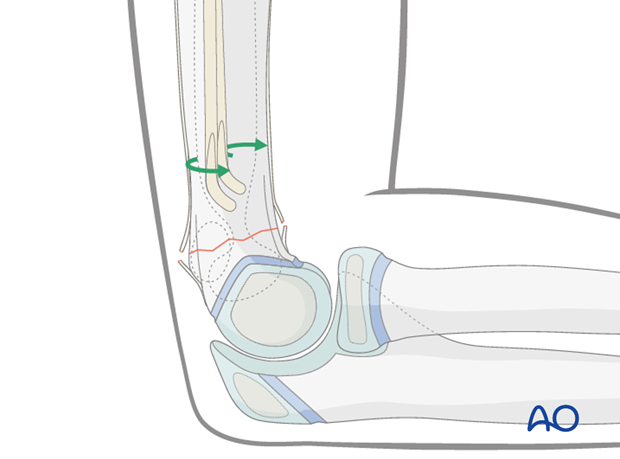
Definitive reduction and fixation
Definitive reduction is now performed using the standard technique, and the forearm is then held in a hyperflexed position to stabilize the fracture (Blount principle).
Note: During the flexion maneuver, the forearm should be rotated so that it is fully pronated when the arm reaches full flexion. The pronation helps to tilt the distal fragment out of any varus malposition and also assists in stabilizing the fracture.
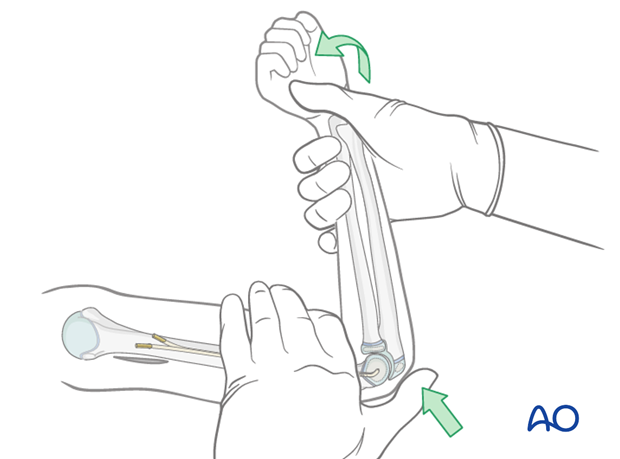
The C-arm and the arm are rotated so that a true lateral view is obtained.
If necessary, the fragments are further manipulated to align the fracture in the lateral view.

Because of the wider diameter of the lateral column, the lateral nail is generally advanced first.
One nail at a time is advanced into the distal fragment either by an oscillating maneuver, or by gentle hammer blows, under image intensifier control.
Care should be taken not to perforate the joint.
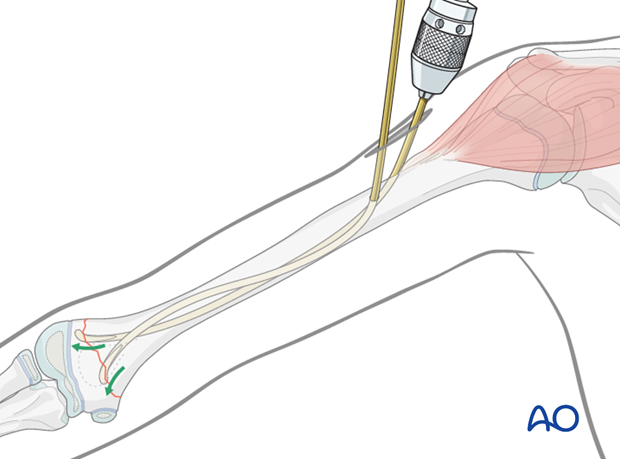
If each nail tip is safely positioned in the distal fragment, refinement of the reduction can be performed by selective rotation of the nails.

The nails are then advanced deeply into the distal fragment. A single perforation of the growth plate does not cause growth disturbance.
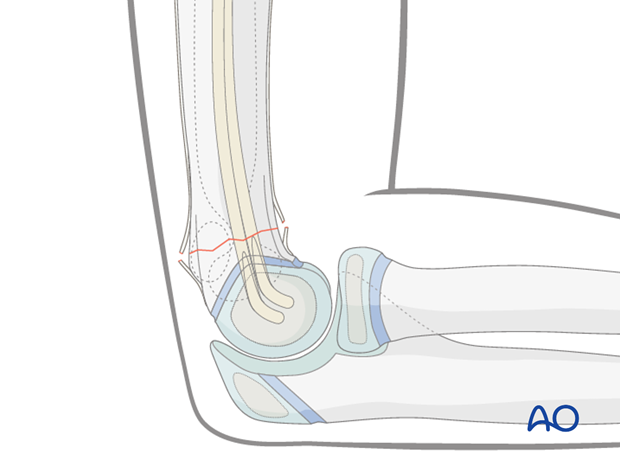
Cutting the nails and wound closure
Both nails are cut to leave at least 1 cm outside the bone to facilitate removal.
If a standard nail cutter is used, the nails are cut slightly shorter as the ends are sharper than when using a dedicated nail cutter.
The skin and subcutaneous tissue are closed in a standard manner.

4. Aftercare
If the child remains for some hours/days in bed, the elbow should be elevated on pillows to reduce swelling and pain.
See also the additional material on postoperative infection and compartment syndrome.
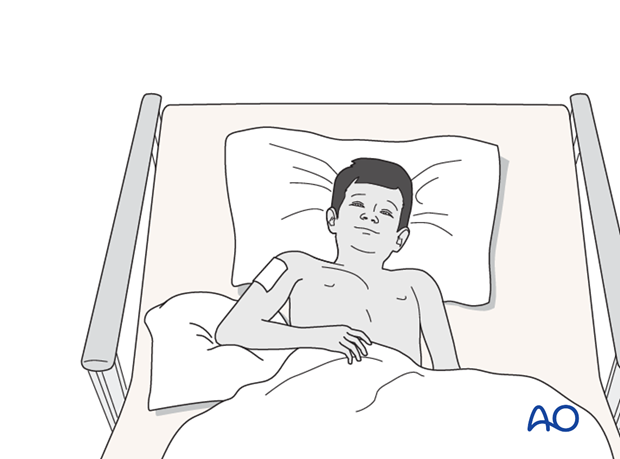
The postoperative protocol is as follows:
- Document the results clinically and radiologically shortly after operation
- No external splintage is required
- The arm should be placed in a sling for a few days until the patient is pain-free
- Early movement of the elbow should then be encouraged
- Discharge from hospital according to local practice (1-3 days)
- The first clinical and radiological follow-up is undertaken, depending on the age of the child, usually 4-5 weeks postoperatively
- In most cases, the child is able to move the elbow almost fully at this first check-up
- Physiotherapy is normally not indicated
Nail removal
Nail removal is delayed until 4-6 months postoperatively when the fracture has healed and modeled completely.
Nail removal can be performed as a day case, under general anesthesia.
For cosmetic reasons, it is best to resect the whole scar and make a definitive cosmetic wound closure.
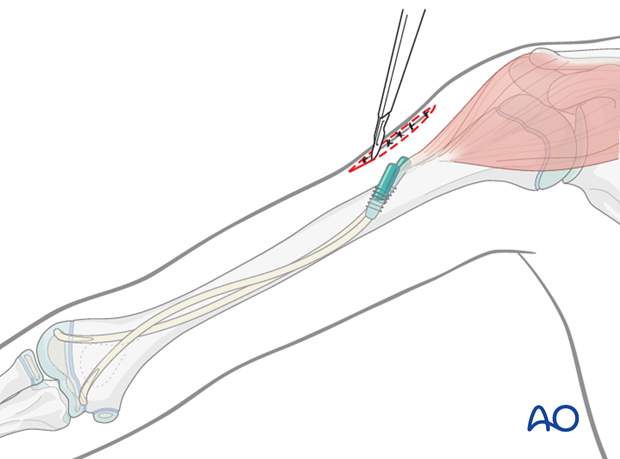
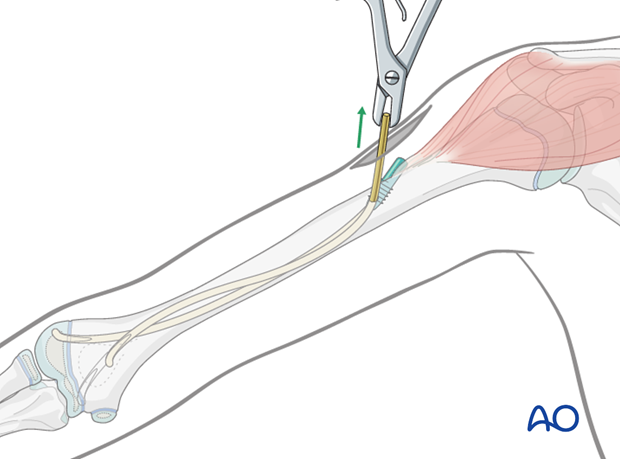
As the nails project from the bone, their ends can be easily palpated. In most cases a small bursa has formed. Once this bursa is opened, the end of each nail can be seen.
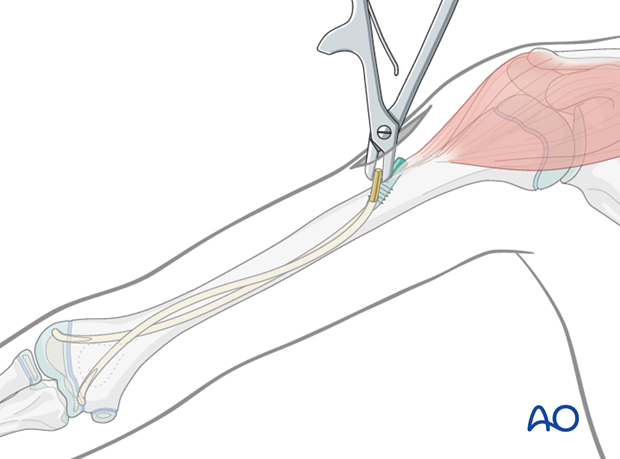
The nails can be removed with the extraction pliers, or similar clamp.
