

Compression plating
1. General considerations
Introduction
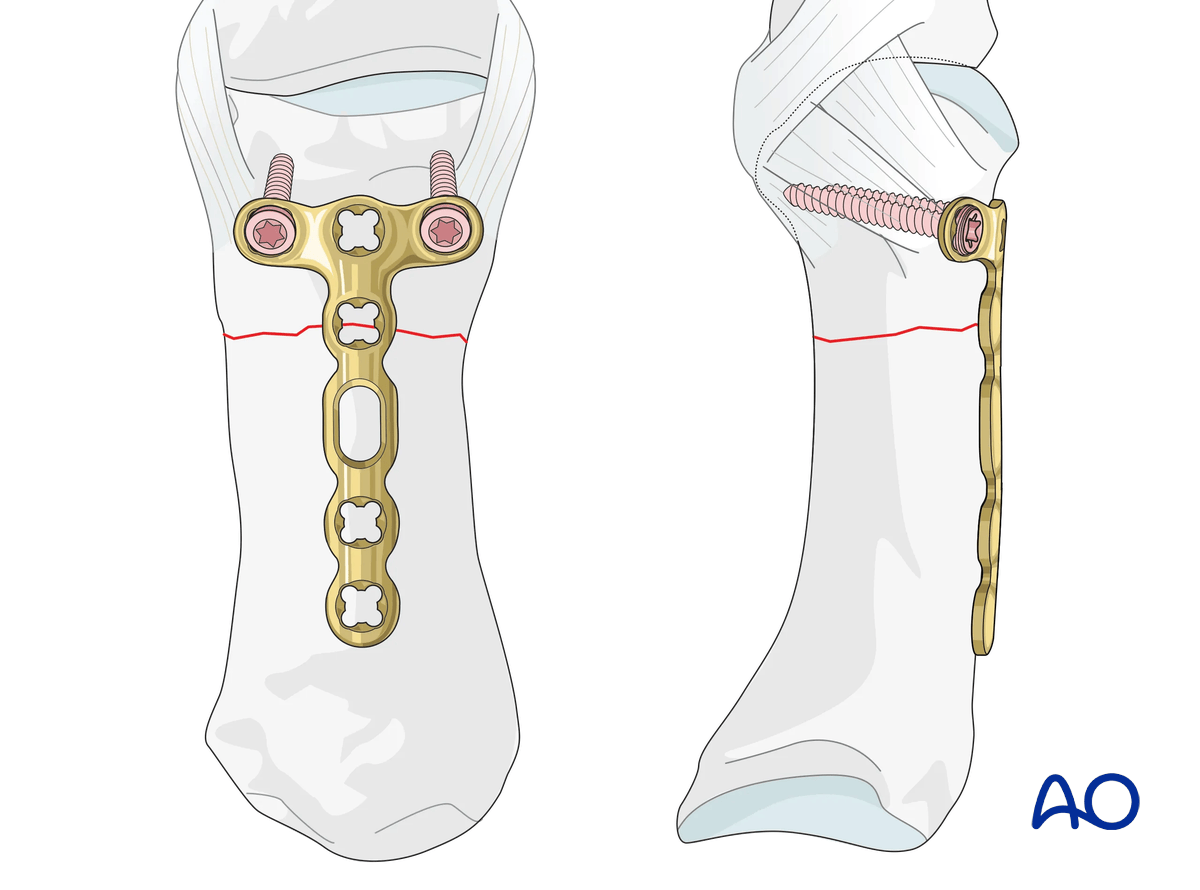
Transverse and slightly oblique diaphyseal and extraarticular fractures may be fixed with compression plating, eg, using a T-plate.
The top end of the plate, eg, cross bar of a T-plate, may be applied dorsally on the distal or proximal fragment depending on the level of the fracture. The top end is usually placed on the shorter fracture fragment.
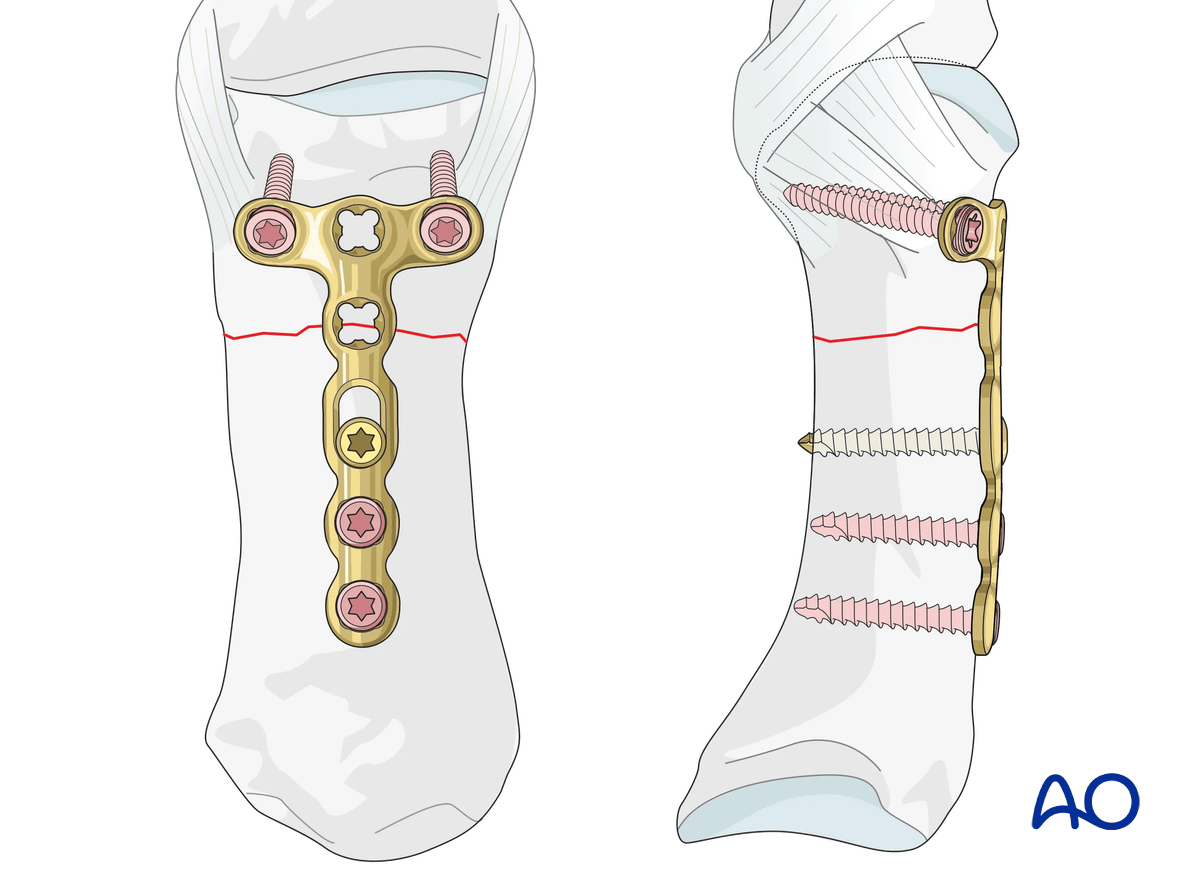
Plate selection
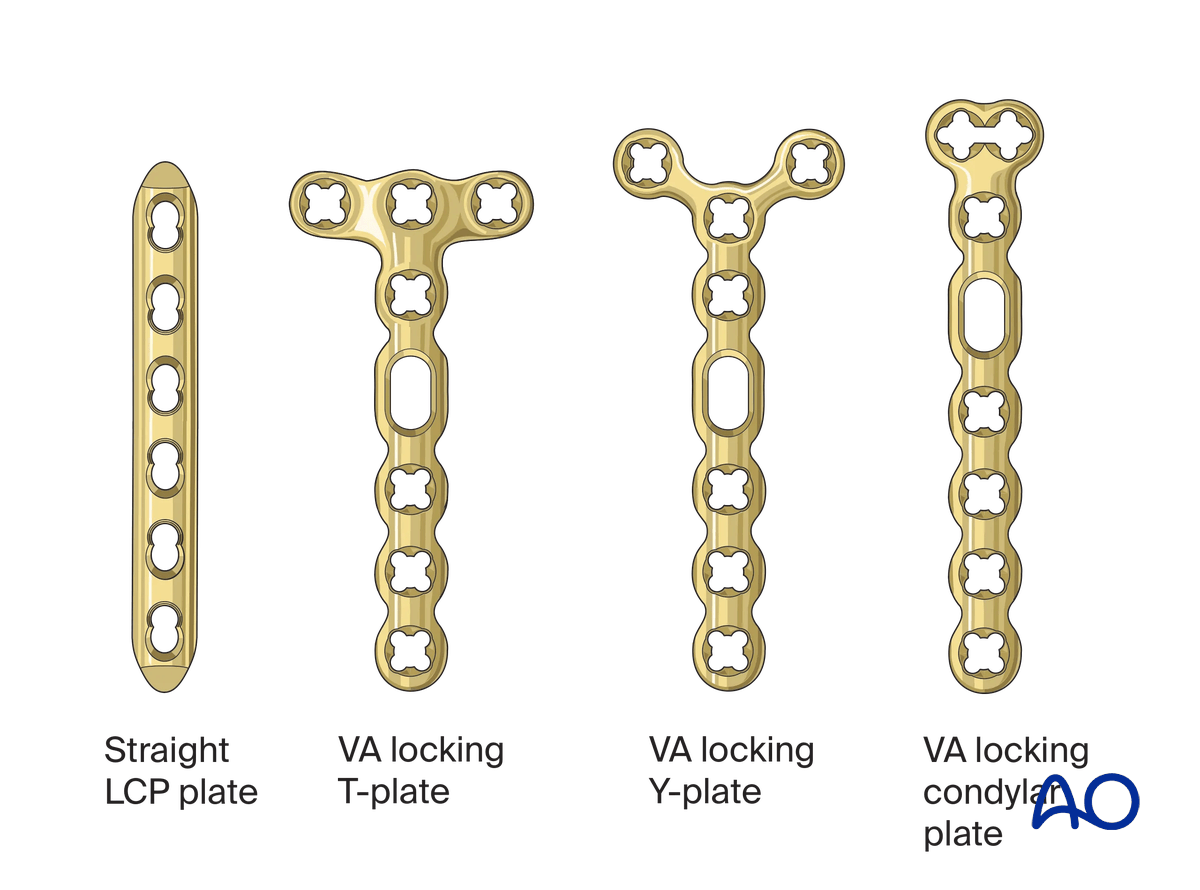
Select a plate (1.5–2.0 mm) according to the size of the bone, fracture geometry, and surgeon’s preference.
The plate length should allow for at least two screws in each main fragment.
The plate is available as a conventional compression plate or with variable-angle (VA) locking-head screws.
The plate may be contoured to fit the anatomy of the bone.
2. Patient preparation
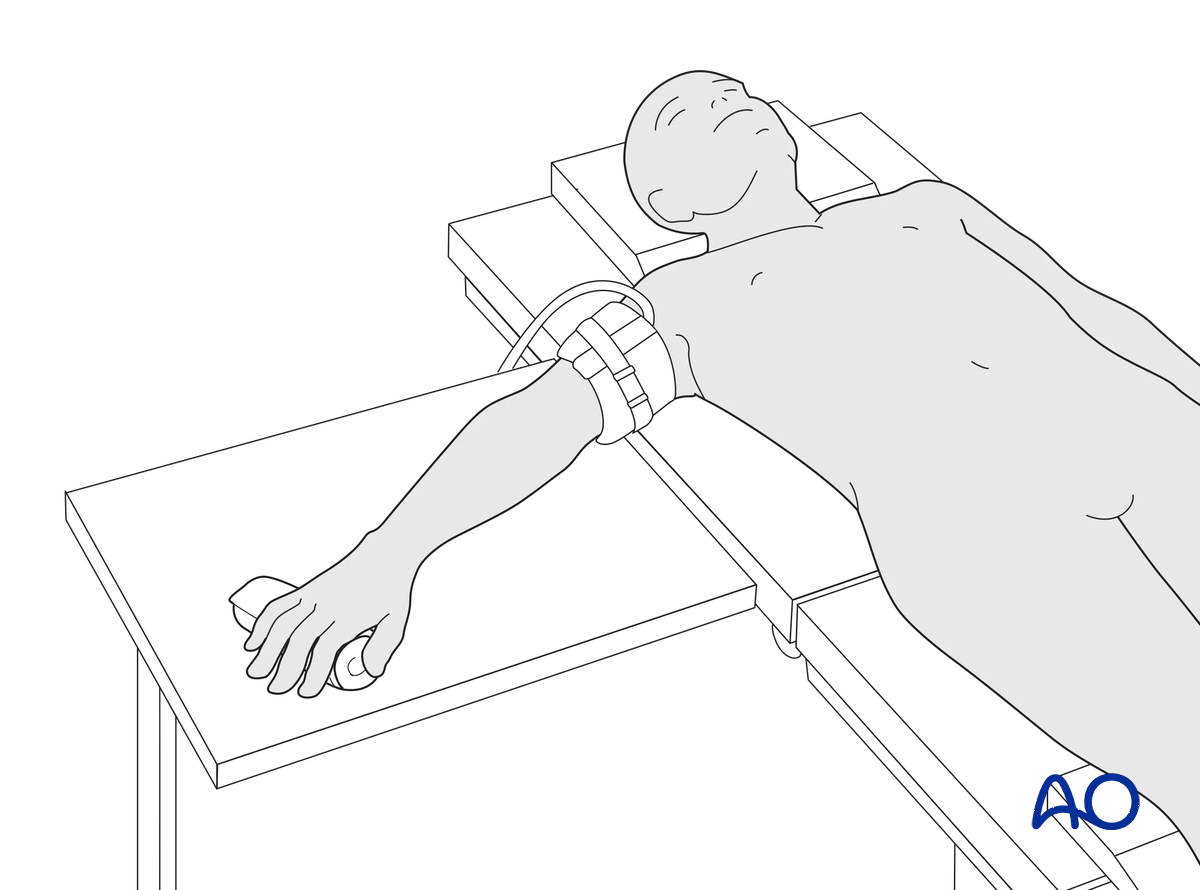
This procedure is usually performed with the patient in a supine position with the arm on a radiolucent side table.
3. Approach
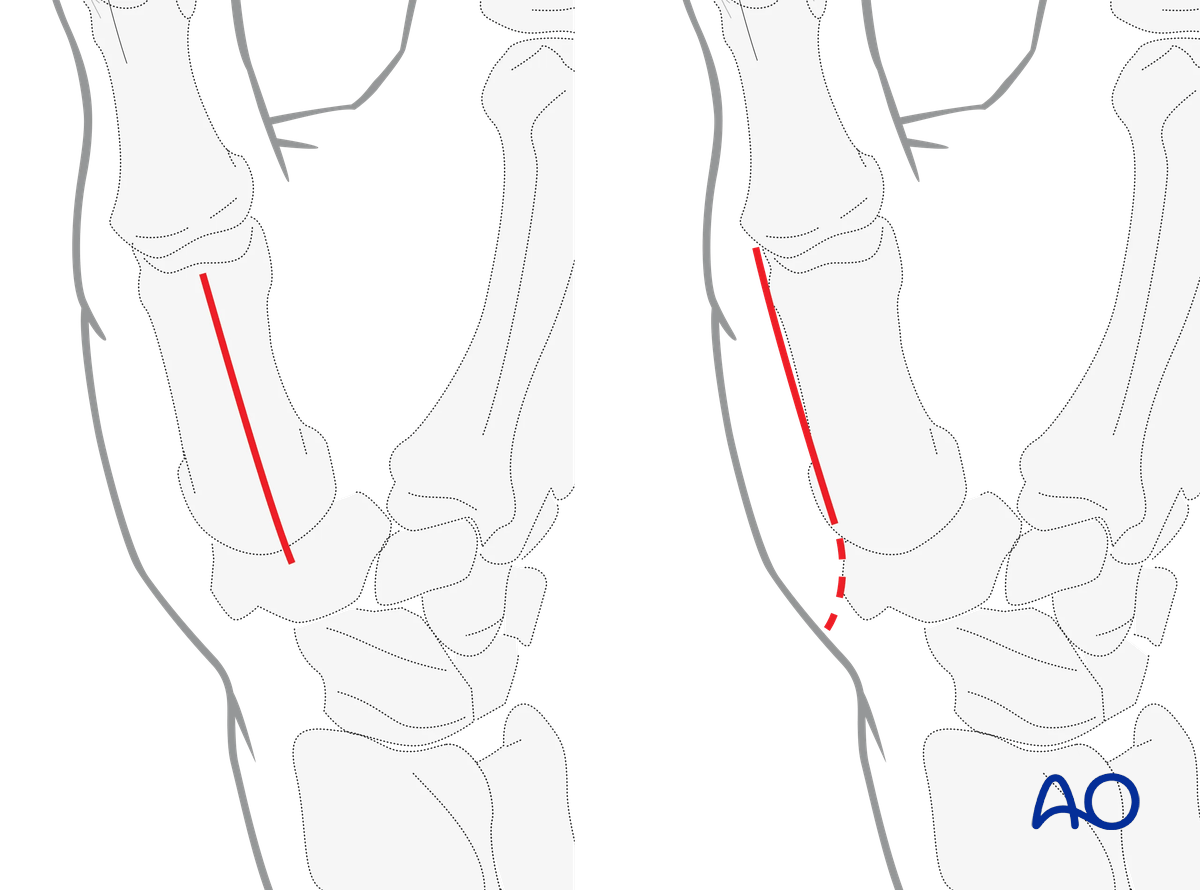
For this procedure, the following approach may be used:
4. Reduction
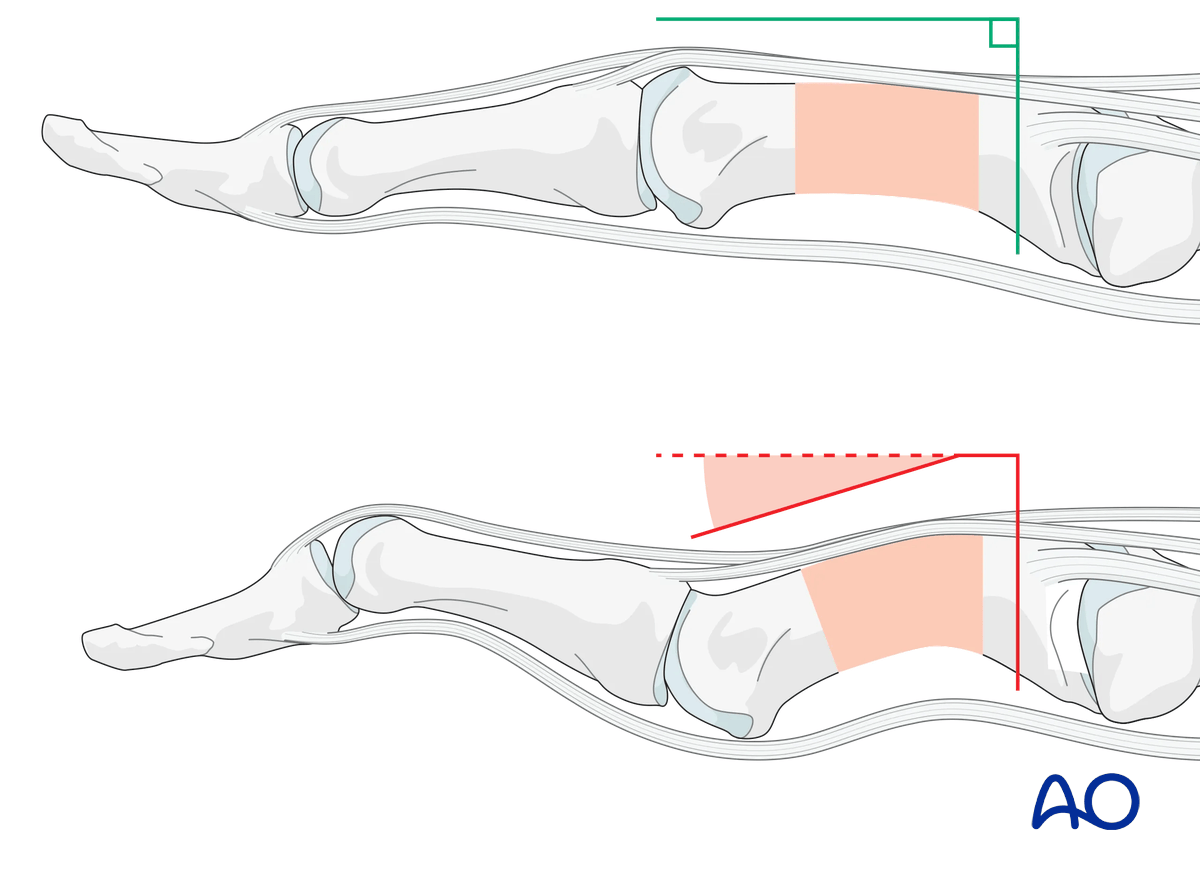
Any axial displacement should be reduced to gain full length of the metacarpal.
Closed reduction
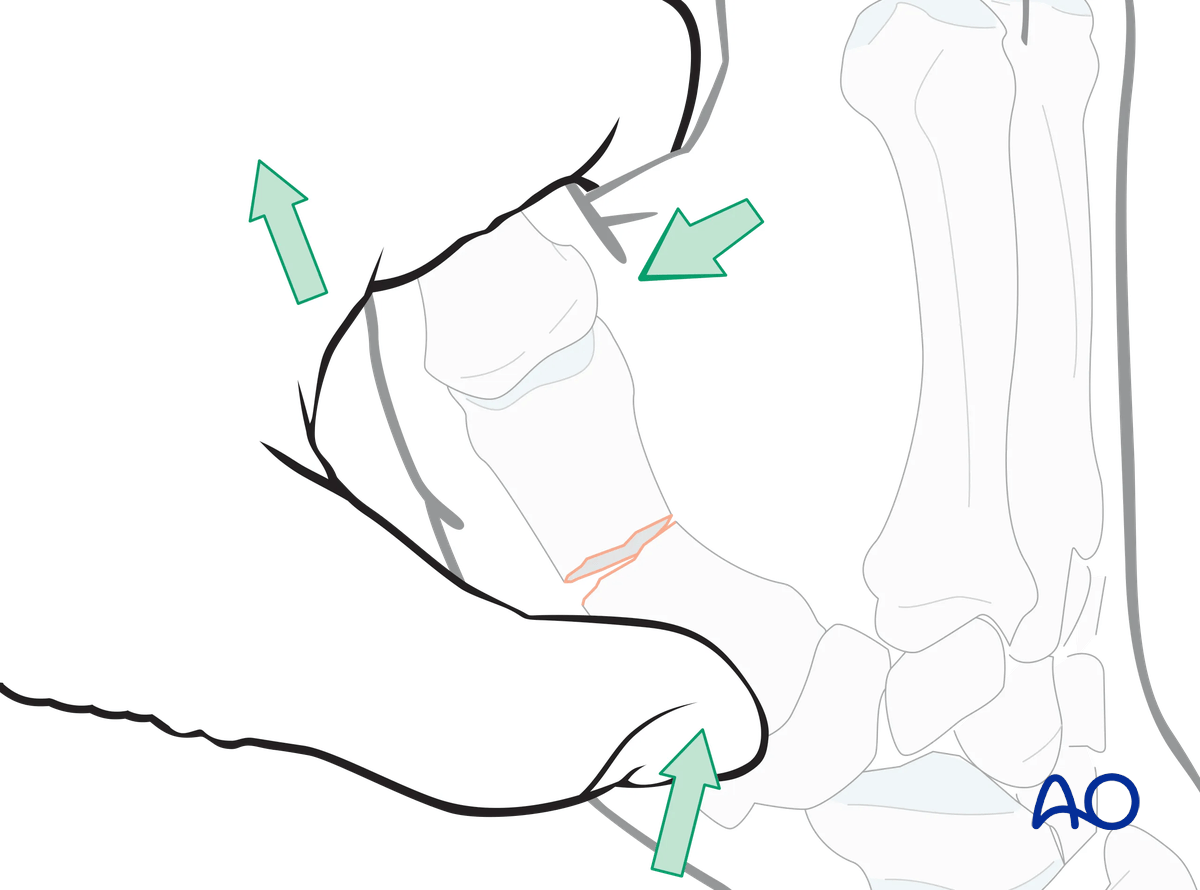
Closed reduction is achieved by applying longitudinal traction and flexing the MCP joint, then pushing the distal fragment dorsally and the proximal fragment palmarly to correct the apex dorsal angulation.
Direct reduction
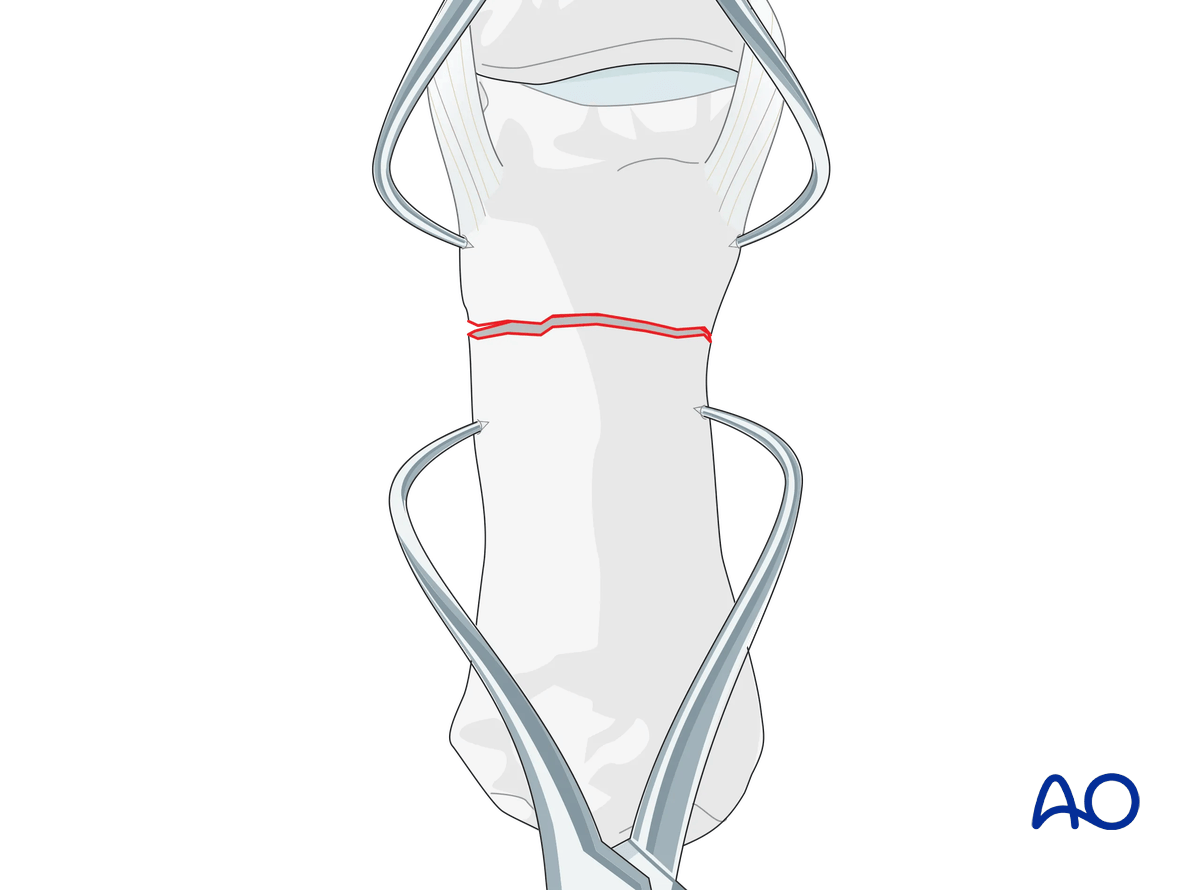
Direct reduction is necessary when the fracture cannot be reduced by traction and flexion or is unstable.
Use two pointed reduction forceps for direct reduction.
Preliminary fixation
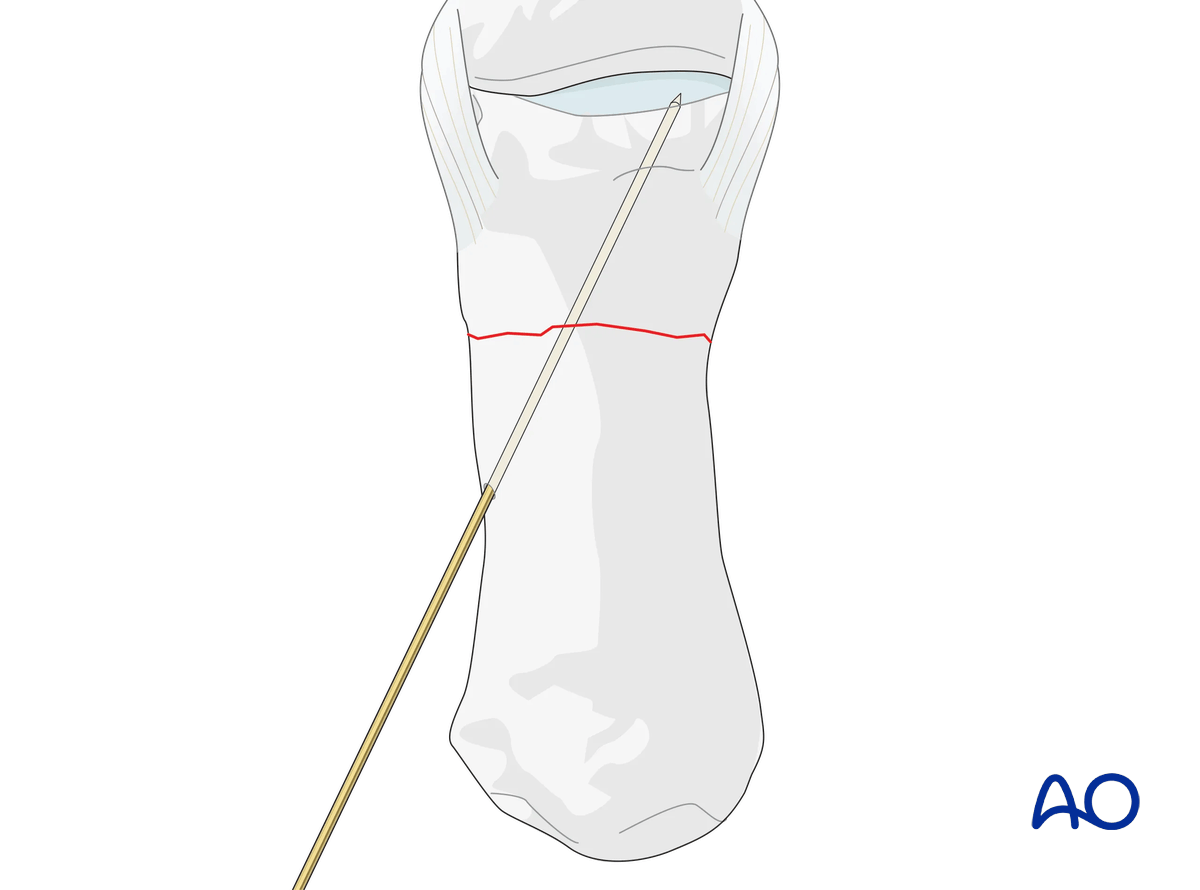
In very unstable situations, insert a K-wire across the fracture plane for preliminary stabilization.
Be aware that the cortical bone in the metacarpal is dense and thick, so the K-wire tip gets very hot. Irrigation during K-wire insertion is essential to avoid thermal necrosis of the bone around the wire track.
5. Checking alignment
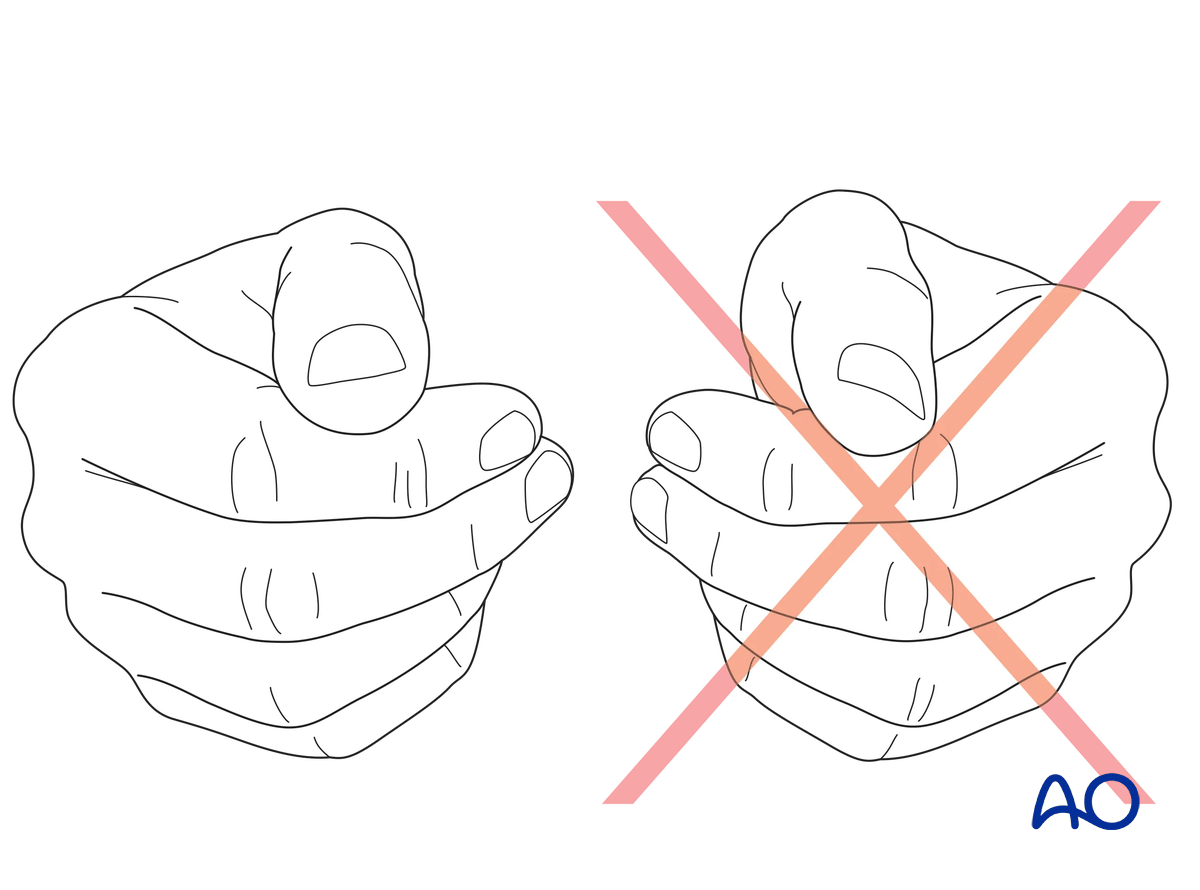
Confirm correct rotational reduction by inspecting the thumb nail plate in relation to the index finger. Compare it to the contralateral side if necessary.
6. Plate preparation
Plate trimming
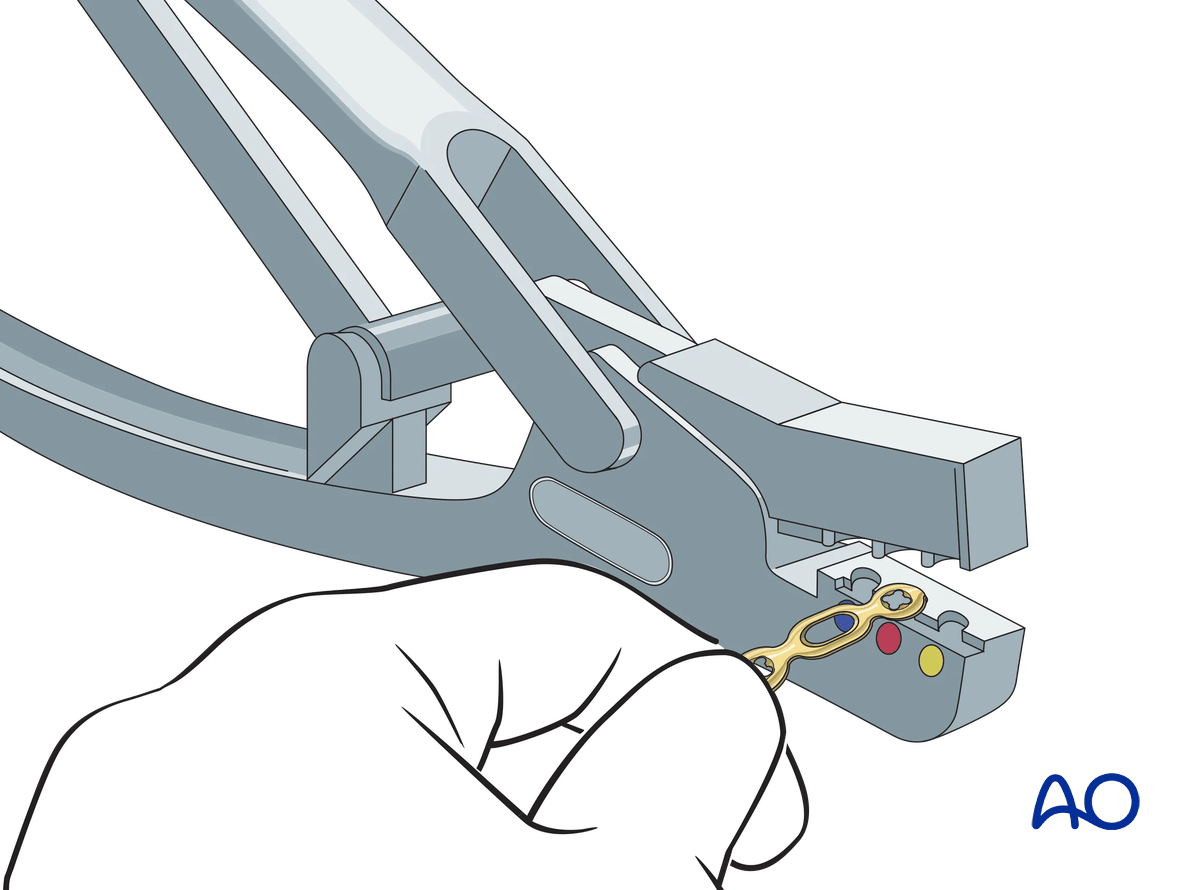
Adapt the plate length to the length of the bone. Avoid sharp edges, which may be injurious to the tendons. There should be at least 3 plate holes proximal to the fracture available for fixation in the diaphysis. At least two screws need to be inserted into the diaphysis.
Contouring
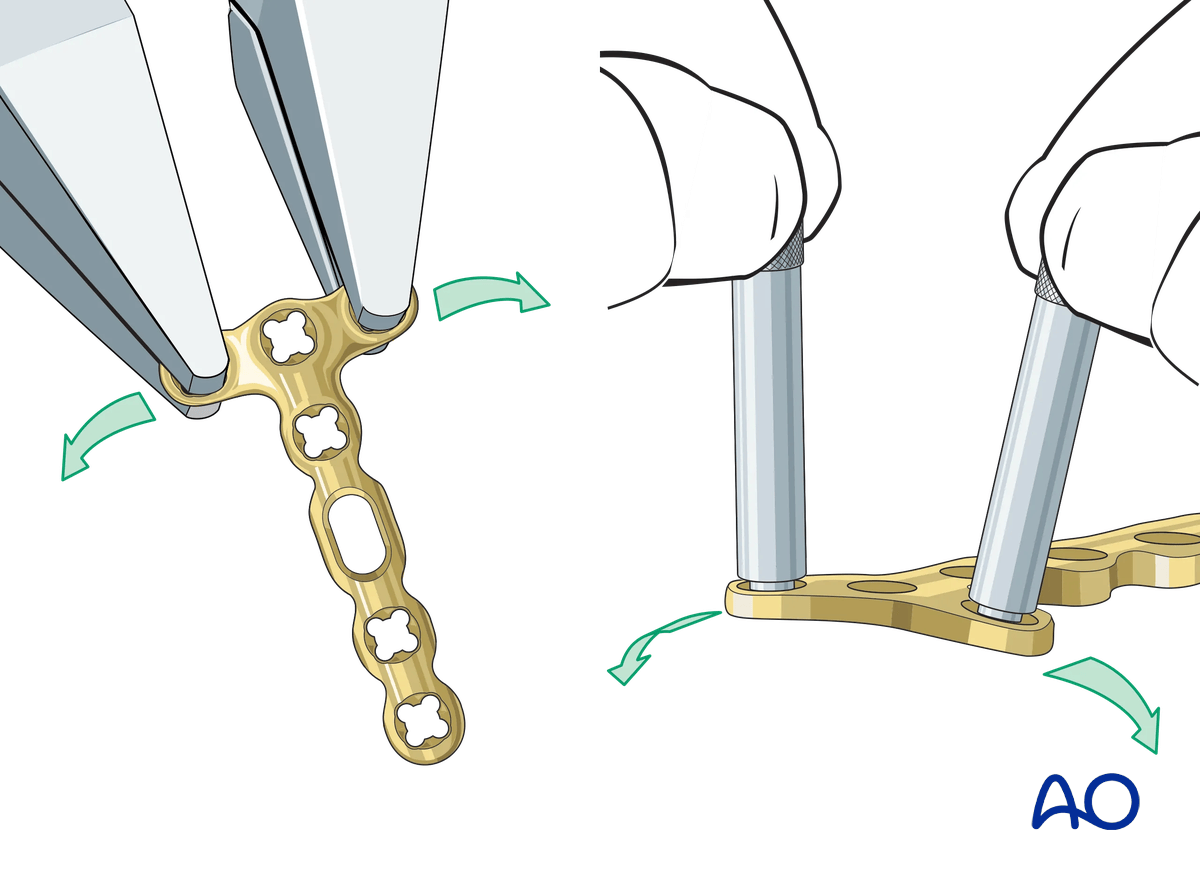
A T- or Y-plate has to be adapted accurately to the contour of the metaphyseal region. Use bending pliers to contour the plate. Be careful to bend in between the holes by positioning the pliers over the plate holes. Alternatively, insert the threaded bolt into the plate holes to bend the plate.
The bend should never go through a hole as this may damage the locking mechanism.
The plate does usually not need to be contoured along the shaft. The dorsal surface of the bone is normally flat from the distal to the proximal metaphysis.
An overbending of the plate may cause fracture deformity or angular malunion.
7. Plate fixation
Basic techniques
Compression plating of a simple transverse or slightly oblique extraarticular fracture follows standard techniques:
Plate application
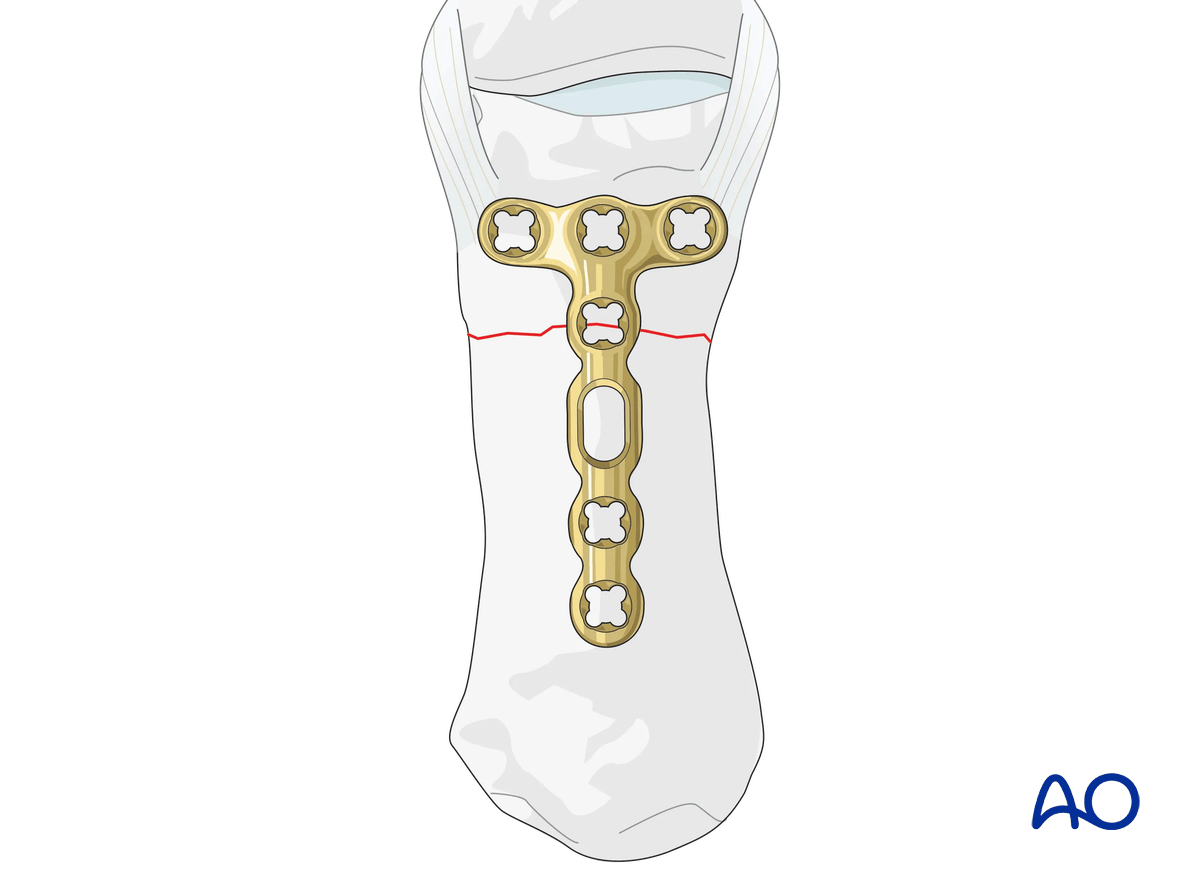
Place the plate dorsally on the bone without interfering with the joint. The distal end of the plate should be proximal to the articular surface of the head and, if possible, avoiding the joint capsule.
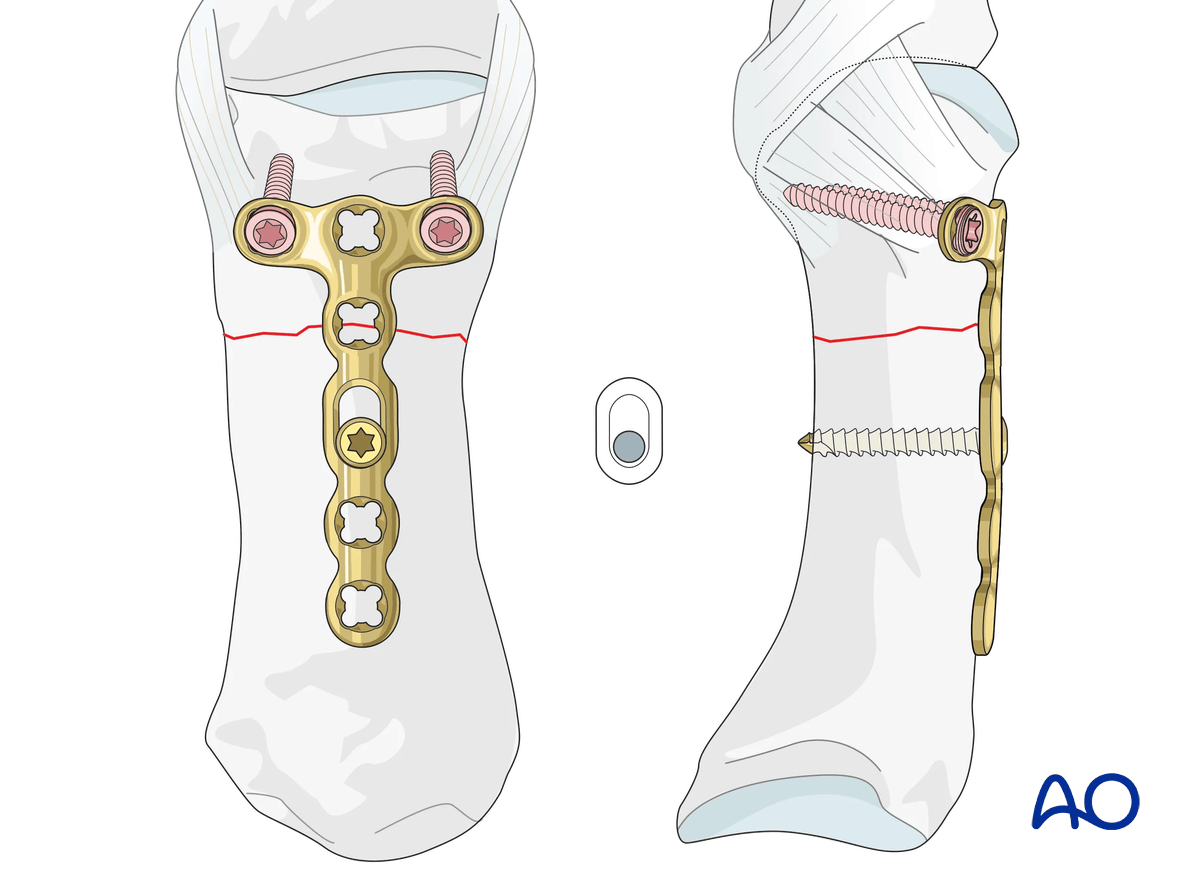
Ensure that the plate is centered on the diaphysis in the coronal plane and the oblong hole is not too close to the fracture.
Screw insertion and compression
Insert two screws into the transverse part of the plate.
Insert a cortical screw in compression mode through the oblong hole in the other fragment.
Checking alignment
Confirm correct rotational reduction by inspection of the thumb nail plate in relation to the index finger again.
Finalizing plate application
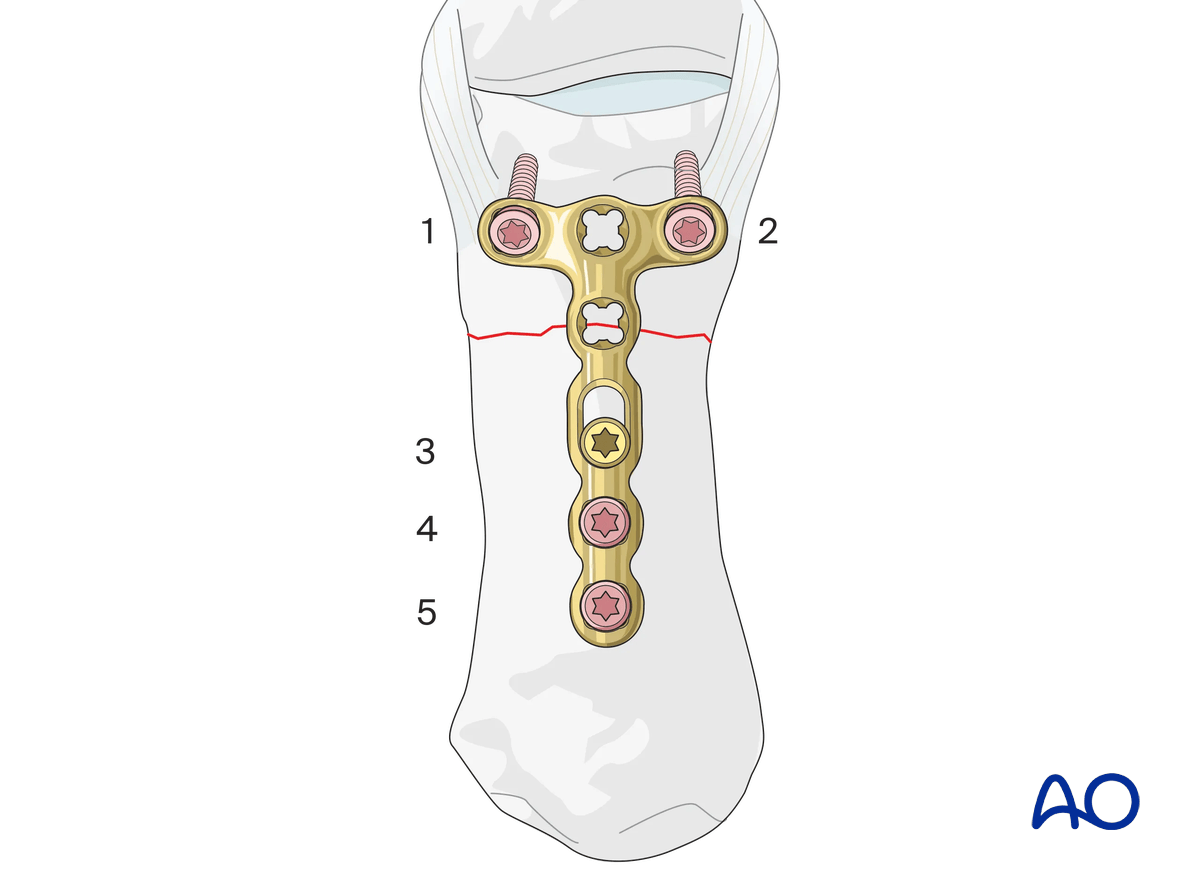
Prepare and insert at least another diaphyseal screw.
Cover the plate with periosteum, if possible, to avoid adhesion between the tendon and the implant leading to limited finger movement.
8. Final assessment
Confirm correct rotational alignment by clinical examination.
Image intensification may be used to confirm anatomical reduction and correct placement of implants in two views.
9. Aftercare
Healing phases
The aftercare can be divided into four phases of healing:
- Inflammatory phase (week 1–3)
- Early repair phase (week 4–6)
- Late repair and early tissue remodeling phase (week 7–12)
- Remodeling and reintegration phase (week 13 onwards)
Full details on each healing phase can be found in the chapter Postoperative treatment of thumb injuries.
Postoperative care
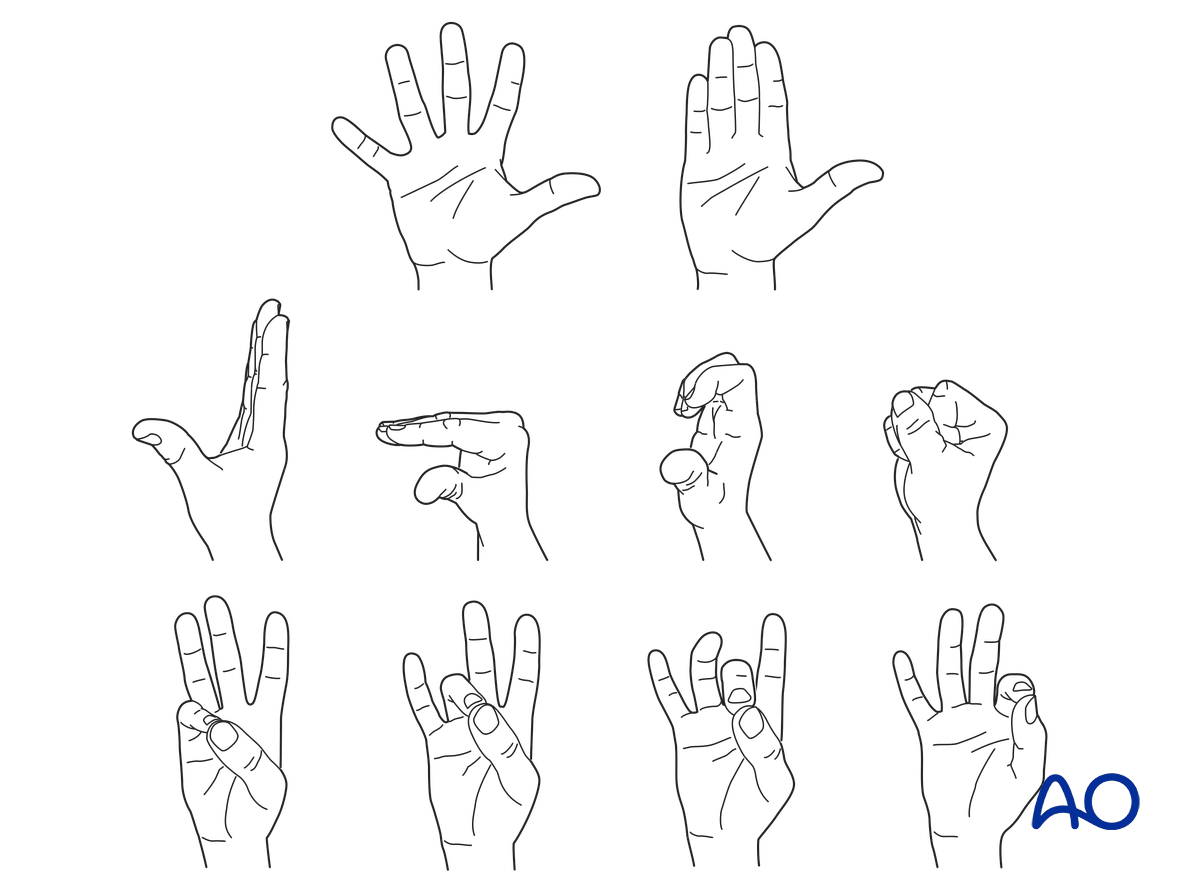
Early range of motion, without load bearing, in the hand is important for optimal outcome.
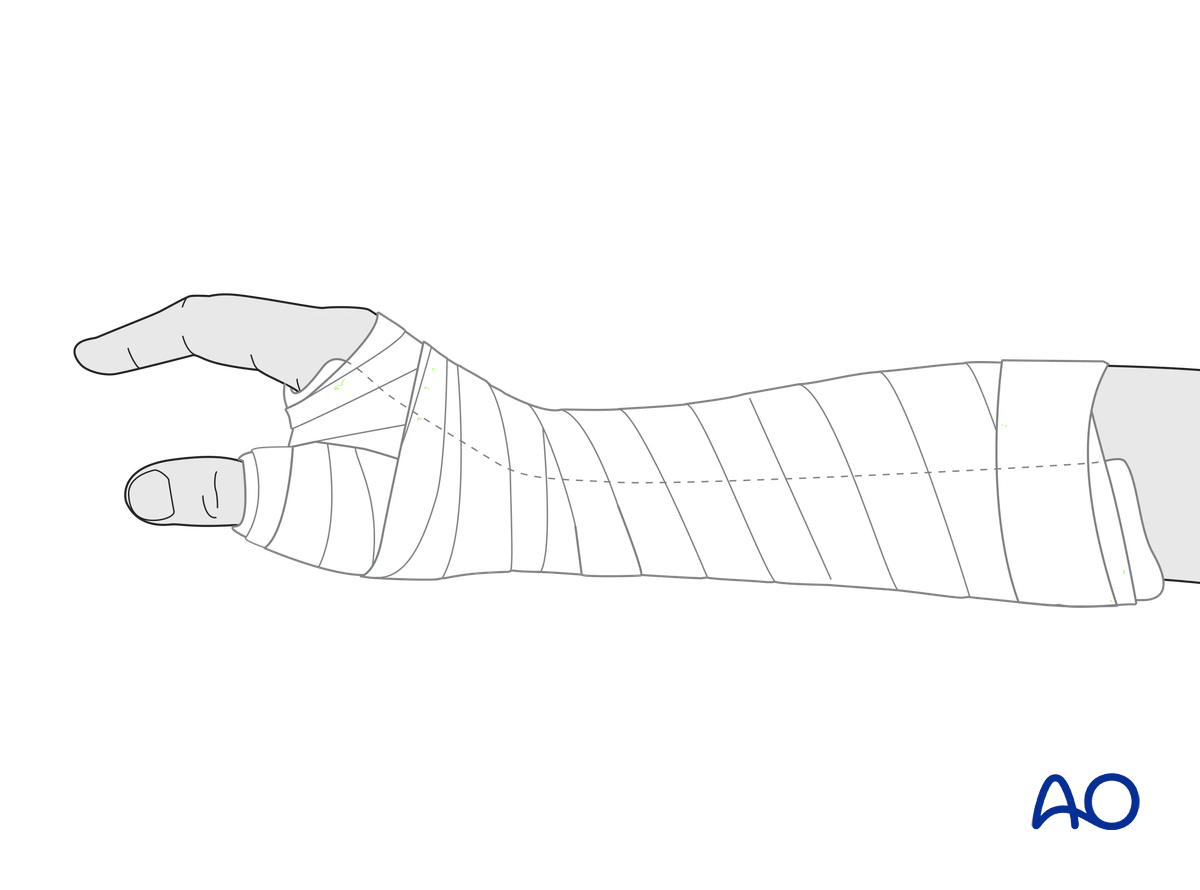
Immediately postoperatively, a temporary plaster splint is applied. This also helps with swelling and pain control.
The plaster splint can be switched to a custom-made thermoplastic splint after a week. The splint should be worn until fracture healing has been confirmed.
Hand therapy should be initiated as soon as possible.
The arm should be actively elevated to help reduce any swelling.
Mobilization
To prevent joint stiffness, the patient should be instructed to begin active motion (flexion and extension) of all nonimmobilized joints of the hand immediately after surgery.
In compliant patients with stable fixation, the splint can be removed under the supervision of a hand therapist, and early active motion exercises started after a few days.
Weight bearing should be avoided until fracture healing is confirmed.
Follow-up
The surgical wound is checked as necessary depending on soft tissue status. The wound is monitored for evidence of infection.
To allow for early joint mobilization and to prevent wound dehiscence, leave the sutures for 2 weeks.
Confirm fracture healing clinically and radiologically after about 5–6 weeks (depending on the fracture configuration).
Implant removal
The implants may need to be removed in cases of soft-tissue irritation.
In case of joint stiffness or tendon adhesion restricting finger movement, arthrolysis or tenolysis may become necessary. In these circumstances, the implants can be removed at the same time.


