Bridging external fixation (temporary)
1. Principles of joint-bridging external fixation
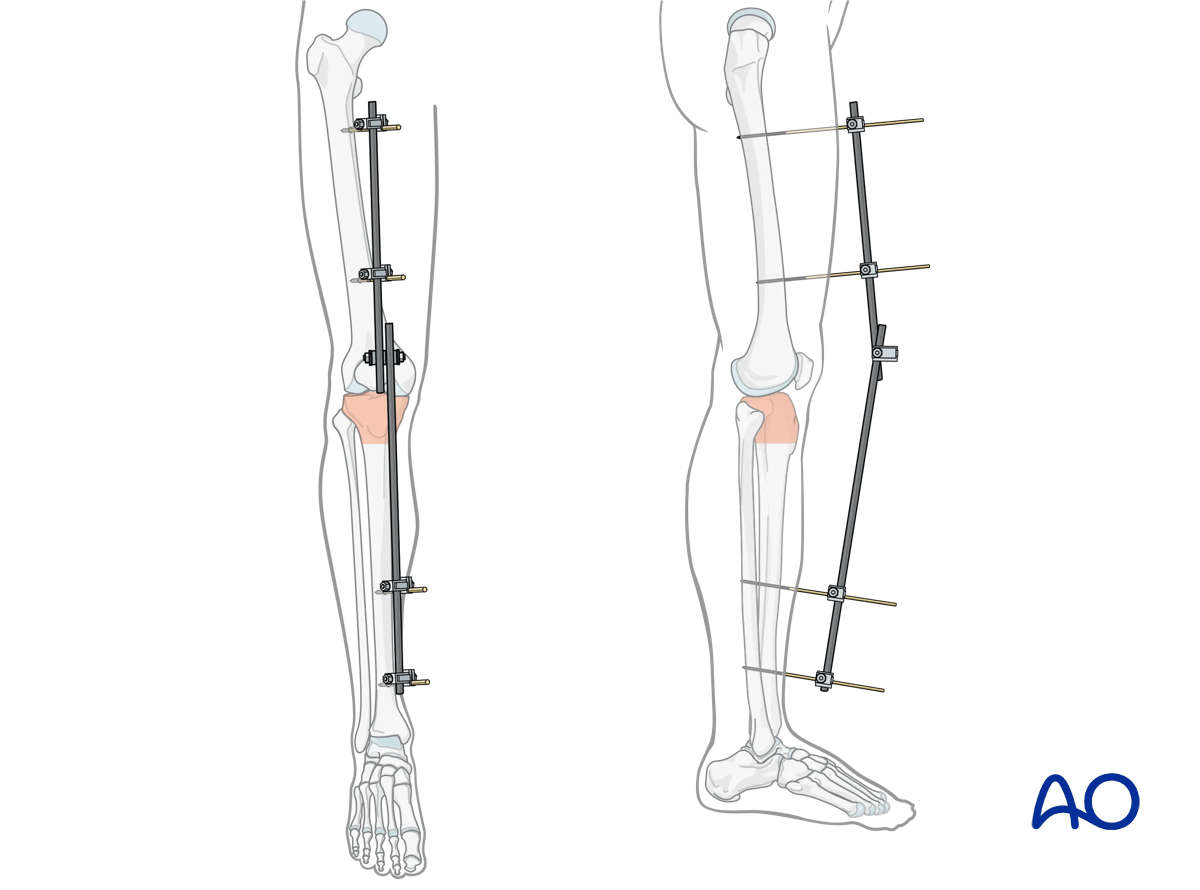
A joint-bridging external fixator is fixed to the femur and the tibia while the fracture zone is left virtually untouched (it is bridged). Provisional reduction is achieved with distraction.
When external fixation is used to bridge the knee joint it is always only for temporary fixation. Prolonged immobilization will lead to difficulties with knee mobility.
It is rapidly applied without need for intraoperative x-rays and can be adjusted later.
Details of external fixation are described in the Modular external fixation basic technique.
Specific considerations for the knee are given below.
2. Note on illustrations
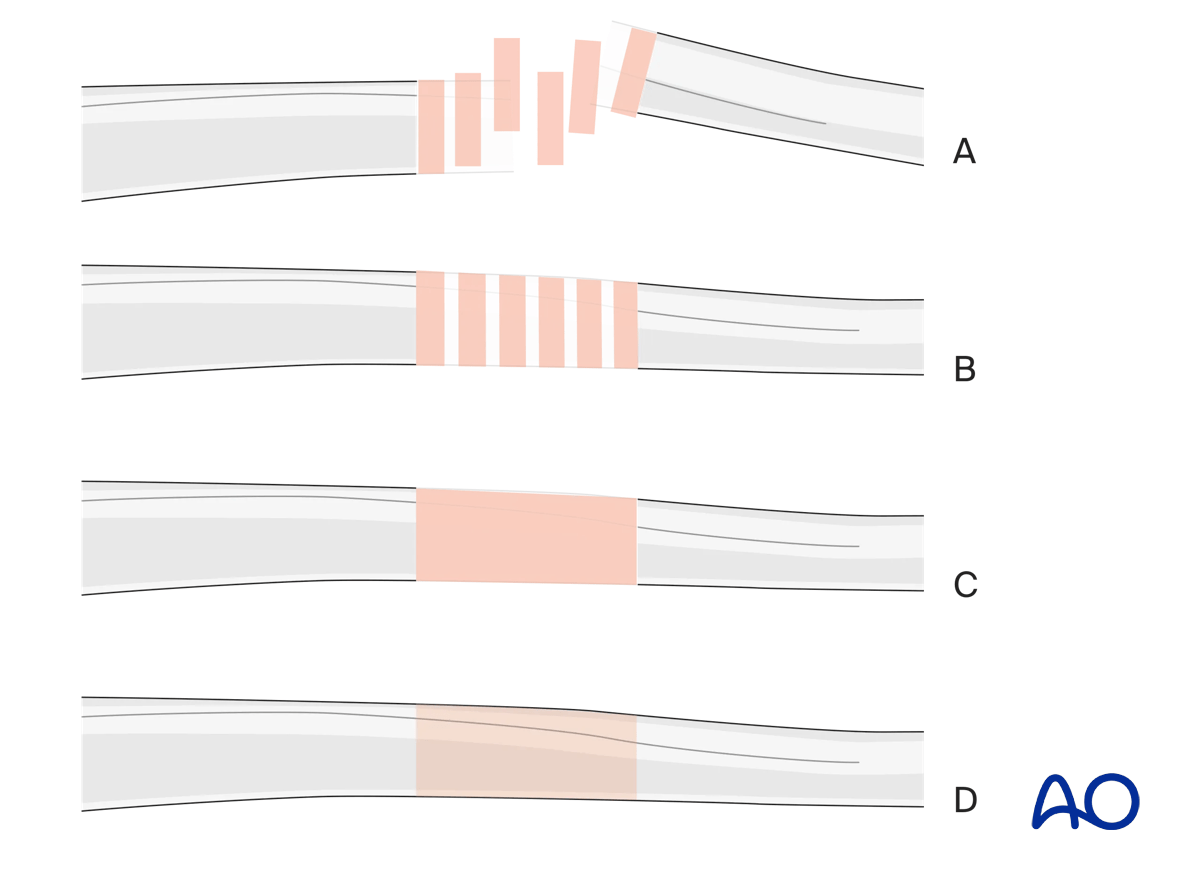
Throughout this treatment option illustrations of generic fracture patterns are shown, as four different types:
A) Unreduced fracture
B) Reduced fracture
C) Fracture reduced and fixed provisionally
D) Fracture fixed definitively
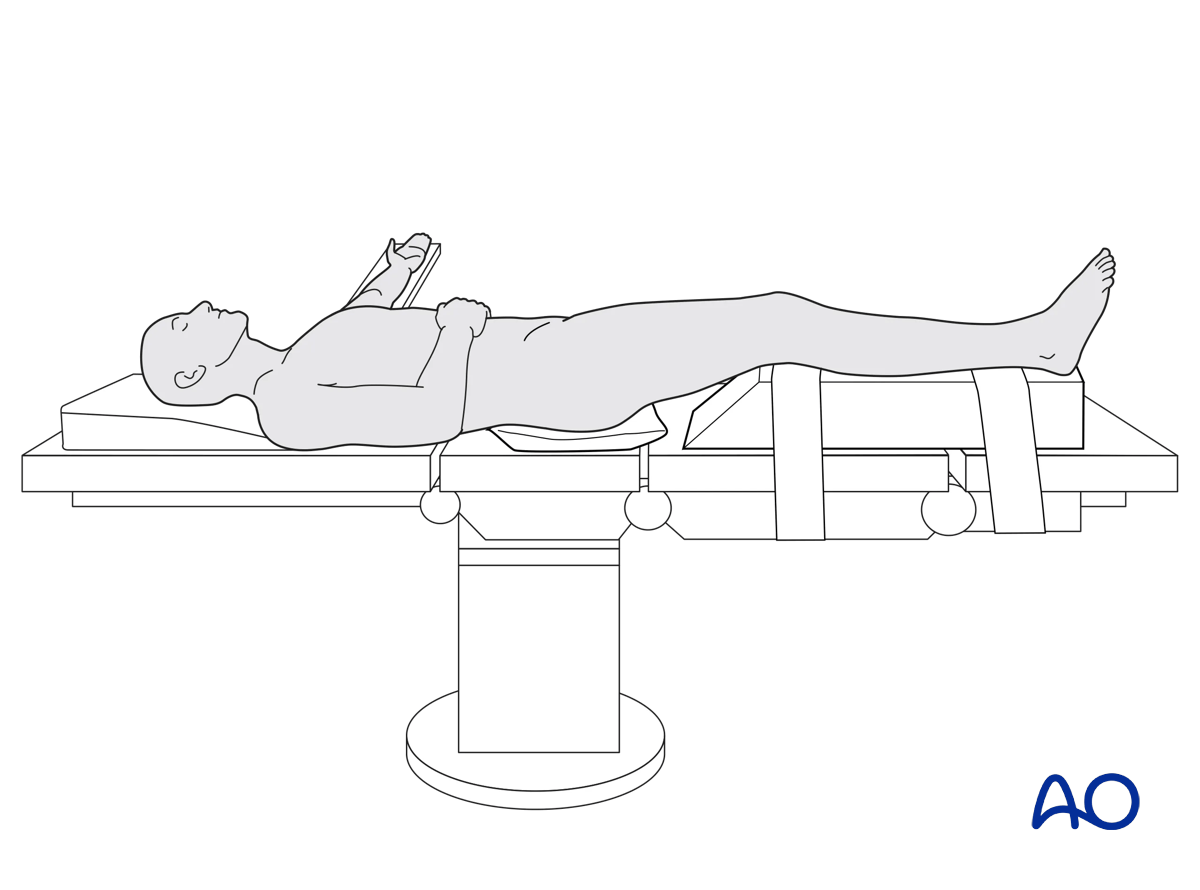
3. Patient preparation
This procedure is normally performed with the patient in a supine position.
4. Pin insertion (femur and tibial shaft)
Pin placement
For safe pin placement make use of the safe zones and be familiar with the anatomy of the lower leg and the femur.
Any pin placed near a joint should be a minimum of 14 mm away from the joint line to prevent joint sepsis.
Soft-tissue dissection
In the femur, blunt dissection of the soft tissues and the use of small Langenbeck retractors will minimize muscular damage.
Using a straight clamp, prepare a channel for the insertion of the pin.

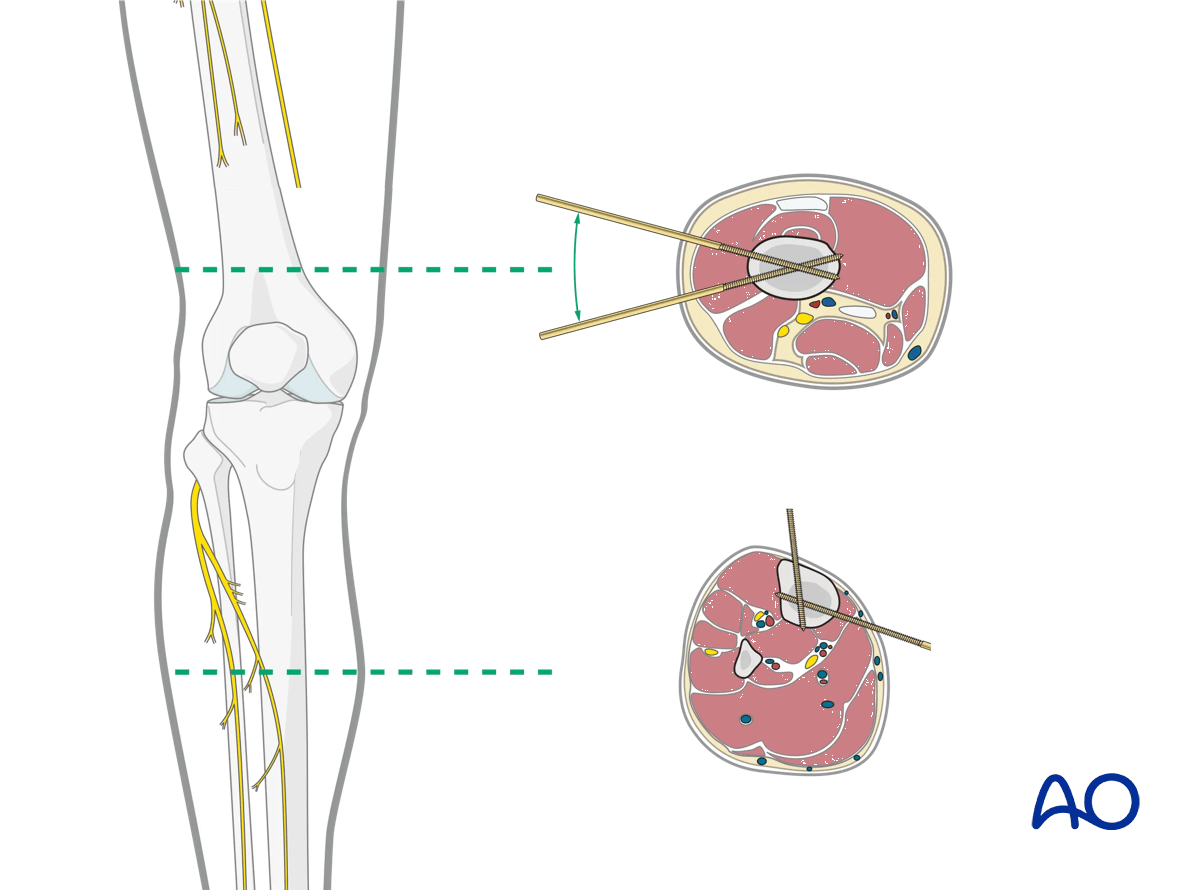
Tibial pin placement
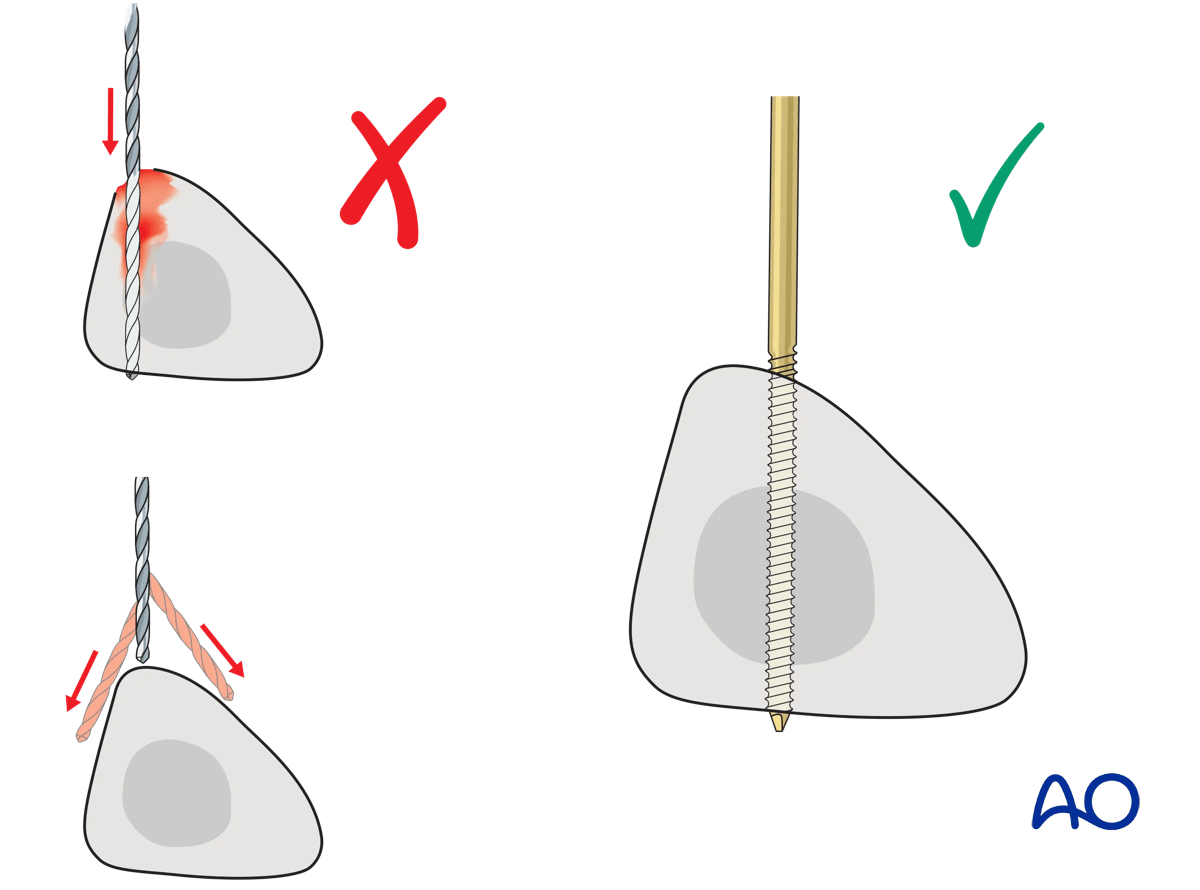
Drilling a hole in the thick tibial crest may be associated with excessive heat generation and there is a risk the drill bit may slip medially or laterally damaging the soft tissues. As the anteromedial tibial wall provides adequate thickness for the placement of pins, this trajectory is preferable. A trajectory angle (relative to the sagittal plane) of 20–60° for the proximal fragment and of 30–90° for the distal fragment is recommended.
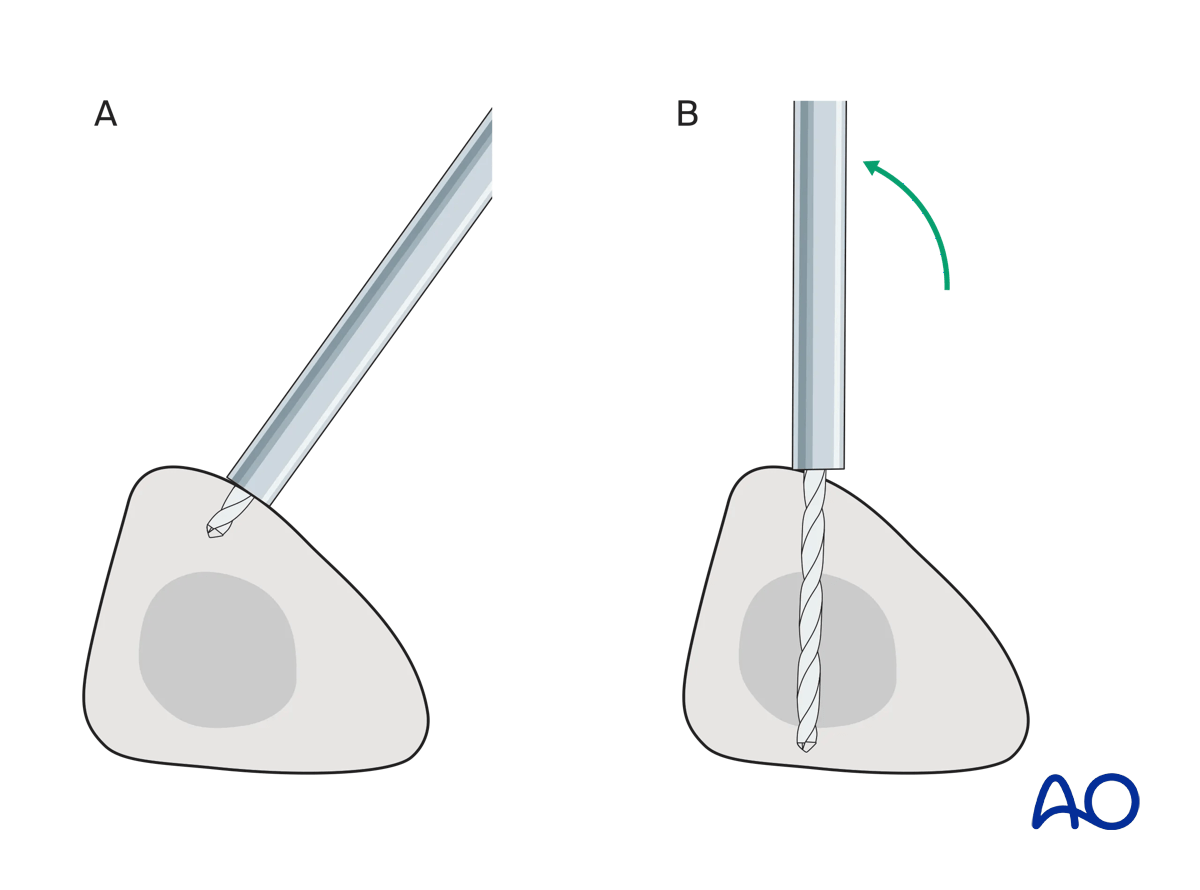
Alternatively, in order to avoid the frame catching on the opposite leg, the pins may be placed more anteriorly. The drill bit is started with the tip just medial to the anterior crest, and with the drill bit perpendicular to the anteromedial surface (A). As the drill bit starts to penetrate the surface, the drill is gradually moved more anteriorly until the drill bit is in the desired plane (B). This should prevent the tip from sliding down the medial or lateral surface.
5. Reduction and fixation (knee)
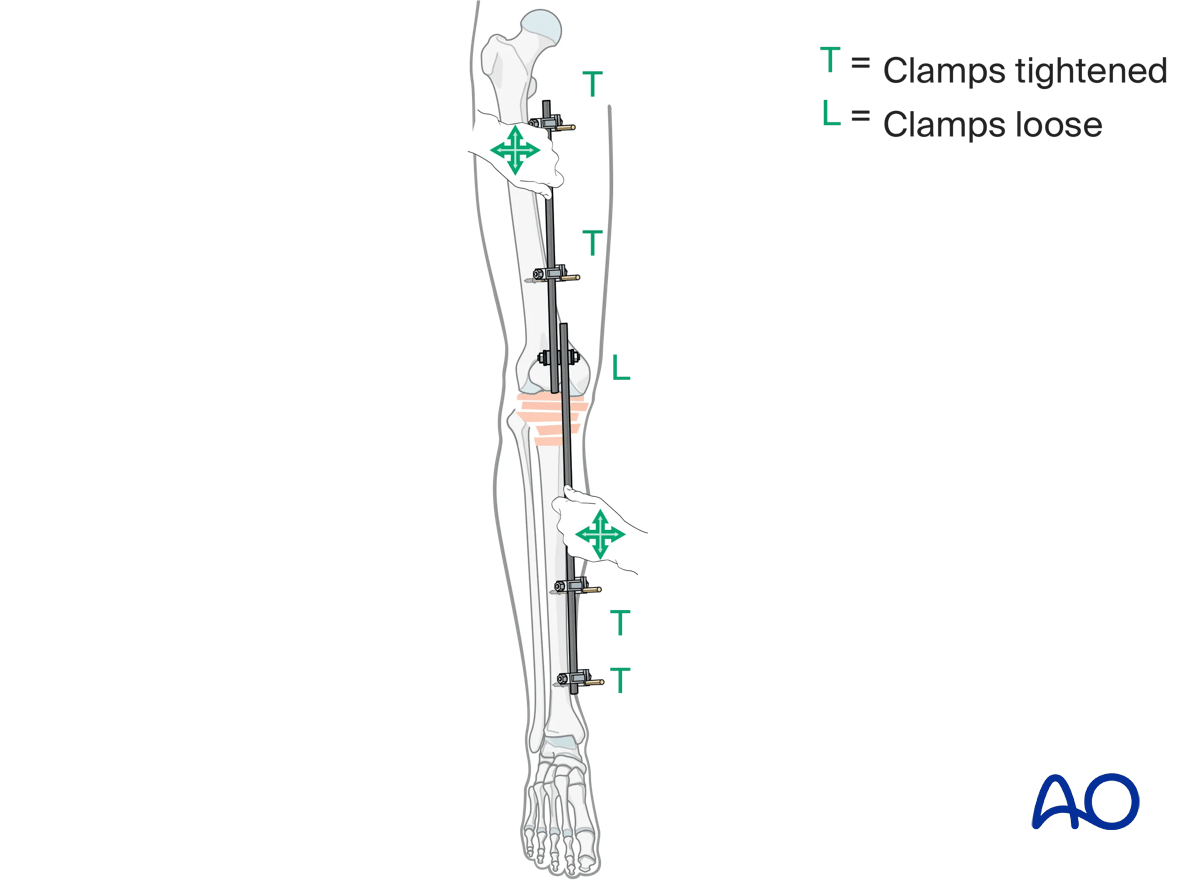
Using the partial frames as handles, manually reduce the fracture in length, rotation and axis.
Restore length with a bolster behind the knee to give slight flexion.
It should be understood that a perfect reduction will not be obtained.
6. Aftercare
Pin site care
Proper pin insertionTo prevent postoperative complications, pin insertion technique is more important than any pin care protocol:
- Correct placement of pins (see safe zones) avoiding ligaments and tendons, eg, anterior tibial tendon
- Correct insertion of pins (eg, trajectory, depth) avoiding heat necrosis
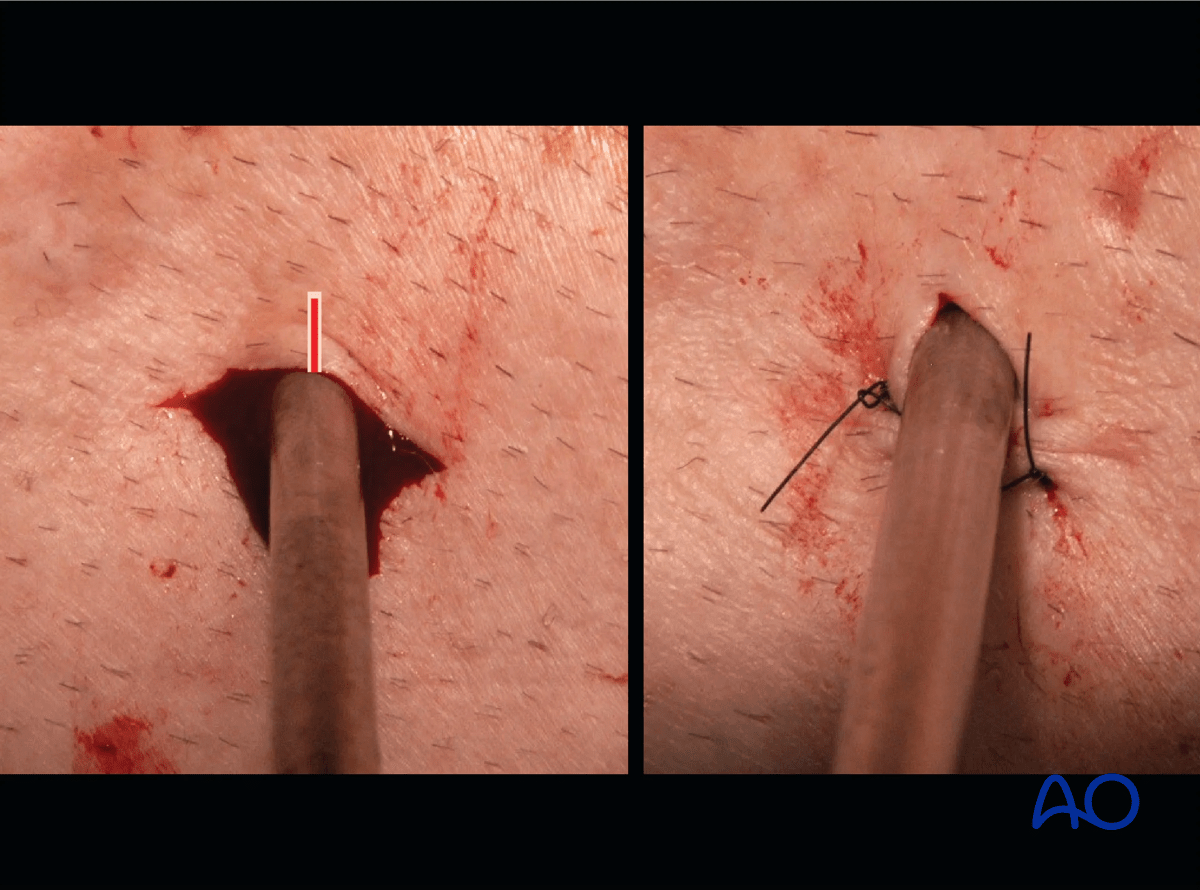
- Extending skin incisions to release soft-tissue tension around the pin insertion (see inspection and treatment of skin incisions)
- Creation of a mechanically stable frame will minimize stress and thus minimize pin-site motion
These images show the release of a pin to minimize skin tension. A releasing incision is made with a scalpel, as shown. After release, the left and right sides are sutured to create a tension-free closure.
Various aftercare protocols to prevent pin track infection have been established by experts worldwide. Therefore, no standard protocol for pin site care can be stated here. Nevertheless, the following points are recommended:
- Relative motion between pin and skin should be minimized as a general rule. This is particularly important in areas of thick tissue or significant soft-tissue movement.
- A compressive dressing that limits skin motion is useful, initially after frame placement, and continued for any pin exhibiting ongoing drainage.
- A daily shower with antibacterial soap is very useful after surgical incisions have healed.
- Pin insertion sites should be kept clean. Any crusts or exudates should be removed. The pins may be cleaned with saline and/or disinfectant solution/alcohol. The frequency of cleaning depends on the circumstances and varies from daily to weekly but should be done in moderation.
- Dressings are not usually necessary once pin drainage has ceased.
- Pin insertion sites need not be protected for showering or bathing with clean water.
- The patient or the care-giver should learn and apply the cleaning routine.
- Oral antibiotics are reserved for pin site infections.
In case of pin loosening or pin track infection, the following steps need to be taken:
- Rest and elevate limb
- Moist saline compress
- Oral antibiotic
- Wrap pin to control skin/pin motion
- Release any skin tension
For recalcitrant pin-site problems consider:
- Culture drainage and switch to organism-specific antibiotics
- IV antibiotics
- Checking x-ray for lucency
- Removal or exchange of pin
Perioperative antibiotics may be discontinued before 24 hours.
Attention is given to:
- Pain control
- Mobilization without early weight bearing
- Leg elevation in the presence of swelling
- Thromboembolic prophylaxis
- Early recognition of complications


