Antiglide plate
1. Principles
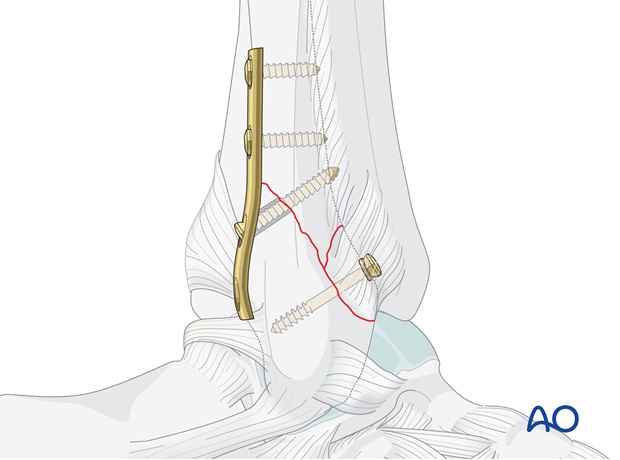
The one-third tubular plate, which is placed posterolaterally on the fibula in an antiglide position, indirectly reduces the fracture and acts as a buttress to resist the posterior and proximal displacement of the distal fragment.
Additionally, the main fracture can be compressed with a lag screw, inserted through the plate.
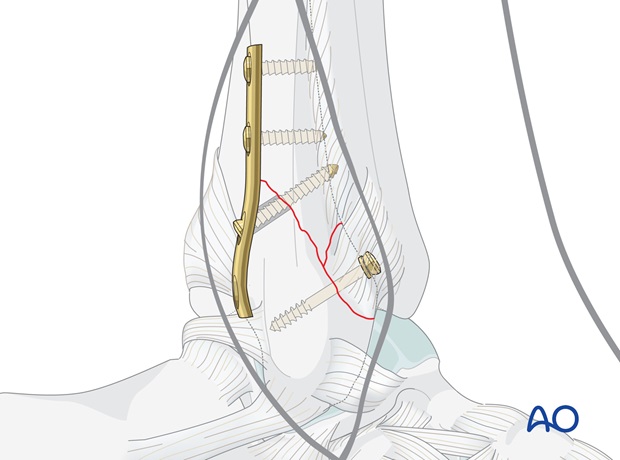
The third fragment, if large enough, can be fixed to the main lateral malleolar fragment with a cancellous lag screw. This technique is used for the three-part type of transsyndesmotic multifragmentary fracture, in which an oblique fracture of the fibula has occurred through the transsyndesmotic zone, and the tip of the proximal fragment ("ski tip") has fractured off.
Teaching videos
AO teaching video: Type B Malleolar Fracture 44-B (2004)
AO teaching video: Malleolar-Fracture Type B (1988)
2. Patient preparation and approach
The patient may be placed in the following positions:
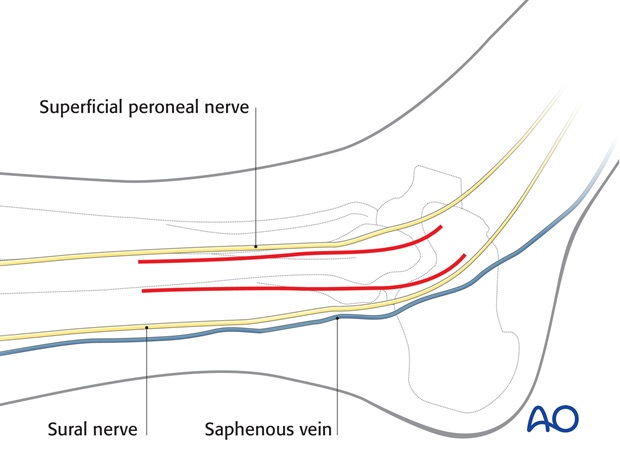
For this procedure a lateral approach is normally used.
3. Preliminary reduction
Preparation of the fracture site
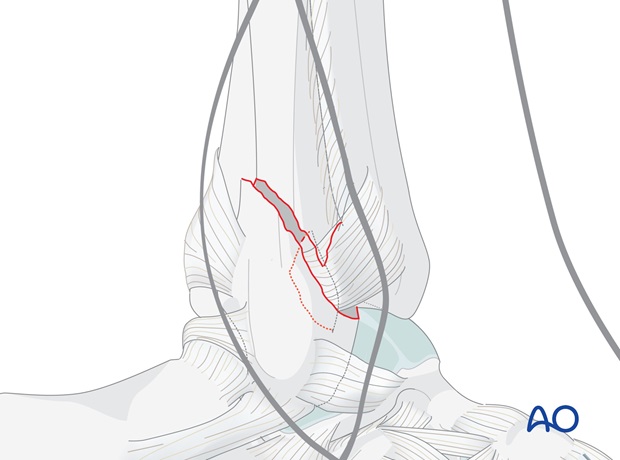
Check that there are no fibers of the anterior fibular ligament trapped between the main fragments, particularly if there has been a bony avulsion of their attachment. This can be a cause of irreducibility of an apparent simple transsyndesmotic fracture.
Do not strip the periosteum more than necessary.
Preliminary reduction before plate application
Having released the third fragment from between the main fibular fragments as necessary, reduce the fracture by applying light longitudinal traction and rotating the foot internally.

4. Plate preparation
Bending the plate
Prepare a four hole one-third tubular plate. To improve the anti-glide buttressing effect, the plate is slightly bent at its distal end.
This applies posterior compression on the distal fragment, which augments compression across the fracture plane.
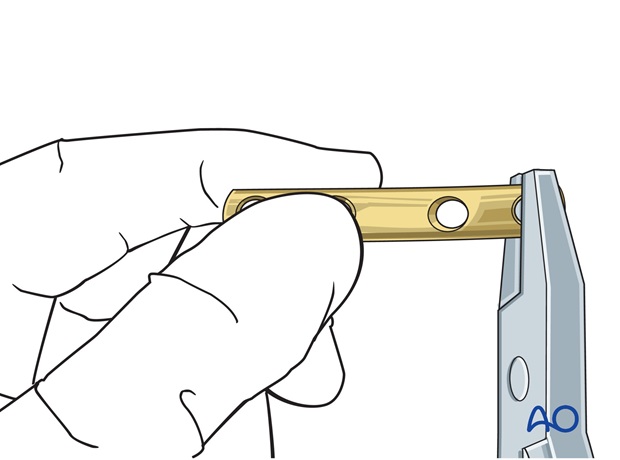
Planning the plate position
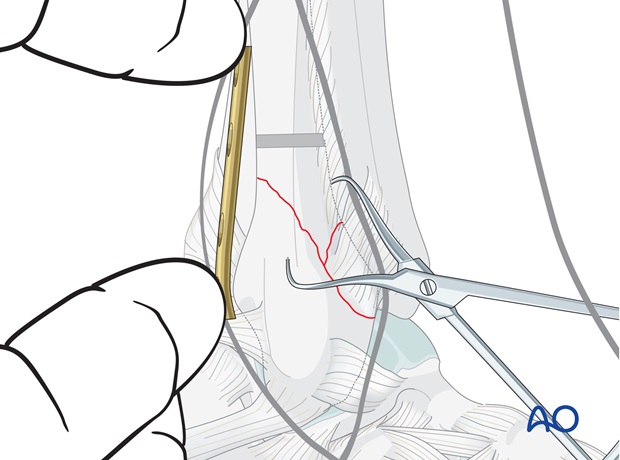
Accurate positioning of the plate is essential in obtaining the desired buttress effect and allowing the insertion of a lag screw. The proximal hole closest to the fracture site should be located 3-5 mm proximal to the fracture line. Ensure that the lower end of the plate is not too distal, as, without the integrity of the "ski tip" of the proximal fibular fragment, a too distal point of pressure on the malleolar fragment risks tilting it anteriorly.
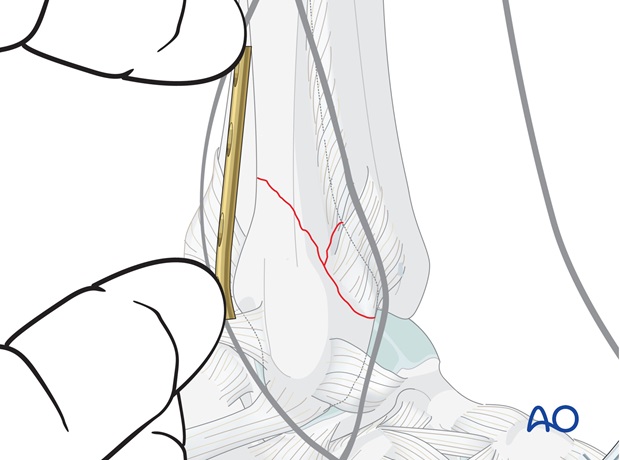
5. Fixation
Drilling
Reduce the main fragments and hold with a pointed reduction forceps. Ensure that the third fragment is reduced before tightening the forceps.
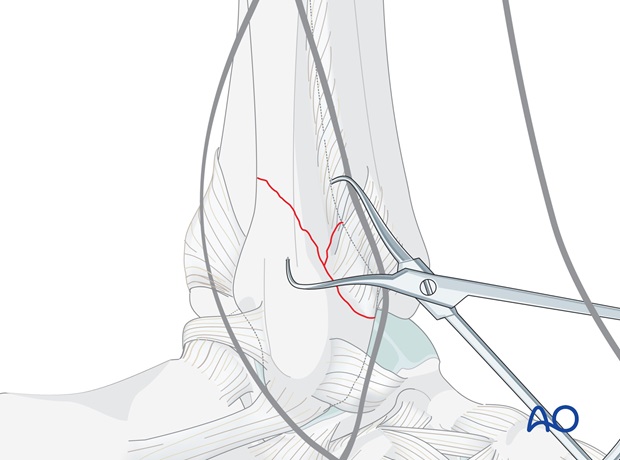
Either make sure the position of the forceps allows the plate to lie in the correct position, or alternatively, place the forceps through the hole in the plate before tightening the forceps.
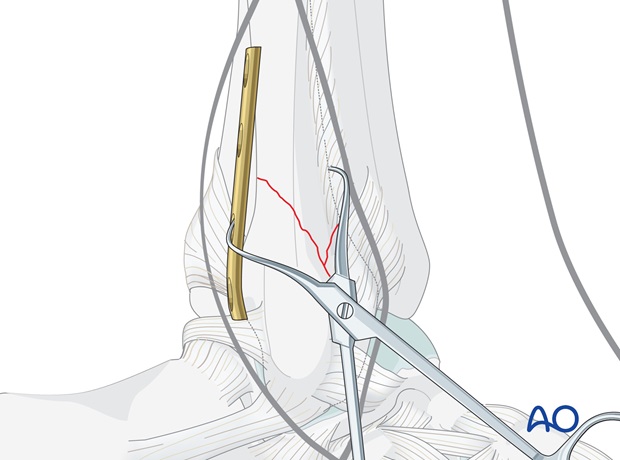
In the proximal fibular fragment, drill a 2.5 mm hole through both cortices, from posterior to anterior, 3-5 mm proximal to the apex of the fracture.
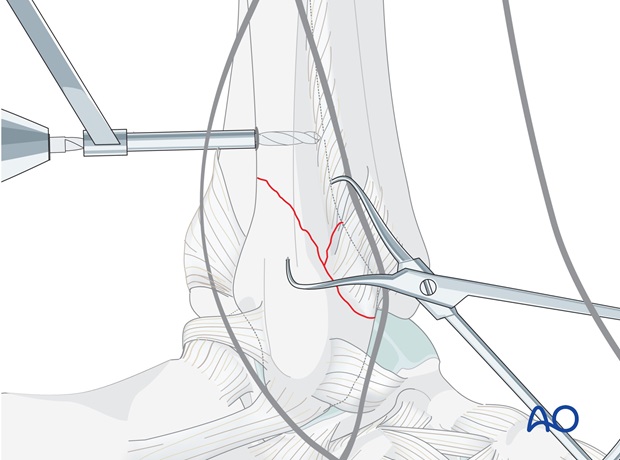
Plate application
Carefully position the plate so that two holes overlie each fragment, and hold it in place with a finger.
Insertion of the first proximal screw
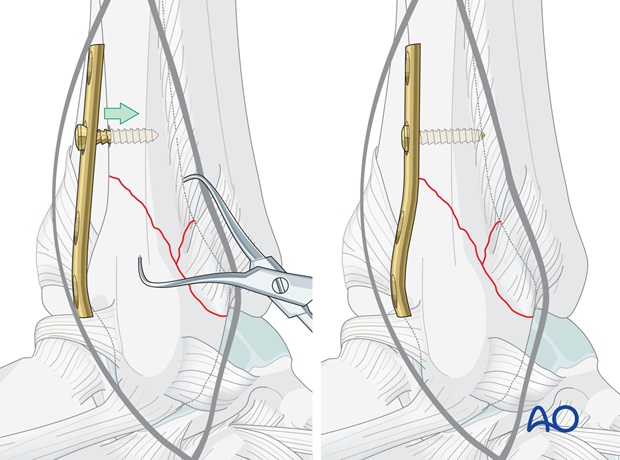
Measure the length of the drilled hole through the plate.
Tap with the 3.5 mm cortical tap and insert the first 3.5 mm cortex screw.
Tightening the screw will push the plate against the fracture, holding it reduced.
Check reduction visually and under image intensification.
Insertion of the second proximal screw
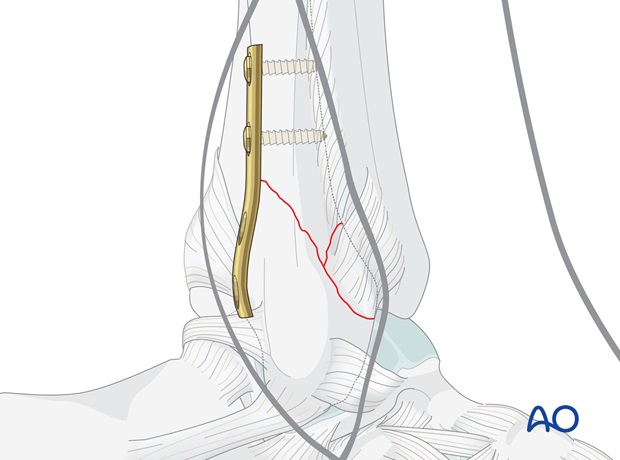
Insert the second screw through the most proximal plate hole, drilling, measuring and tapping through the plate hole.
Prepare insertion of a lag screw
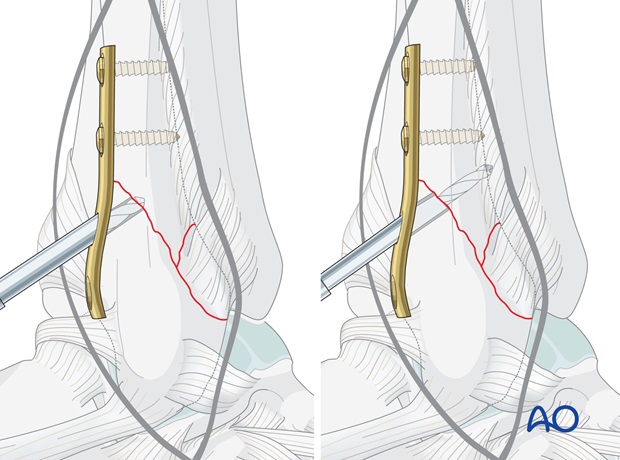
Drill a gliding hole through the plate hole closest and just distal to the fracture, using a 3.5 mm drill bit. The hole should be drilled as perpendicularly to the fracture line as possible.
Insert a 2.5 mm drill sleeve inside the gliding hole and drill the threaded hole in the far cortex with a 2.5 mm drill bit.
Measure the depth of the hole with the hook of the depth gauge pointing proximally.
Tap the far cortex with the 3.5 mm cortical tap.
Insertion of the lag screw
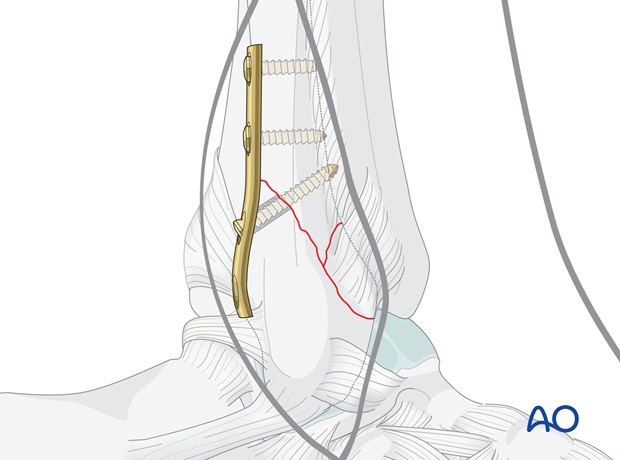
Insert a 3.5 mm cortical screw, functioning as a lag screw, and tighten carefully.
If the bone is osteoporotic, or if the fragment is large, a second cortical lag screw is inserted through the remaining distal plate hole.
Final x-rays should be taken now.
Note
In less oblique fractures, or with a large third fragment, it is not possible to insert a lag screw. In this case you can omit the postero-anterior lag screw.
Fixation of third fragment
The final stage is the fixation of the third fragment to the main lateral malleolar fragment, using an anteroposterior cancellous lag screw, fitted with a washer.
6. Postoperative treatment of infra- and trans-syndesmotic malleolar fractures
A bulky compression dressing and a lower leg backslab, or a splint, are applied, and the limb is kept elevated for the first 24 hours or so, in order to avoid swelling and to decrease pain.
In anatomically reconstructed, stable malleolar fractures, early active exercises and light partial weight bearing are encouraged after day one. In osteoporotic bone, weight bearing should be postponed.
X-ray evaluation is made after 1 week and then monthly until full healing has occurred. Progressive weight bearing is recommended as tolerated.
