MIO - Bridge plating
1. Principles
Bridge plating
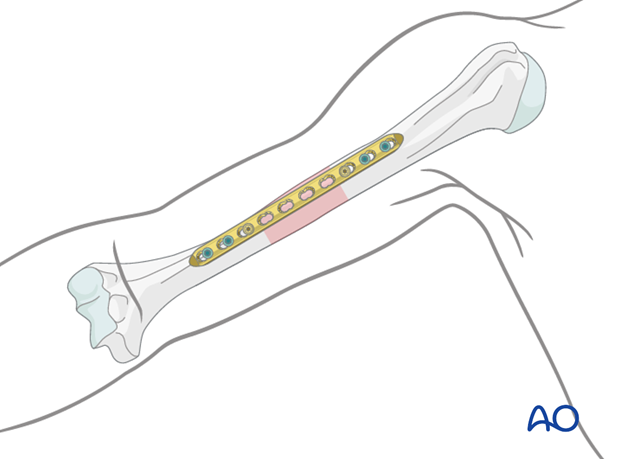
Bridge plating uses the plate as an extramedullary splint, fixed to the two main fragments, while the intermediate fracture zone is left untouched. Anatomic reduction of the shaft fragments is not essential but should be attempted. Furthermore, direct manipulation risks disturbing their blood supply. If the soft-tissue attachments are preserved, and the fragments are relatively well aligned, healing is predictable.
Alignment of the main shaft fragments can usually be achieved indirectly using traction and soft-tissue tension.
Mechanical stability, provided by the bridging plate, is adequate for indirect healing (callus formation).
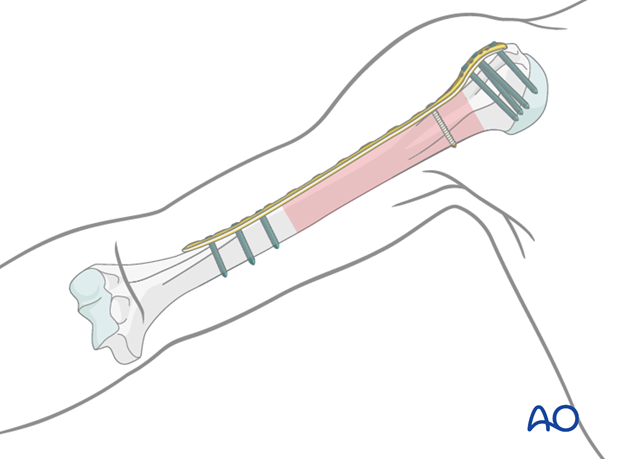
Shaft fractures with more proximal extension
If a fracture extends more proximally, particularly if it involves the greater tuberosity, a PHILOS plate may be selected. This is inserted through a transdeltoid lateral approach proximally, with the plate applied to the lateral aspect of the humerus.
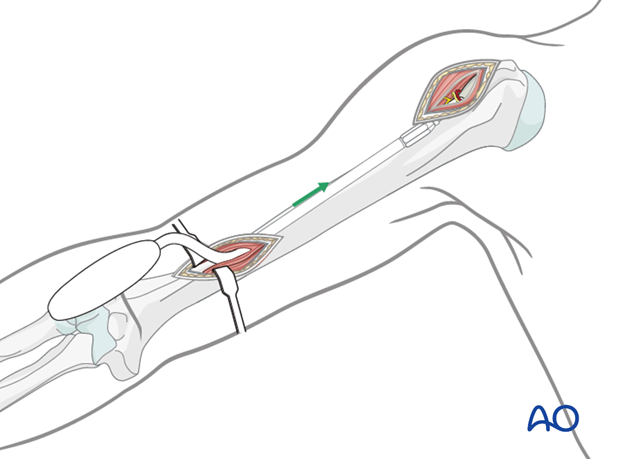
Bridge plate insertion through MIO approach
The minimally invasive (MIO) approach accesses the humerus anteriorly through two small incisions, made proximally and distally. The soft tissues over the fracture site are not affected. The plate is inserted through an extraperiosteal tunnel usually coming from distally. Occasionally the plate may be inserted from proximal to distal, particularly if a PHILOS plate has been selected. This should be checked with image intensification.
In the following procedure the insertion from distally is illustrated.
Open fractures in the humeral shaft
Adequate surgical debridement is the crucial first step in the care of any open fracture.
Read more about the treatment of open fractures in the humeral shaft.
Note on illustrations
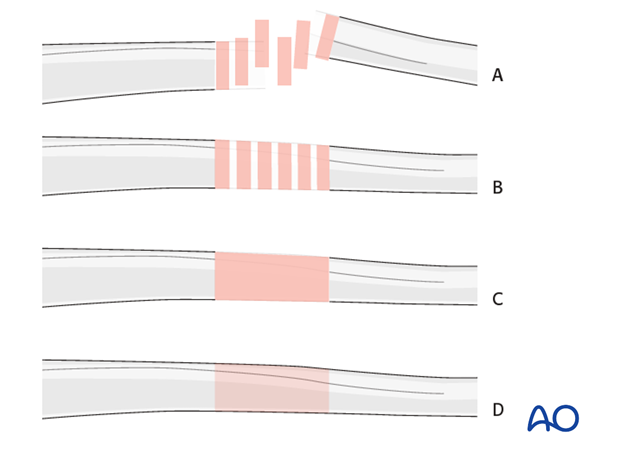
Throughout this treatment option illustrations of generic fracture patterns are shown, as four different types:
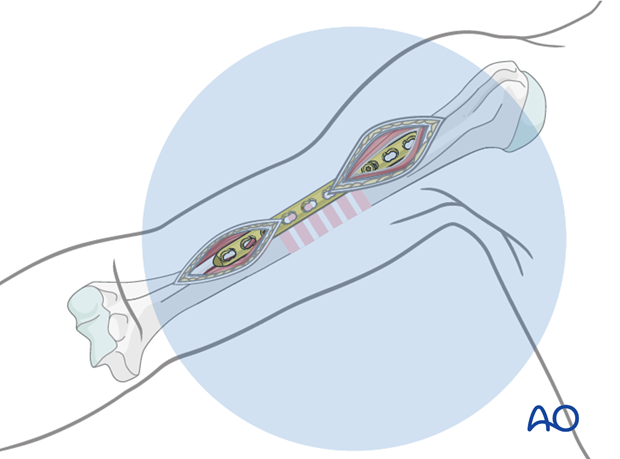
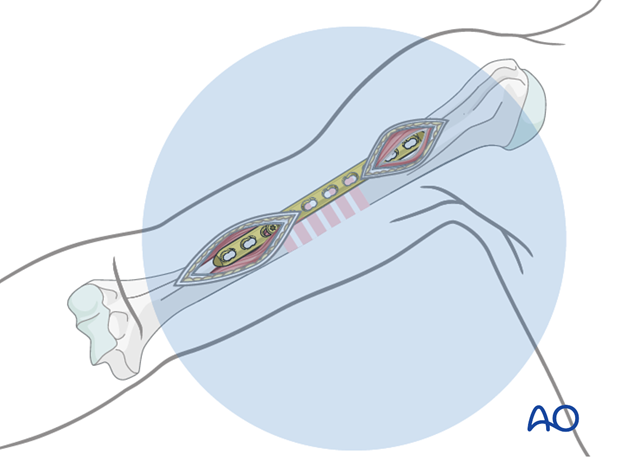
A) Unreduced fractureB) Reduced fracture
C) Fracture reduced and fixed provisionally
D) Fracture fixed definitively
2. Choice of implant
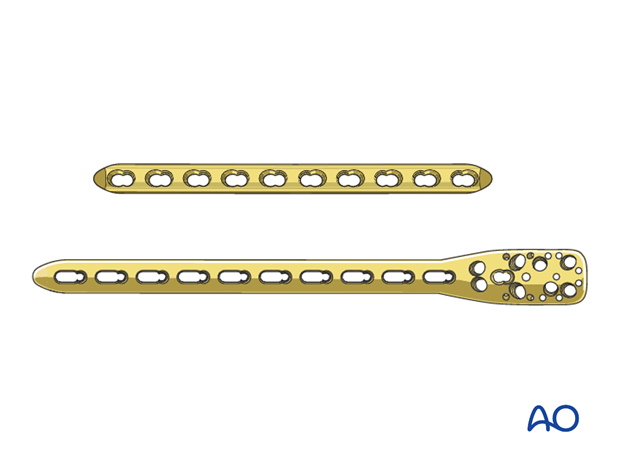
Either a standard plate or a plate with locking head screws (LCP) can be used as a neutralization device. In poor quality bone the use of an LCP is recommended.
As bridge plating should span a long section of the bone, the length of the implant has to be chosen accordingly. It should be long enough to allow sufficient hold in the proximal and distal segments, generally a minimum of three bicortical screws in each. Typically, a ten or twelve-hole 3.5 mm LCP is sufficient. It is also possible to use a long PHILOS plate, placed laterally (see MIO transdeltoid lateral approach).
Longer plates are normally twisted to form a helix, so that the proximal end is applied to the lateral humerus while the distal end lies on the anterior surface.
3. Plate position
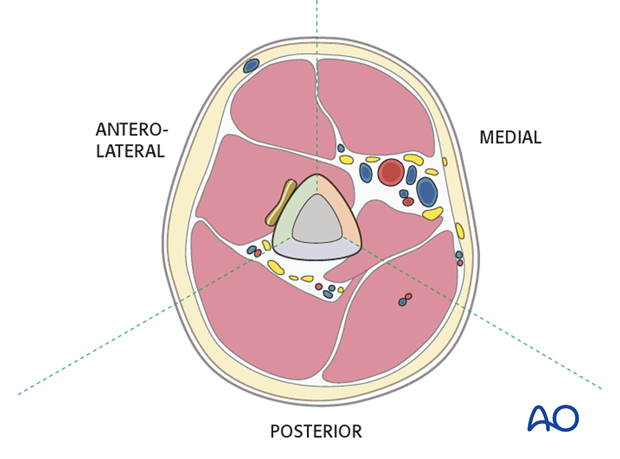
For minimally invasive osteosynthesis (MIO) the anterior surface is preferred. A major advantage is that this avoids detachment of the deltoid muscle and further bending or twisting of the plate is not necessary.
An anterior plate may be less well suited for the very distal humeral shaft.
4. Patient preparation and approaches
Patient positioning
The patient may be placed in either the supine or beach chair position.
Approaches
5. Reduction
It is important to restore axial alignment and rotation. A little shortening of 1 or 2 cm can be accepted in the humerus, and in complex multifragmentary fractures may improve bone contact.
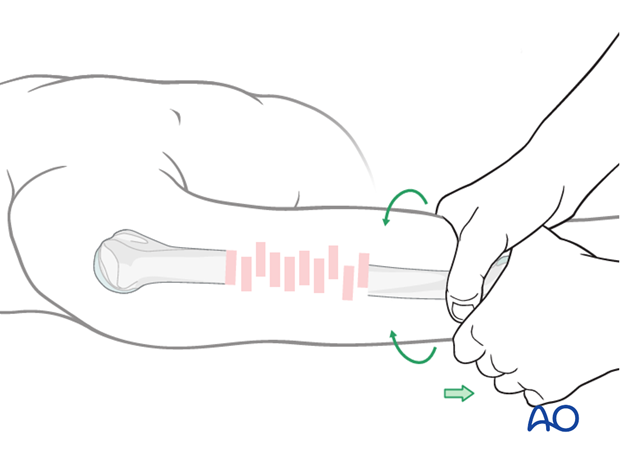
Manual reduction - limb realignment
Begin the reduction with traction on the distal humerus restoring bone length, tension in the soft tissues, realignment of the axis, and rotation.
Reduction by external fixator or distractor
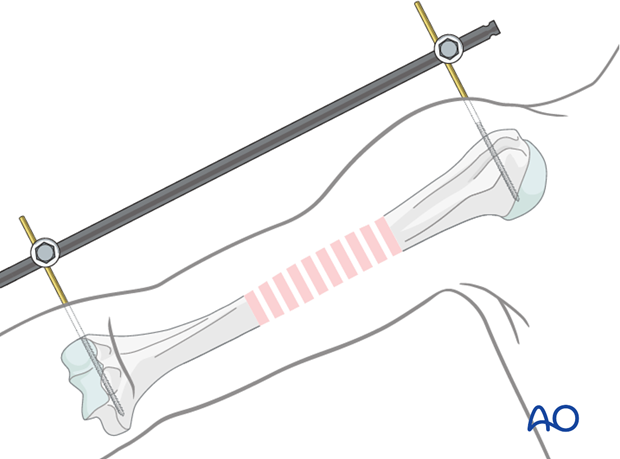
Particularly with comminuted fractures, use of an external fixator, or distractor, can provide alignment and stability for bridge plating without disturbing the soft tissues at the fracture site.
Insert proximal and distal pins outside the planned plate location. Take care not to injure the radial nerve. If in any doubt use incisions wide enough to allow palpation or direct visualization of the radial nerve.
Complete reduction may require additional correction of angulation or rotation. Folded linen bolsters under the fracture often help.
6. Percutaneous plate insertion
Preparing extraperiosteal tunnel
Use a dedicated soft-tissue retractor or periosteal elevator to prepare the extraperiosteal tunnel. Insert the device from distally and slide it cranially with close contact to the bone, until the cranial incision is reached.
Pearl: If no tunneling periosteal elevator is available, the tunnel may be created directly with the plate, using two drill sleeves acting as a handle.
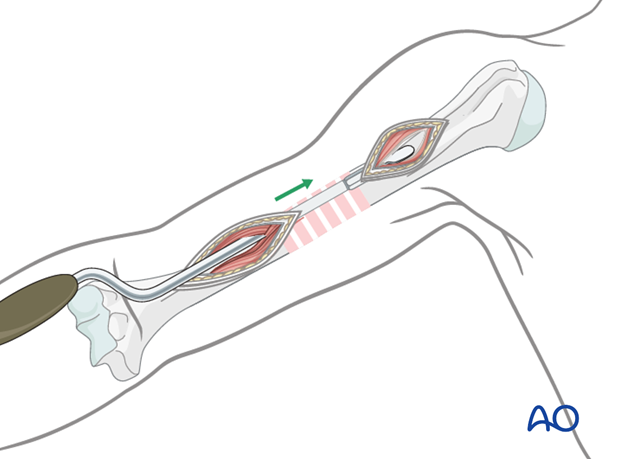
Plate insertion
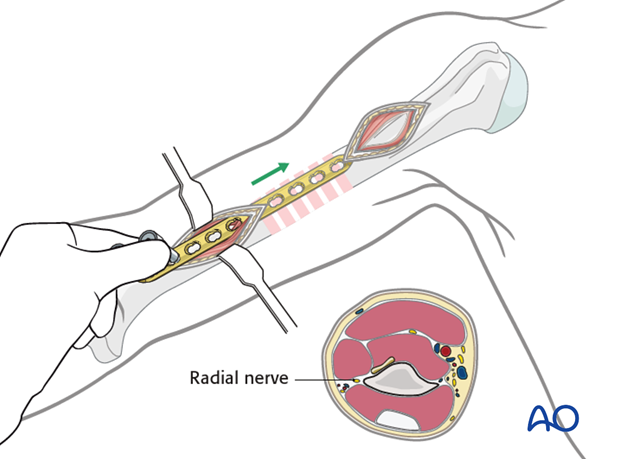
Slide the plate along the bone through the prepared extraperiosteal tunnel, and deep to the overlying soft tissues. Stay anterior on the humerus to avoid the radial nerve.
Confirm plate position using image intensification.
Pearl: Attach drill guides in the two most distal locking holes and use these as a handle to maneuver the plate.
7. Plate fixation
Preliminary proximal fixation
When the plate fits satisfactorily against the proximal segment, attach it provisionally in the third hole from proximal with a single bicortical screw. Alternatively, a push-pull reduction device may be used in the second hole.
Confirm reduction and plate position with image intensification. Remember to check external appearance for alignment, particularly rotation especially in multifragmentary fractures.
Preliminary distal fixation
After confirming the appropriate reduction and plate position fix the plate to the bone in the third hole from distal with a second bicortical screw.
Again, confirm reduction and plate position with image intensification. Remember to check external appearance for alignment, particularly rotation.
If needed adjust reduction of the main segments.
Definitive fixation
If reduction and plate position are satisfactory, insert the remaining proximal and distal screws. Using locking screws, two screws in each end may be sufficient.
Confirm the reduction, plate position, and screw length under image intensification.
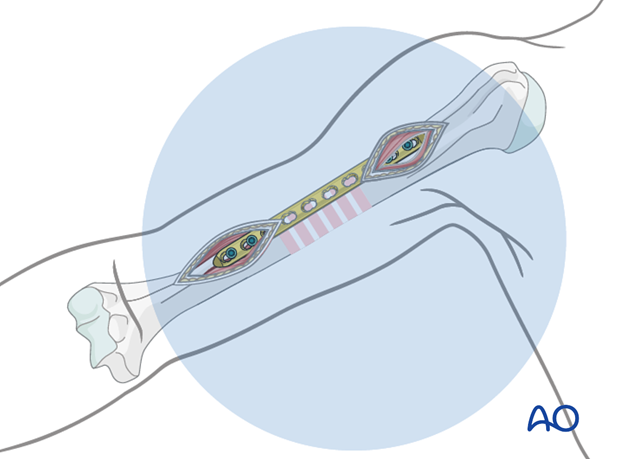
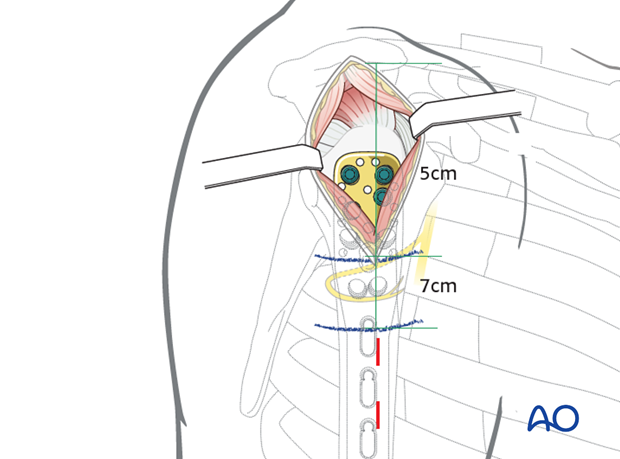
Stab incisions
For further screw fixation, stab incisions may be used.
To avoid damage to the axillary nerve they must not be placed proximal to the 7 cm blue line.
8. Final radiological assessment
Check for proper reduction and implant positions with image intensification in AP and lateral views.
Confirm also a proper rotational alignment of the humerus.
9. Aftercare
Principles
The aim of any surgical fixation of humeral shaft fractures is a stable osteosynthesis of the fracture allowing early passive and active motion. This is crucial to prevent elbow stiffness.
The rehabilitation regimen should take account of any damage to soft tissues, either as a result of the injury or due to the surgery. It also needs to take account of the security of the fixation.
Immediate postoperative care
Carefully examine the patient for neurological deficits and pulses.
Early treatment
In the beginning lymph drainage and elastocompressive bandages may be helpful.
Consider a sling for pain relief within the first days.
Treatment for refixation of deltoid detachment
If the deltoid was detached and reattached, active deltoid contraction should be delayed for the first six weeks.
Mobilization
In the early phase the rehabilitation consists of classic maneuvers eg overhead motion exercises.
Rehabilitation should address the entire upper limb.
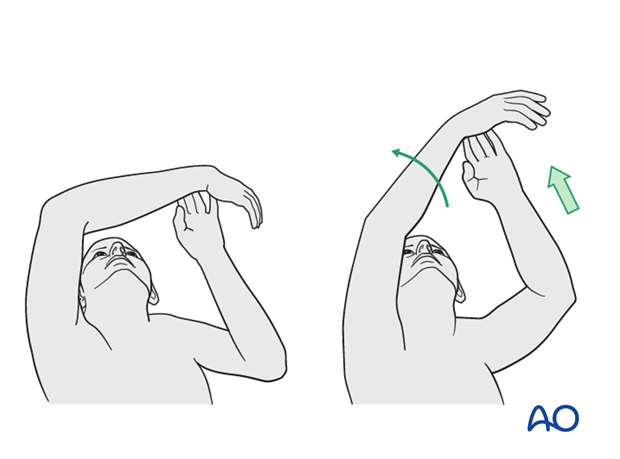
Exercise against resistance
Depending on the bone quality and compliance of the patient, exercise against resistance might be limited.
Follow-up
Clinical and radiological follow-up should be scheduled at least 6 weeks, 12 weeks and 6 months after surgery and continued until a bony healing is confirmed.
Hardware removal
Typically, humeral plates are left in situ indefinitely.
If removal is considered, bony healing should be confirmed. Plates are not normally removed for at least one year after surgery.
Be aware of the risk to the various nerves when dissecting the soft tissues to gain access to the distal humerus for removing anterior or anterolateral plates.
As the radial nerve runs over a posterior plate, removing this plate should only be considered with great caution, and the patient must be well informed about the risks. The original operation note should describe the relation of the nerve to the plate and should be reviewed before plate removal.


