Comminuted radial fracture: bridge plating
1. Principles
General considerations
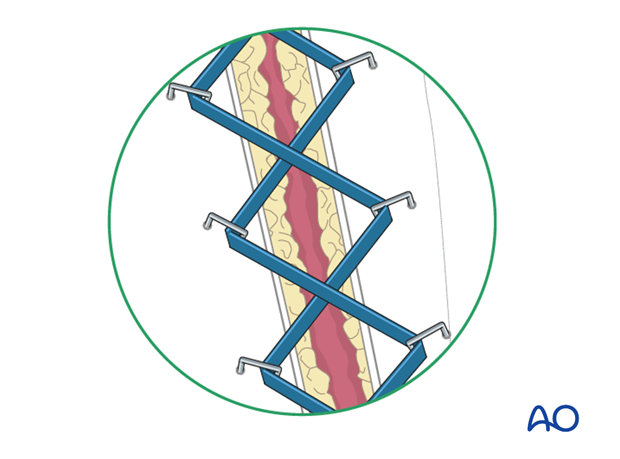
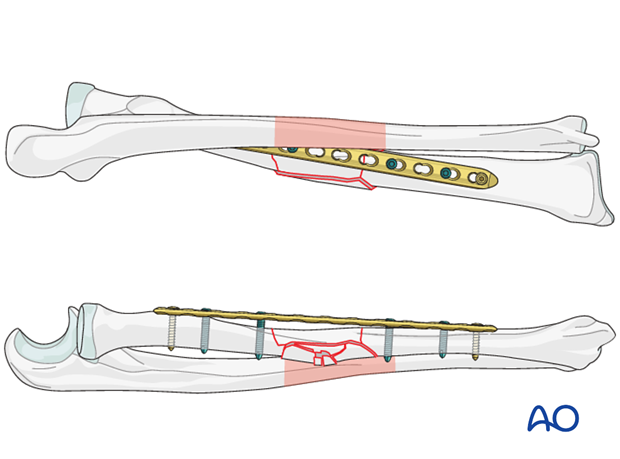
Bridge plating uses the plate as an extramedullary splint fixed to the two main fragments while the complex fracture zone is left virtually untouched (bridged), thereby minimizing damage to the blood supply of the intermediate fragments.
Reduction of the bridged fragments will not be anatomical but the procedure is based on the restoration of the relationship of the two main fragments in terms of length, rotation and axis. In these cases, x-rays of the uninjured contralateral forearm, including both wrist and elbow, are useful as a template for restoring length and rotation.
Soft tissues should be handled with meticulous attention to the vascularity of the fracture zone.
If the radial bridge plating is part of the management of fractures of both forearm bones, particularly in open injuries, a single approach to both bones should be avoided if possible since excessive additional stripping would be necessary. This can lead to an increased risk of infection, nonunion, and heterotopic bone formation.
Choice of implant
The requirements for internal fixation of fragmentary segmental fractures include:
- The plate should be long enough to span the comminuted zone, and to provide at least a four-hole segment over each main fragment, giving the possibility for at least three bicortical screws in each main fragment.
- Well-spaced screws to distribute the stresses on the bone-implant composite for each main fragment
- The morphology of the radius is more complex than that of the ulna and, if available, the locking compression plate (LCP) offers considerable advantages, avoiding the need for precise anatomical contouring. An LCP is particularly useful with short main fragments and in osteoporotic bone.
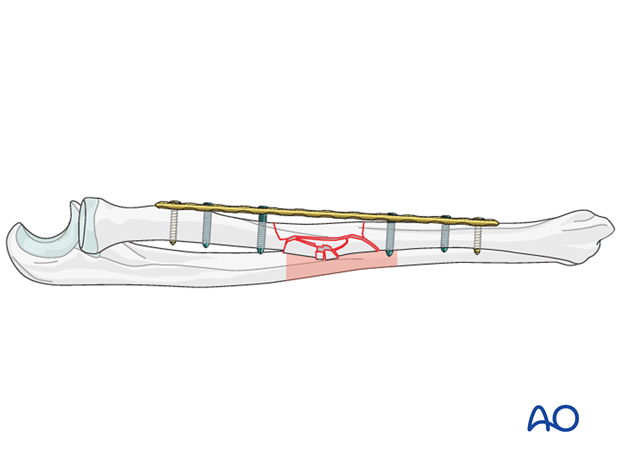
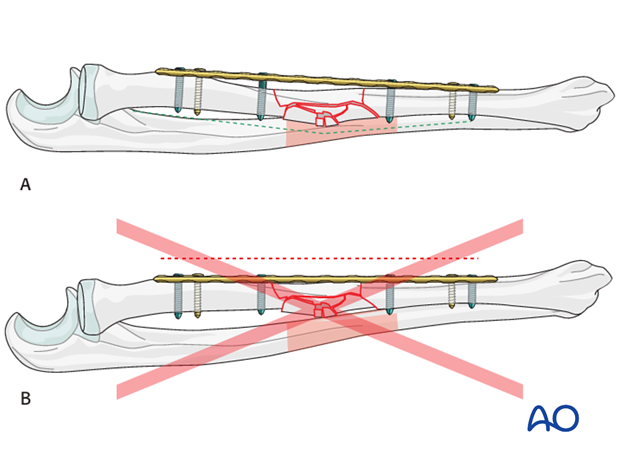
In the radius, a long and straight LCP is placed over a curved bone. Careful attention is paid to the preservation of the radial curve (A). The radial anatomical curve should not be compromised to fit the shape of the plate (B).
The disadvantage of the locked internal fixators is that such plates are difficult to bend.
Choice of approach
In mid and distal radial shaft fractures, either the anterior approach (Henry) or posterolateral approach (Thompson) can be used, depending on surgeon’s preference.
Extent of surgical approach (dissection)
The skin incision should be long enough to expose the intact segments of bone, in order to allow adequate fixation of the bridging plate to each main fragment, and to avoid injury to important neurovascular structures. For example, care should be taken not to injure the posterior interosseous nerve when the Henry approach is extended proximally.
Despite the long skin incision, minimal dissection should be performed in the fracture zone.
Soft-tissue considerations in comminuted zone
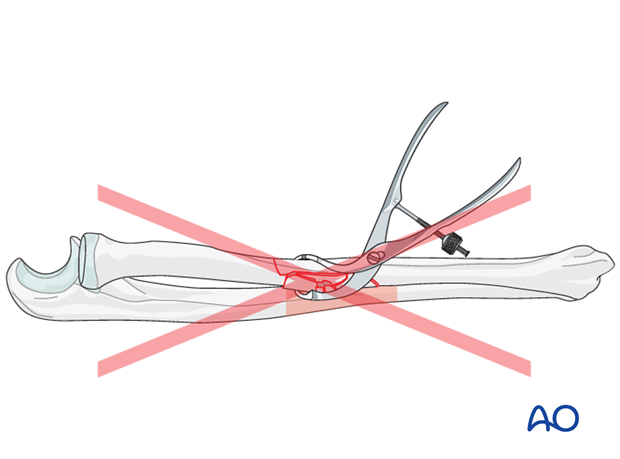
Avoid the placement of instruments, retractors, bone clamps, or fingers around the comminuted zone.
2. Plate position, length and number of screws
Optimal plate position – general considerations
Choose the surface of the bone which is the least comminuted. It is essential, especially in high energy fracture patterns, that adequate soft-tissue coverage be available.
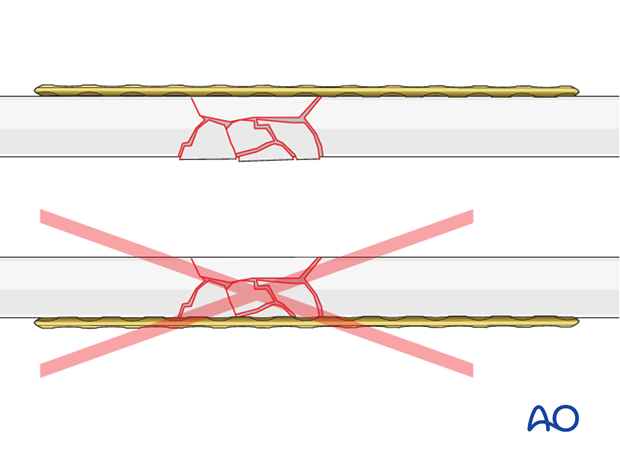
In many cases, soft-tissue coverage and comminution patterns will dictate plate position, rather than biomechanical considerations.
The selection of the optimal plate position will influence the approach chosen.
Avoid any additional injury to the soft tissue over the multifragmentary zone. In addition to preserving the vascularity of the fracture zone, containment of the intermediate fragments within their soft-tissue envelope will also aid their reduction.
Plate position on the radius
The choice of plate position will normally be influenced by the fracture pattern and will determine the approach. However, associated soft-tissues considerations may prevent placing the plate in the optimal biomechanical position.
The plate may be applied to either the anterior or posterior surface of the radius.
If a more extensile exposure is necessary, the Henry approach is chosen and therefore the plate will be placed on the anterior surface.
In the following procedure, we illustrate the plate application to the anterior surface.
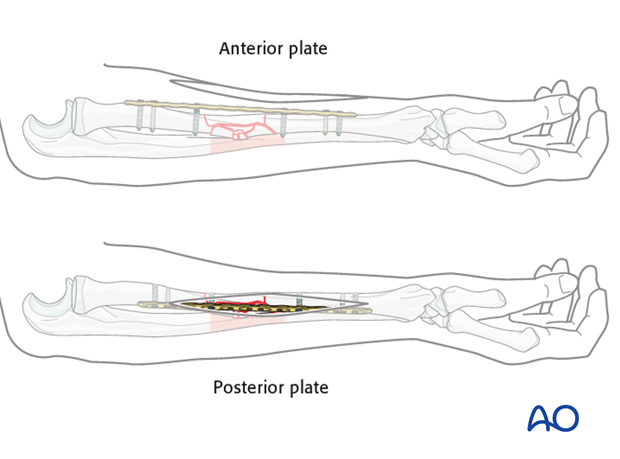
Plate length and number of screws
In the forearm, three bicortical screws are required in each main fracture fragment due to the high torsional stresses. For biological reasons, not every plate hole should be occupied by a screw. Therefore, plates that offer at least 4 holes over each main fragment should be used.

Working length considerations
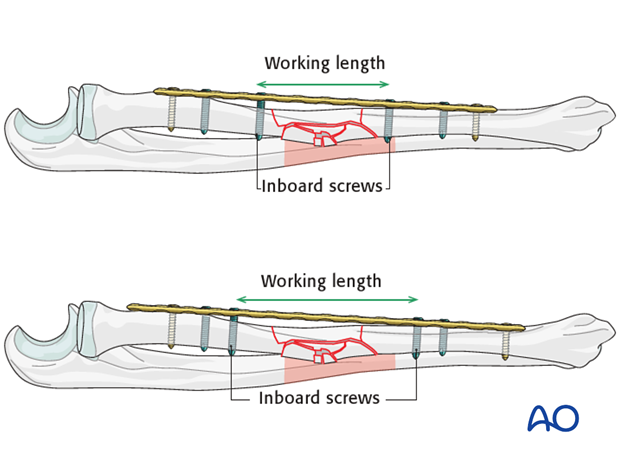
Too great a working length increases the interfragmentary motion and can result in excessive callus formation which is undesirable in the forearm as it may compromise range of rotational motion.
Too short a working length increases the stresses on that portion of the plate and can risk implant fatigue.
In bridge plating, the working length of the segment of the plate spanning the multifragmentary zone can be reduced by placing, the “inboard” screws in each main fragment as near to the intermediate segment as possible. On the other hand, greater separation of the inboard screws increases the working length.
3. Reduction and preliminary fixation of the radius
Reduction
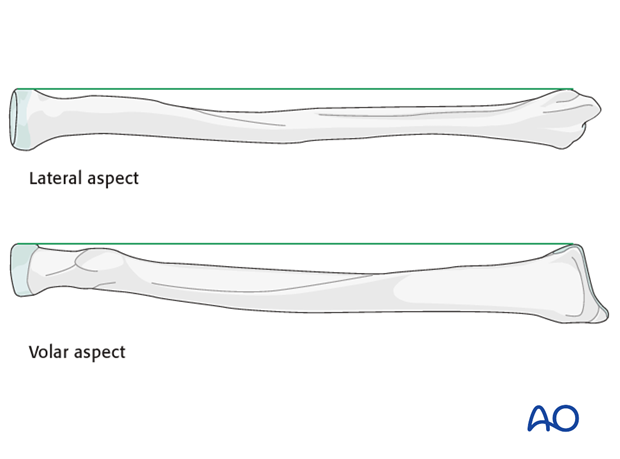
It should be kept in mind that the radius is curved in both coronal and sagittal planes. Every attempt should be made (although not always possible in cases of severe comminution) to restore the normal radial curvature, in order to allow full range of pronation and supination.
Several reduction maneuvers can be useful:
- Manual traction, preliminary screw fixation of a plate to the proximal main fragment and a forceps on the distal main fragment
- Reduction by help of the plate and distraction using a laminar spreader and an independent screw (push-pull technique). The correct radial bow and rotation may be verified by making sure that the radial styloid is opposite the radial tuberosity in a supinated AP view.
Preliminary fixation of the radius
Manual traction, preliminary screw fixation of a plate to the proximal main fragment and a forceps on the distal main fragment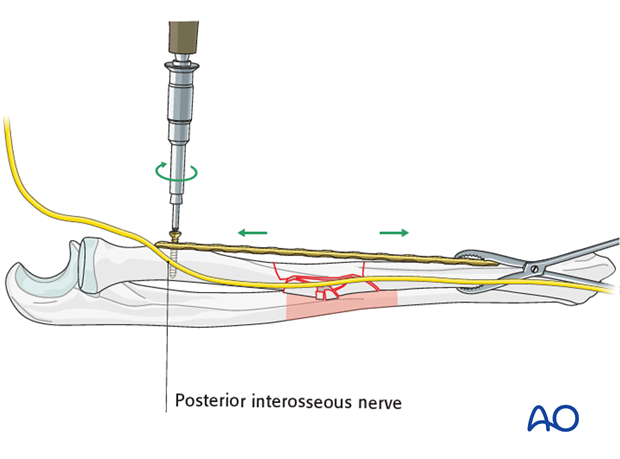
As an angular stable plate is being used as an internal fixator, at least one of the screws in each main fragment needs to be a locking screw. Therefore, insert a locking screw into each main fragment near to the multifragmentary zone whilst carefully maintaining reduction.
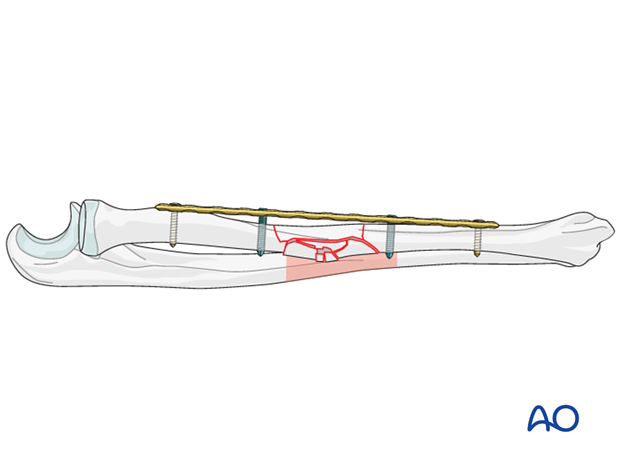
The plate is fixed to the proximal main fragment using a standard screw though the end hole.
Check that rotational alignment is correct.
An independent screw is inserted into the distal main fragment a short distance (1 – 1.5 cm) beyond the distal end of the plate.
Use a laminar spreader between the independent screw and the end of the plate to distract the fracture, restoring length and axial alignment.
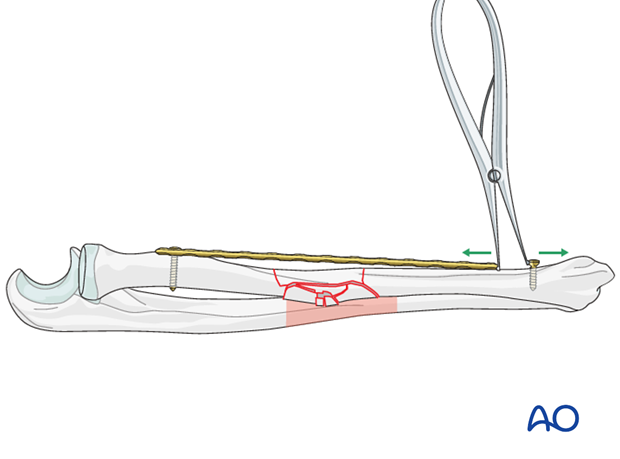
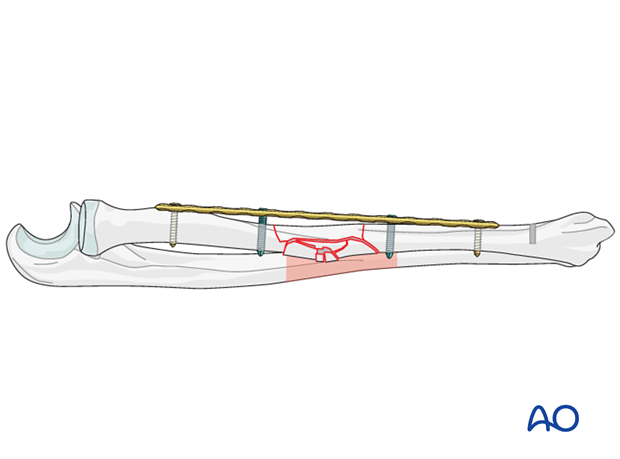
Once the reduction is completely satisfactory, additional screws are inserted.
As an angular stable plate is being used as an internal fixator, at least one of the screws in each main fragment needs to be a locking screw. Therefore, insert a locking screw into each main fragment near to the multifragmentary zone. The laminar spreader and its independent screw can now be removed.
4. Definitive fixation of both bones
Assessment of overall forearm reduction
Before finally committing to a definitive fixation make the following checks:
- Gently examine the range of forearm rotation.
- Use image intensification 1) to check plate length and position, and 2) at each end of the forearm, to check the radioulnar relationships compared to the preoperative x-rays of the uninjured side.
Now complete the ulnar fixation by inserting additional screws as necessary.
As a standard (non-locking) plate is usually used for the ulna, at least three bicortical screws should be inserted into each main fragment.
5. Final check of osteosynthesis
Check the completed osteosynthesis by image intensification. Make sure that the plates are at proper locations, the screws are of appropriate length and a desired reduction was achieved.
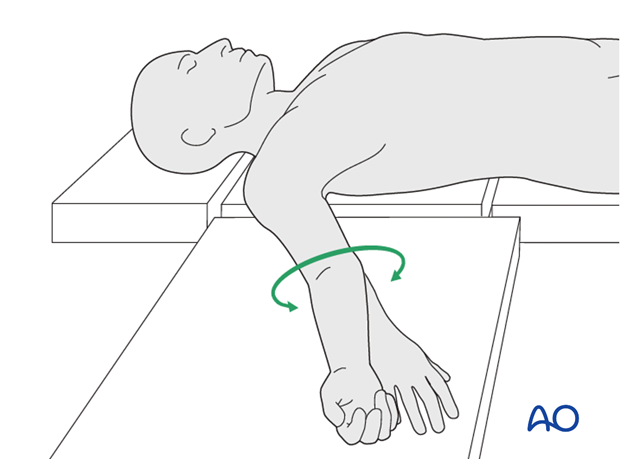
Again, check the range of motion in all directions. Because of the difficulty of perfect anatomical restoration of these complex fractures, it is advisable to check the congruity of the DRUJ radiographically by comparing it to the preoperative x-ray of the contralateral side. If residual displacement is revealed, the difficult decision then has to be made whether to attempt to revise the reductions and fixations, or to accept some residual DRUJ displacement.
6. Assessment of Distal Radioulnar Joint (DRUJ)
Before starting the operation the uninjured side should be tested as a reference for the injured side.
After fixation, the distal radioulnar joint should be assessed for forearm rotation, as well as for stability. The forearm should be rotated completely to make certain there is no anatomical block.
Method 1
The elbow is flexed 90° on the arm table and displacement in dorsal palmar direction is tested in a neutral rotation of the forearm with the wrist in neutral position.
This is repeated with the wrist in radial deviation, which stabilizes the DRUJ, if the ulnar collateral complex (TFCC) is not disrupted.
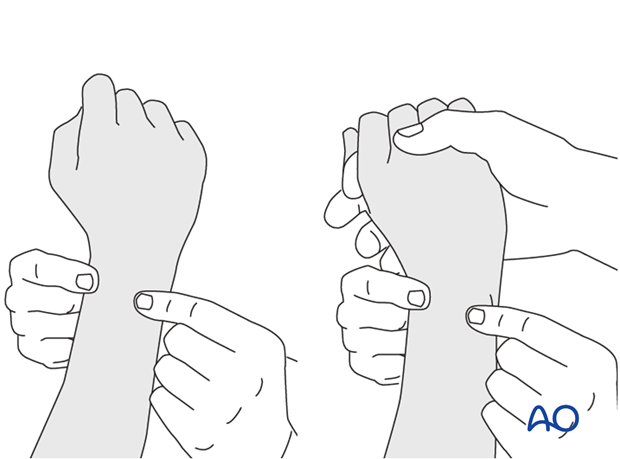
This is repeated with the wrist in full supination and full pronation.
Method 2
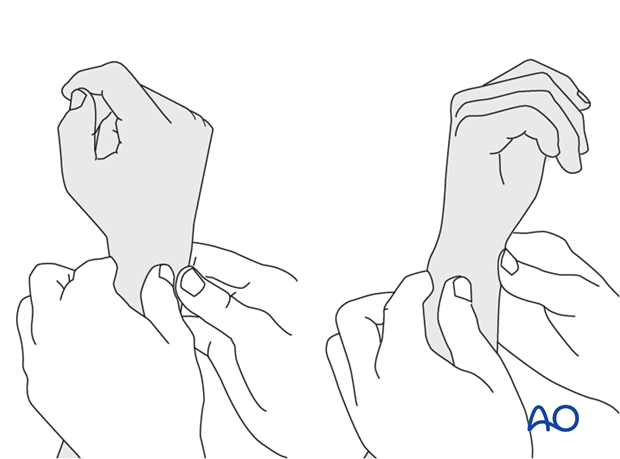
In order to test the stability of the distal radioulnar joint, the ulna is compressed against the radius...
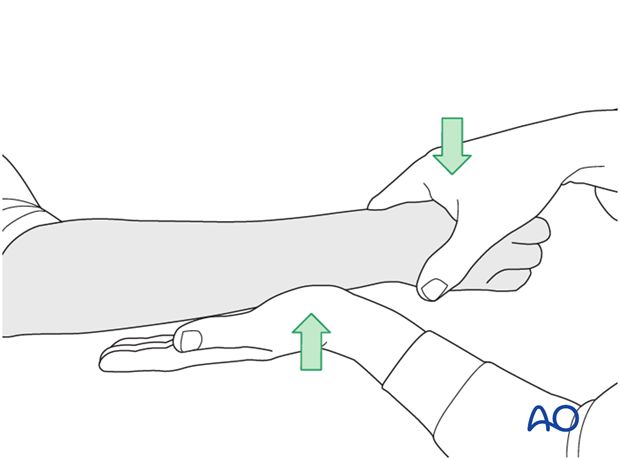
...while the forearm is passively put through full supination...
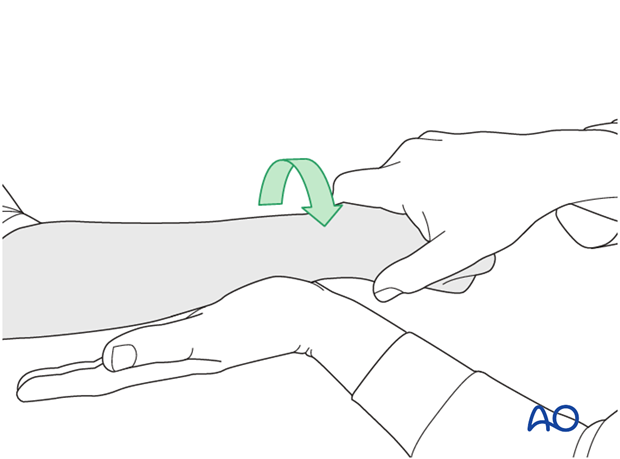
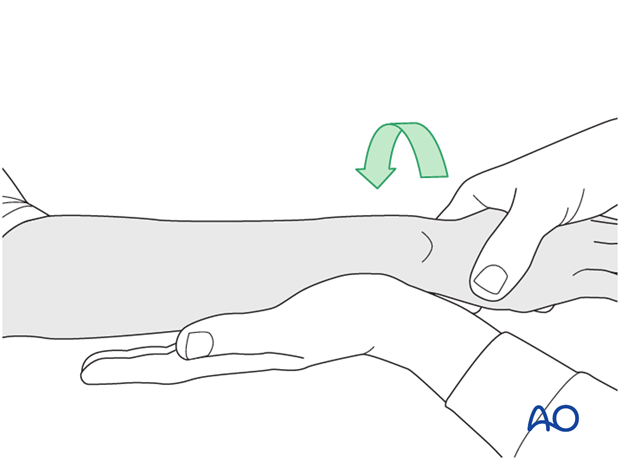
...and pronation.
If there is a palpable “clunk”, then instability of the distal radioulnar joint should be considered. This would be an indication for internal fixation of an ulnar styloid fracture at its base. If the fracture is at the tip of the ulnar styloid consider TFCC stabilization.
7. Wound closure
Subcutaneous tissue and skin should be closed by interrupted sutures. In certain instances, for example with marked forearm swelling, one of the wounds may have to be left open (usually the radial approach, as the ulna is subcutaneous). There are different techniques to overcome these difficulties (e.g., elastic closure, vacuum-assisted closure, petroleum jelly gauze, skin substitute, etc.)
