K-wire fixation
1. Principles
Introduction
K-wires can be applied to many different fracture patterns. Considerations include fracture obliquity, comminution, and soft tissue status.
As K-wires cannot compress the fracture, the fracture needs to be reduced before K-wire insertion, which is particularly true for articular fractures.
The preferred K-wire configuration would be extra-articular to prevent damage to the articular surface. Axially inserted wires that break may be difficult to retrieve.
Threaded K-wires are generally not preferred as they are more challenging to extract and potentially maintain fracture gaps.
The goal of an intramedullary wire would be to secure the fracture site in a soft-tissue-friendly manner while maintaining alignment.
K-wires should be sized appropriately to the bone. Typically, wires thicker than 2.0 mm are not needed. The surgeon should be careful to cool the K-wire during insertion to reduce the risk of thermal necrosis.
Toe fractures versus long bone fractures
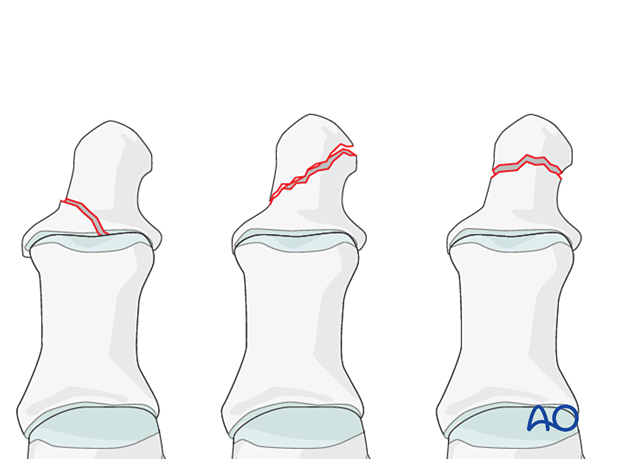
Toe fractures are different from long bone fractures.
- The bones are very small
- Fracture gaps are small
- Fixation devices don't need to counter large forces
Thus, following the AO principles is less critical than for long bones, and often isolated screws or K-wires alone will work satisfactorily.
Restoration of length, rotation, and angulation are important for cosmesis.
The hallux is particularly critical due to its importance for walking.
Timing of surgery
The timing of surgery is influenced by the soft tissue injury and the patient's physiologic status.
Dislocation or injuries associated with the skin at risk requires immediate intervention regardless of the amount of soft tissue swelling.
If possible, swelling should be significantly decreased before surgery, which can take up to two weeks in some instances.
Open fractures should be promptly irrigated and debrided, and treated with antibiotics. Definitive fracture fixation may not be possible during this setting.
Forefoot fractures do not contribute to physiologic instability. If there is no soft tissue at risk, urgent intervention is not required.
K-wire configurations
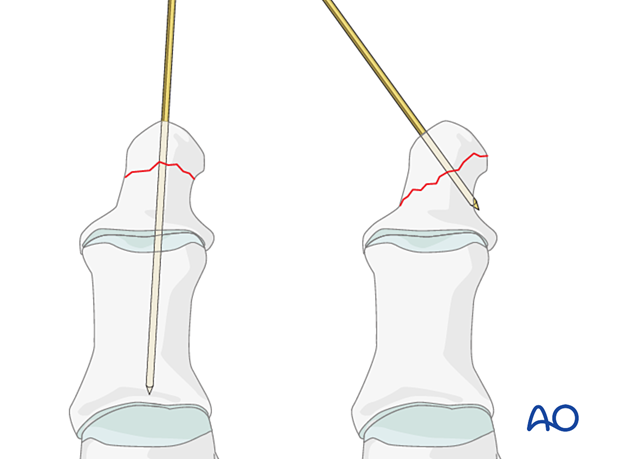
The fragment size is usually small, limiting K-wire configurations other than axial K-wire insertion.
However, certain fractures may allow for other insertion patterns.
2. Patient preparation and approach
Patient preparation
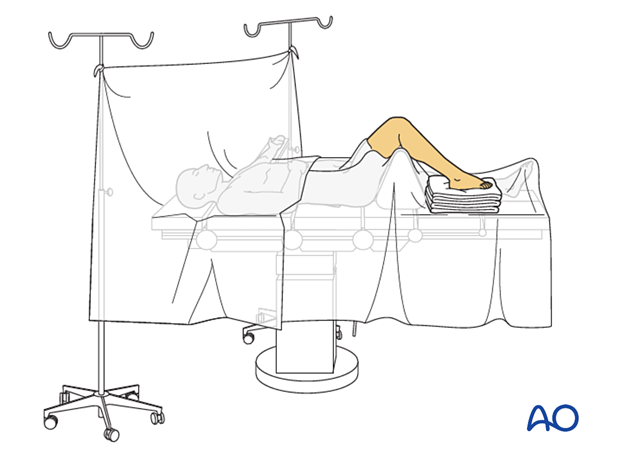
This procedure is typically performed with the patient placed supine and the knee flexed 90°.
Approach
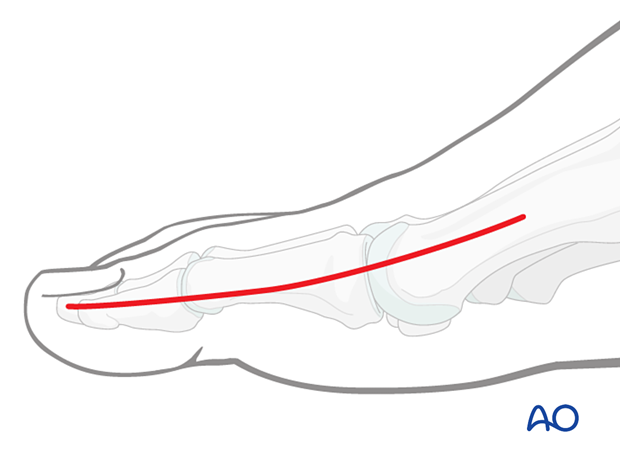
An open approach may be required to reduce the fracture and remove soft-tissue interposition.
Typically the medial approach to the hallux is used.
Consider inserting the K-wires outside the skin incision to prevent contamination.
3. Reduction and preliminary fixation
Indirect reduction
Grasp the digit's terminus and use a combination of axial and angular traction to exaggerate the deformity.
Realign the toe and release the traction.

Direct reduction
DebridementWhen an anatomic reduction is desired, it is crucial to debride the hematoma and invaginated periosteum from the fracture site.
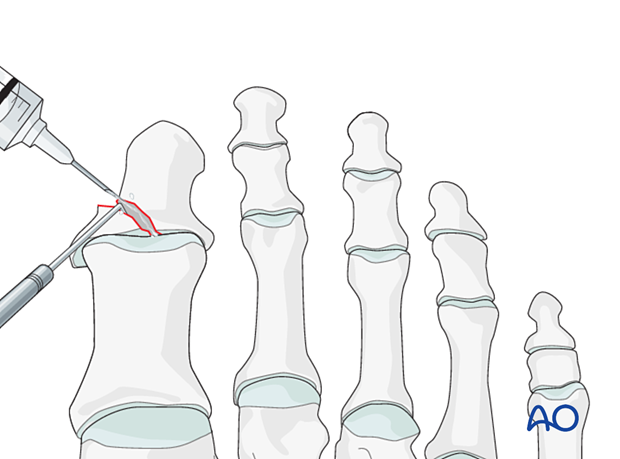
Restore anatomical axial rotation, length, and angulation using one or more of the below techniques:
- A small, pointed reduction forceps can be used for larger fragments. Be careful not to apply excessive force as this can lead to fragmentation. If possible, apply the reduction clamp so that the forces created by the clamp are at right angles to the fracture line. This clamp placement helps in reducing the fracture and in applying compression.
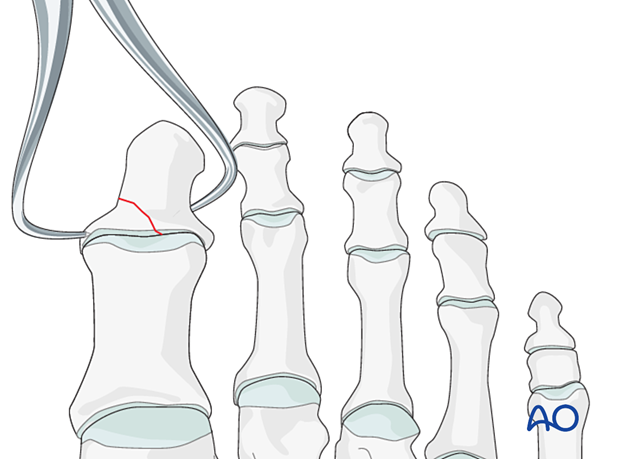
- A K-wire can be inserted into the fragment and used as a joystick. Once reduction is accomplished, the wire may be advanced to secure the reduction.
Use image intensification to confirm the reduction.
4. K-wire insertion (non-axial)
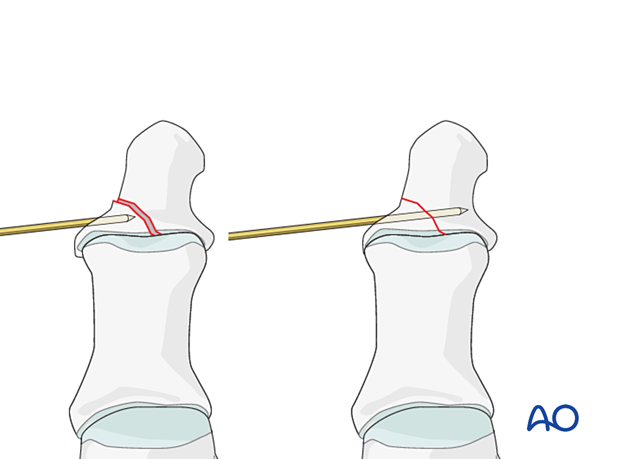
A K-wire is inserted percutaneously according to the preoperative plan (if not already done so using the joystick technique).
Caution should be made to prevent thermal injury when inserting a K-wire in dense bone.
Intraoperative fluoroscopy is particularly useful to aid the correct position of the K-wire.
The stability of the reduction is assessed, and if needed, additional K-wires are inserted.
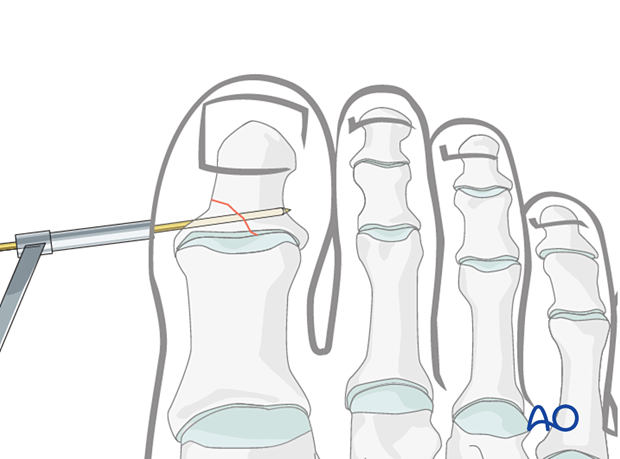
When satisfactory stability is achieved, cut the K-wire leaving adequate K-wire protruding through the skin to facilitate removal.
Assess the skin pin interface and release any excessive skin traction.
5. K-wire insertion (axial)
Marking K-wire track
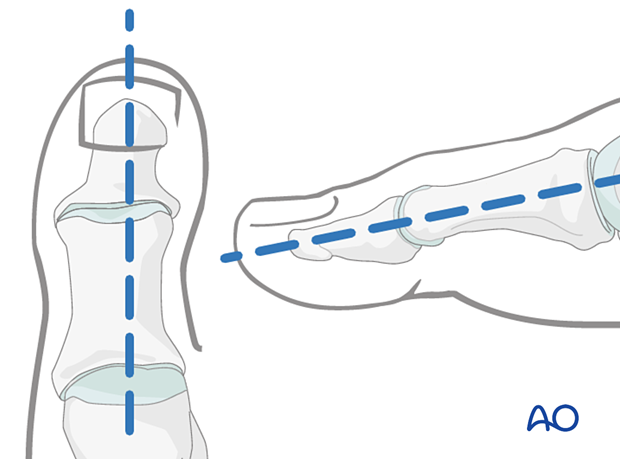
To avoid unnecessary radiation from image intensification, mark the K-wire's planned track with a skin marker on the distal phalanx in both the AP and the lateral aspects.
K-wire insertion into the distal phalanx
A 16 gauge hypodermic needle or a drill guide can be used to prevent the K-wire from slipping during insertion. Either instrument facilitates K-wire insertion along the longitudinal axis of the phalanx.
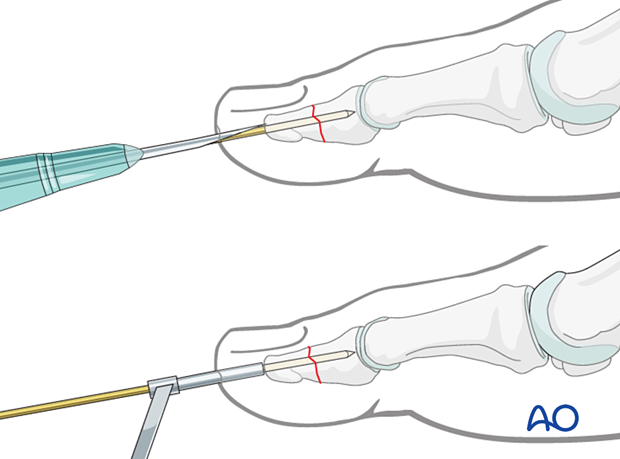
If a K-wire is mistakenly inserted at an angle to the phalanx axis, it is recommended to leave it in until a second K-wire has been inserted in the correct orientation. Leaving the first K-wire in place prevents the second wire from going unintentionally along the wrong track.
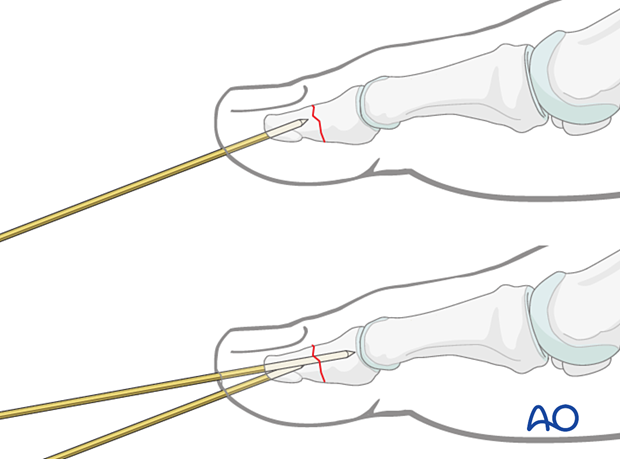
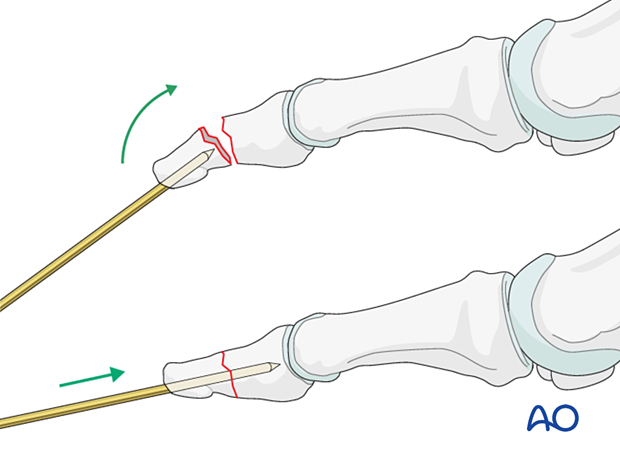
Optional reduction and fixation technique: Use K-wire as a joystick
Advance the K-wire up to the fracture line but not across it. Use the K-wire as a joystick to reduce the fracture.
Once satisfactorily reduced, the wire can be advanced across the fracture plane and into the phalanx base.
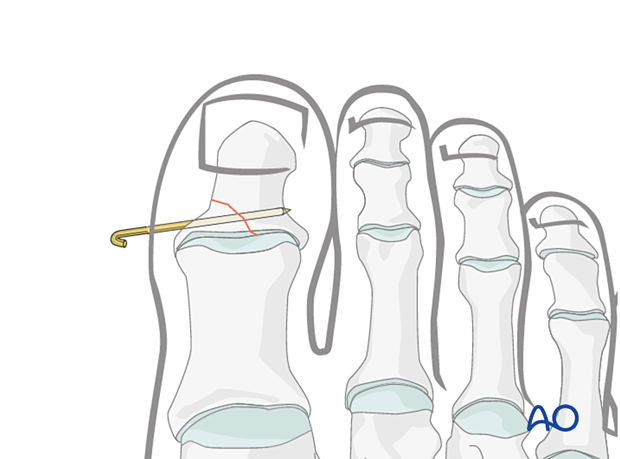
Cut the K-wire
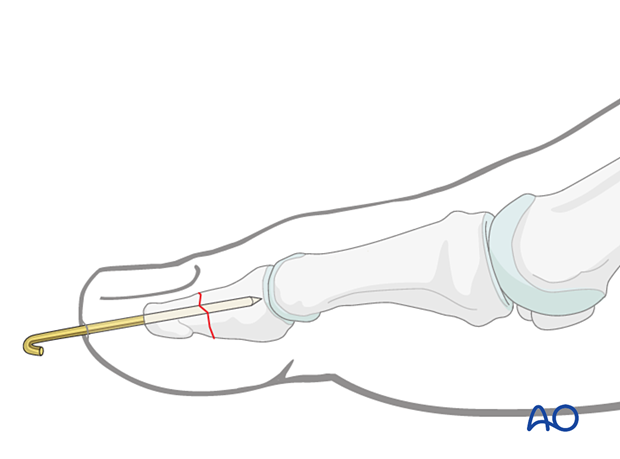
Cut the K-wire so that it protrudes through the skin, about 1 cm from the tip of the toe.
With the wire placed in a finished position, clamp the portion of the wire nearest the skin with a Kocher.
Using a sucker tip that goes over the tip of the K-wire, the K-wire is bent 170°.
The K-wire is then cut such that enough length is left for ease of removal.
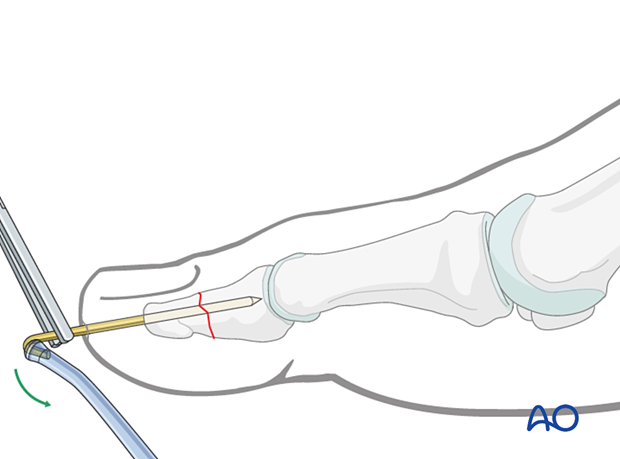
Leaving the K-wire to protrude through the skin in this way has the advantage of its being easy to remove. The disadvantages are patient discomfort and the risk of pin-track infection.
6. Aftercare
An appropriate well-padded dressing should be applied to protect the surgical incision.
The skin pin interface should be similarly well-padded but with dressings that can be readily removed to inspect for pin site infection.
Immediate postoperative treatment is rest, ice, and elevation.
The patient should be encouraged to begin early weight-bearing as permitted by the stability of the fracture. In general, patients can be weight-bearing as tolerated.
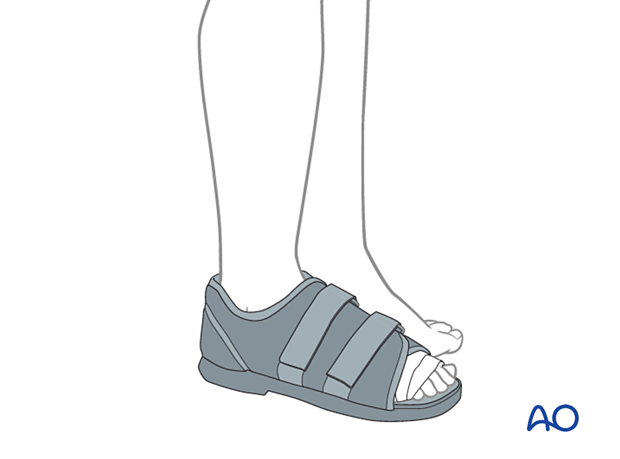
A stiff-soled shoe can be used to protect the surgical site.
Patients must exercise their ankle and subtalar joints to prevent stiffness (eg, by stretching their Achilles).
X-ray the toe at six weeks to confirm satisfactory union and remove K-wires if present. Once the fracture is united, the orthosis may be gradually discontinued.
