

External skeletal fixation
1. Indications
The use of circular and hybrid external skeletal fixators (ESFs) is appropriate for 23-A2 and 23-A3 fractures, especially in toy and small breed dogs. They can also be used in larger breeds where the distal fracture fragments are too small for plate management.
External fixators can also be extremely useful in the management of open fractures of the distal radius and ulna in dogs and cats.
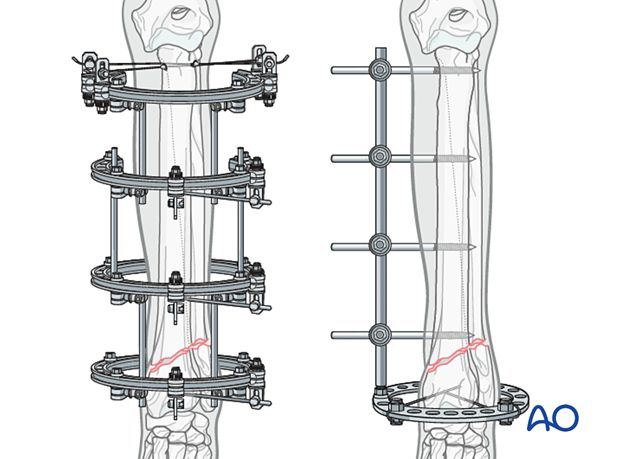
Circular fixation
Circular ESFs based on interconnected rings and K-wires are commonly used for the management of juxta-articular fractures that cannot be adequately stabilized by other implant systems.
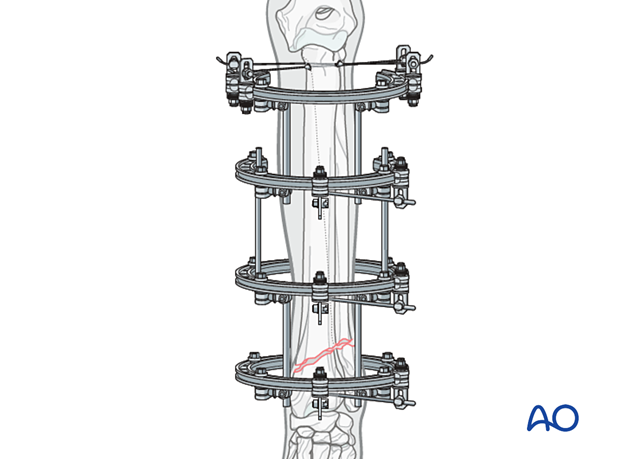
Hybrid fixation
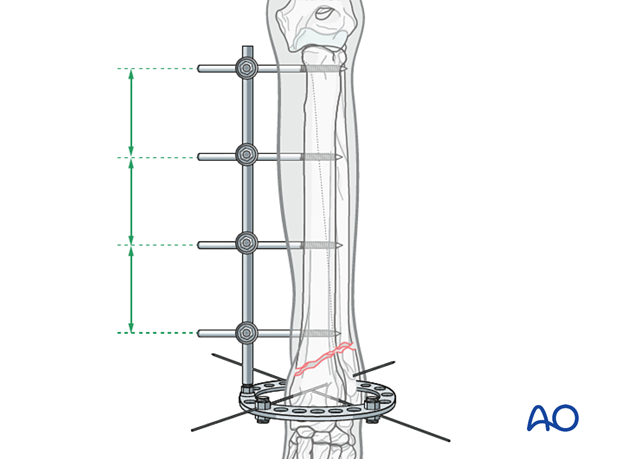
A hybrid ESF combines fixation half-pins coupled to connector rods proximally (ie, a linear ESF) and diverging K-wires coupled to full or partial rings distally. At a minimum, a ring in the distal segment coupled with a type IA linear component is used to create the hybrid ESF.
The placement of a hybrid ESF is facilitated by fluoroscopy, allowing a minimally invasive approach to fracture fixation.
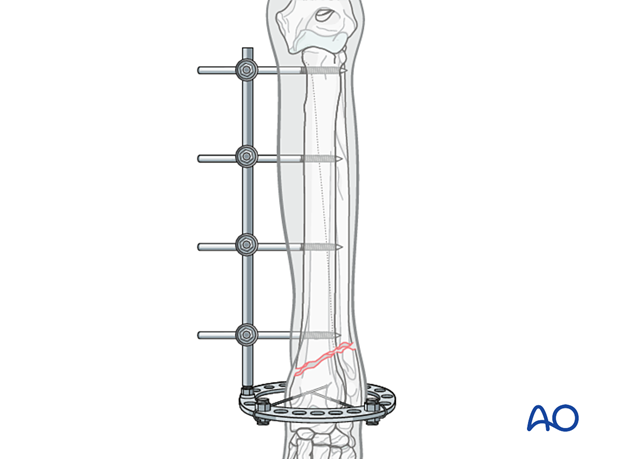
2. Positioning and approach
The patient is placed in dorsal recumbency at the end of the operating table.
A minimally invasive approach is used when closed reduction can be achieved.

3. Reduction
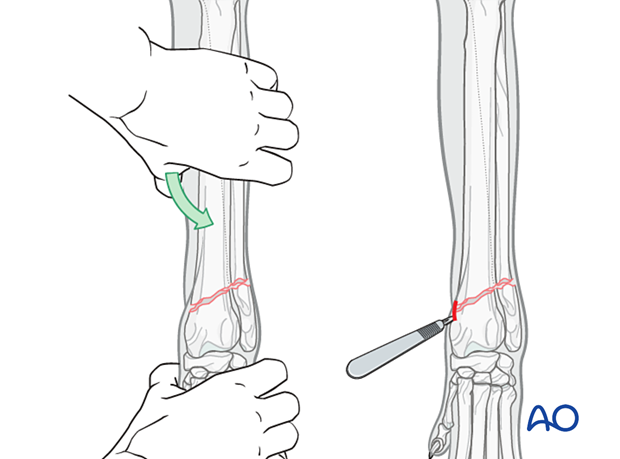
The fracture is closed-reduced when possible. Alternatively, a mini-open approach over the fracture can be used to reduce the fracture before applying the circular ESF.
4. Fixation
Ring fixator application
An appropriately sized ring is placed on the limb.
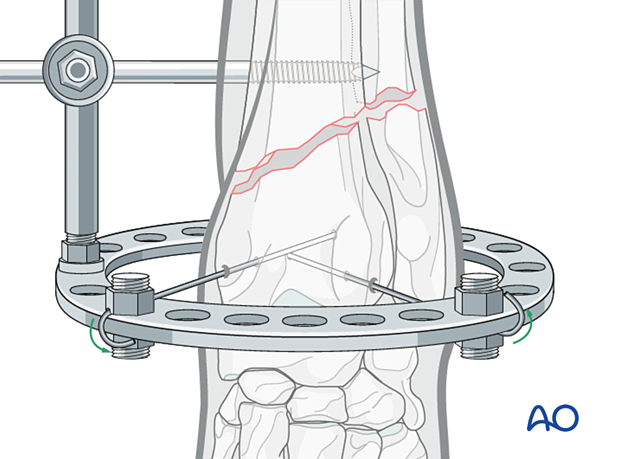
Using a surgical drill, a K-wire is driven perpendicular to the long axis of the radius and immediately proximal to the joint in the distal segment and distal to the ring. This K-wire should be placed in a craniolateral to caudomedial direction.
The K-wire is secured to the distal side of the ring with the limb centered in the ring. The ring axis is positioned perpendicular to the long axis of the radius.
Read more about general principles for ESF.
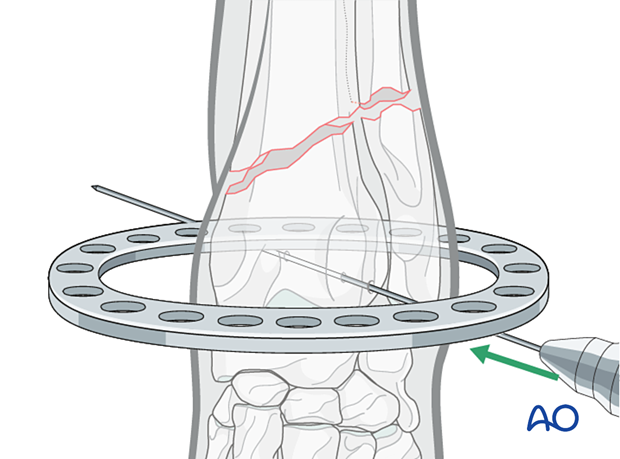
A second K-wire is placed on the proximal side of the ring, driven with a surgical drill in a craniomedial to caudolateral direction, crossing the first wire within the body of the radius, and secured to the ring. When placing the second wire, caution should be exercised to maintain the ring's plane perpendicular to the long axis of the radius.
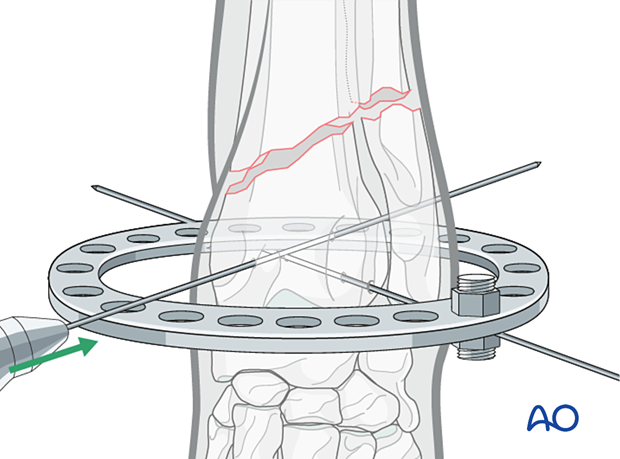
Assembly of the external skeletal fixator
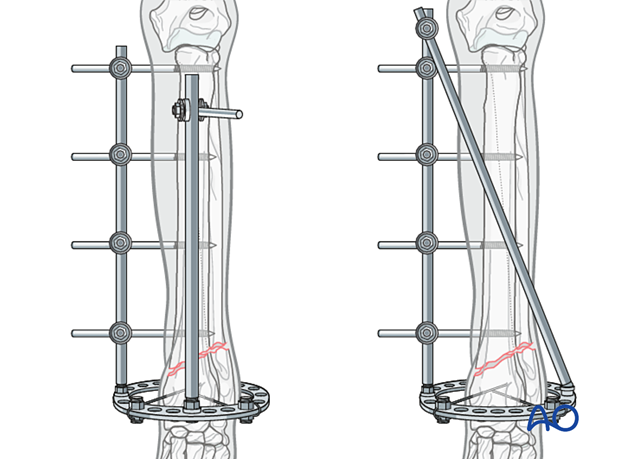
A hybrid connector rod is coupled to the ring on the medial side. Three to four clamps are placed on the connector rod, either then or later.
The rod is aligned with the long axis of the radius and an appropriately sized threaded half-pin is used to secure the connector rod to the bone, starting proximally. The half-pin should be placed through an appropriately sized pilot hole.
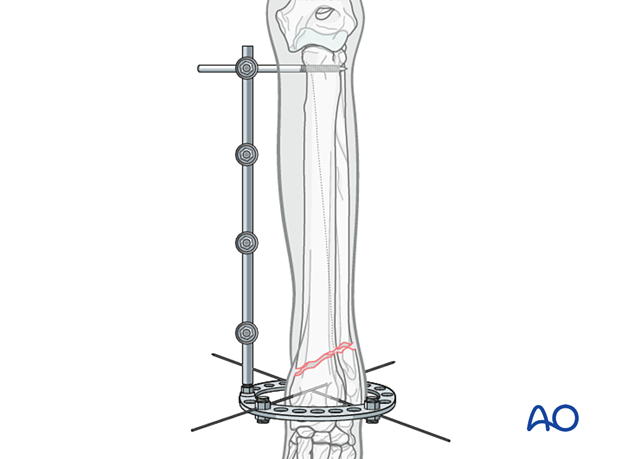
A second threaded half-pin is placed through the clamp closest to the fracture line, approximately one bone diameter proximal to the fracture line.
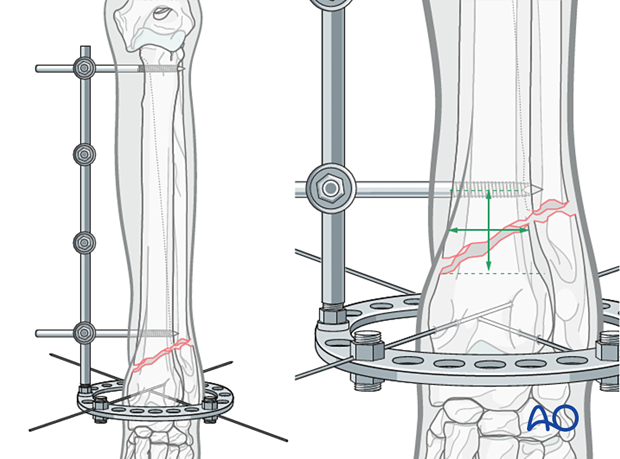
The remaining one to two half-pins are equally distributed between the first two pins. Any skin tension against a fixation pin is released with a scalpel.
The K-wires are cut and bent over the ring.
The ends of the half-pins are cut short at the level of the clamp and covered with protective caps.
5. Aftercare
Phase 1: 1–2 days after surgery
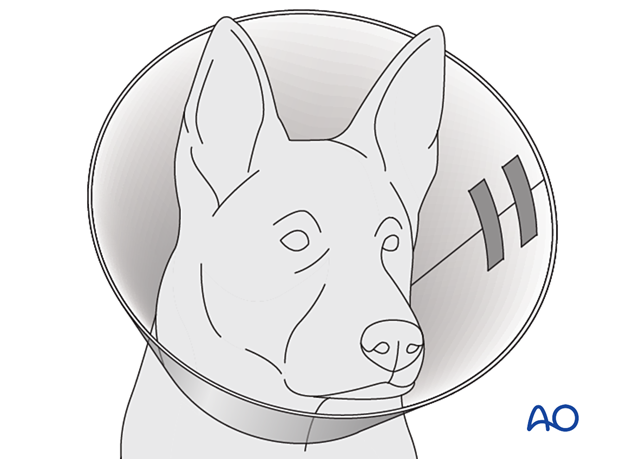
An Elizabethan collar (E-collar) must be worn until all bandages have been removed and the skin incision completely healed (approximately 10–14 days). Crate confinement and leash walking are critical.
Dry surgical scrub brush sponges should be placed between the skin and the bars to create gentle skin compression. A Robert Jones bandage can be used to help prevent postoperative swelling for the first 3–5 days after surgery. The aim is to reduce edema, inflammation, and pain. Following removal of the Robert Jones, bandaging can be limited to covering the frame with loose-weaved gauze and self-adhesive wrap.
Analgesics, including nonsteroidal anti-inflammatory medications and opioids, are recommended.
The pin-skin interface should be cleaned and adequately protected with a nonadherent bandage and triple antibiotic ointment.
Phase 2: Day 3–fracture healing
The aim is to resolve hematoma and edema and control pain. Nonsteroid anti-inflammatory medications may still be needed for the first 7–10 days.
The progress of incision healing can be assessed 10–14 days after surgery, and the sutures, if present, are removed.
The use of an E-collar can be discontinued once the incision has healed.
On day 3, the bandage and sponges are removed, and the pin-skin interface is inspected for drainage and cleaned with an antiseptic solution.
If edema still exists, the pin-skin interface is covered with a nonadherent bandage, surgical scrub brush sponges are placed between the skin and the bar, and the frame is wrapped with a compression bandage. In addition, a triple antibiotic ointment is applied on the edges of the skin. This process is repeated every 2–3 days (depending on the degree of drainage) until the edema has resolved. Once the edema has resolved and the pin-skin interface incisions have begun to granulate, the frame can simply be covered by compression bandage.
Clamp tightness should be checked weekly.
The skin-pin tract interface should be cleaned regularly until no discharge is noted.
Crate confinement and leash walking with sling support should continue. However, walks can slowly be increased to 5–10 minutes per week.
No high-impact activities, including running, jumping, or playing, should occur until the fracture is healed.
A radiographic assessment is performed every 4–8 weeks until confirmed bone healing.
Disassembly or staged disassembly
When there is evidence of early/soft callus formation, staged disassembly (ie, planned destabilization) of the construct can be considered.
Complete removal of the ESF is indicated once the fracture is healed.


