Posterior microscopic tubular cervical foraminotomy (PMTCF)
1. Introduction
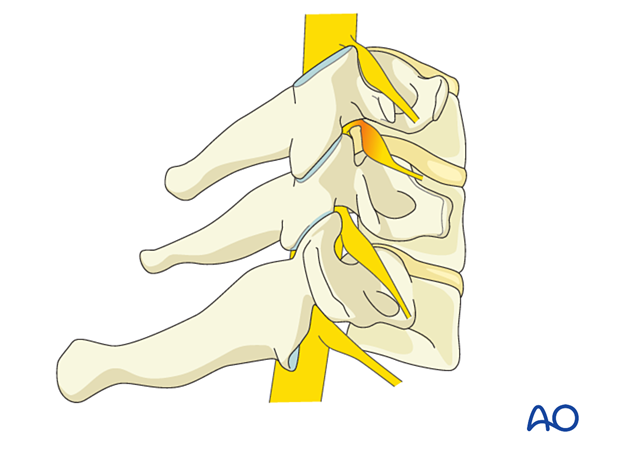
Cervical foraminal stenosis leads to nerve root compression through degenerative changes, including bony overgrowth/osteophytes or disc herniation. It may not always be clear from imaging which pathology is causing the compression, and in many cases may be multifactorial.
Thus, the sequence of this procedure is first to perform bony decompression to expose the nerve root. In some cases, this may be adequate.
However, inspection for disc herniation should always be performed and addressed if indicated. Additional bony decompression may be needed in cases of calcified discs or osteophytes.
To prevent instability, no more than 50% of the facet joint should be removed.
2. Required instruments
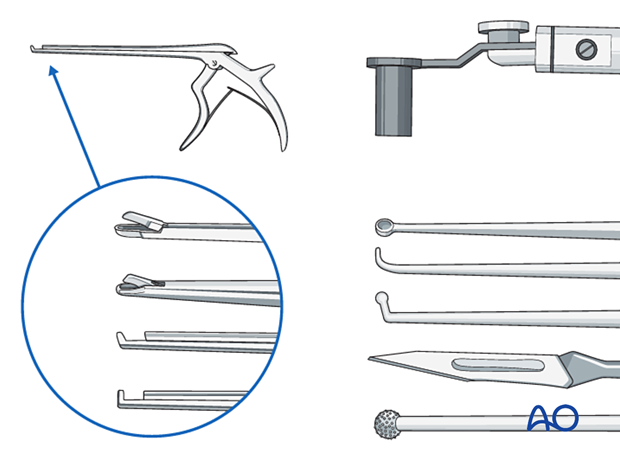
The following specialized instruments are recommended for this procedure:
- Tubular retractor system, 15 mm or 18 mm diameter tubes, variable lengths, or specular retractor
- Surgical microscope - an exoscope or loupes and headlights may be used instead
Bayonetted MISS instruments:
- Kerrison rongeurs 1–3 mm, 45° and 90° angle
- Pituitary rongeurs
- Ball tip nerve hook
- Knife
- Curettes of various sizes and angles
- Nerve root retractor
- High-speed burr with diamond tip (or a side-cutting burr) with an extra-long angled or curved handpiece
- Suction
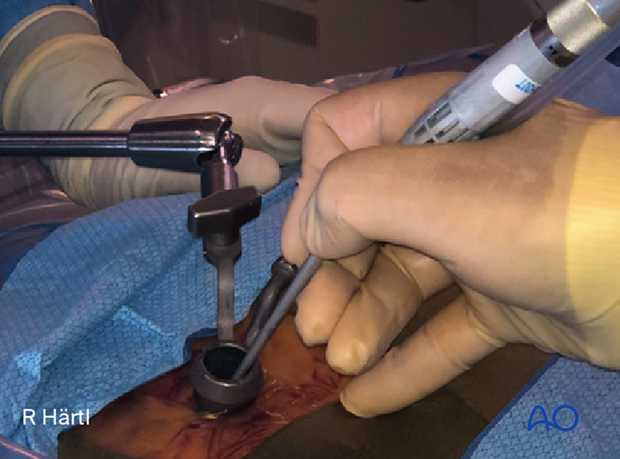
- Always stabilize/support instruments, including the burr, on the edge of the tubular retractor.
- When using the burr, the surgeon may initially use two hands. With increased experience, the surgeon should be able to control the drill with one hand when stabilizing it along the edge of the tube, and maybe by using the fourth or fifth finger to touch the sterile field surrounding the tube (see image). This will free up the other hand to use the suction.
3. OR set up and patient positioning
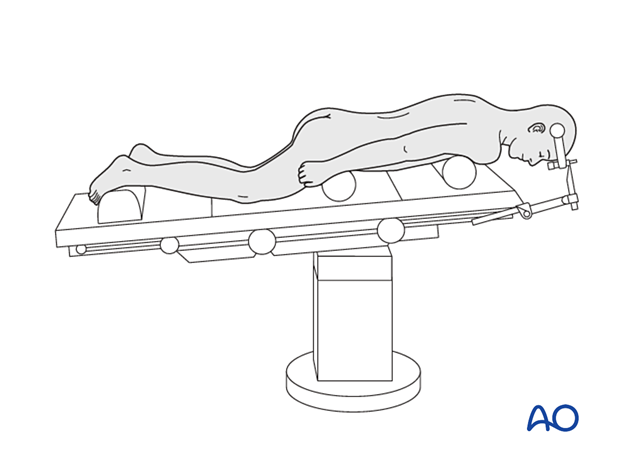
The patient is placed in a prone position with the head in a Mayfield head holder and slight neck flexion in a reversed Trendelenburg position.
A sitting position is an option depending on the surgeon's preference. While the sitting position reduces bleeding, it increases the risk of air embolism.
4. Fluoroscopic identification of target level after draping
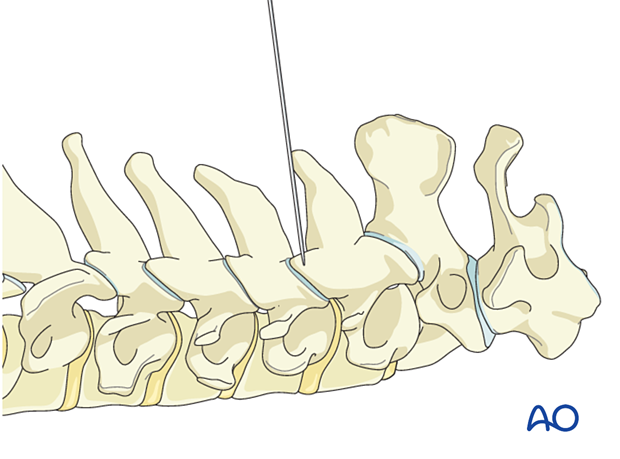
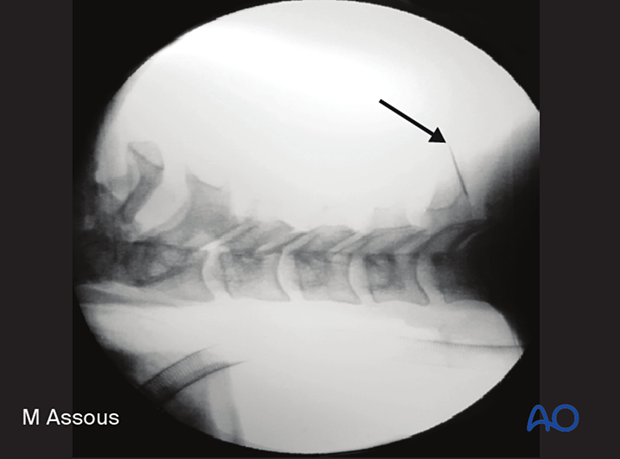
The correct operative level is determined using a spinal needle and AP and lateral fluoroscopy or navigation.
Aim the needle parallel to the disc space, directly at the facet joint.
Alternatively, use 3D navigation to localize the correct level throughout the procedure.
5. Visualization of the surgical field
Incision
The skin can be infiltrated as per the surgeon's preference.
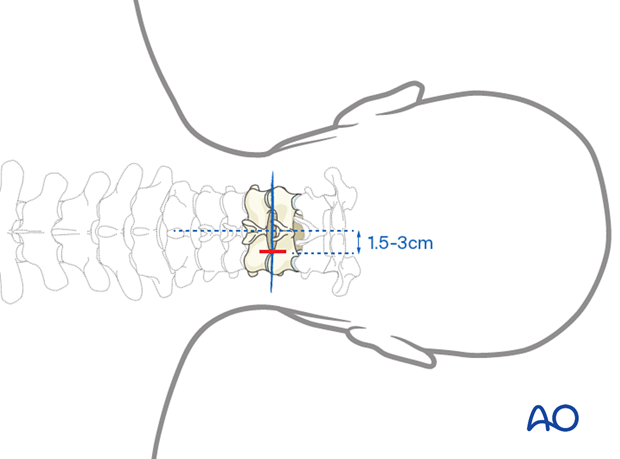
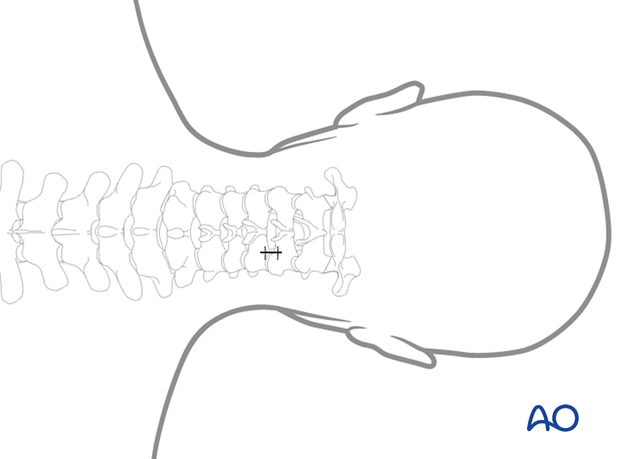
Perform an appropriately sized paramedian incision on the symptomatic side. Typically, this will be 1.5–3 cm laterally to the midline.
Open the fascia sharply. Carefully dissect the trajectory to the docking point of the first dilator, located at the medial aspect of the facet joint, using Metzenbaum scissors and bipolar coagulation.
Meticulous bleeding control needs to be maintained.
Insertion of dilators
Visualize the docking point of the first dilator. Insert the first dilator under direct visualization and confirm the correct level using fluoroscopic guidance or navigation.
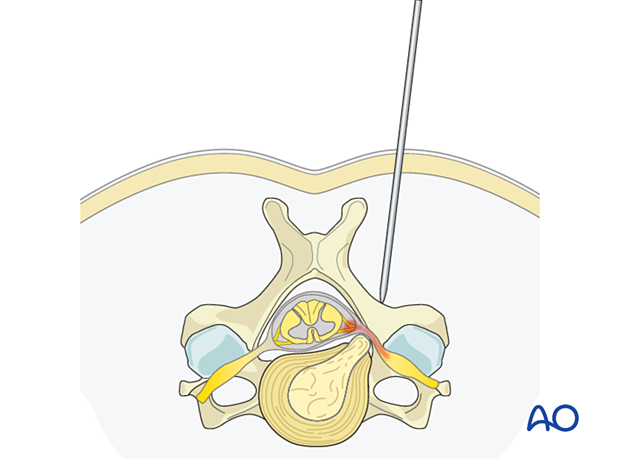
Insert sequential dilators until the appropriate dilation has been achieved.
Determine the required tube length and insert the final tubular retractor (typically 15–18 mm diameter) level to the skin. Then remove the dilators.
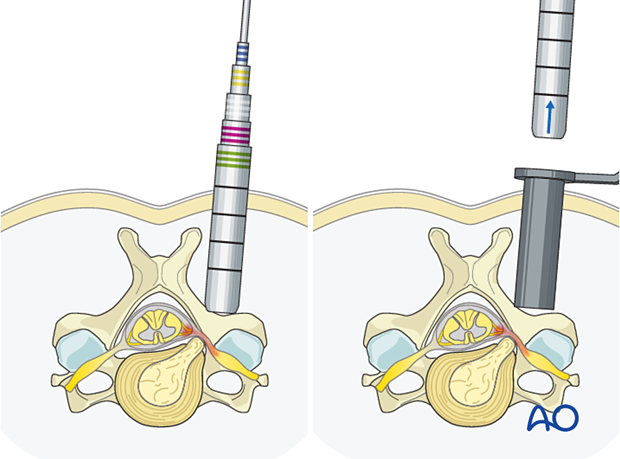
Secure the retractor to the table-mounted arm.
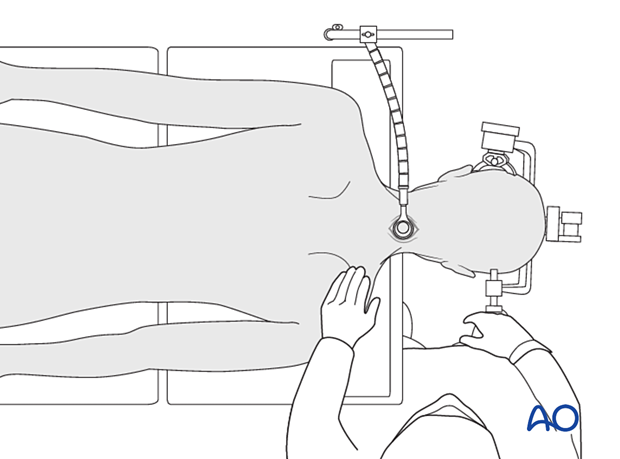
The microscope should be brought in at this point. Alternatively, an exoscope or loupes and headlights may be used.
Insert the microscope so the surgeon can be positioned parallel to the spine. This position will help with orientation.
Remove the soft tissues using monopolar or bipolar diathermy to visualize the facet joint and the lateral aspect of the interlaminar space.
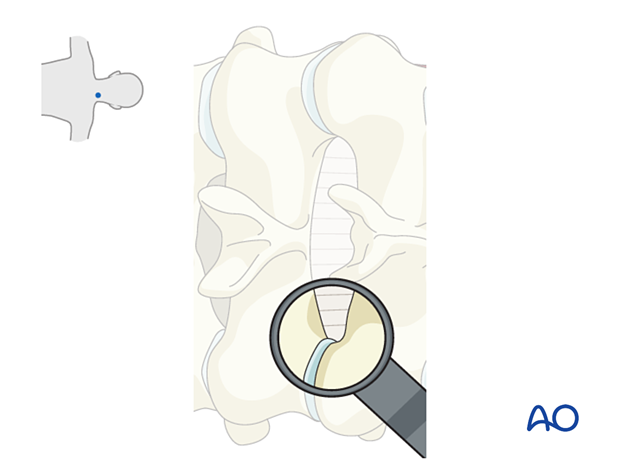
Optimal visualization is obtained when the medial half of the facet joint and the V shape between the inferior and superior lateral lamina are visible (as illustrated). The bottom of the V should be centered in the view.

Check that the tube position is correct using fluoroscopy or navigation.
6. Decompression
Bone available for removal
Approximately 1/3 of the lamina above and the lamina below must be removed.
Care must be taken not to remove more than the medial half of the facet joint, as this may lead to joint instability.
Cranially and caudally, bone removal is limited by the pedicles.

Bone removal
LaminaThin out the lateral third of the cranial and caudal laminae using a high-speed burr. A diamond burr is preferred because of the proximity to the nerve roots and the dura.
There can be epidural venous bleeding, which should be controlled with hemostatic agents or bipolar cautery.
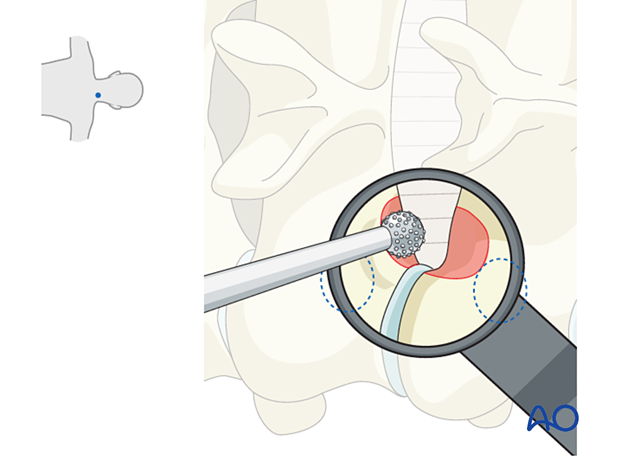
When thinned sufficiently, continue the hemilaminotomy using a 1–2 mm Kerrison rongeur to expose the lateral margin of the ligamentum flavum (LF).
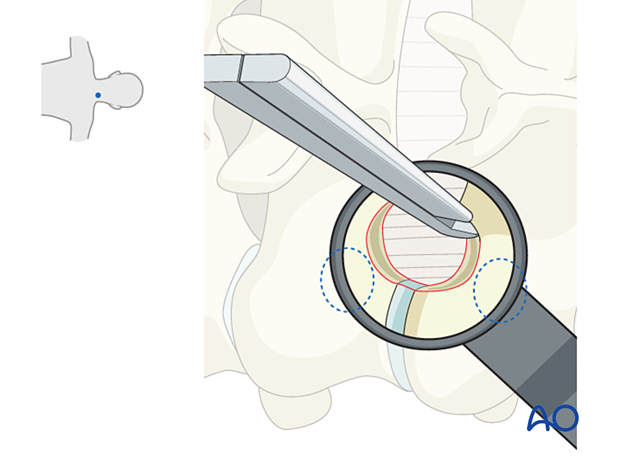
The lateral aspect of the LF may be visualized, which is dissected using a blunt nerve hook.
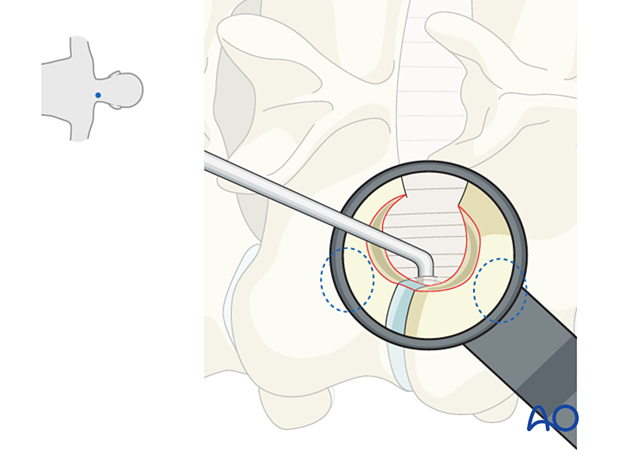
Alternatively, a 1 mm Kerrison rongeur may be used from medial to lateral to resect the exposed LF.
Use bipolar diathermy on a low setting before completely removing the LF to reduce venous bleeding, which is very common at this stage.
The use of hemostatic agents may be required.
Keep in mind that the intraforaminal nerve root is not typically covered by the LF and can therefore be injured if entered unexpectedly with the drill.
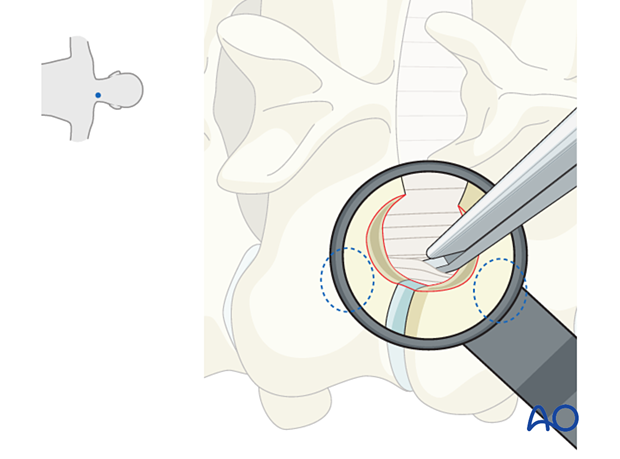
Foraminal decompression
The hemilaminotomy is completed once the underlying nerve root and dura are visualized.
The exiting nerve root is typically most compressed underneath the superior articulating process. Care should be taken to thin this out with the burr.
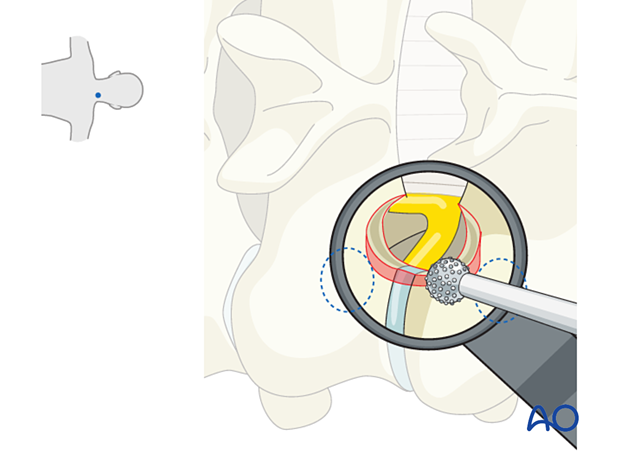
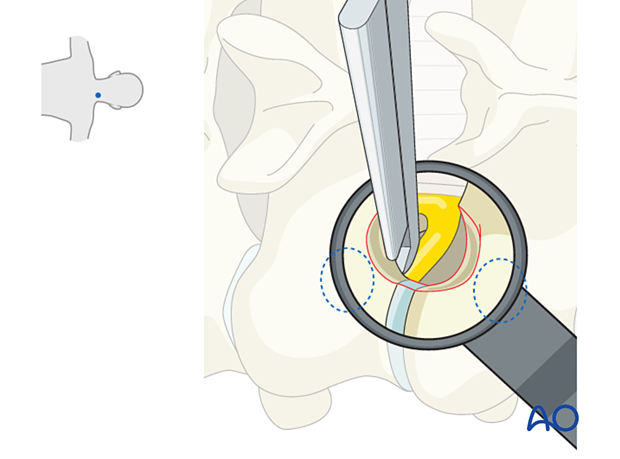
Burr out the medial aspect of the facet until the medial border of the cranial and caudal pedicle wall can be palpated.
Palpate the foramen with a small nerve hook to verify adequate decompression.
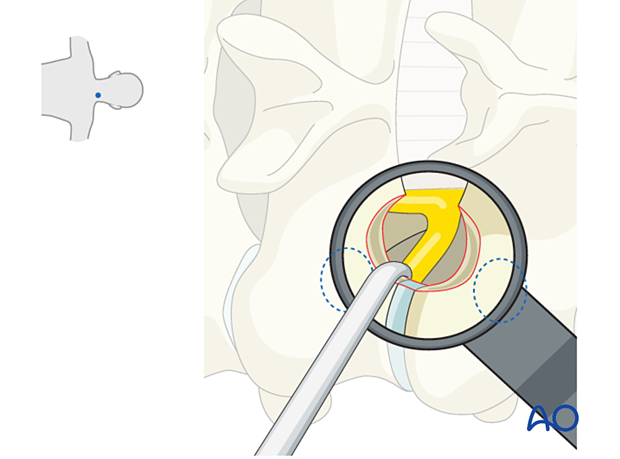
It is helpful to know the size of the facet to prevent over-resection and instability. Its size can be found by palpating the lateral border of the facet using a Penfield 4.
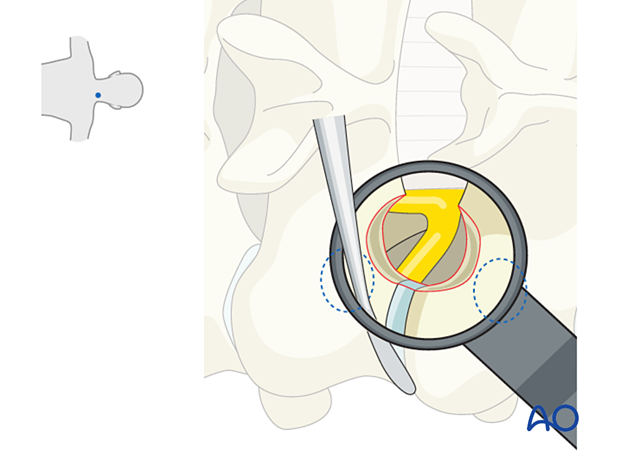
Mobilization of the nerve root
Carefully identify the exiting nerve root.
The pedicles are always reliable landmarks for finding the root.
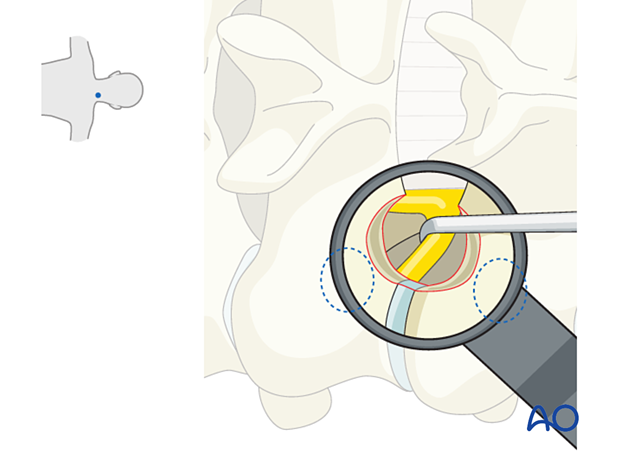
The nerve root should be carefully mobilized cranially to inspect for disc herniation.
Beware of double roots.
It is not uncommon for a herniation to be found cranial to the root.
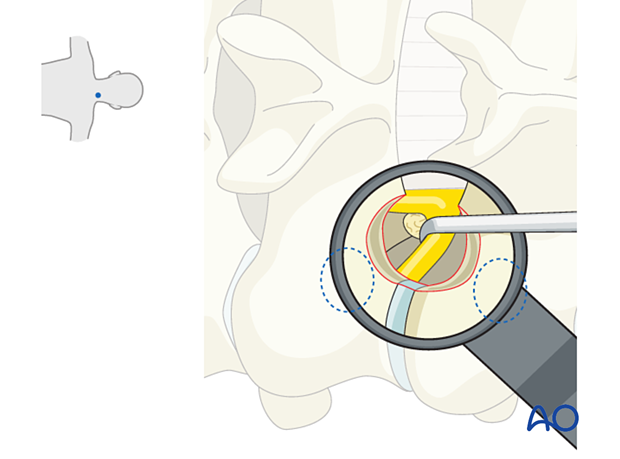
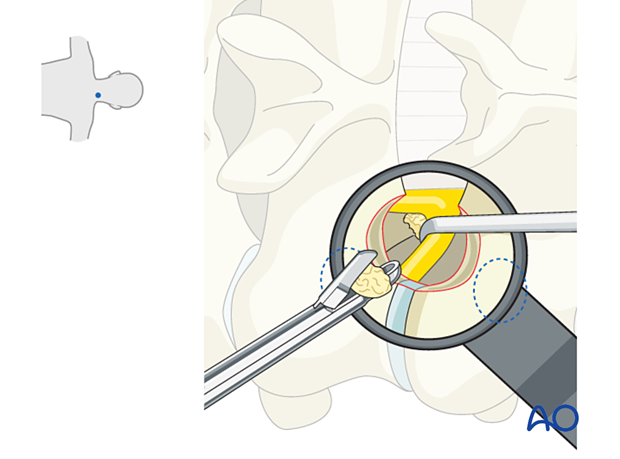
Removal of extruded disc material
Extruded fragments are removed with pituitary rongeurs.
7. Tube removal and closure
Hemostasis is achieved with hemostatic agents or bipolar cautery.
The tube is slowly removed. Any muscular bleeding should be identified and cauterized.
The fascia is typically closed using an interrupted suture.
Standard multilayer closure of subcutaneous layers and skin is performed.
A drain may be used if necessary.
8. Aftercare
The patient can usually be discharged on the day of surgery or the following day.
Cervical immobilization is not required.
Patients may feel incisional or muscular pain that usually subsides within a few days.


