Revision of a stemless implant
1. Principles
The primary principle is to obtain a stable humeral component while creating the environment for the periprosthetic fracture to unite.
ORIF of the humerus is required in addition to revision of the humeral component. Further information can be found in the AO Surgery Reference adult trauma Humeral shaft module.
Preoperative planning ensures:
- Adequate surgical exposure
- The necessary inventory of equipment and implants
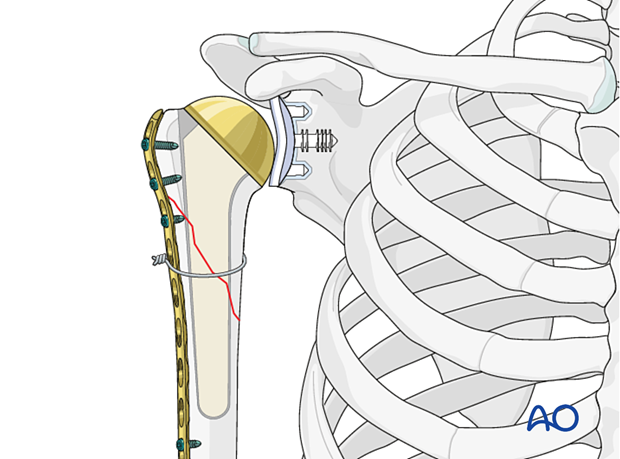
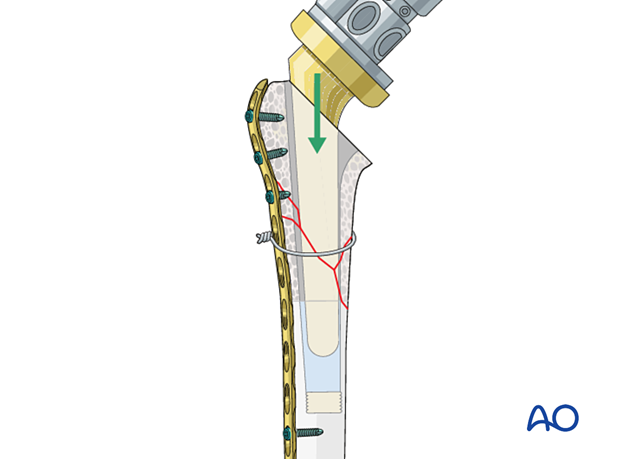
This illustration shows the final construct after revision of a stemless implant to a stemmed implant.
2. Preparation
The standard patient position is the beach chair position with inclination of about 30°. An arm holder may be helpful but is not essential.
Intraoperative fluoroscopy can be helpful.
Patient positioning should be discussed with the anesthetist.

3. Approach
The standard approach is a deltopectoral approach.
This may be extended distally or proximally as needed.

4. Implant removal
Stemless prosthesis
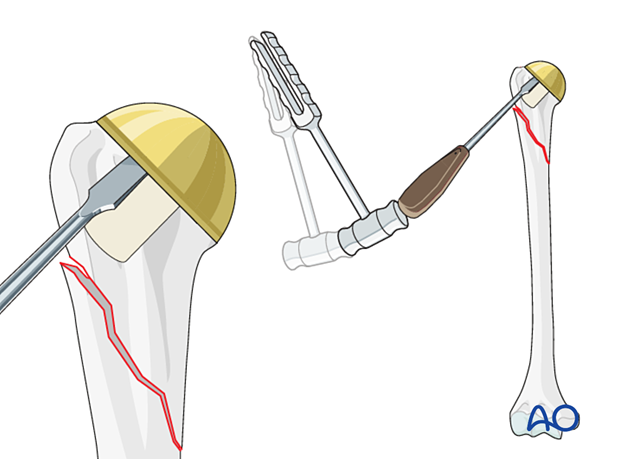
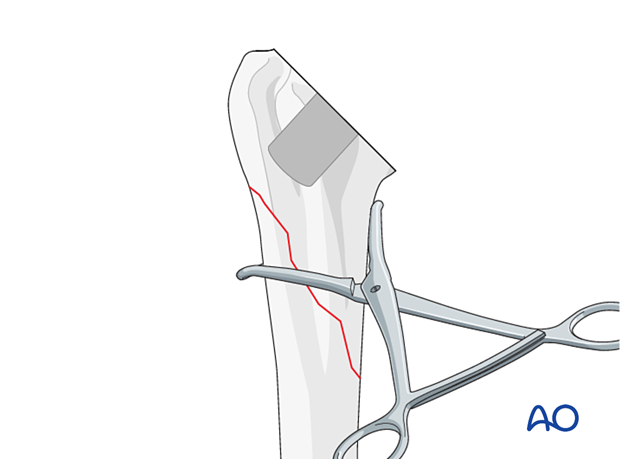
In the case of a stemless prosthesis, osteotomes are used to liberate the periphery of the prosthesis. An implant-specific tool is used to remove the prosthesis.
5. Reduction
The fracture should be appropriately exposed.
Bone fragments are reduced to realign the metaphysis and diaphysis.
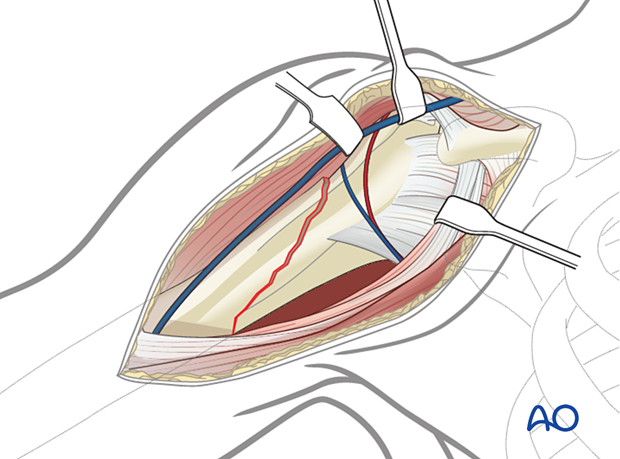
Provisional reduction is achieved with reduction clamps.

In simple fracture patterns, cerclage cables or wires can be used to maintain the reduction.
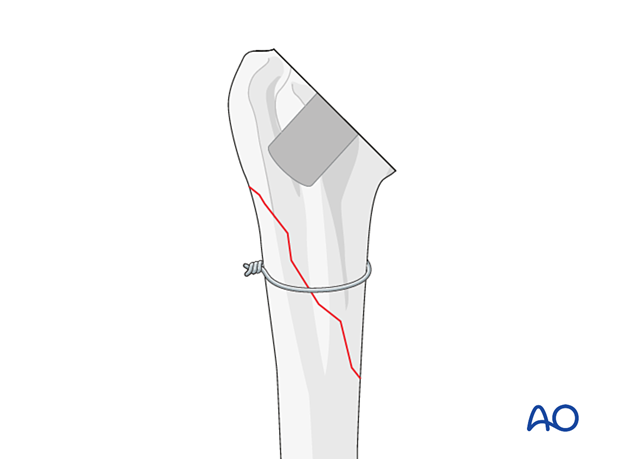
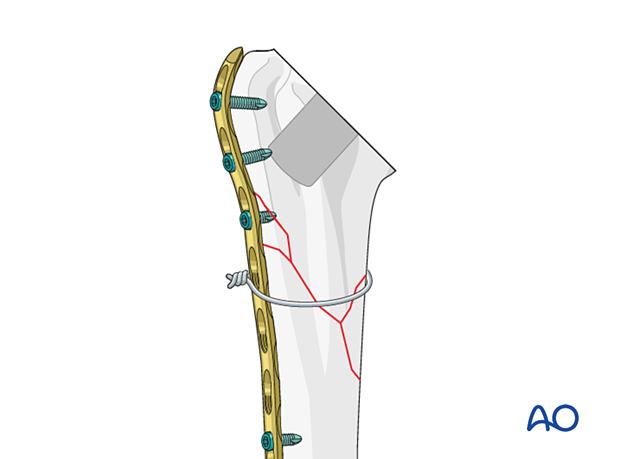
In complex fracture patterns, bridging plate fixation is required to maintain reduction and stability.
Provisional reduction of the fracture may be provided by cerclage wire or sutures.
The appropriate plate for bridging fixation may be applied and provisionally fixed proximally and distally, taking care not to obstruct the implantation of a planned humeral component. Provisional monocortical screws are recommended.
6. New stemmed implant – preparation and insertion
After reduction and fixation of the fracture the choice of cemented or uncemented revision stemmed implant is based on a number of factors including:
- Predicted implant-bone interface quality
- Humeral shaft morphology
- Bone quality
The implantation technique options include:
- Uncemented
- Cemented
- Hybrid
Uncemented
The uncemented implantation technique is chosen when predicted implant-bone interface quality is sufficient for primary humeral implant stability.
A standard humeral component is implanted following appropriate preparation, according to the manufacturer's instructions.
Information about the uncemented basic technique is provided here.
After implantation of the humeral component definitive bridging fixation of the fracture is completed using a combination of techniques including short locking screws proximally, supplementary cerclage wires or sutures, and long locking screws distally.
Information about plate fixation principles can be found here.
Cemented
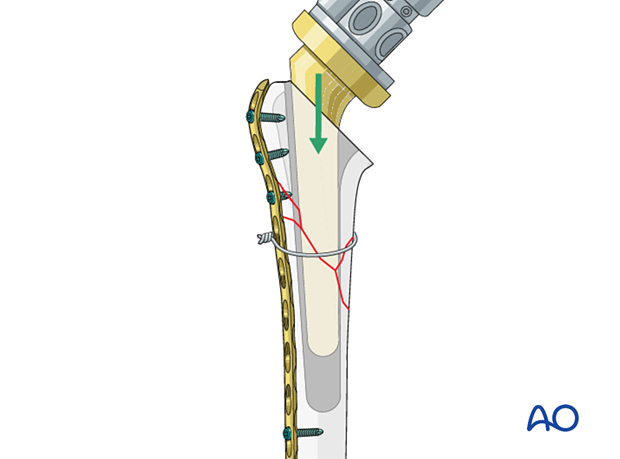
The cemented implantation technique is chosen when predicted implant-bone interface quality is not sufficient for uncemented primary humeral implant stability.
Information about the cemented basic technique is provided here.
After implantation of the humeral component definitive bridging fixation of the fracture is completed using a combination of techniques including short locking screws proximally, supplementary cerclage wires or sutures, and long locking screws distally.
Information about plate fixation principles can be found here.
- Cement extrusion at the fracture site may compromise eventual fracture healing
- Cement extrusion at the fracture site may damage the radial nerve (and other close nerves) if not noted
Hybrid
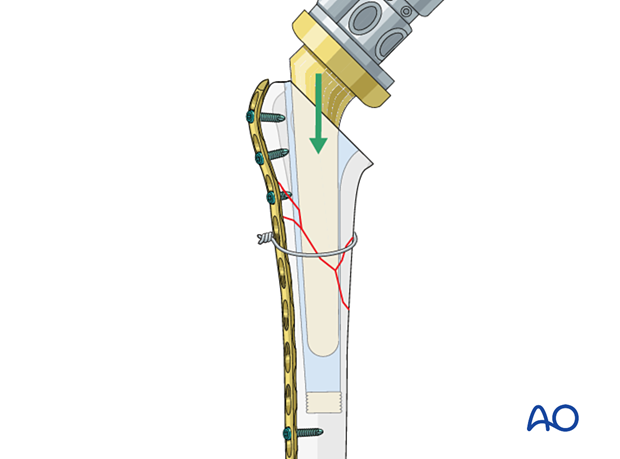
The hybrid implantation technique is chosen when predicted implant-bone interface quality at, and proximal to, the fracture site is considered likely to heal well enough for secondary humeral implant stability. Cementation of the humeral implant distal to the fracture provides initial humeral stem stability, which then facilitates secondary humeral implant stability as the fracture heals.
Information about the hybrid basic technique is provided here.
After implantation of the humeral component definitive bridging fixation of the fracture is completed using a combination of techniques including short locking screws proximally, supplementary cerclage wires or sutures, and long locking screws distally.
Information about plate fixation principles can be found here.
- Cement extrusion at the fracture site may compromise eventual fracture healing
- Cement extrusion at the fracture site may damage the radial nerve (and other close nerves) if not noted
7. Shoulder joint stability
In the setting of an anatomic total shoulder replacement, the rotator cuff must be robust and intact, and the subscapularis tendon must be repaired. If these conditions are not met, a reverse total shoulder replacement should be considered.
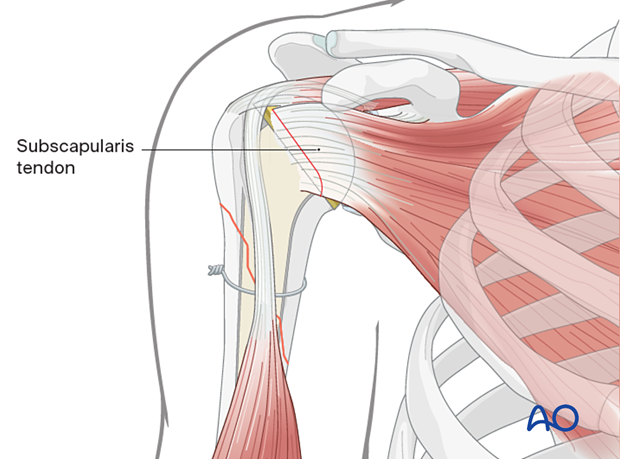
Stability of a reverse total shoulder replacement can be improved by:
- Repair of the greater and/or lesser tuberosities
- Repair of the subscapularis tendon
- Using a retentive polyethylene humeral liner
- Revising the glenosphere
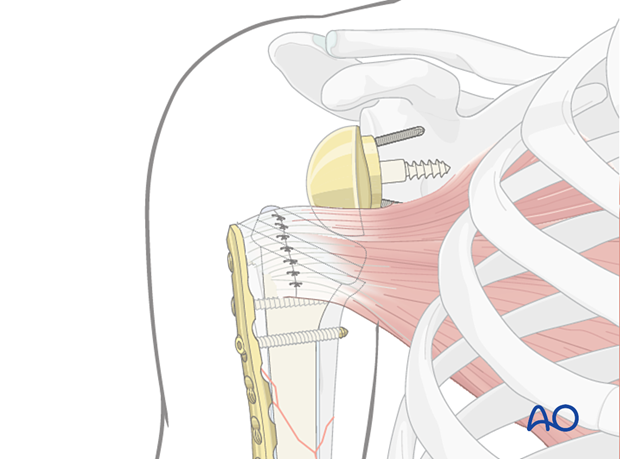
8. Stability verification
Stability of the total shoulder replacement and fracture fixation is assessed by passive movement of the limb through a functional range of movement to include internal rotation (placing the hand by the ipsilateral hip), elevation (placing the hand on the vertex of the head), and external rotation in mid-range elevation (reaching forward).
If necessary, image intensification whilst performing these movements may be helpful.
9. Aftercare
Postoperative phases
The aftercare can be divided into four phases of healing:
- Inflammatory phase (week 1–3)
- Early repair phase (week 4–6)
- Late repair and early tissue remodeling phase (week 7–12)
- Remodeling and reintegration phase (week 13 onwards)
Full details on each phase can be found here.


