Bridge plate
1. Note on illustrations
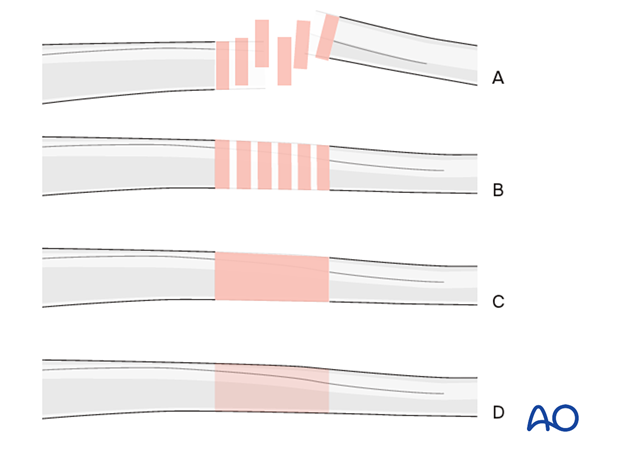
Throughout this treatment option, illustrations of generic fracture patterns are shown, as four different types:
A) Unreduced fracture
B) Reduced fracture
C) Fracture reduced and fixed provisionally
D) Fracture fixed definitively
2. Introduction
Bridge fixation is selected in multifragmentary or osteoporotic fractures.
Length, alignment, and rotation must be achieved with bridge fixation independently of which implant is chosen.
Principles
Alignment of the main fragments can be achieved indirectly with the use of:
- traction
- reduction tools
- the implant itself
In general, three major deformities must be managed when performing open fixation of the distal femur with condylar LCP:
- Varus/valgus: The frontal plane alignment is determined by the fixation of the femoral articular block to the condylar LCP with the distal locking screws. If the central 7.3 mm screw in the plate is parallel with the tibio-femoral joint surface, this ensures appropriate varus/valgus alignment.
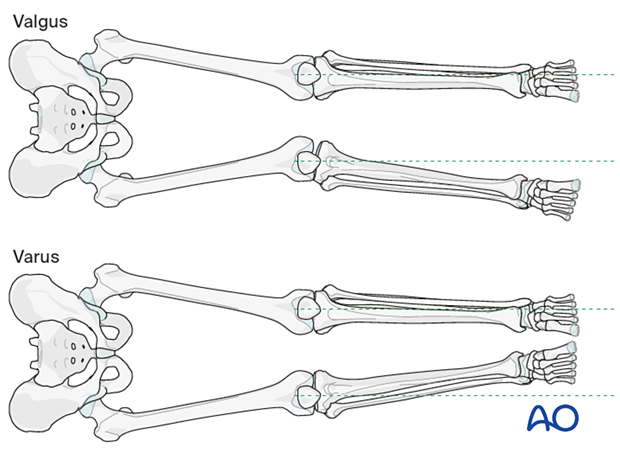
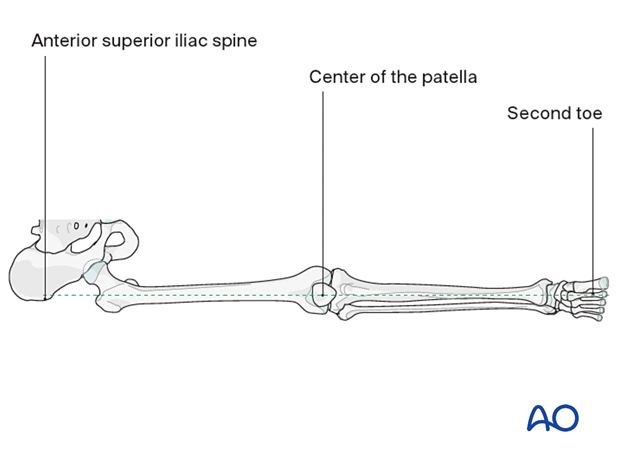
- Rotation: Careful monitoring of the rotation of the limb is observed throughout the operative procedure. The rotation becomes established once a distal screw and a proximal screw have been inserted.
- Flexion/extension (sagittal plane alignment): The alignment of the Condylar LCP on the lateral aspect of the distal femur establishes the presence or absence of any extension, or flexion, deformity at the fracture site. The second screw in the distal segment establishes the sagittal relationship between the plate and the distal fragment. The sagittal reduction at the fracture becomes established (“locked-in”) once the plate is fixed to the femoral shaft.
Hyperextension deformity
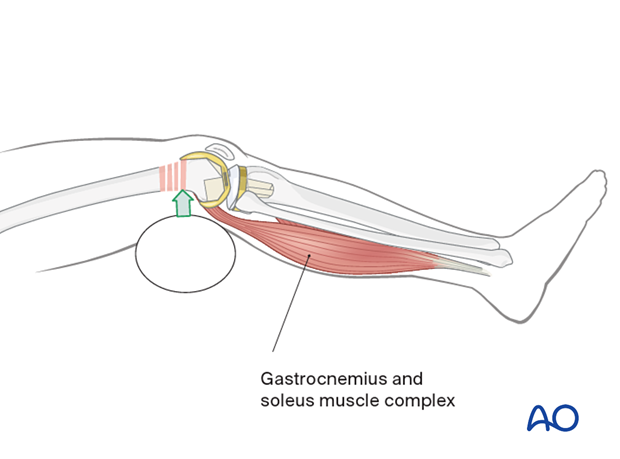
The gastrocnemius typically causes a hyperextension deformity of the distal femoral articular block.
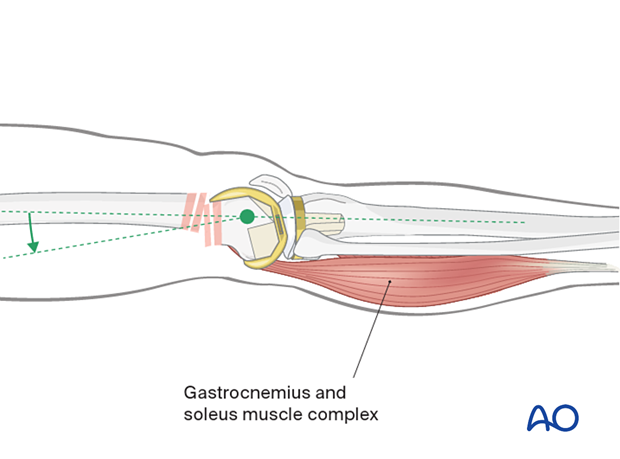
Hyperextension deformity must be corrected before fracture fixation. Aids to correcting this hyperextension deformity include:
- Muscle relaxation of the patient
- A bolster in the supracondylar region
- Flexion of the operating table leg segment
3. Implant selection
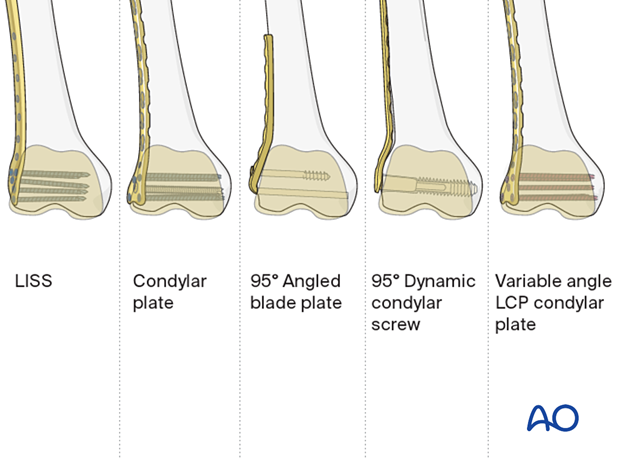
Comparison of distal femur implants
Bridge fixation of periprosthetic fractures can be achieved with a variety of plates:
- 95° angled blade plate
- LISS plate
- DCS plate
- Condylar LCP
- Variable angle LCP condylar plate
The distal femur has a unique anatomical shape. Seen from an end-on view, the lateral surface has a 10° inclination from the vertical, while the medial surface has a 20–25° slope.
A line drawn from the anterior aspect of the lateral femoral condyle to the anterior aspect of the medial femoral condyle (patellofemoral inclination) slopes approximately 10°. These anatomical details are important when inserting screws.
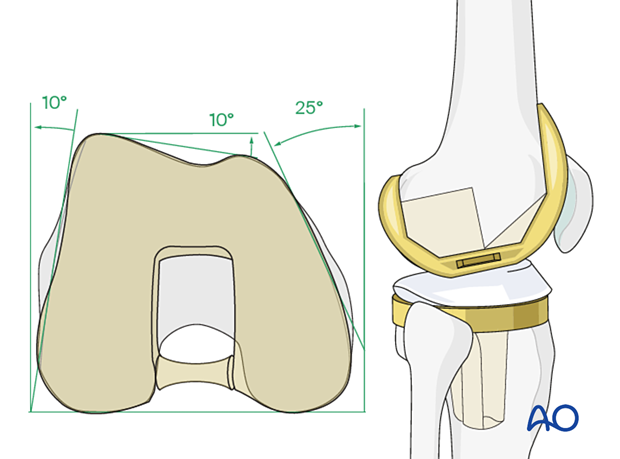
The geometry of the femoral component may block certain screw locations or trajectories.
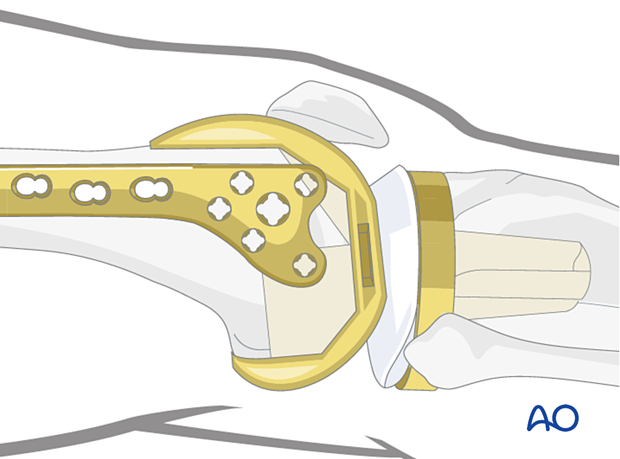
Variable angle screws provide the surgeon with more options for screw placement. This is especially useful in case of cruciate sacrificing femoral component.

Plate length/number of screws
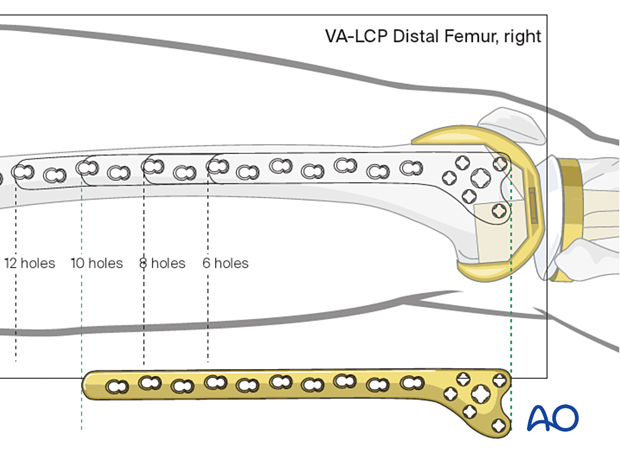
These fractures often occur in osteoporotic bone postoperatively; a long plate may be desirable to distribute stress in the poor bone. In general, 4 screws should be chosen to spread along the proximal plate, while 5 points of fixation are desirable in the metaphysis.
Options for additional stability
Additional stabilization can be achieved with locking and nonlocking screw fixation above and below the fracture site.
If there is no room for bicortical screw fixation, different options may be used around the component stem to secure the plate:
- Unicortical locking screw fixation
- Cerclage cables integrated into the plate
- Locking attachment plate
For additional details on these implants please refer to adjunct plate options.
4. Preparation and approach
This procedure is usually performed through an anterolateral or lateral approach.
5. Reduction
It is critical to consider what method would be used to assess indirect reduction. This will determine patient positioning, preoperative radiographs, operating room setup, and prepping and draping.
A key concept in reduction is that proper application of the precontoured plates on the distal femur assures correct frontal plane alignment.
Length, rotation, and sagittal plane deformity (hyperextension/hyperflexion) must be addressed.
Reduction aids
Reduction is aided by:
- Bolsters posterior to the supracondylar region, which help correct the hyperextension deformity of the distal femoral articular block. Further aids to reduce the hyper extension deformity is gastrocnemius relaxation and flexion of the knee to 30°.
- Manual traction or, preferably, femoral distractor, which helps restore length of the limb.
- A Hohmann retractor, which may be used as a lever to correct sagittal displacement.

- A sagittal pin can be used as a joystick in the condylar block to correct flexion/extension before interfragmentary compression is achieved.

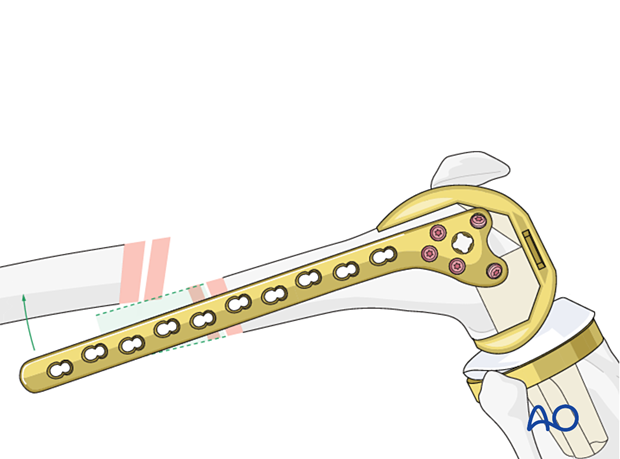
The plate itself can be used as a reduction too; by applying the plate in the correct position on the distal femur, appropriate alignment is established when the plate is fixed to the proximal femur.
Check that the plate is properly orientated on the lateral femoral condyle. Because the shaft of the femur is frequently translated, proper plate placement can be determined by matching the plate head shape to that of the condyle. The position of the plate on the distal femoral articular block at this point will determine final flexion/extension reduction.
Length
Use manual traction or femoral distractor to restore length.
Generally, the length may be assessed by evaluating overlap or distraction of the posterior cortex of the femur.
Establishment of rotation
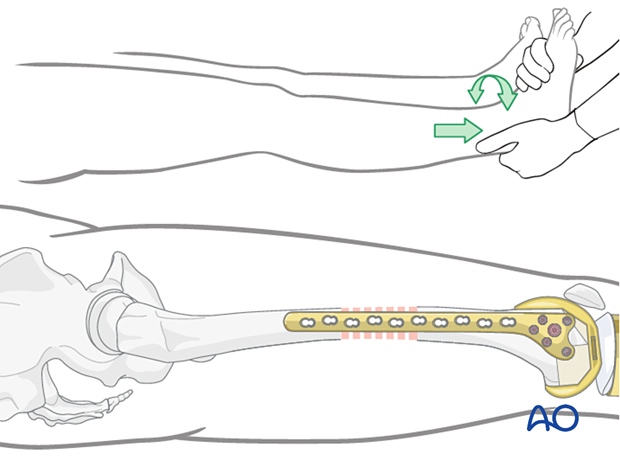
Place a bolster underneath the buttock of the involved extremity. Assess rotation using at least one of these methods:
- Ensure alignment of the anterior superior iliac spine, the center of the patella, and the second toe
- Compare rotation with the contralateral leg

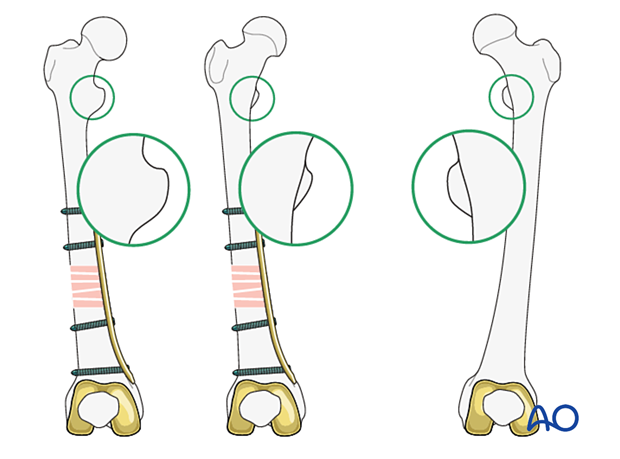
- Use radiological assessment to compare the profile of the lesser trochanter with that of the contralateral leg (lesser trochanter shape sign), holding the leg so that the patella faces anteriorly on both sides. Before positioning the patient, store the profile of the lesser trochanter of the intact opposite leg (patella facing anteriorly) in the image intensifier. The illustration shows the lesser trochanteric profile of the intact opposite side.
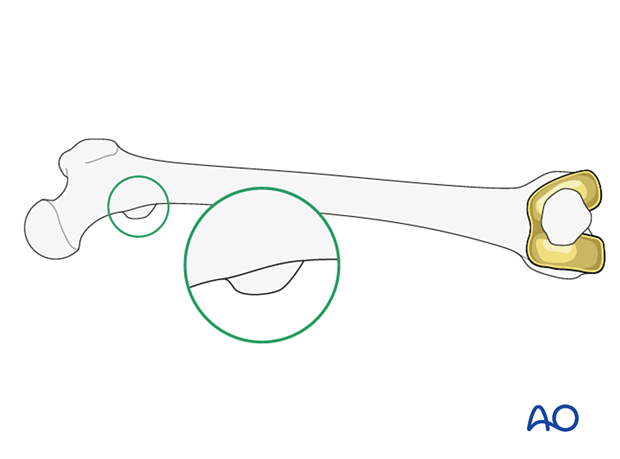
Checking for malrotation after plate positioning
In cases of malrotation, the lesser trochanter is of a different profile when compared to that of the contralateral leg.
Take care to assess rotation with the patella facing directly anteriorly.
Checking coronal alignment after plate positioning
It is very important to restore the biomechanical axis of the lower limb. The normal biomechanical axis follows a line from the center of the femoral head, through the center of the proximal tibia and then through the center of the ankle joint. This axis can be checked intraoperatively by using a piece of cable, such as the diathermy cord. The cord is stretched from the iliac spine across the patella to the cleft between the first and second toes.
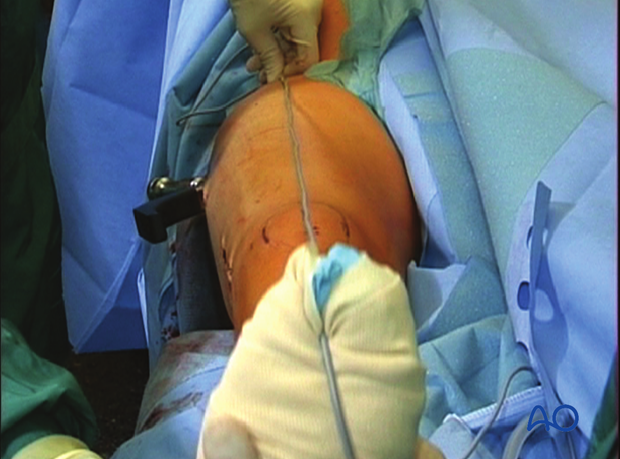
If alignment is correct, this cord will pass over the midline of the patella, and slightly medial to the tibial eminence. The radiological landmarks of the center of the femoral head, the center of the knee and the center of the ankle joint should all be in line if the mechanical axis of the femur is correct.
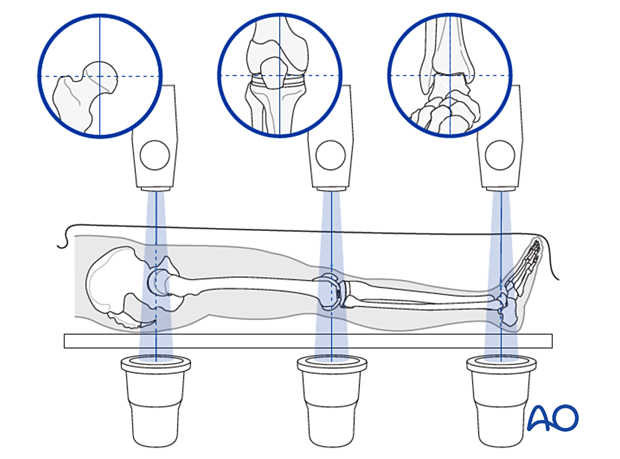
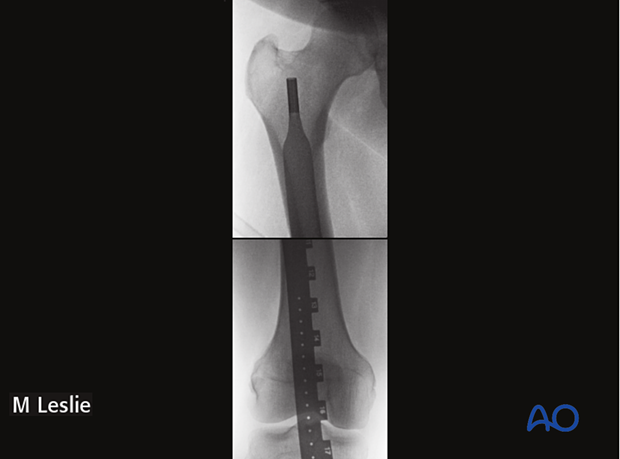
Checking length after plate positioning
Prior to patient preparation, a radiopaque ruler can be used to measure the contralateral extremity.
Alternatively, intraoperative clinical evaluation can be performed if both legs are prepped.
6. Fixation
Plate length/number of screws
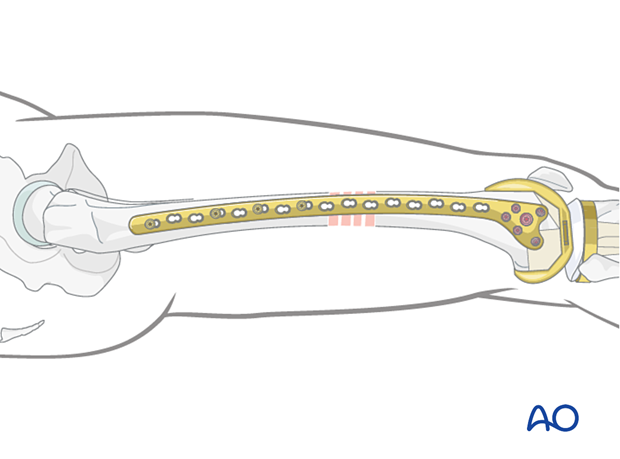
These fractures often occur in osteoporotic bone. A long plate is desirable to distribute stress in poor bone. In general, 4 screws should be chosen to spread along the proximal plate with a screw density of less than 50%. 5 points of fixation are desirable in the metaphysis.
Locking head screws must always be employed in the metaphysis and can be considered in the diaphysis.
A reasonable plate working length should be used. This usually means leaving a number of holes empty between proximal and distal fixation. A short working length risks an unfavorable strain environment across the fracture and nonunion. Early plate breakage could also occur.
A minimum of 4 empty holes can be considered as a guide.
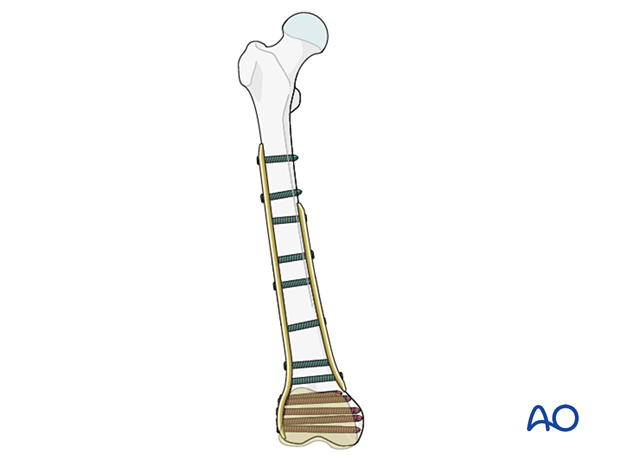
In heavy patients, unreliable patients, and those who have factors associated with slow fracture healing, consider double plate fixation by adding a medial plate.
Final check of stability
Gently move the knee through a full range of motion.
Examine the knee for any ligamentous instability.
7. Aftercare
The goal of fixation should be to allow early full weight bearing postoperatively.
Knee bracing is not essential and should be considered optional for patient comfort.
