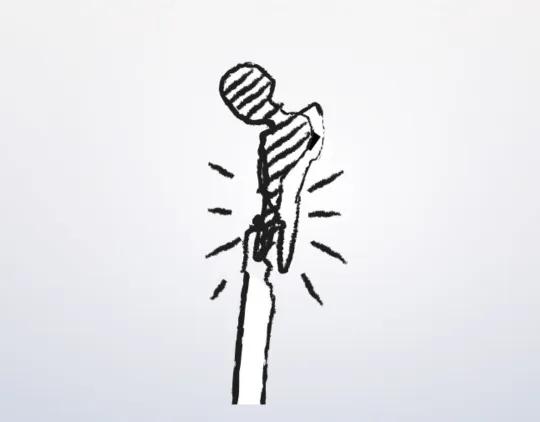
Cerclage compression wiring
1. Principles
Introduction
Periprosthetic patella fractures occur typically through fall onto a bent knee. With this simple mechanism comes significant surgical care issues and potential complications. The difficulty in the treatment of a patella that has been resurfaced includes the diminutive size of the remnant patella and the disruption of the blood supply that occurs at the time of the knee arthroplasty. If the extensor mechanism is disrupted due to displacement of the fracture, then the patellar button is likely also unstable. This will therefore require open reduction and internal fixation in conjunction with the revision of the patellar component.
Preoperative planning is critical and can be complicated by the scatter produced by the metallic components during a CT scan. However, plain radiographs are often inadequate to understand the comminuted nature of these fractures.
A surgeon should be prepared for multiple modalities of fixation.
Cerclage compression wiring
The forces produced by the quadriceps on patellar fractures are significant and may cause early fixation failure. For example, screw fixation alone would generally fail. The physiological forces acting on the patella tend to distract the fragments, more on the anterior than at the posterior aspect.
The cerclage compression wiring technique can be used in all fracture patterns.
This cerclage compression construct was previously called a “tension band”. More information about the tension band principle can be found here.
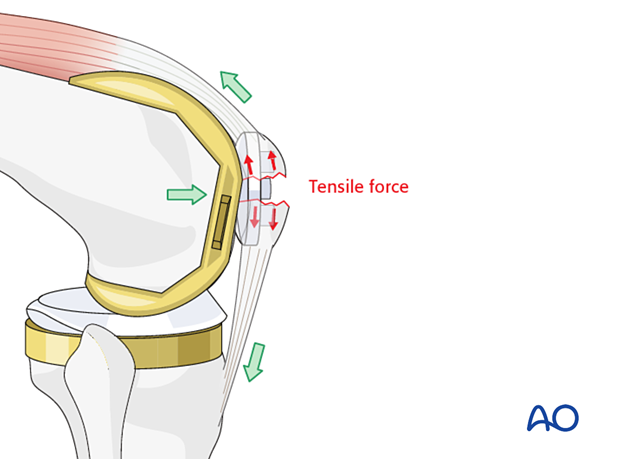
To be successful, the ventral cortex must be reconstructable.
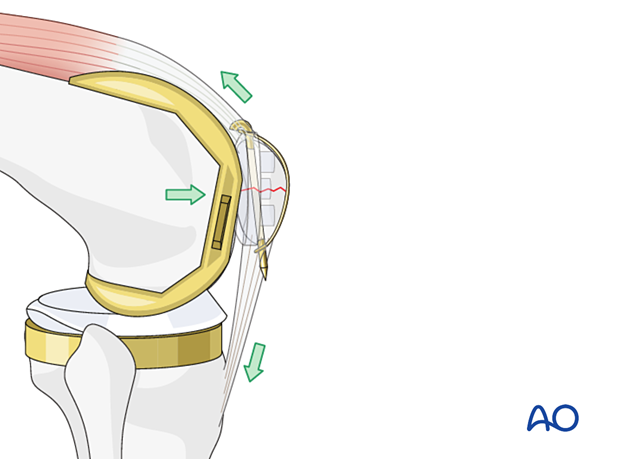
Verification of reduction
A precise reconstruction of the articular surface is not possible or necessary when the patella has been previously resurfaced. However, restoration of the extensor mechanism and a recipient bed for a new patellar button are the ultimate goals.

Outside-in/Inside-out technique
Reduction and fixation can be achieved in two ways, either by first reducing the fracture and then drilling the K-wires through the reduced fragments (outside-in technique) or by first drilling the wires into the unreduced fragments followed by reduction and completion of the fixation (inside-out technique).
2. Patient preparation and approach
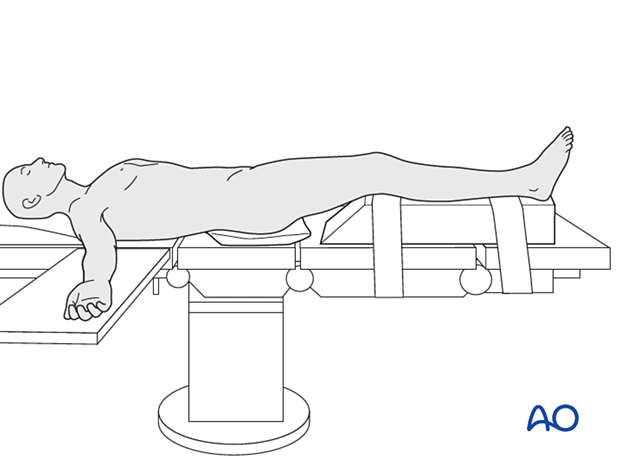
The patient should be positioned supine with the affected lower extremity on a ramp that will allow for full knee extension and ease of biplanar fluoroscopy.
The prior surgical incision should be utilized over the mid patella. The deep dissection should be carried out with an arthrotomy that will allow for exposure of the undersurface of the patella. Utilization of a proximal thigh tourniquet can be helpful during reconstruction. The surgeon may also choose to have appropriate polyethylene implants available for revision, particularly in knee replacements that have been in place for many years.
3. Reduction and K-wire insertion using outside in technique
Debridement
When exposure is complete, the surgeon will be able to evaluate the patellar button for stability. Occasionally the patient may have a peripheral fracture that may disrupt the extensor mechanism without disrupting the prosthetic patella. However, if the patella component is unstable, it should be removed with careful extraction of all cement.
The knee joint and fracture lines must be irrigated and cleared of the blood clot and small debris to allow exact reconstruction.
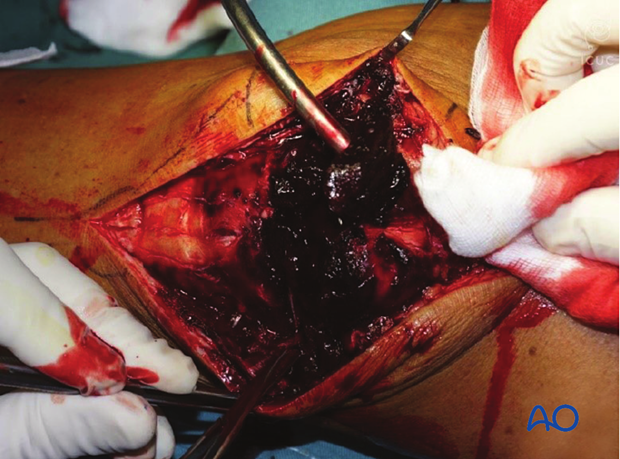
Reduction
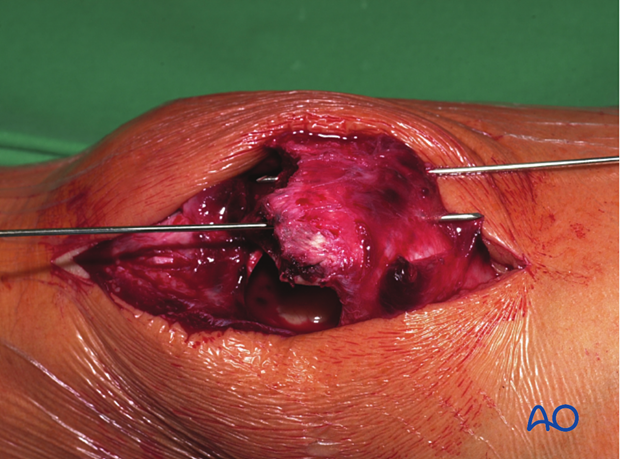
The larger fragments are reduced using a pointed reduction forceps or tenaculum.
In frontal/coronal (transverse) fractures, the reduction is easier with the knee extended.
The reduction is held by one or two reduction forceps. Note that one forceps may produce an eccentric force and allow for fracture gapping. The use of two forceps on either side of the patella is much more effective.
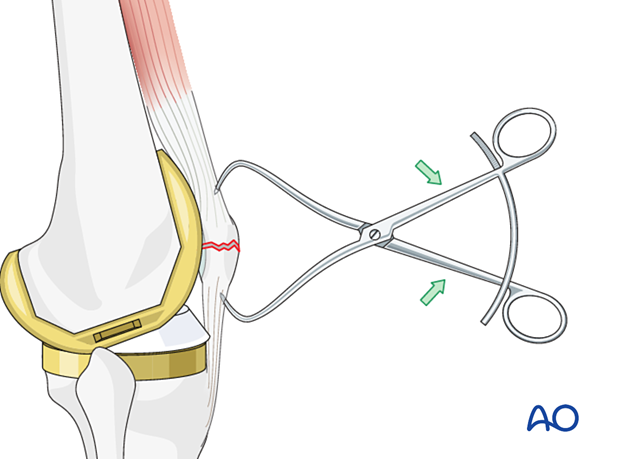
K-wire insertion
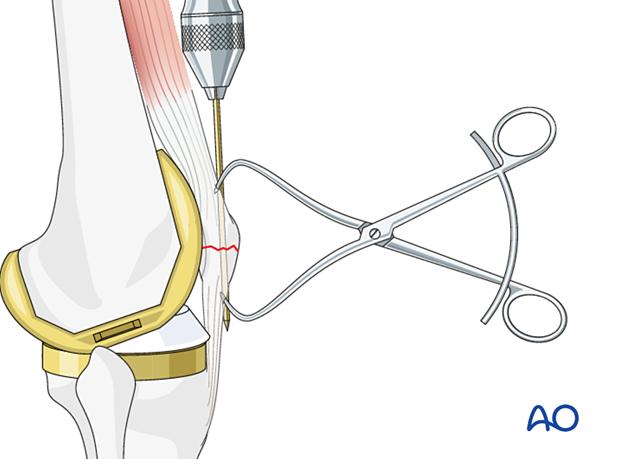
Using the outside-in technique, drill the first K-wire in an axial direction. The second K-wire is then drilled parallel to the first, through the reduced fragments ensuring the K-wires do not enter the joint. It may be difficult to find the right direction and position for the wires.
Two parallel K-wires should be inserted to give more stable fixation.
4. Reduction and K-wire insertion using inside out technique
The exact positioning of the K-wires is challenging once the fracture is reduced. Therefore, some surgeons prefer to drill the K-wires in an inside out manner.
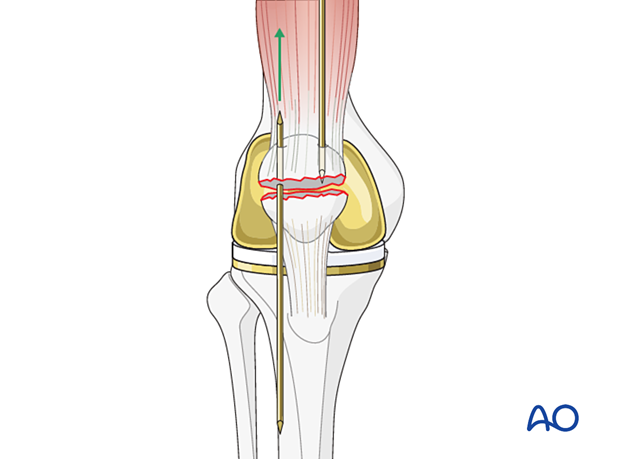
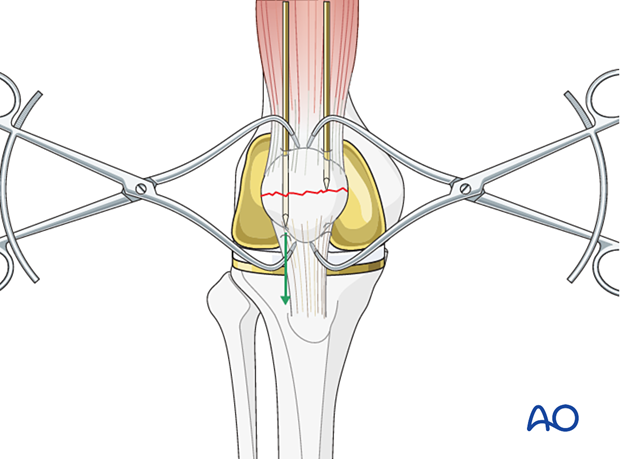
Drill two K-wires (pointed at both ends) from the fracture surface through the proximal fragment, exiting superiorly.
Manually reduce the main fragments and hold them with pointed reduction forceps.
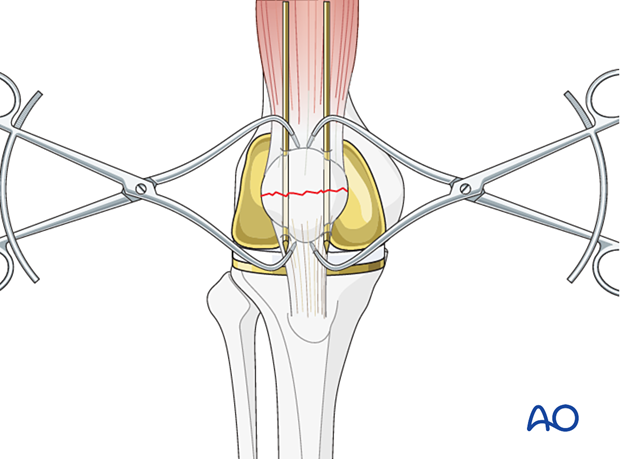
Finalize K-wire insertion
The ideal level for the K-wires lies approximately 5 mm below the anterior patellar surface. Often the K-wires are closer to the articular than to the anterior surface. Nevertheless, the principle of cerclage compression wiring is not compromised. The position of the wires may be checked with an image intensifier or X-ray at this stage before proceeding to insert the cerclage compression wire.
5. Cerclage compression wire insertion
Choose a wire of enough strength to withstand the tensile forces generated in the figure-of-eight loop (1.0 – 1.25 mm diameter, 18-16 gauge).
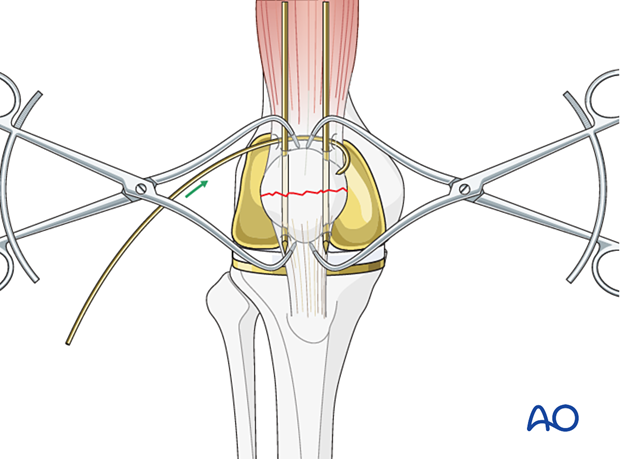
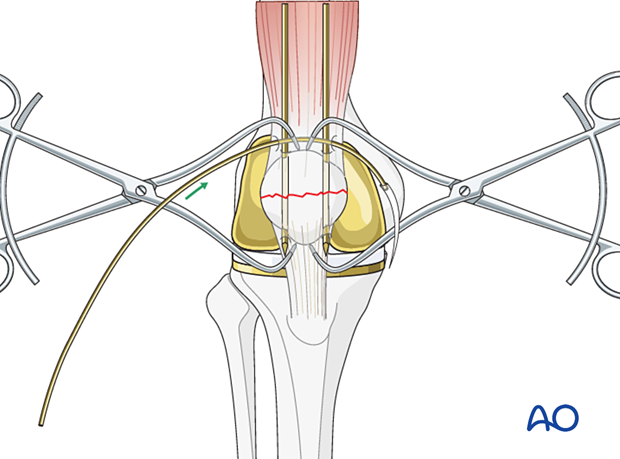
Push a sufficiently long (e.g., 30 cm) wire manually as close as possible to the angle between the bone and the protruding K-wire tips.
The wire should be as close as possible to the bone throughout its whole course both superiorly and inferiorly to prevent postoperative fracture distraction with knee flexion.
The use of a large bore injection needle may be helpful.
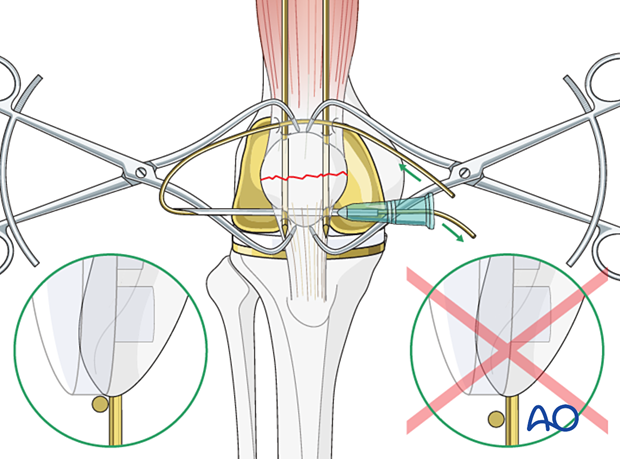
A figure-of-eight is superior in neutralizing tension forces and is therefore preferred by many surgeons.
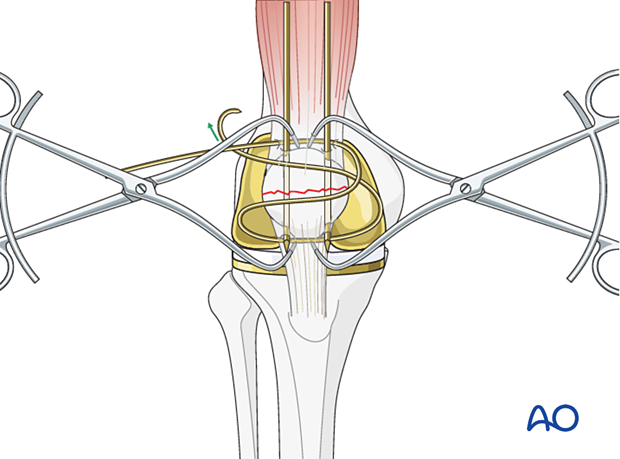
A cerclage (figure-of-zero) wire has more stability against the torsion force. However, if the K-wires are located very near the lateral and medial borders of the bone, the cerclage can cut into the retinacula, leading to less construct thickness.
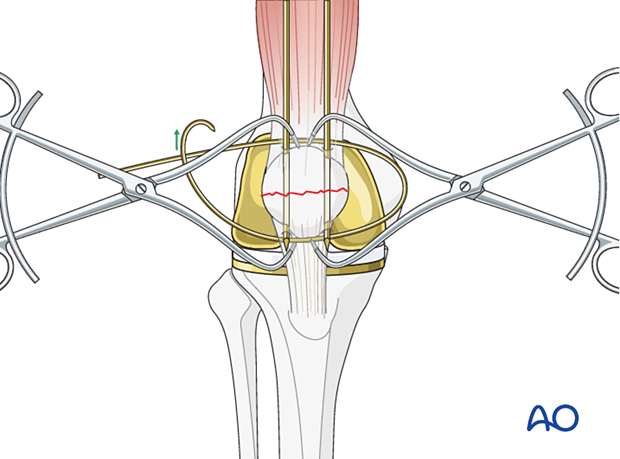
Applying the figure-of-eight wire
While tightening the figure-of-eight wire, keep the knee in extension.
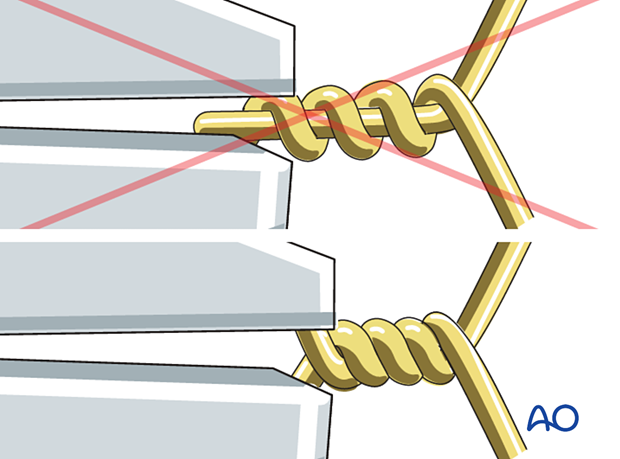
Pull away from the patella as the wires are twisted.
The wires should be twisted at least 5 times to prevent fixation failure. When stainless steel wires tighten, they will lose the surface sheen and if tightened further the wire may break.
Care should be taken finally to position the twisted wire into deeper soft-tissue muscle layers, if possible.
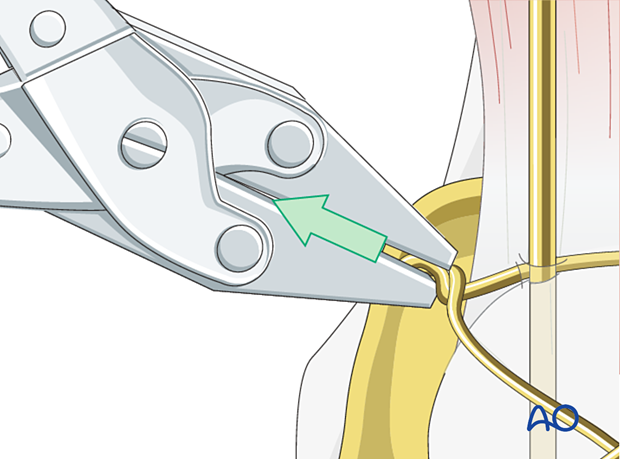
A bone hook is then placed underneath the wire on the opposite side from where the two wire ends were tightened. The bone hook is twisted creating a new knot which then is tightened to remove excess slack in the figure of eight construct. The surgeon must be careful not to overtighten with two knots in the same wire.
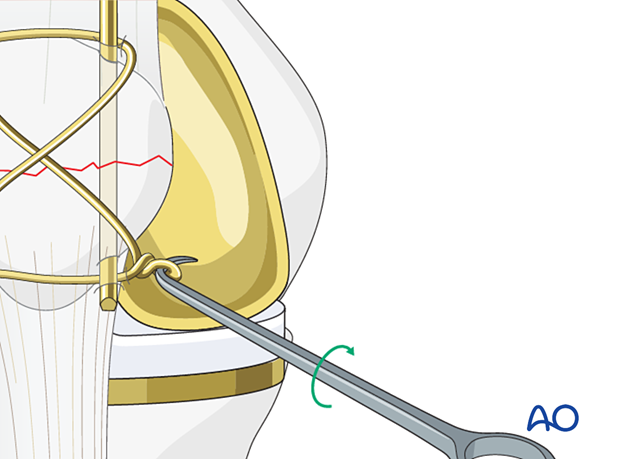
Bend the proximal pin ends, shorten them, turn them towards the quadriceps tendon, and drive them into the patella to prevent skin irritation and loosening.
The distal pin ends are trimmed to remove the sharp points, but not bent, for easier removal.
Some surgeons may prefer to make two twists to tighten the figure-of-eight wire. If two twists are used care must be taken not to leave extra-prominent wires protruding.
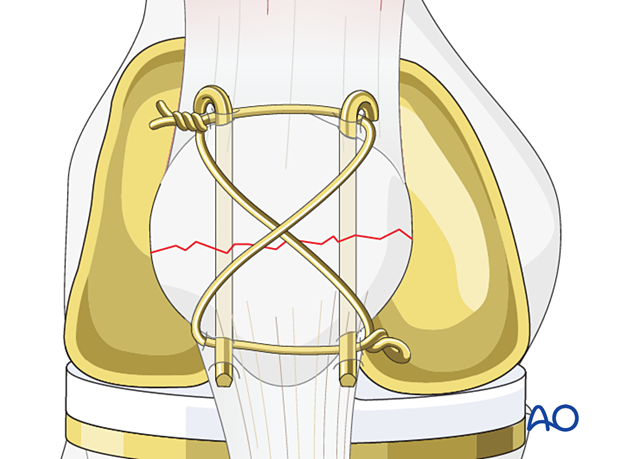
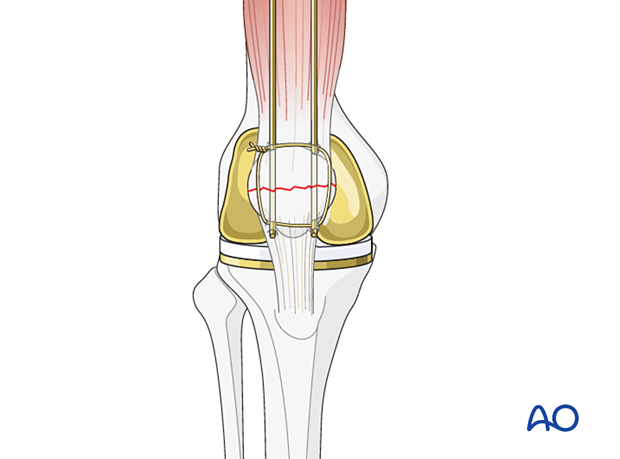
Alternative: Cerclage configuration
Illustration showing the final osteosynthesis with a cerclage configuration.
Patella component revision
After the successful reconstruction of the patellar anatomy, the patellar button can be revised. Please refer to the dedicated section of the AO Surgery Reference.
6. Aftercare
The patient can typically be full weight-bearing in extension until wound healing. Gentle range of motion exercises can be continued until bony consolidation.
