ESIN
1. General considerations
Introduction
In trochanteric fractures in young children up to the age of 6-8 years, stability and absolute anatomical reduction is not as critical as in older children.
Surgeons skilled in ESIN techniques may opt for this method as an alternative to treatment with pediatric hip locking plate.
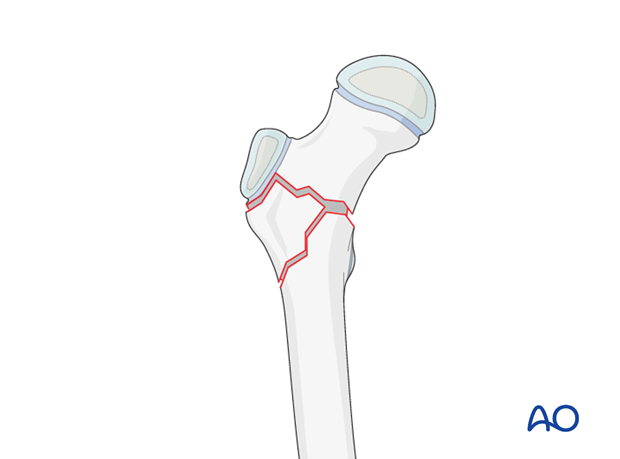
Nail configuration
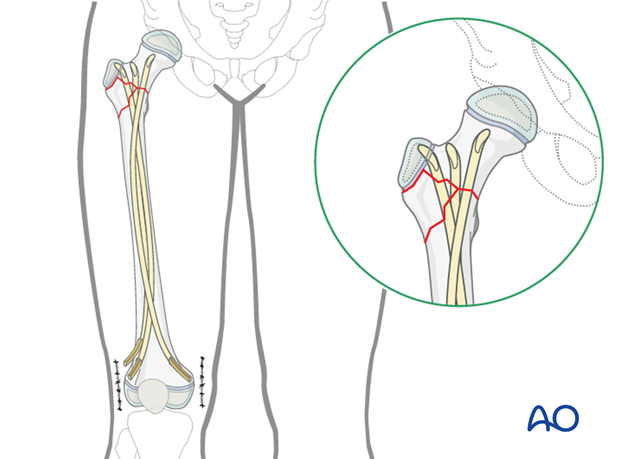
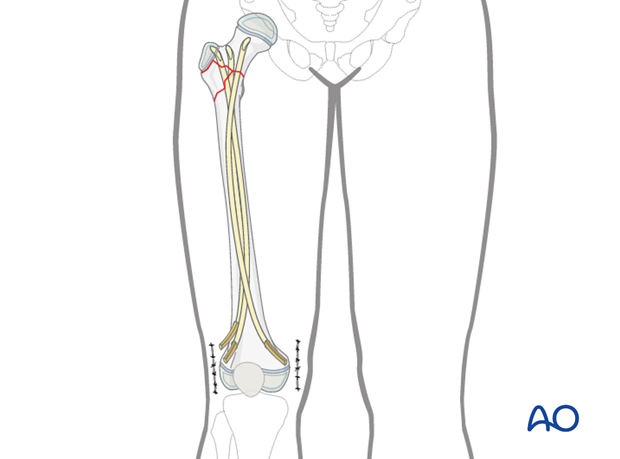
Three nails are used for this fracture configuration.
The first nail is inserted from lateral distally and is secured in the greater trochanter.
The second nail is inserted from medial distally and is directed medially along the calcar towards the physis of the femoral head.
The third nail is inserted from lateral, proximal to the initial nail, and directed into the cranial aspect of the femoral neck.
Nail diameter
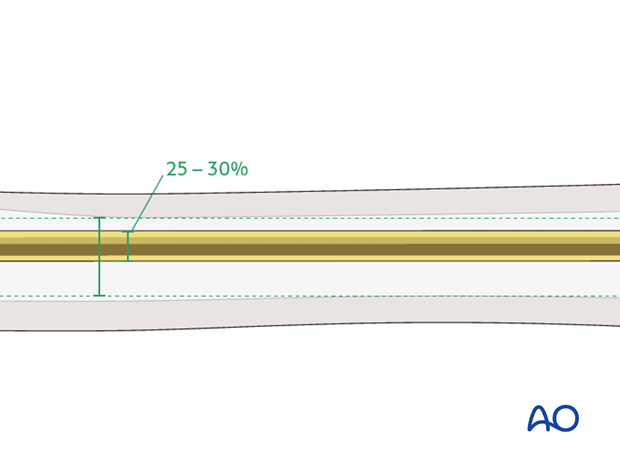
As three nails are used, the diameter of each must be 25-30% of the medullary canal to allow insertion of the third nail.
Note: The biomechanical environment of a proximal metaphyseal fracture is different from a femoral shaft fracture. Even though the three nails only fill 90% of the narrowest part of the medullary canal, adequate stability is obtained.
Equipment selection
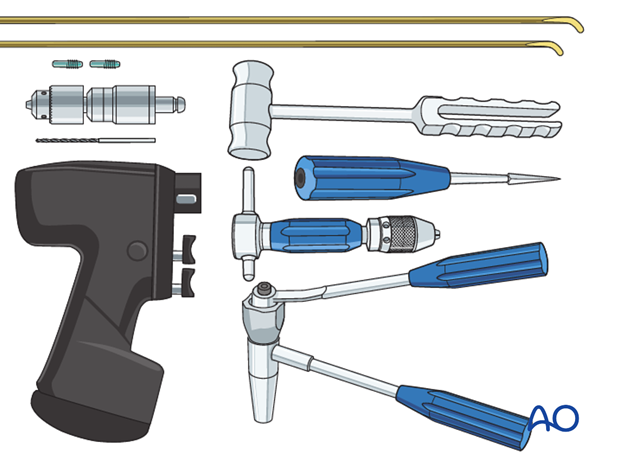
Standard ESIN implants and instruments are used:
- 2.5, 3.0, or 3.5 mm nails
- Awl
- Inserter chuck
- Hammer
- Nail cutter
- Drill
- End caps
2. Anesthesia and positioning
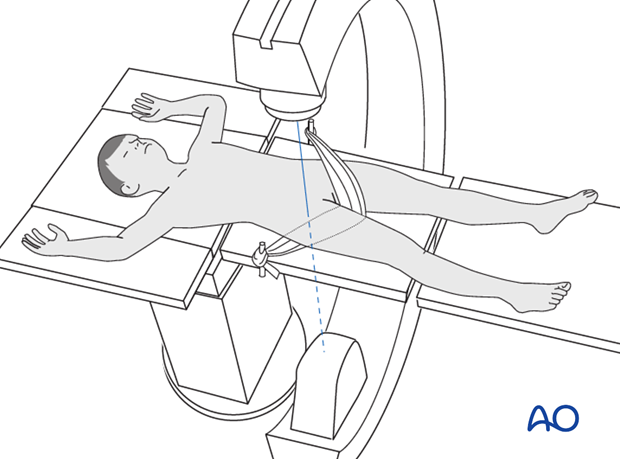
The patient is placed in a supine position.
The C-arm is positioned perpendicular to the operating table from the opposite side.
Note: After reduction has been achieved, the leg should be moved as little as possible.

Intubation and muscle relaxation are mandatory, in order to facilitate manipulation and reduction.
The child is placed free on the table.
Countertraction is provided by a folded sheet, fixed to the proximal part of the OR table on the uninjured side, wrapped around the groin, crossed under the injured limb, and fixed to the OR table (see illustration).
It is important to ensure that good quality images are possible with the image intensifier and that rotation of the leg is unimpeded.
Preoperatively, the rotational profile of the uninjured side must be measured and documented.
In some patients, it is an advantage to expose both legs to allow intraoperative clinical comparison.
3. Planning of nail entry points
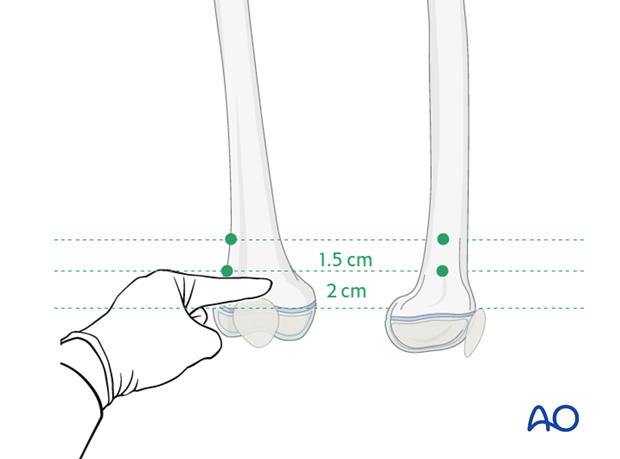
Entry points for the medial and first lateral nails are 2 cm above the physis.
For the third nail, a second lateral entry point is marked 1.5 cm proximal to the first lateral entry point.
An incision starts at each planned entry point and extends 2-4 cm distally (depending on the size of the child). See the minimally invasive approach for more details.
Note: Close placement of the lateral entry points can lead to bone splitting.
If in doubt, the intended entry points should be verified with an image intensifier.
4. Nail insertion
Precontouring of the nails
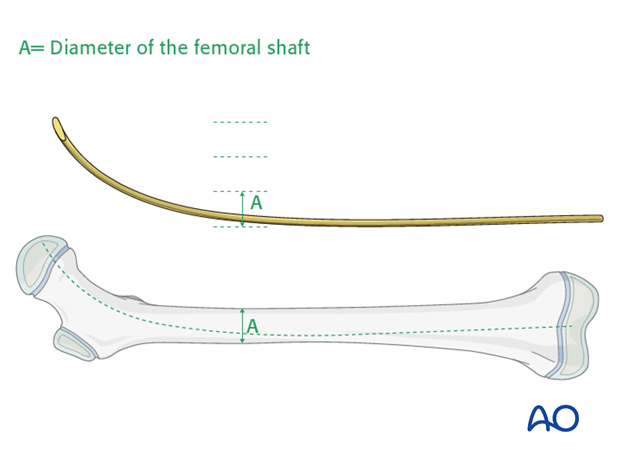
As this fracture extends proximally, each nail should be precontoured in the first 1/3 of its length to ensure that the tips of the nails engage and anchor in the femoral neck and greater trochanter respectively.
The amount of precontouring should be sufficient to recreate the neck-shaft angle.
Opening of the medullary canal
The subcutaneous tissues are divided by blunt dissection until the cortex of the femur is reached.
An awl is used to mark each entry point in the bone.
In order to prevent the tip of the awl from slipping, the medullary canal is opened with the awl initially perpendicular to the bone. As the awl advances into the cortex, the direction is changed to 45° to the femoral axis. The awl is advanced using an oscillating movement until the diameter of the hole is slightly larger than that of the nail.
It may be necessary to use an image intensifier to confirm the direction and insertion depth.
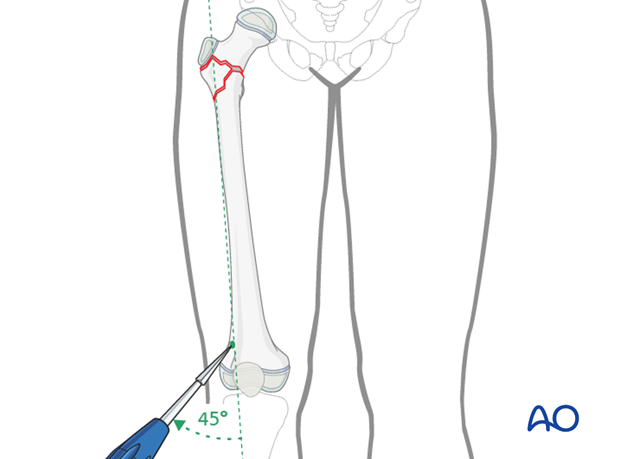
The first nail is placed into the inserter, passed into the lateral distal hole, and advanced manually as far as the fracture using an oscillating maneuver.
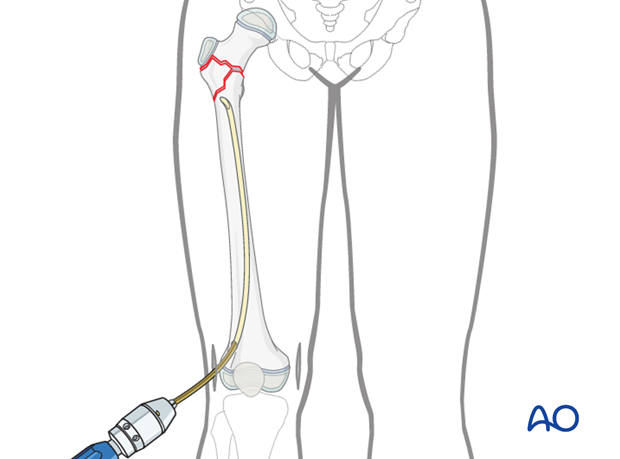
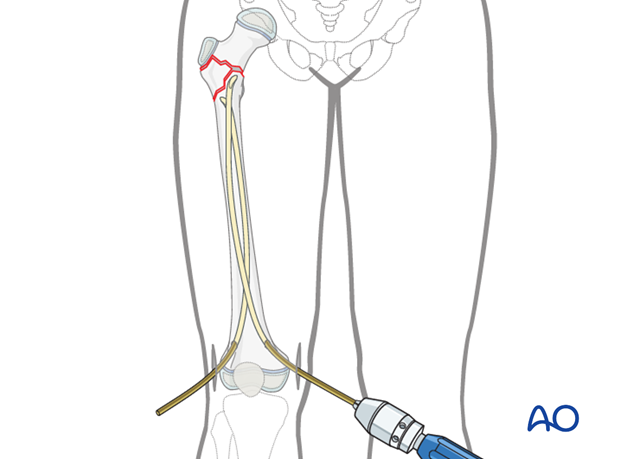
The second nail is inserted in the same manner from the medial hole.
5. Reduction
Once the tips of both nails are positioned just distal to the most distal fracture line, preliminary reduction is obtained to allow advancement of the lateral or medial nail, depending on the fracture morphology.
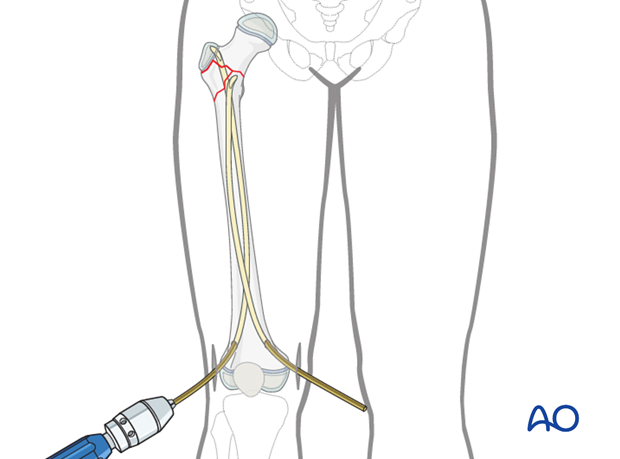
The medial nail has to follow the calcar up to the physis of the femoral head. The tip may have to be turned anteriorly depending on the anteversion of the femoral neck.
Note: It is mandatory to check the position of this nail tip in an axial view to confirm correct placement, without perforation of the femoral neck.
The tip of the nail must be orientated along the femoral neck axis in the axial view.
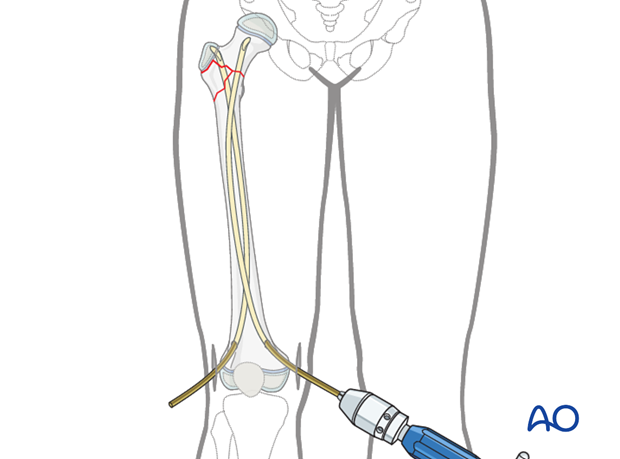
After both nails have passed and stabilized the fracture, limb rotation must be evaluated. If rotation is symmetrical, the nails can be advanced to the greater trochanter and the femoral head physis respectively.
Note: If reduction is not successful, a small incision over the fracture zone can be made and direct reduction performed.
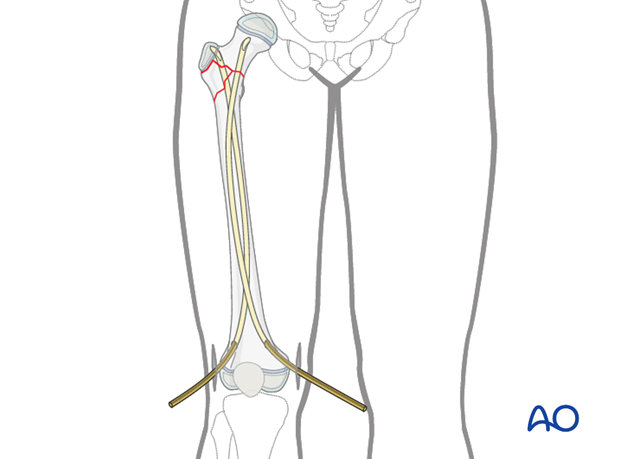
The third nail is inserted into the proximal lateral hole. Care must be taken not to interfere with the position of the first two nails.
Note: The eventual position of the nail tip must allow advancement into the proximal fragment.
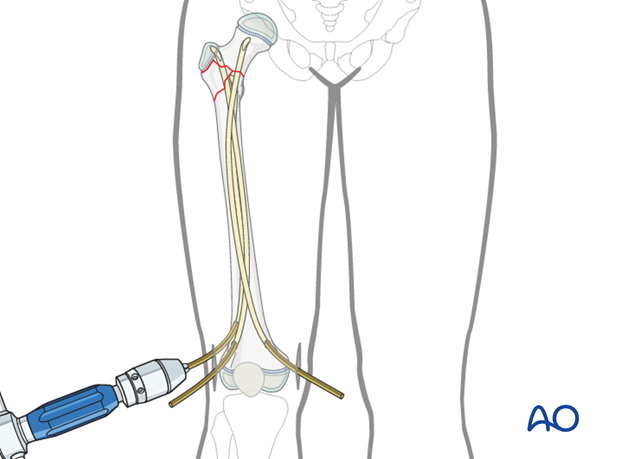
X-ray evaluation
It is important to obtain AP and "frog" lateral x-rays.
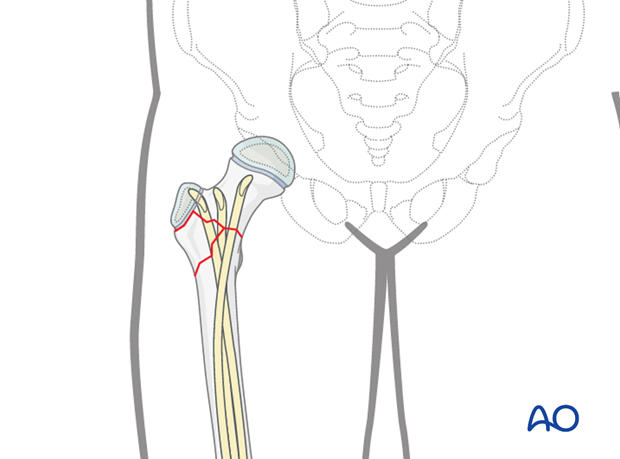
Cutting the nails and wound closure
All nails are cut to leave at least 1 cm outside the bone to facilitate removal.
The skin and subcutaneous tissue are closed in a standard manner.
6. Additional technique for greater axial stability
End caps insertion
To improve axial stability, smooth end caps are inserted to support the distal ends of the nails.
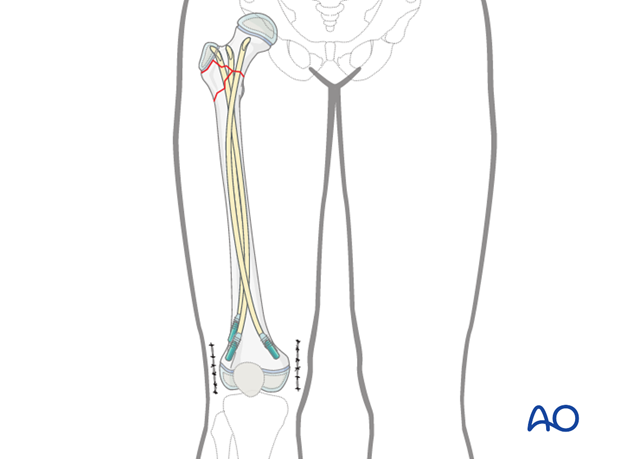
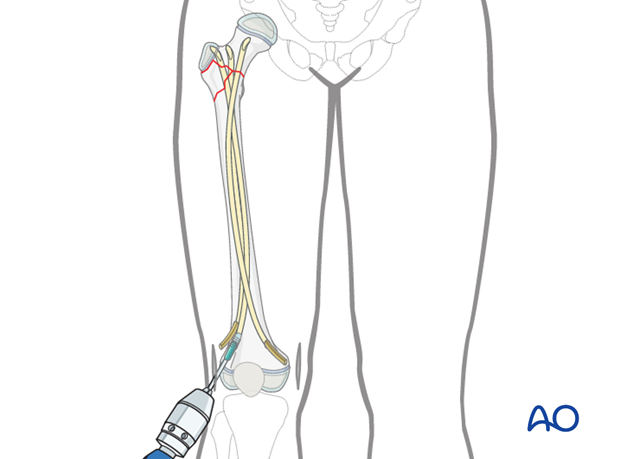
The end cap is fixed on the corresponding screwdriver, which can be placed into the standard inserter.
The end cap is positioned over the cut nail end under image intensifier control, and screwed into the metaphyseal bone.
The end caps are produced with a self-tapping cancellous bone thread.
7. Aftercare
Introduction
After surgical stabilization, the construct should be sufficiently robust to allow protected weight bearing. Smaller children may not be able to comply with this and may need immobilization.

Infection
See the additional material on postoperative infection.
Mechanics
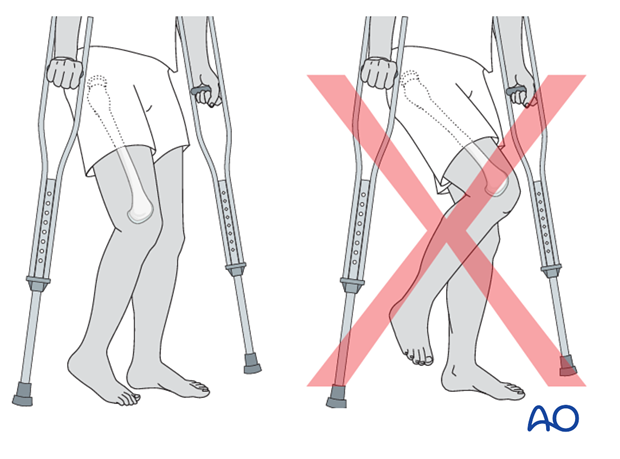
Forces through the hip are less with toe-touch weight bearing than with non-weight bearing. Therefore, toe-touch is normally recommended for initial mobilization. This needs to be taught to children by a physiotherapist.
Range of movement
Range-of-movement exercises should start in the immediate postoperative period to prevent stiffness. Surgeons should indicate if any extremes of movement are forbidden.
Weight bearing
Having started with toe-touch weight bearing, children progress to partial weight bearing and then to full weight bearing according to their age and the predicted rate of healing of their fracture.
Even older adolescents should be fully weight bearing without aids at three months.
Sports
Swimming can be allowed as soon as partial weight bearing is permitted.
Contact sports should be avoided for at least six months.
Follow-up x-rays
Correct nail position and accurate reduction should be verified with postoperative x-rays.
Check x-rays are usually performed 4–6 weeks postoperatively and full weight bearing may be started depending on the callus formation.
Implant removal
Nail removal is delayed until after there is clinical and radiological confirmation of fracture healing and consolidation.
Note: If a bone cyst is still present, the nails can be retained for internal support.
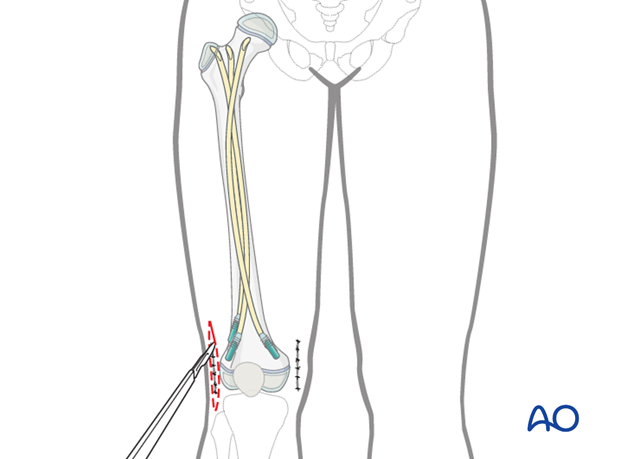
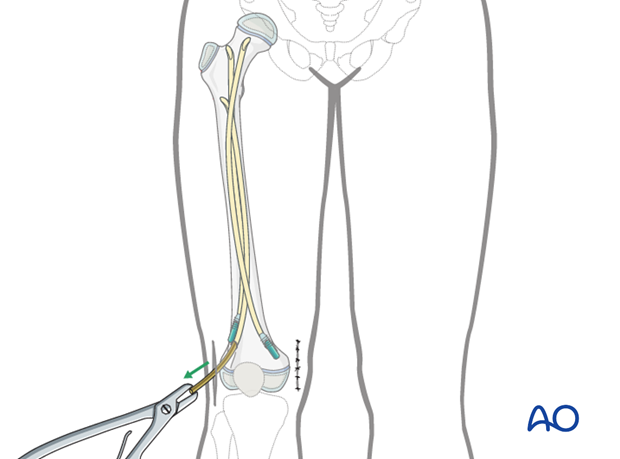
The nails can be removed with the extraction pliers.
Note: End caps are removed with the screwdriver used for insertion.
