ESIN
1. Introduction
General considerations
The ESIN method involves closed reduction and internal fixation with an elastic nail.
This method is a commonly used treatment option for displaced and/or unstable fractures of the forearm and can be used in any age group.
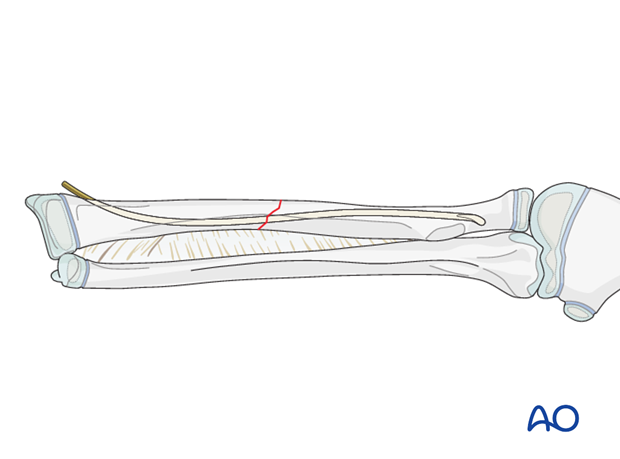
ESIN without image intensifier
The ESIN method is possible without an image intensifier or peroperative x-ray examination.
The procedure is modified to include direct visualization of the fracture with an open approach. Stripping of the periosteum and disruption of the fracture hematoma are disadvantages.
2. Instruments and implants
Instrument set for ESIN
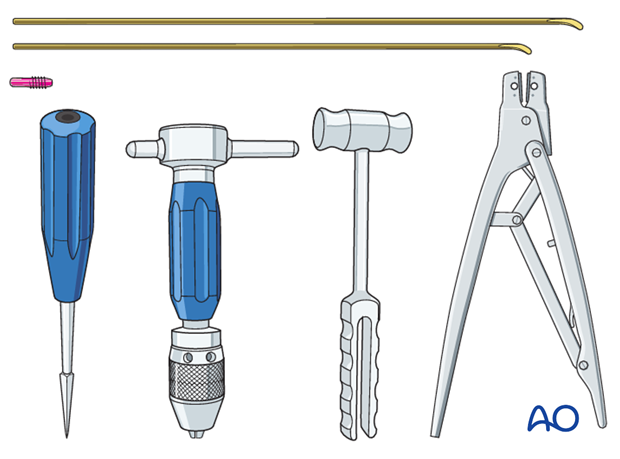
- 1.5-2.5 and occasionally 3.0 mm elastic nails
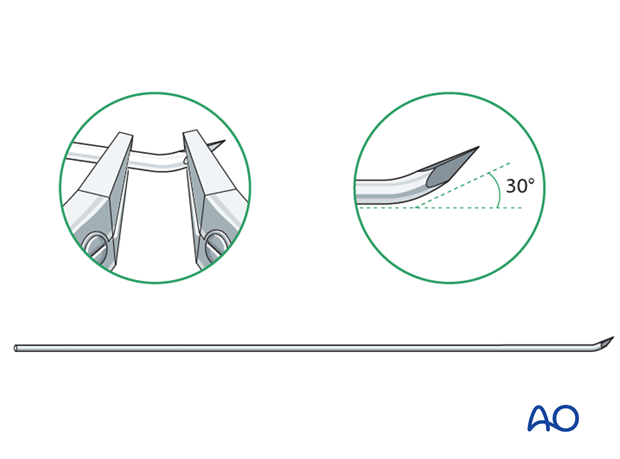
- Alternatively: 30 cm long, 1.6-2.5 mm K-wires with the tip bent
- Awl or drill
- Inserter
- Nail cutter
- Small hammer
- Optional: end caps
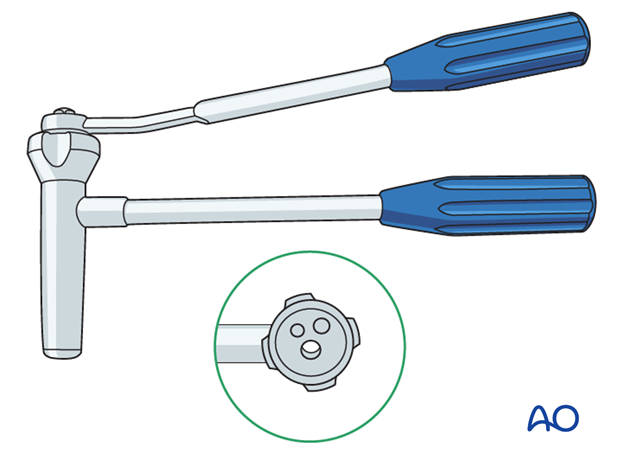
The end cutter is useful to avoid sharp ends and soft-tissue irritation.
Use of K-wires
Ring fixator wires may be used.
Bend the tip by approximately 30° to provide a gliding aid.
Nail diameter
For optimal reduction and intramedullary three-point fixation, the nail diameter should be between 60% and 70% of the medullary canal.
3. Patient preparation
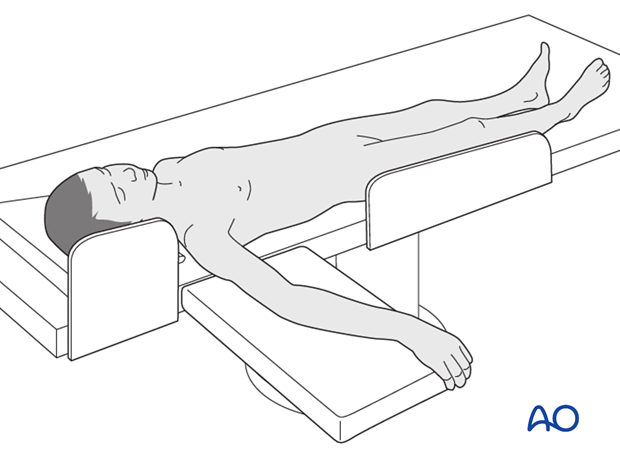
This procedure is normally performed with the patient in a supine position.
4. Technique
Preliminary reduction
Preliminary reduction is not useful as deformity usually recurs following manipulation.
Entry points
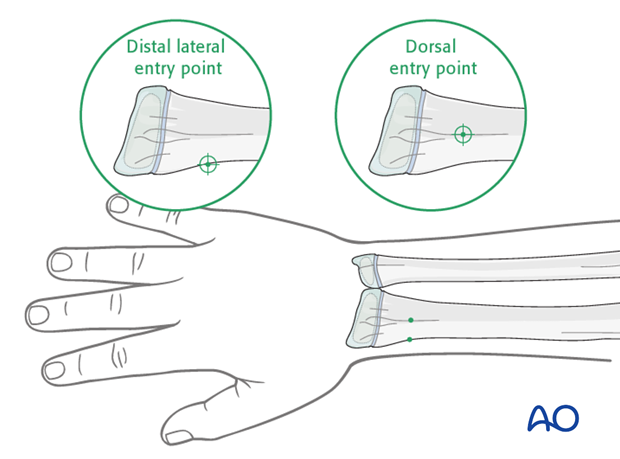
The distal lateral entry point is in common use and shown in this procedure.
Insertion through Lister’s tubercle (dorsal entry point) is also well established and offers more versatile nail manipulation and is an alternative for distal 1/3 fractures of the radius.
Opening the canal
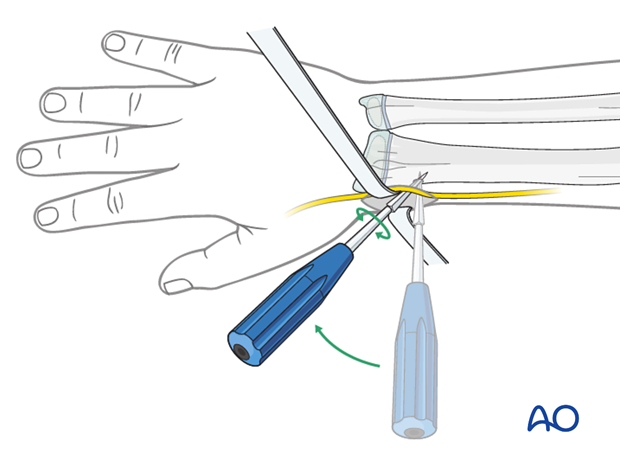
Use small scissors or a surgical clip and small retractors to dissect to the bone under direct vision.
Note: Avoid injury to the superficial radial nerve and the cephalic vein.
Place the awl or drill directly onto the bone and perforate the near cortex, under direct vision, perpendicular to the bone.
Do not hammer the awl to avoid perforation of the far cortex.
When the medullary canal is reached, lower the awl or drill 45° to the shaft axis and advance it with oscillating movements to produce an oblique canal.
Nail insertion
Precontouring the nail for forearm shaft fractures may be required.
The medullary canal is small, and the nail may deform during insertion.
Fix the nail into the inserter and pass it into the canal.
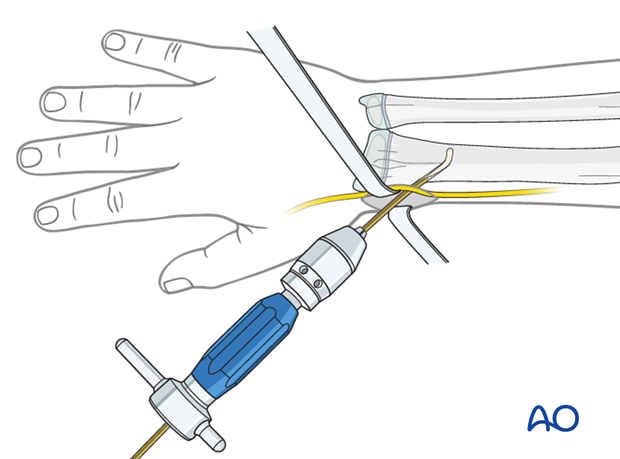
Pearl: insertion of nail tip perpendicular to shaft
Insert the nail with the tip perpendicular to the shaft axis until the far cortex is felt. Rotate the nail 180° and advance it using the curved side of the tip as a gliding aid.
If the tip is stuck in the far cortex and cannot be advanced, remove the nail and bend the tip to give a slightly more pronounced curvature.
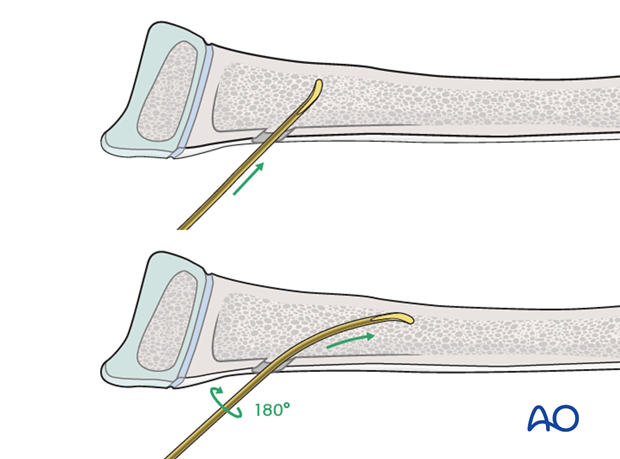
Advancing the nail
Advance the nail to the fracture site with an oscillating maneuver.
Pearl: A short working length (3-5 cm) between the entry point and the inserter improves control of the nail during insertion.
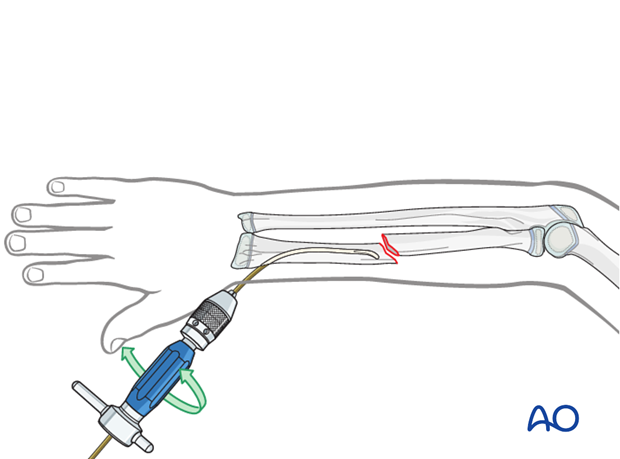
Pitfall: iatrogenic fracture
In young children, the nail tip may become stuck because of the narrow medullary canal.
Do not use a hammer if the nail is stuck as this risks iatrogenic fracture.
Withdraw by 2 cm, rotate the nail to free the tip and continue advancing.
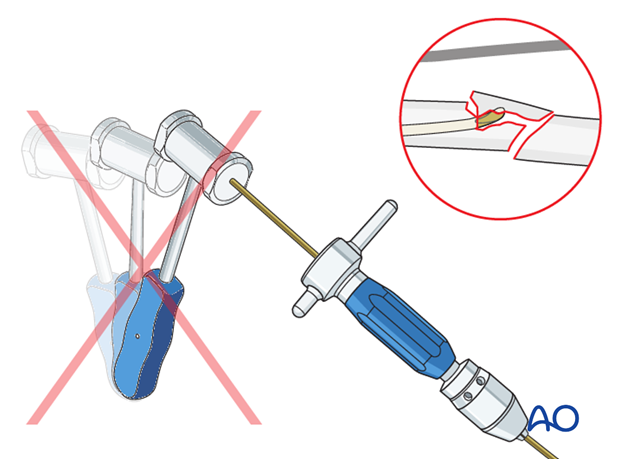
Reduction with nail
Point the nail tip toward the opposite fracture plane and advance the nail into the proximal fragment. At this point gentle hammer blows may assist insertion and prevent the nail from advancing into the soft tissues. Rotate the tip to reduce the fracture.
Advance the nail for 2-3 cm and rotate the nail back to the initial position.
Reduction can be aided by increasing the deformity to allow fracture surface contact using the nail as a joystick.
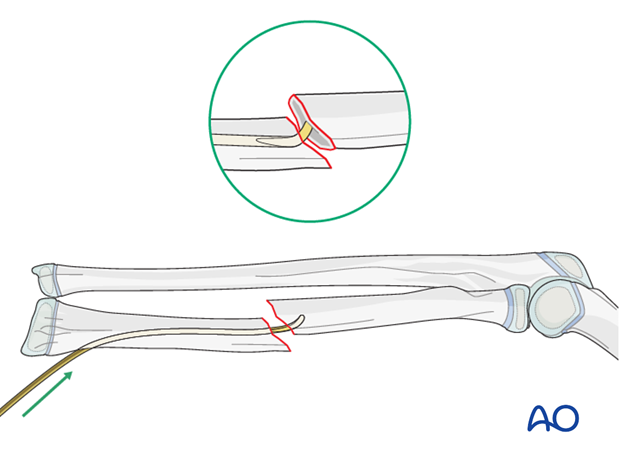
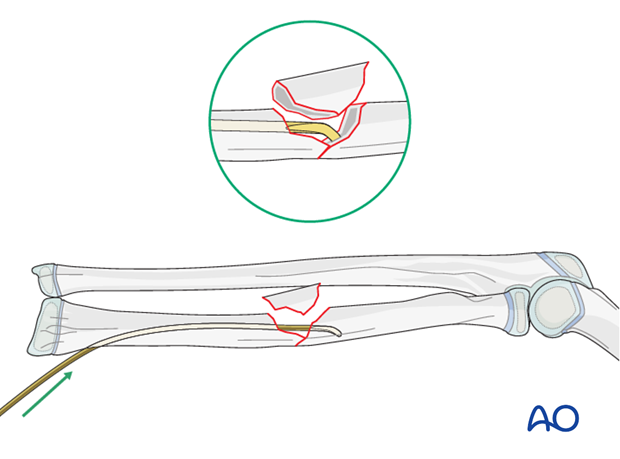
In case of a wedge fracture (22r-D/5.2), sufficient bone contact is necessary for axial stability avoiding redisplacement and telescoping. If there is length instability the use of end caps is recommended.
The major fragments are reduced and the wedge fragment is not disturbed.
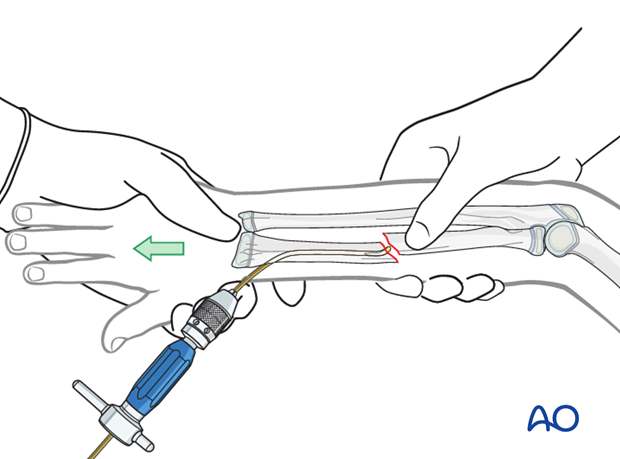
Closed reduction
If the nail cannot be advanced into the proximal segment, manipulate the fracture by distraction and rotation of the forearm and check using image intensifier.
This may reduce the fracture in both planes and allows the nail to advance.
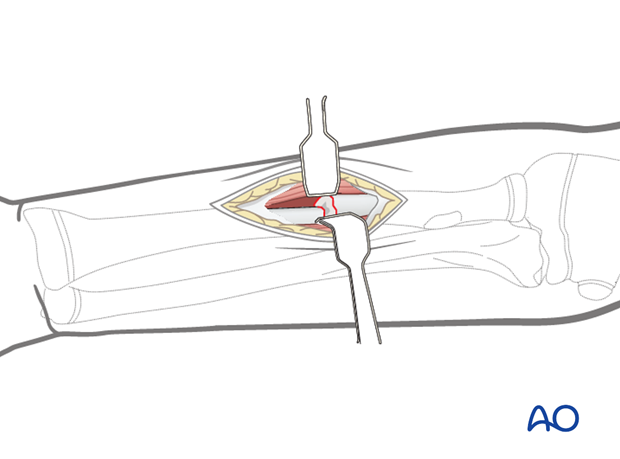
Open reduction
If the nail cannot be advanced after three attempts, open the fracture zone for reduction and advance the nail into the proximal fragment under direct vision.
If an image intensifier is not available, an open procedure is necessary.
Make a small skin incision over the fracture zone followed by a small incision in the deep fascia.
The fracture often causes soft-tissue stripping, and the fragments are located with blunt finger dissection.
Insert two small retractors so that both fracture ends are visible.
Pearl: Before opening the fracture, a threaded K-wire may be used to manipulate the proximal fragment.
Pitfall: risk of compartment syndrome
Repeated attempts to achieve closed reduction and fixation may increase the risk of compartment syndrome.
The compartment status should be checked within 6 hours.
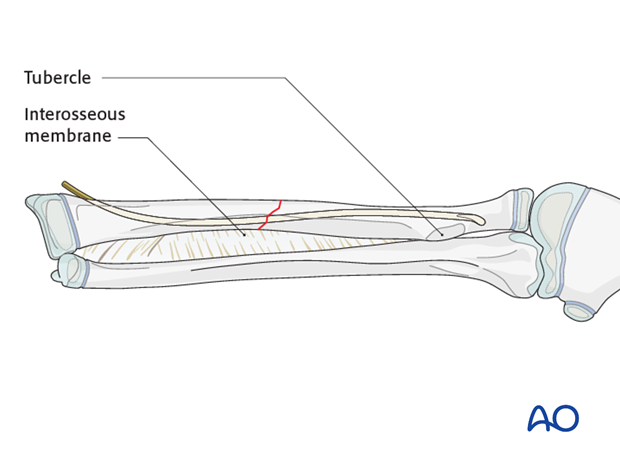
Final nail position
Advance the nail up to the strong metaphyseal bone at the level of the radial tubercle.
Place the forearm in supination with the nail tip rotated towards the ulna to tension the interosseous membrane.
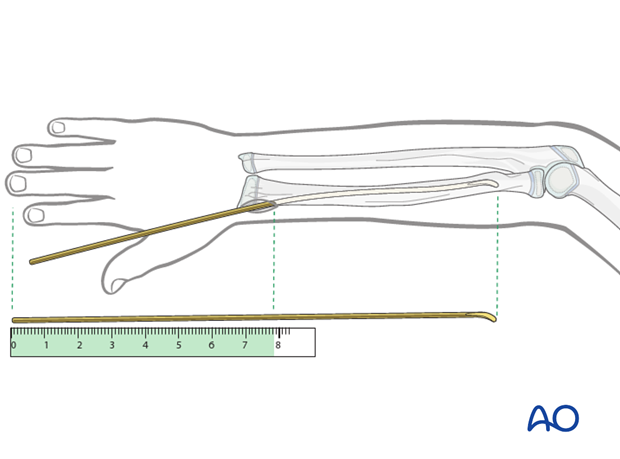
Pearl: estimation of nail length
If an image intensifier is not available, estimate the optimum nail length with a second identical nail placed parallel to the initial nail.
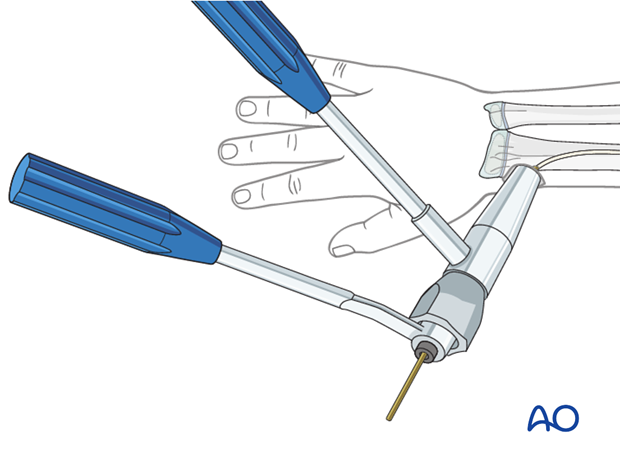
Cutting the nail and wound closure
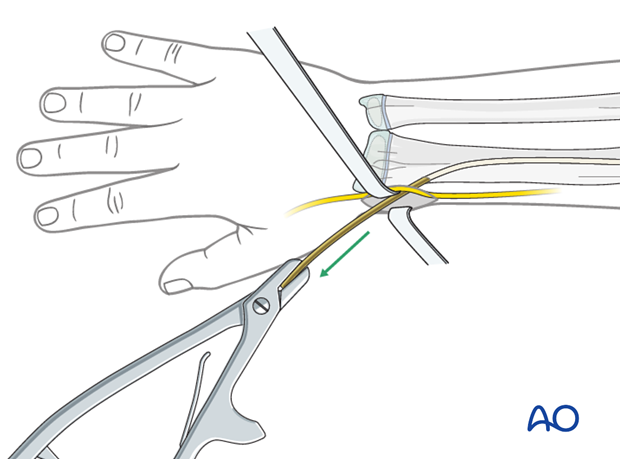
When using the lateral entry point, cut the nail near the bone.
If a dedicated nail cutter is not available, cut the nail slightly shorter as the end will be sharper and this prevents skin perforation.
Gently withdraw the nail by 1 cm, cut the nail outside the skin and reinsert to the original position with an impactor.
Ensure that the nail tip does not irritate the superficial radial nerve.
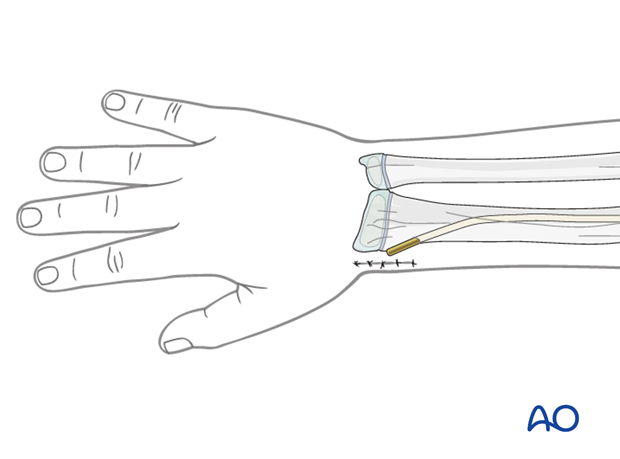
When using the dorsal entry point, the nail should be left long or protected with small end cap to prevent rupture of the extensor pollicis longus.
Close the subcutaneous tissue and skin in a standard manner.
5. Option: end caps
End caps may be useful for:
- Stabilization of length unstable fractures
- Protection of soft tissues (eg EPL)
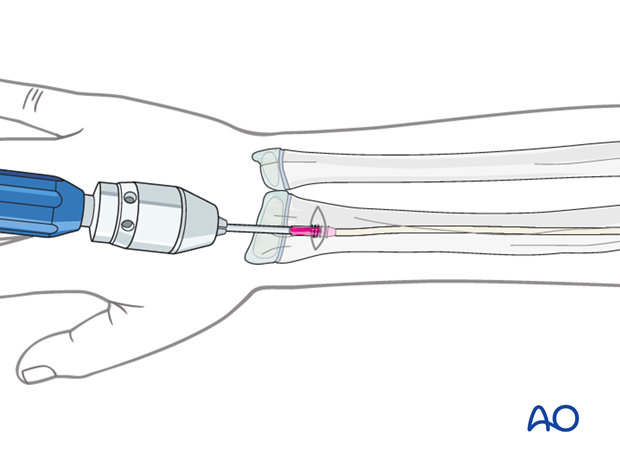
The nail should finally be advanced using the beveled impactor.
A small end cap can be inserted over the nail using the inserter.
6. Final assessment
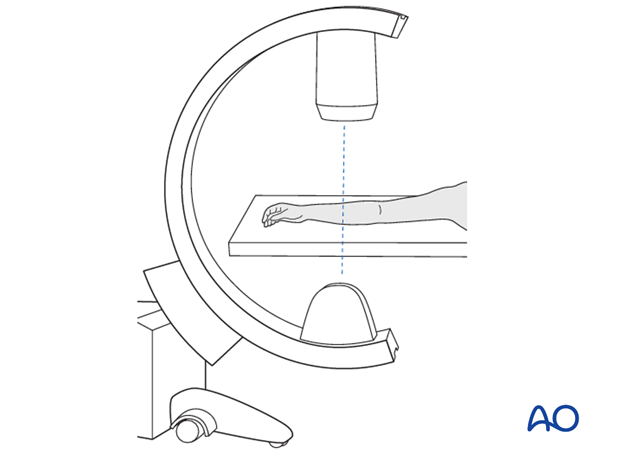
Check the completed osteosynthesis with image intensification. These images should be retained for documentation or alternatively an x-ray should be obtained before discharge.
Make sure that the desired reduction has been achieved and the nail is of appropriate length.
7. Aftercare following ESIN
Immediate postoperative care
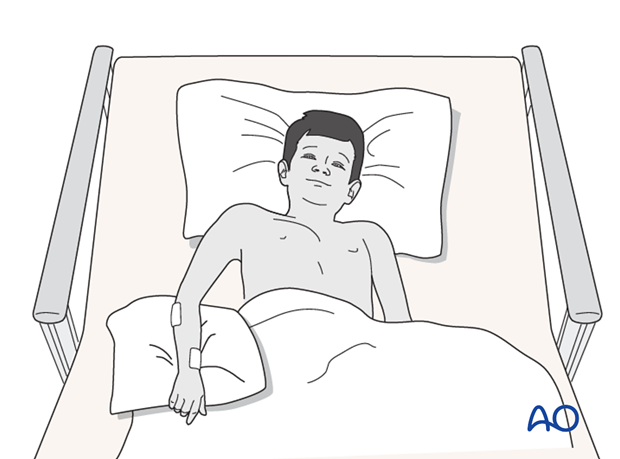
Whilst the child remains in bed, the forearm should be elevated on pillows to reduce swelling and pain.
They should be encouraged to use the arm.
Cast immobilization
Cast immobilization is not necessary and hinders early recovery of joint movement.
For Monteggia lesions treated with ulnar nailing, the forearm may be immobilized in a cast in the position of maximum stability of the radiocapitellar joint for 2-4 weeks.
Analgesia
Ibuprofen and paracetamol should be administered regularly during the first 4-5 days of injury, with additional oral narcotic medication for breakthrough pain.
If pain is increasing the child should be examined.
Neurovascular examination
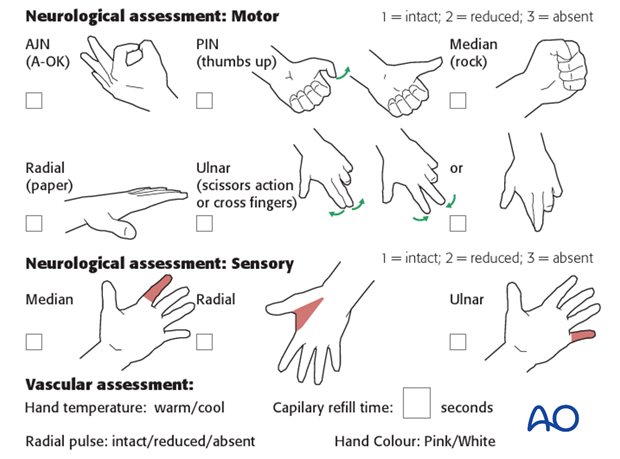
The child should be examined regularly, to ensure finger range of motion is comfortable and adequate.
Neurological and vascular examination should also be performed.
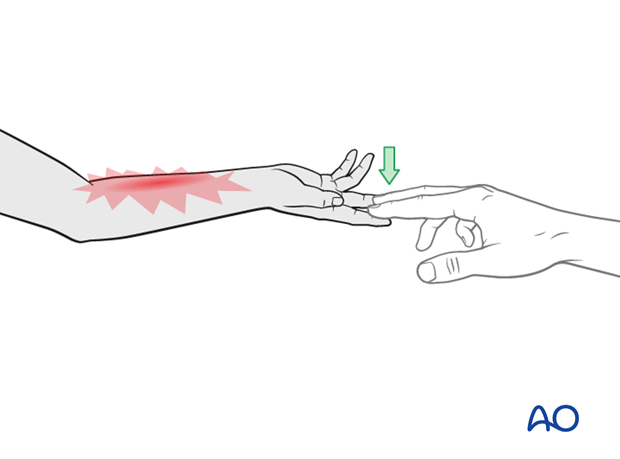
Compartment syndrome should be considered in the presence of increasing pain, especially pain on passive stretching of muscles, decreasing range of active finger motion or deteriorating neurovascular signs, which are a late phenomenon.
See also the additional material on postoperative infection.
Compartment syndrome
Compartment syndrome is a possible early postoperative complication that may be difficult to diagnose in younger children.
The presence of full passive or active finger extension, without discomfort, excludes muscle compartment ischemia.
If there are signs of a compartment syndrome:
- If the child is in a cast, split the cast, along its full length down to skin level.
- Elevate the limb.
- Encourage active finger movement.
- Reexamine the child after 30 min.
If a definitive diagnosis of compartment syndrome is made, then a fasciotomy should be performed without delay.
Discharge care
Discharge from hospital follows local practice and is usually possible after 1-3 days.
The parent/carer should be taught how to assess the limb.
They should also be advised to return if there is increased pain or decreased range of finger movement.
It is important to provide parents with the following additional information:
- The warning signs of compartment syndrome, circulatory problems and neurological deterioration
- Hospital telephone number
- Information brochure
For the first few days, the elbow and forearm can be elevated on a pillow, until swelling decreases and comfort returns.
The arm can be placed in a sling for a few days until the patient is pain free. Many children are more comfortable without support.
Mobilization
Early movement of the forearm should be encouraged as soon as the patient is pain free.
Physiotherapy is normally not indicated.
Follow-up
The first clinical and radiological follow-up depends on the age of the child and is usually undertaken 4-6 weeks postoperatively.
At this point, the child should be able to move the forearm almost fully with some limited rotation caused by callus formation.
AP and lateral x-rays are required.
See also the additional material on healing times.
Nail removal
Nail removal is delayed until the fracture has modelled completely and can be performed as a day case, under general anesthesia.
In the distal radius, the nail end may slip under tendons and nerves. This may irritate the soft tissues and make it difficult to palpate the nail tip.
Exposure of the nail end should be performed under direct vision with small retractors.
In most cases, a small bursa has formed. Once this bursa is opened, the end of the nail can be seen.
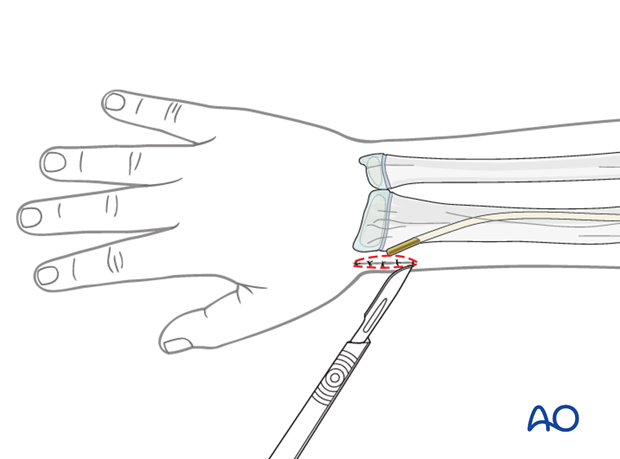
The nail can be removed with the extraction pliers, or a similar clamp. A strong needle holder is also useful.
