External fixation
1. Introduction
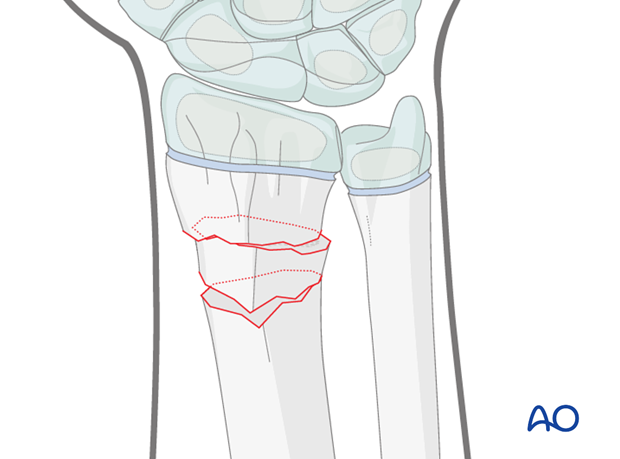
These fractures are usually posteriorly angulated (apex anterior) and whilst they can generally be reduced closed, occasionally impediments to reduction include periosteum, pronator quadratus and, rarely, the median nerve.
Anteriorly angulated (apex posterior) fractures are less common and are also generally reduced closed, but the extensor tendons occasionally impede reduction.
If closed reduction and limited open reduction are unsuccessful, open reduction is occasionally required.
Preliminary reduction
Prior to the application of the external fixator, manipulative closed reduction is only usually necessary when there is soft tissue vulnerability from displaced bony fragments, or if distal vascular impairment is present. Otherwise, once the fixator has been applied it can be used to assist reduction maneuvers by exploiting skeletal distraction, in association with the appropriate manipulation, according to fracture type.
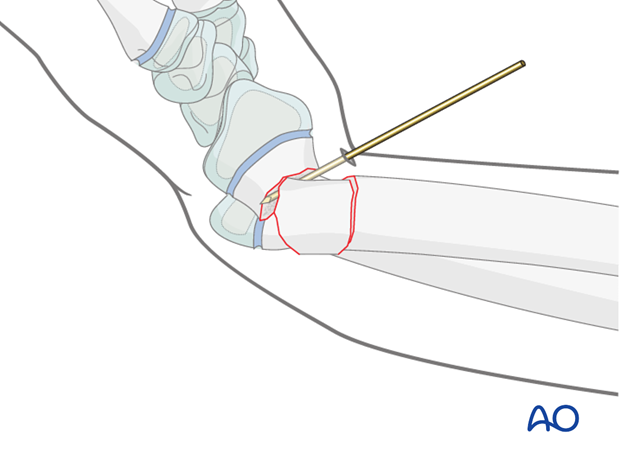
Occasionally reduction can be assisted with a K-wire as a lever inserted into the fracture site, or as a joystick.
Wound management
For open fractures, standard management of the wound will be according to local protocol, which will usually include:
- Broad spectrum intravenous antibiotics given at first contact
- Careful assessment and documentation of the neurovascular status of the hand
- In the presence of significant vascular injury, immediate surgery with restoration of circulation should be conducted no later than 3-4 hours
- Initial wound management involves removal of gross contamination to allow documentation (photography)
- Wound is covered with a nonadherent gauze and waterproof dressing to prevent desiccation
- The forearm is splinted using a backslab
- Definitive wound management should be conducted, ideally with orthopedic and plastic surgical input, by complete excision of the injury zone (debridement)
- Urgent surgery is required in all open fractures if the wound is heavily contaminated
- Fracture stability is achieved using a simple external fixator

2. Patient preparation
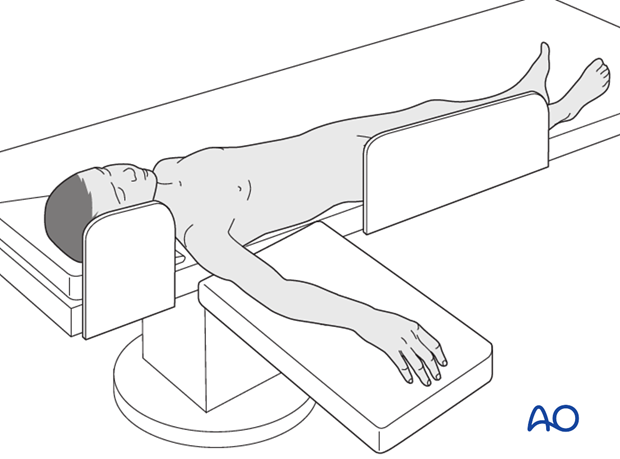
This procedure is normally performed with the patient in a supine position.
3. Anatomy of the distal forearm
A thorough knowledge of the anatomy of the wrist is essential.
The additional material gives a short introduction.

4. Preliminary remarks to application of external fixator
Joint-spanning external fixation of the wrist may be used as a temporary treatment in patients with additional soft tissue injuries and in polytrauma. In such situations, the external fixator allows better access to the soft tissues than a cast.
Joint-spanning external fixation may also be used as a definitive treatment in complex metaphyseal fractures.
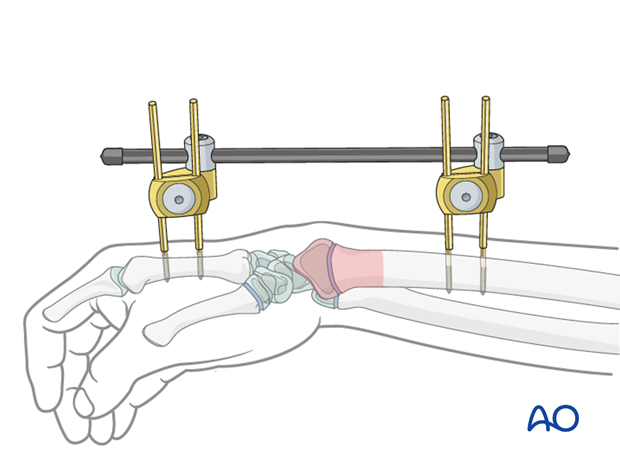
Different configurations of external fixations are available.
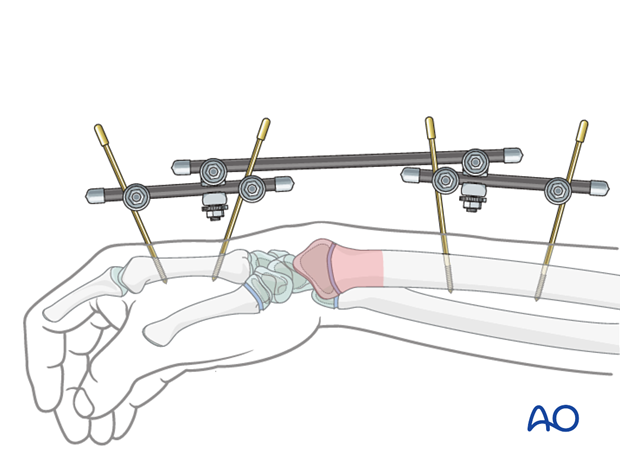
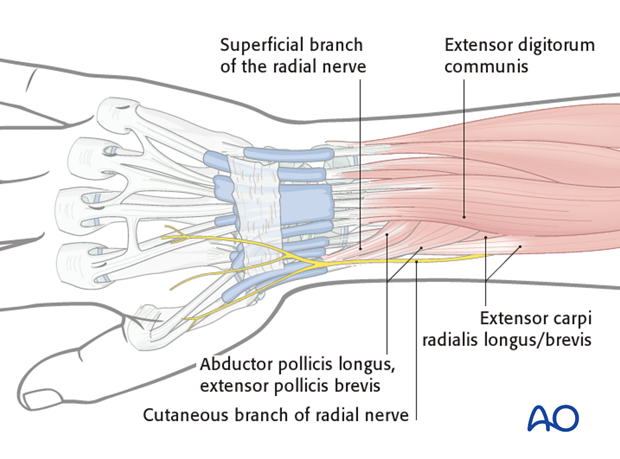
The following three potential complications are of concern when inserting Schanz screws for external fixation:
- Injury to extensor tendons
- Injury to the superficial branch of the radial nerve
- Metacarpal fracture
The following precautions minimize the risk of these complications:
- Knowledge of the anatomy and specific landmarks for pin insertion
- Adequate surgical incisions
- Blunt dissection down to bone
- Use of a protection sleeve
Equipment
The following equipment is recommended:
- 4.0/3.0 mm self-drilling Schanz screws are usually adequate for pre-adolescents
- 4.0 mm self-drilling Schanz screws are used for adolescents
- 4.0 mm carbon fiber rods
- Universal clamps
- Parallel drill guide

5. Landmarks for pin insertion into the second metacarpal
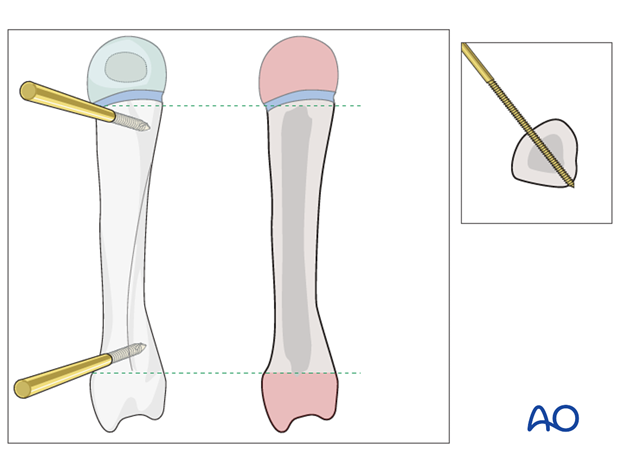
The distal screw should be inserted into the flare of the distal shaft.
The more proximal screw is inserted into the flare of the base of the metacarpal.
The Schanz screws should obtain a good hold in both cortices.
Pitfall
An eccentric position of a pin may weaken the metacarpal, leading to fracture.
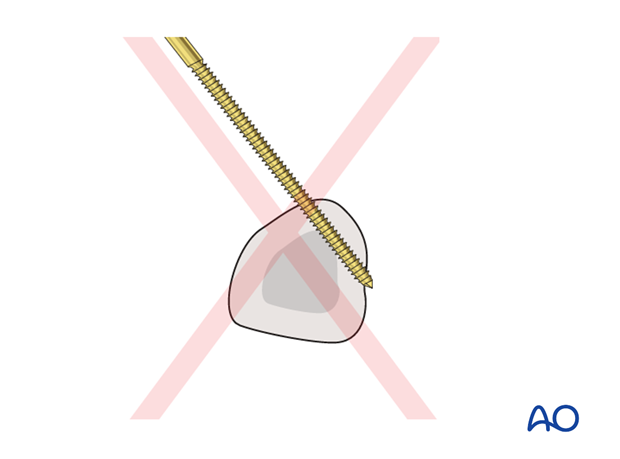
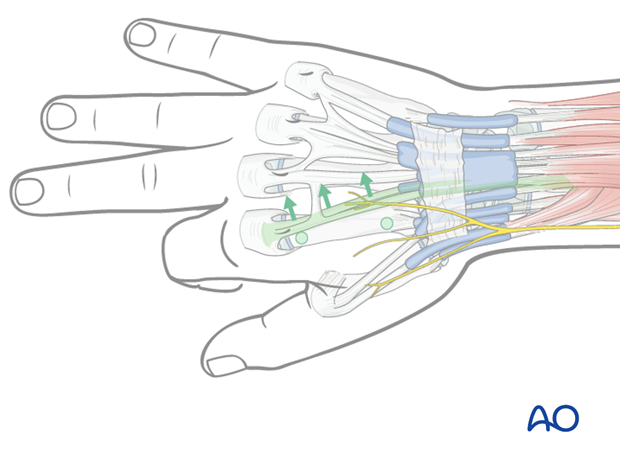
The extensor tendon hood must not be transfixed with the distal metacarpal screw.
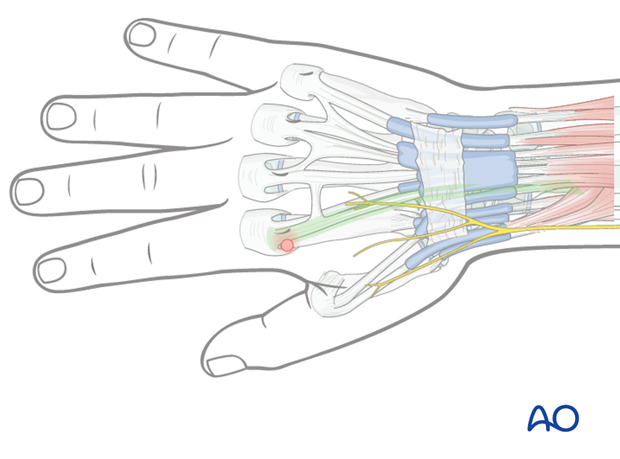
In order to avoid this complication, the index metacarpophalangeal (MCP) joint should be passively flexed 90° so that the extensor hood moves slightly distally and the tendons are pulled in a medial direction.
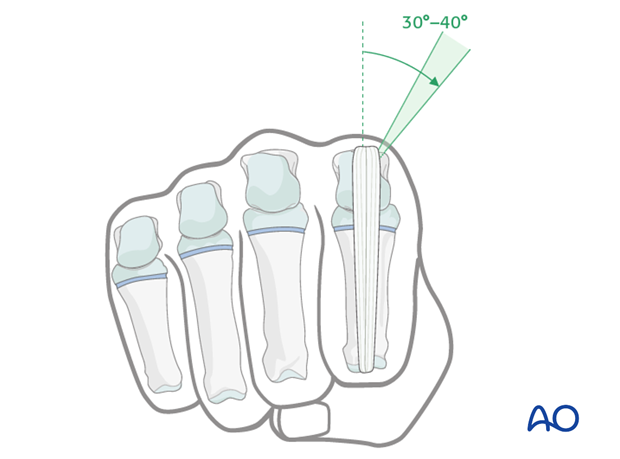
Pin insertion plane
In the coronal plane, the pins should be inserted at an angle of 30–40° in relation to the sagittal plane to avoid transfixing the extensor tendon/hood.
6. Insertion of distal metacarpal Schanz screw
A skin incision is made over the second metacarpal.
The bone is exposed by blunt dissection and the long shaft of the parallel drill guide is inserted directly onto the bone.
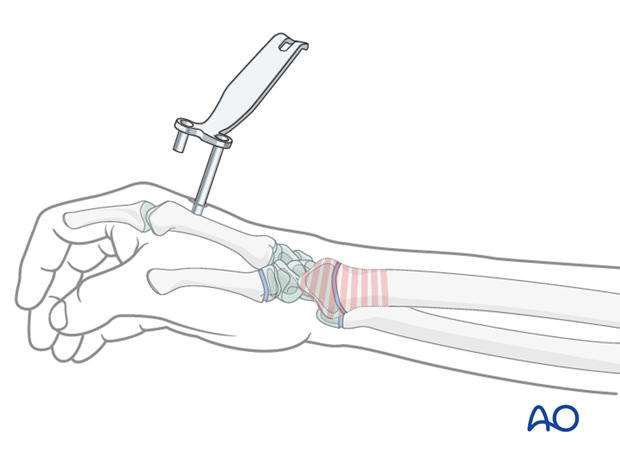
The first Schanz screw is inserted. If self-drilling, self-tapping Schanz screws are used, they are inserted using a slow-running power drill with continuous irrigation, through the long sleeve of the combined drill guide.
If standard Schanz screws are used, predrilling through the drill sleeve to protect the soft tissues is recommended. Schanz screws are then inserted by hand.
Great care must be taken not to insert the screw beyond the far cortex of the metacarpal to avoid injury of the palmar structures.
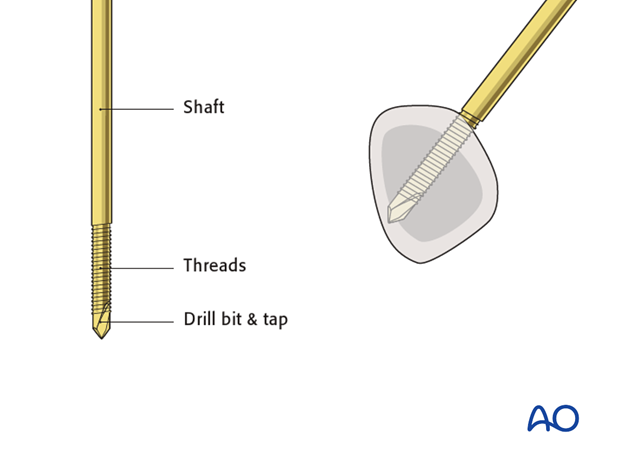
The tip should be embedded in the far cortex to resist cantilever forces. Correct position should be checked using image intensification.
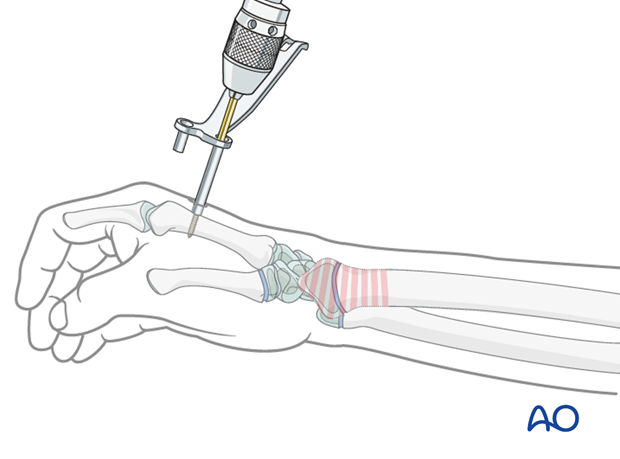
The guide is removed and its short sleeve is passed over the first Schanz screw.
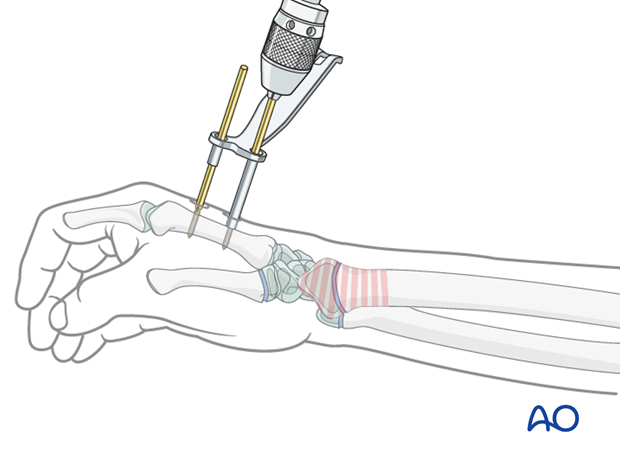
A skin incision is then made for the insertion of the second Schanz screw as determined by the separation of the short and long sleeves of the guide. This is necessary as the double pin clamps have a fixed distance between the two holes.
The bone is exposed by blunt dissection and the long shaft is again inserted into direct contact with the bone.
The second Schanz screw is inserted through the long shaft of the parallel drill guide.
7. Landmarks for pin insertion in the radial shaft
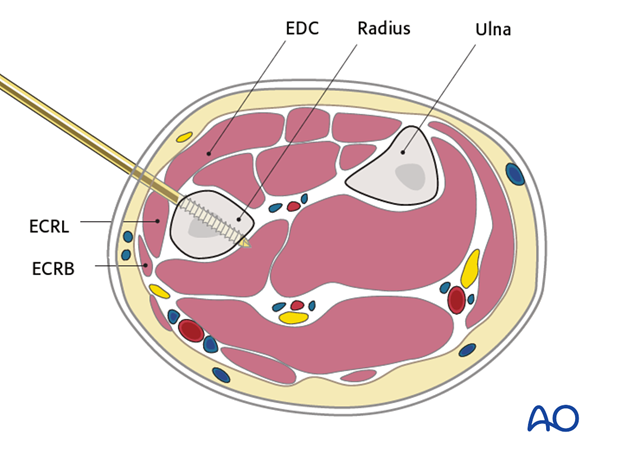
The proximal two Schanz screws should be inserted proximal to the muscle bellies of Abductor Pollicis Longus (APL) and Extensor Pollicis Brevis (EPB), and should not penetrate them.
These muscles are usually easy to identify. Proximal to these muscles, the radial shaft can be palpated through the skin between the bellies of the Extensor Digitorum Communis (EDC) and Extensor Carpi Radialis Longus/Brevis (ECRL/ ECRB). This is the preferred area for Schanz screw insertion into the radial shaft.
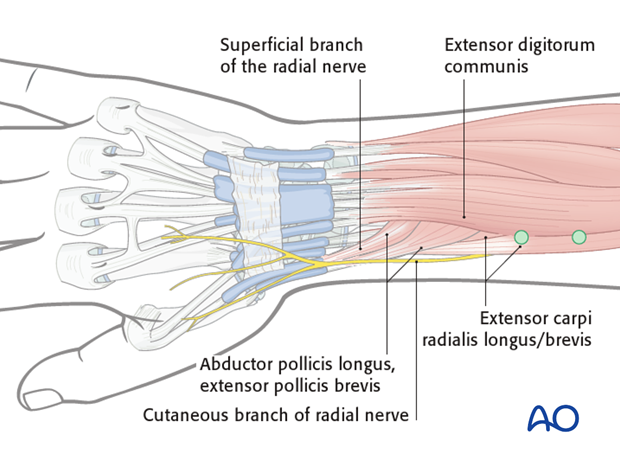
The screws are inserted through the parallel drill guide, as previously described for the metacarpal screw, perpendicular to the long axis of the radius.
If self-drilling, self-tapping Schanz screws are used, they are inserted using a slow-running power drill with continuous irrigation, through the long sleeve of the combined drill guide.
If standard Schanz screws are used, predrilling through a drill sleeve to protect the soft tissues is recommended. Schanz screws are then inserted by hand.
8. Frame construction
The fixator clamps are guided over the paired Schanz screws.
An appropriate length of carbon fiber rod is chosen.
The rod is guided through the two clamps. Each end of the rod is fitted with a protective cap.
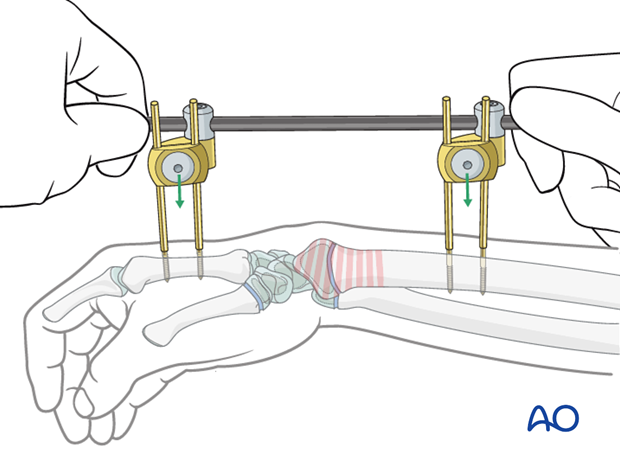
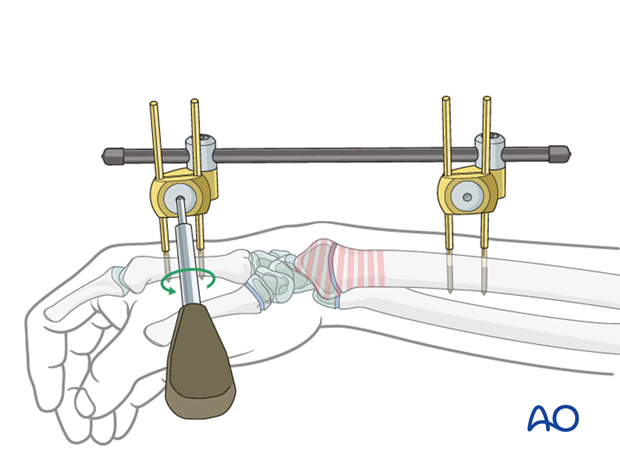
The screw to fix the clamps to the Schanz screws is tightened.
The two remaining set screws are left untightened, which allows free play of the external fixator construct.
9. Reduction
Longitudinal traction is applied to the distal two Schanz screws to reduce the fracture. Additional maneuvers may be necessary depending on the specific fracture pattern.
Once satisfactory reduction is obtained, the remaining two set screws are tightened.
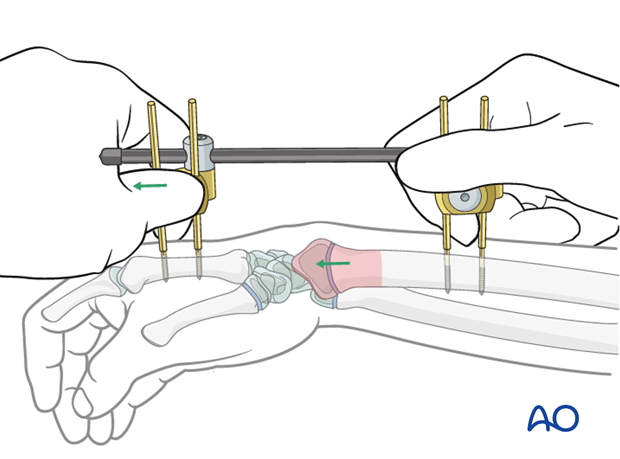
Any tension in the skin at the pin sites should be relieved by lengthening the incisions as necessary.
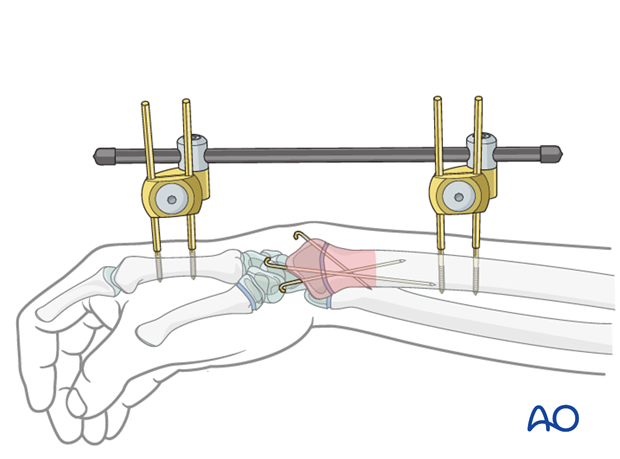
Additional K-wires
In multifragmentary fractures, additional K-wires may be inserted percutaneously.
See specific fracture type for details of K-wire insertion.
10. Pin-site care
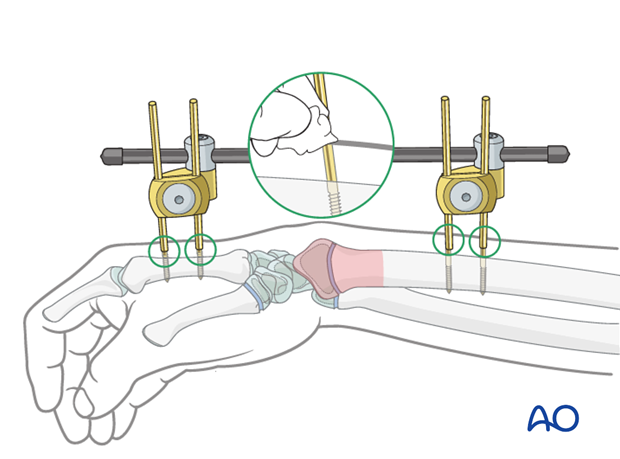
The insertion sites of the pins should be cleaned frequently in order to avoid pin-track infection.
Sterile isotonic solution is sufficient for cleaning as long as there are no signs of infection.
There may be local protocols for pin-site care.
11. Removal of external fixator
If the external fixator is used as definitive treatment, it is usually left in place until fracture healing has reached a stage when redisplacement is unlikely. This depends on the fracture pattern, but is usually around 4-6 weeks (depending on the age of the child) after application.
12. Aftercare
External fixators require special pin care, which should be adapted according to the local protocol.
It is important to keep the interface between skin and screws clean and dry rather than using antiseptic solutions. Pin care should ideally be done on a weekly basis, either by a dedicated practitioner or by an informed compliant parent/carer.
A sample local protocol could be as follows:
- Early movement of the wrist and fingers should be encouraged as soon as pain allows.
- Parents/carers should be advised not to disturb the dressings unless they have been instructed how to undertake pin care. If there is pain around the pin site, medical review should be undertaken urgently. Any signs of infection, such as redness, pus, or discharge are likely to indicate infection and should prompt appropriate treatment (pin site cleansing, topical or oral antibiotics).
- First clinical follow-up will be determined by the needs of the fracture. Pine site inspection by the treating surgeon should be undertaken no later than two weeks after surgery.
- At each follow-up the pin sites should be assessed and necessary care instituted.
- Subsequent follow-up x-rays, to evaluate healing of the fracture by callus formation, can be performed 4-6 weeks postoperatively. For complete fractures of the methaphysis, follow-up has to be monitored with AP and lateral x-rays no later than 10-12 days after treatment and subsequently every 15-20 days until fracture is consolidated.
- The external fixator is removed according to local practice, once the fracture is determined to be healed.
See also the additional material on posttraumatic growth disturbances.


