Open reduction; plate fixation
1. Introduction
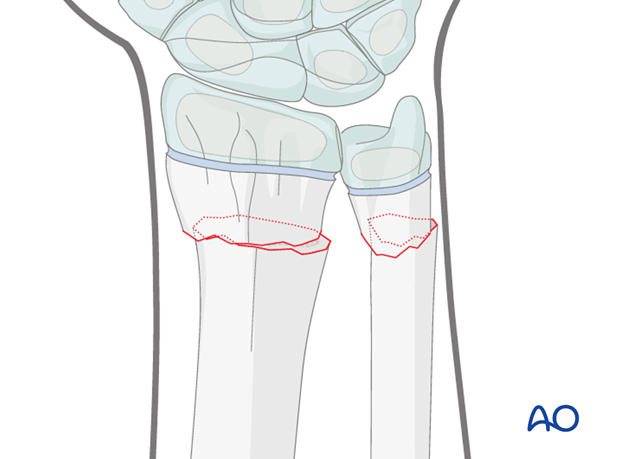
These fractures are usually posteriorly angulated (apex anterior) and whilst they can generally be reduced closed, occasionally impediments to reduction include periosteum and/or pronator quadratus.
Anteriorly angulated (apex posterior) fractures are less common and are also generally reduced closed, but the extensor tendons occasionally impede reduction.
If closed reduction is unsuccessful, open reduction is indicated.
2. Patient preparation
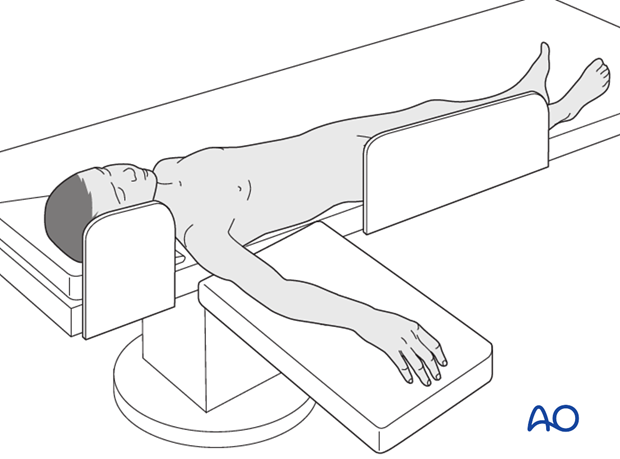
This procedure is normally performed with the patient in a supine position.
3. Approach
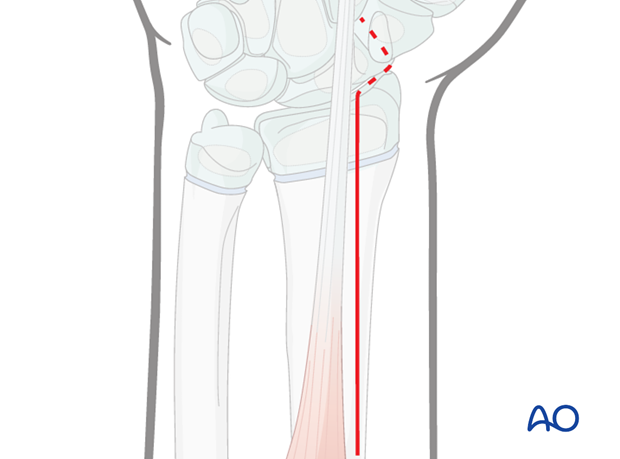
As the majority of these fractures are posteriorly displaced, open reduction is most commonly performed via the anterior approach.
A posterior approach may occasionally be necessary for irreducible anterior displacement.
A thorough knowledge of the anatomy of the wrist is essential. The corresponding additional material gives a short introduction.
4. Open reduction
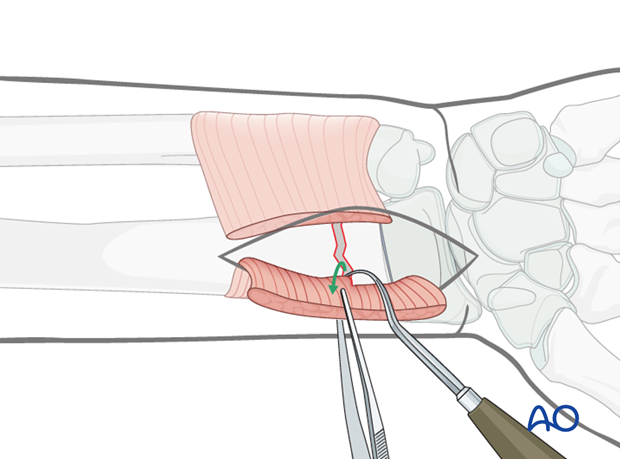
Removal of impediments
Soft tissue impediments to reduction are removed, eg, pronator quadratus as in the illustration.
Once the soft tissue impediments have been removed, the fracture can be reduced under direct vision.
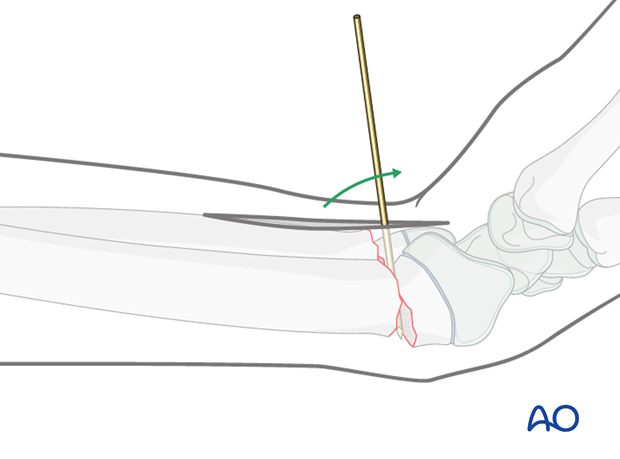
Direct reduction using a K-wire
A K-wire is inserted at the fracture site and used as a lever to facilitate reduction of either bone.
5. Plate fixation
For anteriorly displaced fractures, a simple buttress technique is used confining screw insertion to the proximal fragment.
The plate acts as a buttress against further anterior displacement and is usually sufficient.
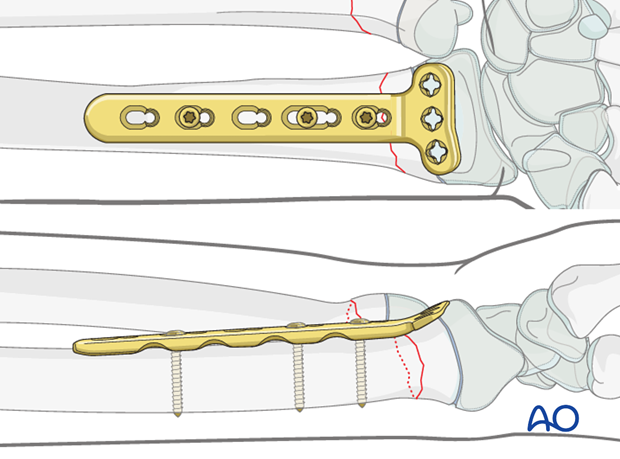
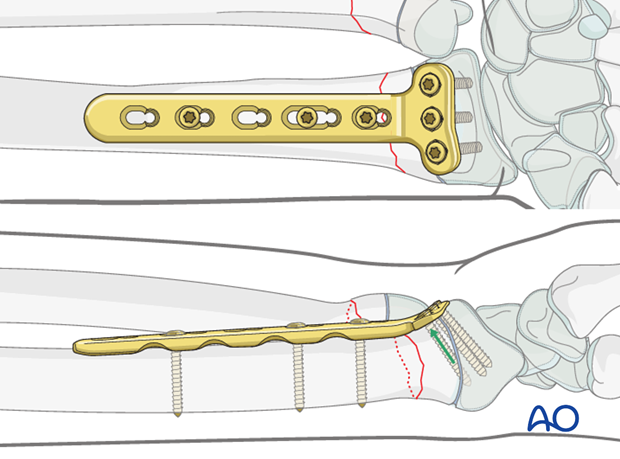
As the majority of these patients are approaching skeletal maturity, if additional stability is required screws may be inserted into the distal fragment, if necessary crossing the physis.
For posteriorly displaced fractures, distal fixation is required with screws engaging the epiphyseal segment.
Provisional K-wire fixation
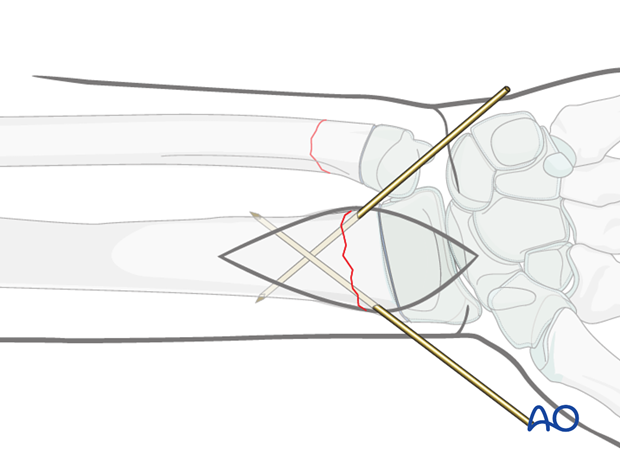
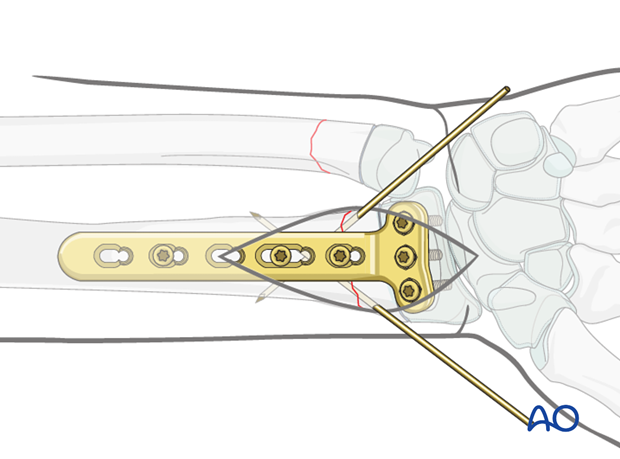
The fracture is provisionally fixed using a single, or two crossed, smooth 1.6 mm K-wires through the radial metaphysis avoiding the growth plate and the perichondrial ring, if possible.
Application of distal radial plate
The longitudinal portion of the plate is applied to the bone. The distal end of the plate should end just proximal to the edge of the radial articular surface.
Smaller implants are available for younger children.
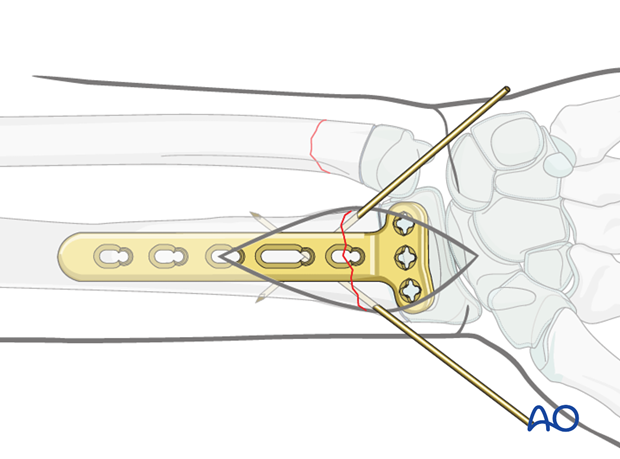
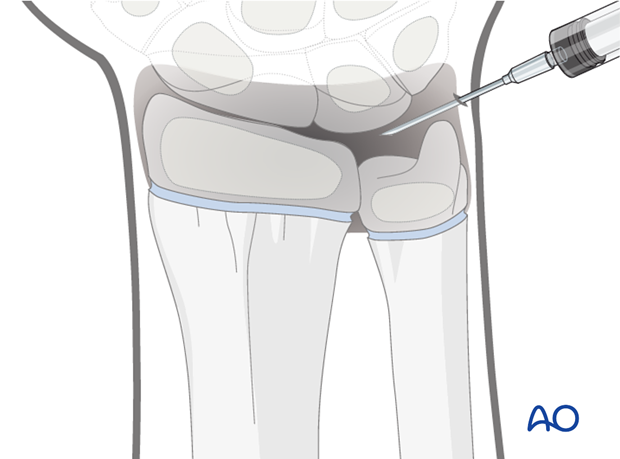
If in doubt, the position of the articular surface can be demonstrated with an arthrogram.
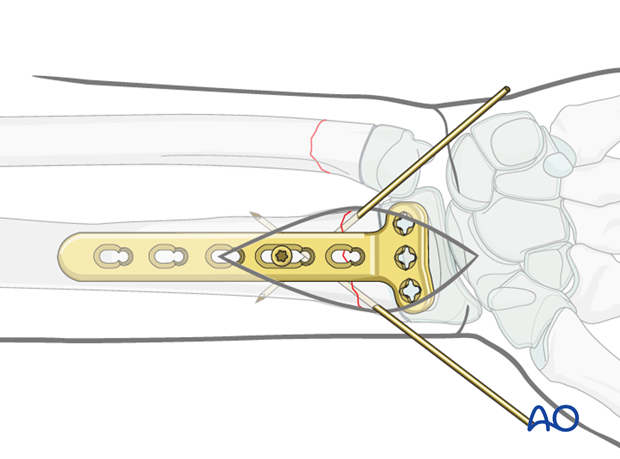
Insertion of the first screw
A screw is inserted through the most distal plate hole overlying the proximal radial fragment.
The plate position is checked using intraoperative imaging and/or arthrogram, and the screw is then tightened.
Insertion of additional screws
When the plate has been used in buttress mode, the proximal fixation is then completed by the insertion of additional screws into the proximal fragment.
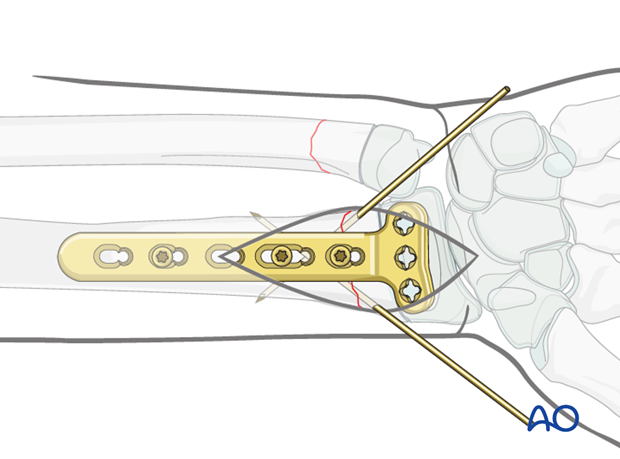
For unstable, posteriorly displaced fractures, the distal fragment is secured with screws through the transverse portion of the plate.
Once the plate fixation is complete, the provisional K-wires are removed.
6. K-wire stabilization of the ulna
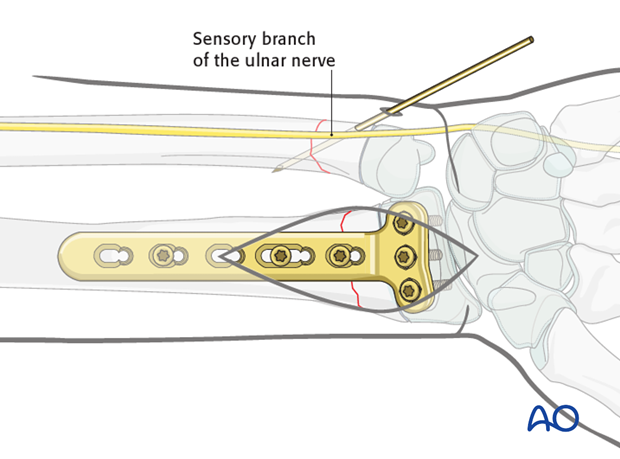
If ulnar stabilization is required, this can be achieved using a K-wire through the ulnar styloid or ulnar metaphysis if the fragment is sufficiently large..
An additional small skin incision may be required.
Care should be taken to avoid the dorsal sensory branch of the ulnar nerve.
The wires should be inserted with an oscillating drill and cooled with saline solution to prevent thermal injury.
The wires may also be inserted by hand using a T-handle.
7. Short arm cast
General considerations
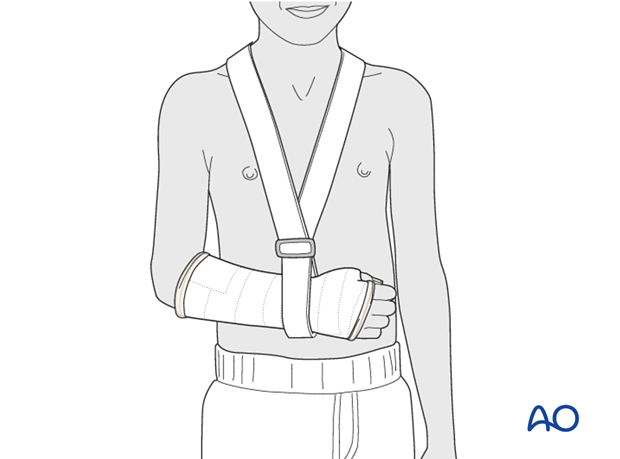
The purpose of the cast is protective as stability is provided by the internal fixation device.
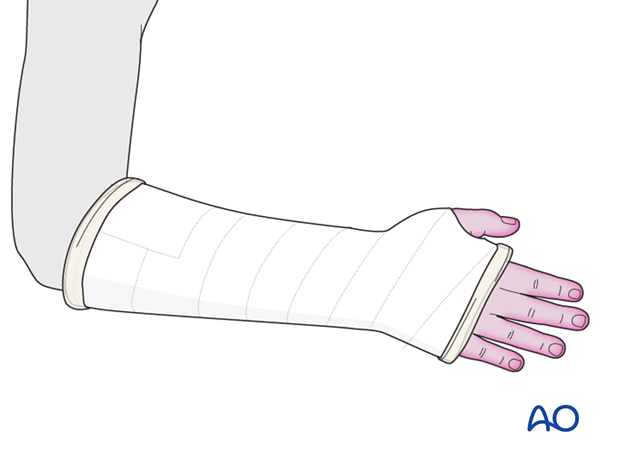
The short arm cast is applied according to standard procedure:
Splitting the cast
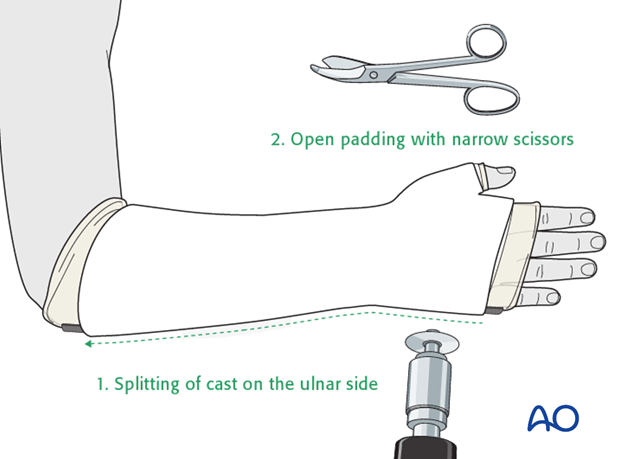
If a complete cast is applied in the acute phase after injury, it is safer to split the cast down to skin over its full length.
8. Aftercare
Tight cast
Further swelling in a restricting cast can cause pain, venous congestion in the fingers and occasionally a compartment syndrome.
For this reason any complete cast applied in acute phase should be split down to skin.
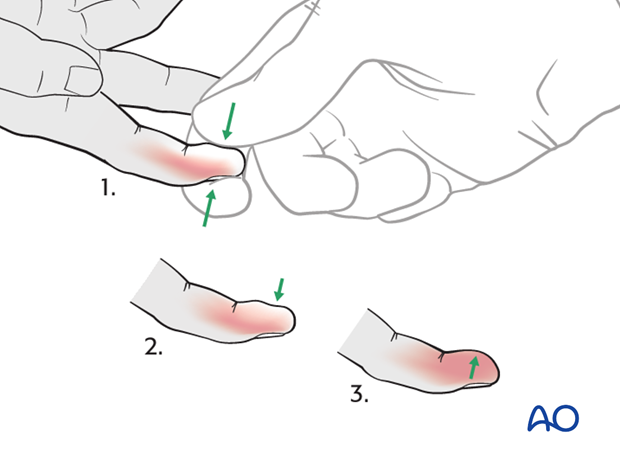
Parents/carers should be instructed how to detect circulatory problems by pressing and releasing the fingertips and watching if the blood flow/color returns to normal (capillary refill), compared to the opposite hand.
Compartment syndrome
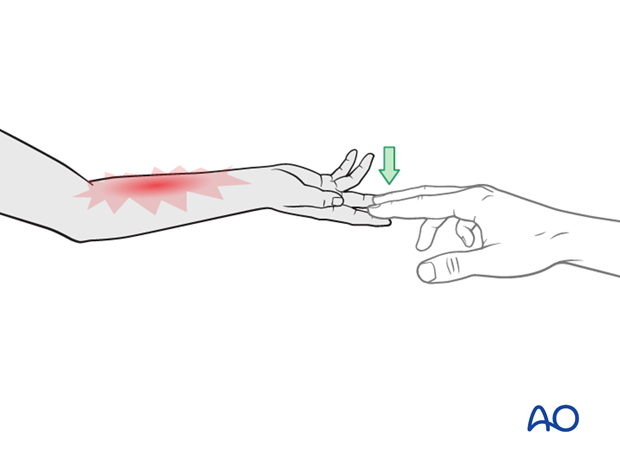
Compartment syndrome is an unusual but serious complication after the application of a complete cast and can be difficult to diagnose, especially in younger children. Neurological signs appear late and the main sign is excessive pain on passive extension of the fingers.
It is important to make sure that the parents/carers are aware of the risk of compartment syndrome.
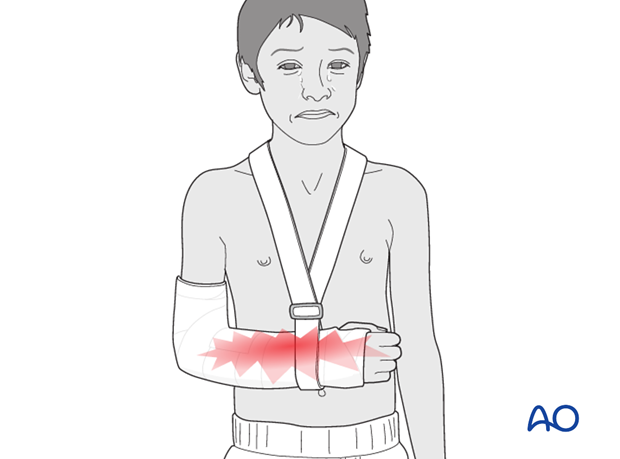
The parents/carers and patient should be informed to take note of increased pain and/or unresponsiveness to normal painkillers.
They should know that this may indicate serious complications. It is important for them to detect these signs as early as possible and report them urgently to the surgeon/nurse by telephone, or to attend the Emergency Room (ER) without delay.
Nerve compression is an occasional complication and the signs include:
- Sensory deficits (numbness)
- Weakness of active finger movement
- Paresthesia
Infections
See also the additional material on postoperative infections.
Cast care
If a normal plaster of Paris cast is used, it is important to keep the cast clean and dry in order to maintain the reduction.
When the swelling has reduced, the cast can become loose. The loss of support can result in loss of reduction.
In this circumstance, the parents/carers are advised to return to the healthcare provider.
Follow-up x-rays
Depending on the fracture pattern, the age of the child and the method of treatment, the patient has to return for follow-up x-rays to monitor the fracture position.
X-rays taken for fracture position can be taken with cast in place. Any x-rays to assess the state of bone healing must be taken without the cast and correlated with clinical examination.
In most cases, it is conventional to obtain follow-up x-rays after reduction to ensure that the position is maintained.
In general, in the child below 5 years of age, the follow-up is usually about 4-5 days after reduction. In the older child with a potentially unstable fracture, an x-ray would normally be taken at 7-10 days.
Further follow-up x-ray is a matter of clinical judgement, the responsibility of the treating surgeon, and tends to be longer in older children (see also Healing times).
For complete fractures of the metaphysis, redisplacement after reduction is not uncommon. It is therefore, important to take early follow-up x-rays in order to detect a possible redisplacement.
See also the additional material on posttraumatic growth disturbances.
Plate removal
Plate removal is advisable as soon as there is radiological evidence of stable fracture healing. This is to prevent growth disturbance either by direct compression of the perichondrial ring or indirect compression of the physis.
Removal of these implants is a hazardous surgical procedure because of scarring from the previous operation. There is a high incidence of damage to important structures and this surgery should be undertaken by an experienced surgeon.
K-wire removal
The K-wires can be removed without sedation in the clinic after approximately 3 weeks (depending on the age of the child).


