ORIF - Lag screws with protection plate
1. Principles
General considerations
ORIF with lag screws and neutralization plate is a high-risk and difficult technique for these injuries.
Utmost care must be taken to prevent excessive stripping of the soft tissues from the intermediate fragments, as the blood supply to these is usually tenuous.
The surgeon should consider less invasive techniques such as closed intramedullary nailing, indirect reduction and bridge plating, or external fixation.
Indications
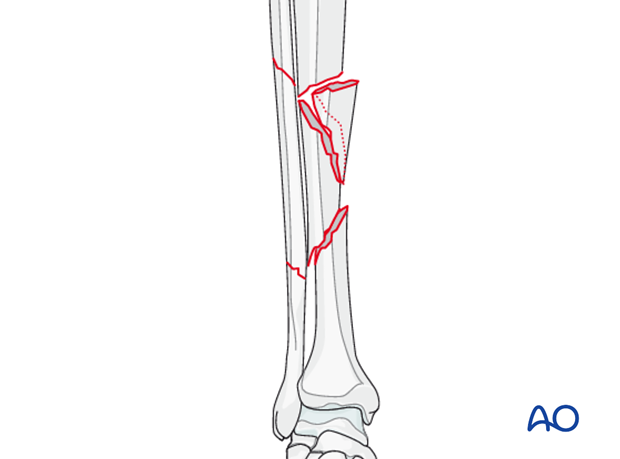
Segmental fractures with significant periarticular involvement may be best suited for plate fixation. Long oblique or spiral fracture patterns are appropriate for lag screws and a neutralization plate.
Note: A combination of fractures patterns (long oblique, short oblique and transverse) is often present in segmental fractures. Usually a combination of techniques is necessary to deal with these different fractures.
Surgical tactic
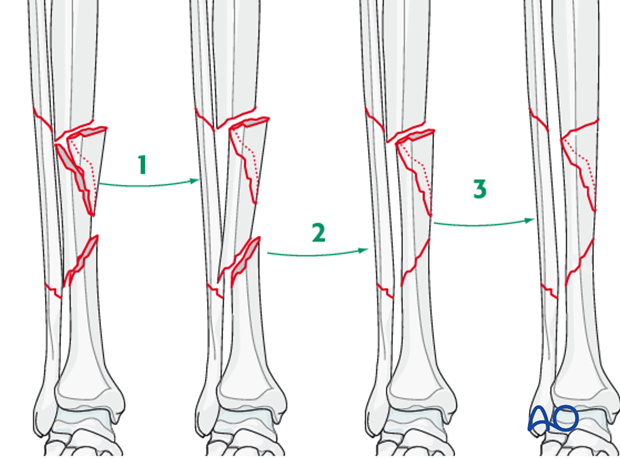
If open reduction and lag screw fixation with neutralization plate are selected, the appropriate surgical tactic is to reduce sequentially the number of fractures, fixing one fracture plane at a time. The idea is to go from 3 fracture lines to 2 to 1 fracture line, starting with the simplest fracture.
Fracture stabilization
Another principle is that fracture stability should be increased in progressive steps. Since instability risks soft-tissue disruption, it is important that provisional stabilization protect the soft tissues during successive steps of reduction and fixation.
Initial stabilization of a complex diaphyseal fracture often is best obtained with a bridging distractor or external fixator. Strategically placed bumps to support the leg may help in addition.
With some complex fractures, a plate that bridges the fracture zone may be applied provisionally before or during the application of interfragmentary lag screws.
2. Patient preparation and approaches
Patient preparation
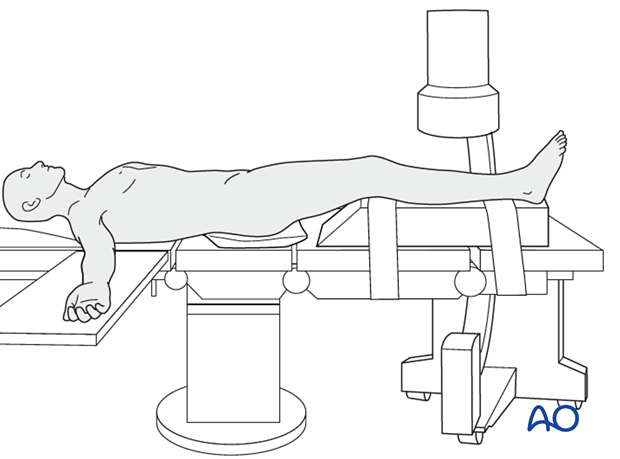
The patient is in a supine position on a radiolucent table or a standard operating table with a radiolucent extension. A pad is placed underneath the buttock to prevent external rotation.
A large foam bolster or cushion is placed under the affected leg to raise it above the opposite leg and facilitate lateral C-arm images.
Approaches
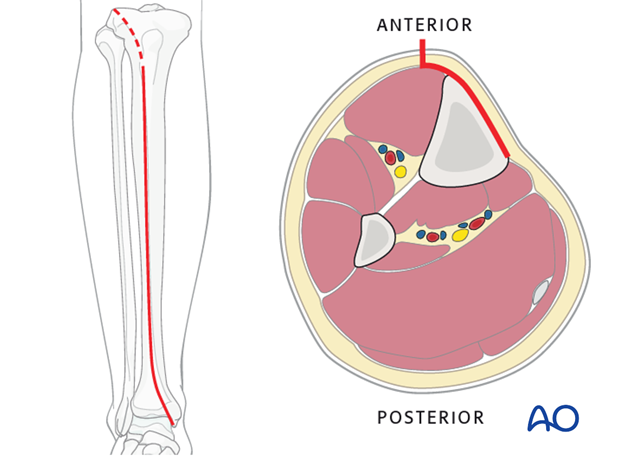
An anteromedial approach is preferred. The advantage of this approach is, that it removes no muscle from the fracture fragments. Also, the medial surface of the tibia is normally flat and conventional plates can be contoured to fit the surface or precontoured plates fit with minimal or no modification.
The anterolateral approach should be chosen if the soft tissues don’t allow for an anteromedial approach. It is difficult to use this approach distally due to soft-tissue interference and contouring the plate along the lateral aspect of the tibia.
3. Reduction
Reduction principle
The key to all reduction is restoring axial length.
Ways of gaining length are:
- Manual traction (for simpler fresh fractures)
- Distractor/external fixator
- Articulated tension device (ATD)
- Push-pull screws
- Use of reduction forceps
Example: Large distractor or external fixator
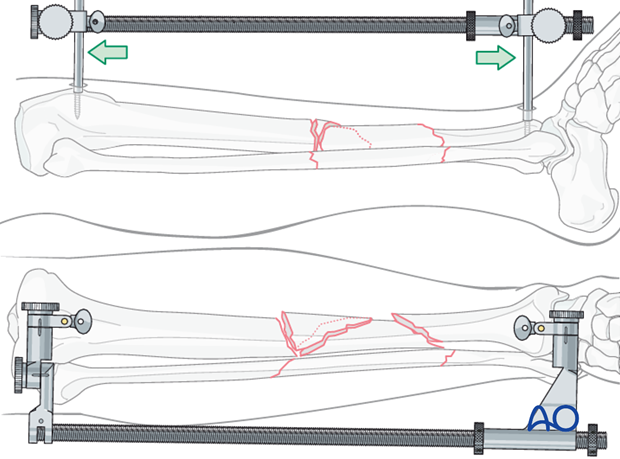
A large distractor is very helpful for reduction. Place a Schanz pin in both proximal and distal fragments. Distraction is applied across these pins by turning the nut on the threaded rod.
If the plate is to be placed medially, then the distractor should be placed anteriorly.
Note: The pins must be placed in the same anatomical plane, so that when the distractor is attached, rotational alignment of the tibia is correct. With the distractor in place, rotational alignment is hard to change.
Remember that tension with the distractor may produce angulation. Adjust the pin clamps appropriately.
Rotation
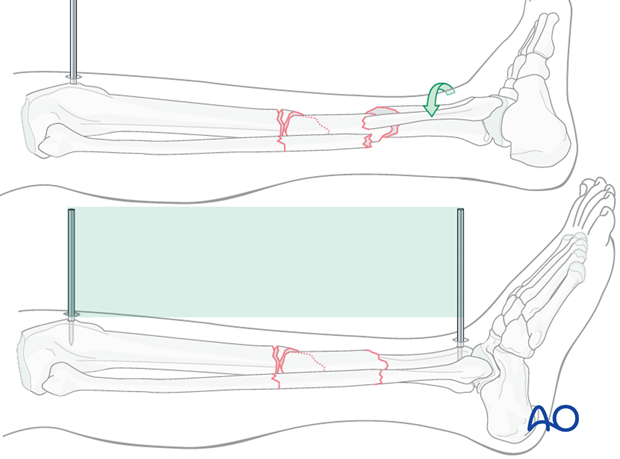
Rotational alignment must be considered during application of any of the previous reduction methods.
The distractor or simple external fixator are uniplanar devices. Rotation of the fracture fragments cannot be adjusted significantly once the pins have been placed and attached to the device.
Thus, the pins should be placed so that when they are in the same plane, the fracture is reduced.
Final reduction of the fracture
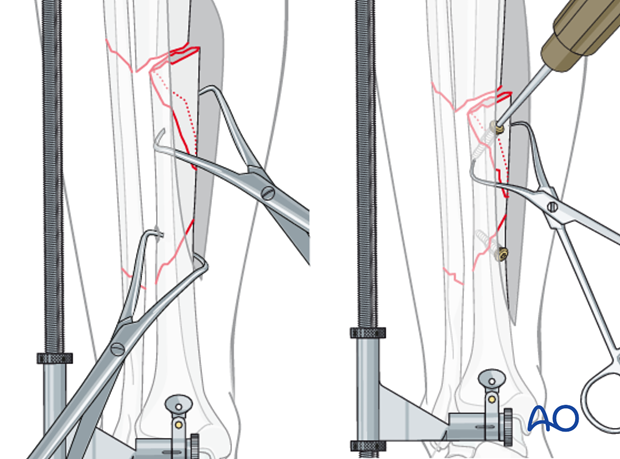
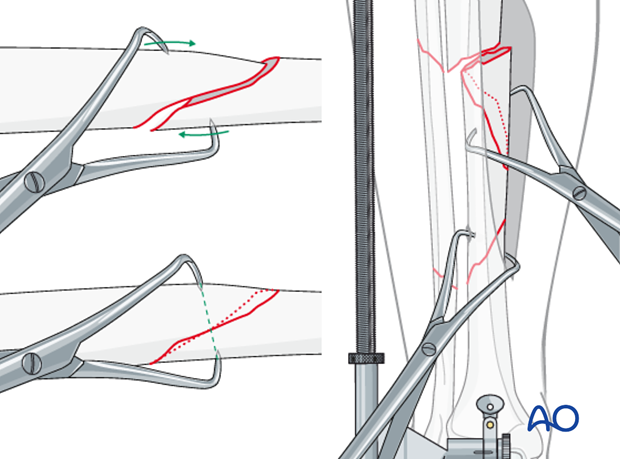
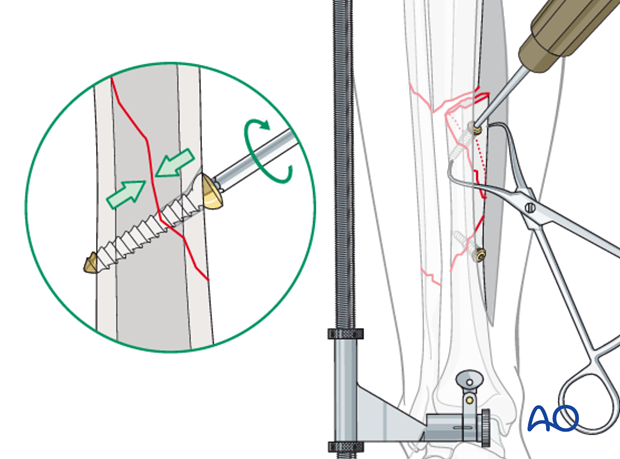
Final reduction of the fracture is done with pointed reduction forceps.
Placement of the reduction forceps is key. Each point must be placed in anticipation of where it will be with the fracture reduced once length is restored.
These forceps will often be placed almost along the line of an ideal lag screw.
Provisional fixation
At this point, the individual fractures can be either provisionally fixed with reduction forceps or definitively fixed with lag screws.
Note:
Each fracture must be reduced anatomically, and in sequence. If the first one is malreduced, correct reduction of the second will be impossible.
4. Lag screw placement and plate insertion
Lag screw insertion
Lag screws should be inserted where possible without interfering with plate placement. Some lag screws will be outside the plate and some lag screws will be through the plate.
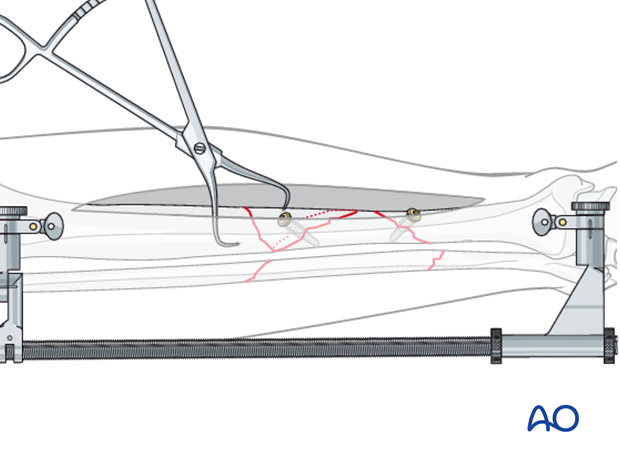
Plate application
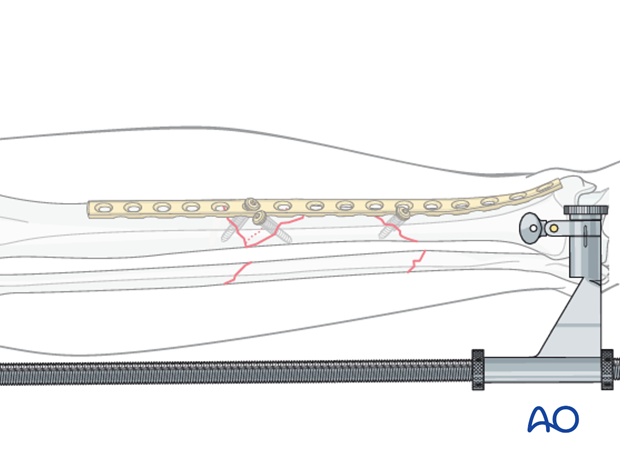
The first screws through the plate should be lag screws where necessary.
Of course, the plate needs to be selected, and properly contoured, before it can be applied. Instructions for these steps follow.
5. Plate selection and preparation
Choice of the plate
Plate length is based upon symmetry above and below the fracture zone. In the case of a segmental fracture, the fracture zone includes all fractures lines. In C-type fractures, at least 3-4 screw holes on either side of the fracture zone are necessary. Another guideline, when fracture location permits, is that the plate should be roughly three times the length of the fracture zone.
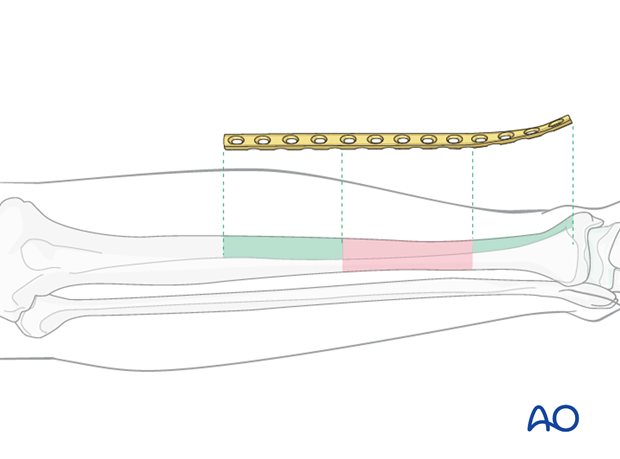
When the fracture zone is very distal or proximal, there may not be room enough for symmetric plate length in the segment nearest the articular surface. In this situation, a plate with multiple hole options in the metaphysis is chosen to improve fixation in the short periarticular segment.
A locking plate may be indicated if the bone quality is poor or when the fracture extends into softer metaphyseal bone.
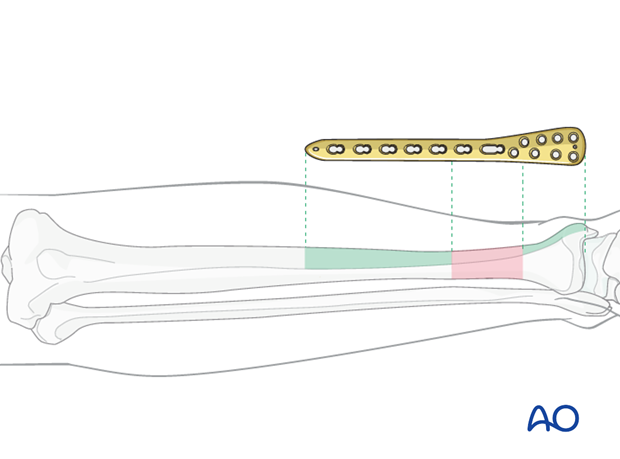
Traditionally a 4.5 mm plate has been advised for the tibial shaft. Its advantages include increased plate thickness and larger screw size for added strength. These plates are, however, more difficult to contour and may be too prominent.
A 3.5 mm plate offers improved contourability and multiple screw options in metaphyseal (end-segment) zones. However, they are less durable than the large fragment plates.
Another consideration is the choice between an anatomically precontoured plate or one which the surgeon contours. For plates which need to be contoured, the following steps have to be employed.
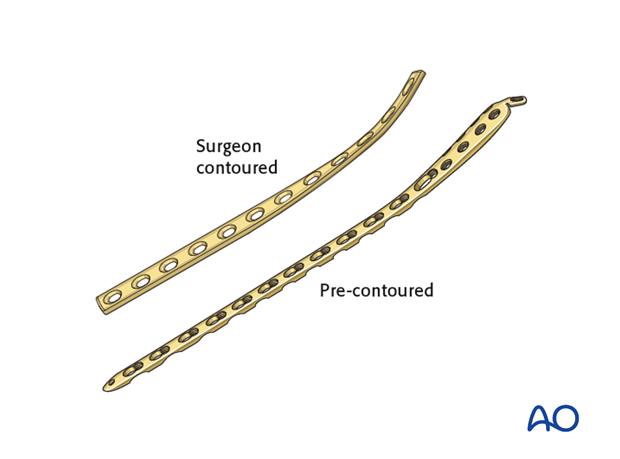
Twisting the plate
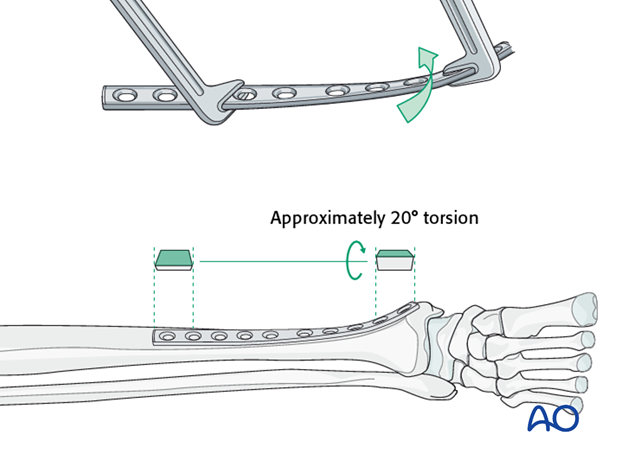
The anteromedial surface of the tibial shaft twists internally approximately 20° as it approaches the medial malleolus.
The first step of plate contouring is to twist the plate so it matches the tibial surface upon which it will lie.
If the plate is bent before it is twisted, the process of twisting will alter the bend that has been created.
Matching the curvature
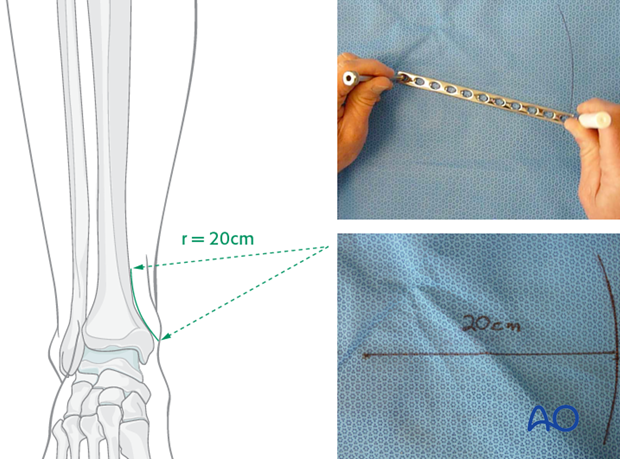
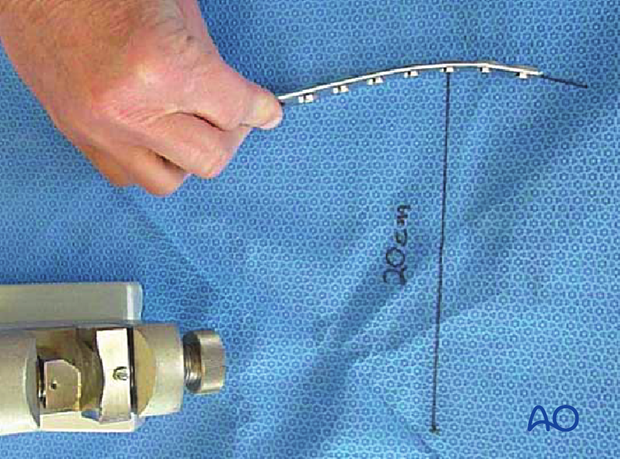
Depending upon the plate location, more or less bending of the plate will be required to match the contour of the intact (or reduced) bone. Much of the medial tibial shaft is quite straight, so that little bending is required. However, the distal medial surface has a significant concavity, with a typical radius of curvature of 20 cm as illustrated.
Such a 20 cm radius can be drawn on a sterile drape and used as a template for plates to be used in this location.
Bending the plate
The plate can be bent with bending irons alone, but it is preferable to bend with a bending press, because the press gives more control.
In either case, the bending is done in small steps to produce a smooth contour. Contouring only takes place over the distal 10-12 cm of the plate. When finished, the plate should match the 20 cm radius of curvature.
6. Final plate fixation
Plate fixation
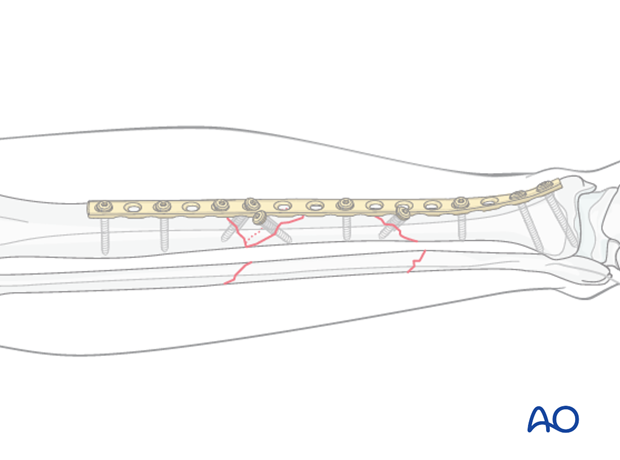
After the properly contoured plate is applied, the first critical screws are placed, to obtain interfragmentary compression and to anchor the plate proximally and distally.
At this point, stability is provided by the plate, and the distractor or external fixator can be removed. Remaining screws are added as required.
Remember that it is not necessary to fill every hole of the plate, particularly in the diaphysis.
7. Postoperative care
Perioperative antibiotics may be discontinued before 24-48 hours.
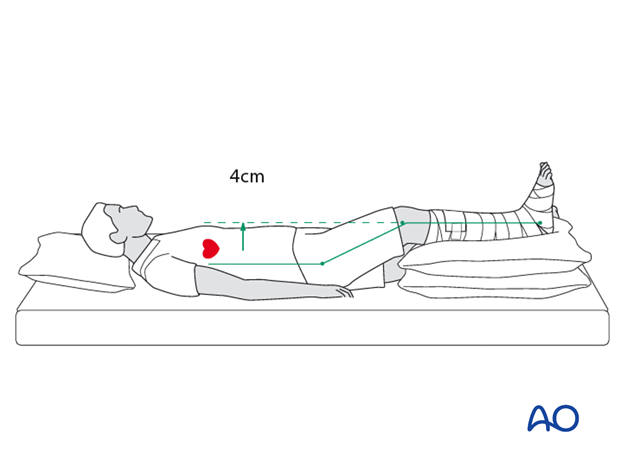
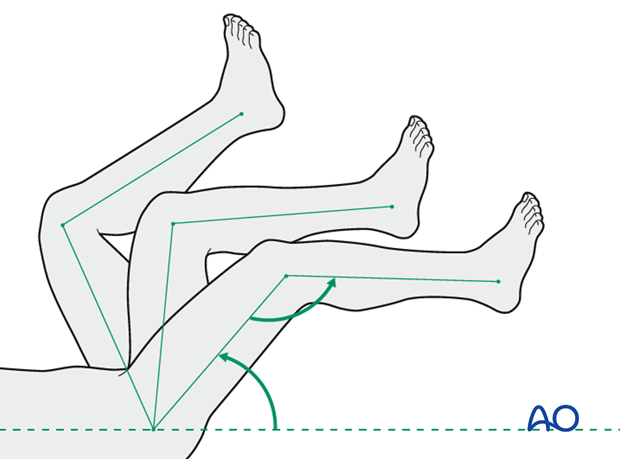
After surgery, the patient’s leg should be slightly elevated, with the leg placed on a pillow, 4 cm above the level of the heart.
Attention is given to:
- Pain control
- Mobilization without early weight bearing
- Leg elevation when not walking
- Thromboembolic prophylaxis
- Early recognition of complications
Soft-tissue protection
A brief period of splintage may be beneficial for protection of the soft tissues, but should last no longer than 1–2 weeks. Thereafter, mobilization of the ankle and subtalar joints should be encouraged.
Mobilization
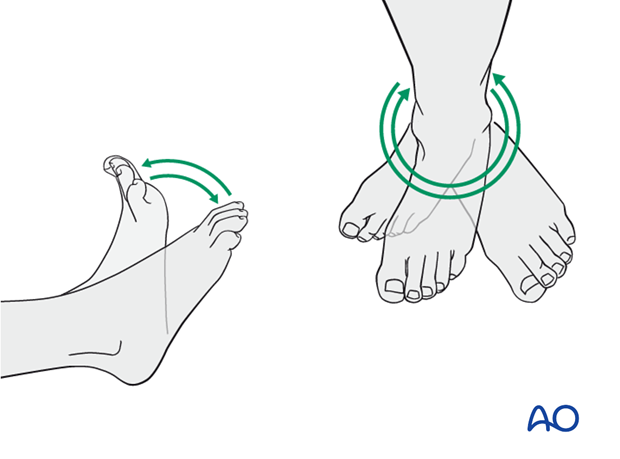
Active and assisted motion of all joints (hip, knee, ankle, toes) may begin as soon as the patient is comfortable. Attempt to preserve passive dorsiflexion range of motion.
Weight bearing
Limited weight-bearing (15 kg maximum), with crutches, may begin as tolerated, but full weight bearing should be avoided until fracture healing is more advanced (10-12 weeks).
Follow up
Follow-up is recommended after 2, 6 and 12 weeks, and every 6-12 weeks thereafter until radiographic healing and function are established. Depending on the consolidation, weight bearing can be increased after 6-8 weeks with full weight bearing when the fracture has healed by x-ray.
Implant removal
Implant removal may be necessary in cases of soft-tissue irritation by the implants. The best time for implant removal is after complete bone remodeling, usually at least 24 months after surgery. This is to reduce the risk of refracture.


