MIO - Bridge plating
1. Principles
Bridge plating
Bridge plating uses the plate as an extramedullary splint, fixed to the two main fragments, while the intermediate fracture zone is left untouched. Anatomical reduction of the wedge fragments is not necessary. Furthermore, direct manipulation risks disturbing their blood supply. If the soft-tissue attachments are preserved, and the fragments are relatively well aligned, healing is predictable.
Correction of length, rotation and axial alignment of the main shaft fragments can usually be achieved indirectly, using traction and soft-tissue tension.
Mechanical stability, provided by the bridging plate, is adequate for indirect healing (callus formation).
For minimal invasive surgery, the use of an image intensifier is recommended.
Pearl
If the fibula has a simple fracture pattern, plating this fracture first will provide an indirect reduction of the tibia, establishing length and approximate rotational and axial alignment.
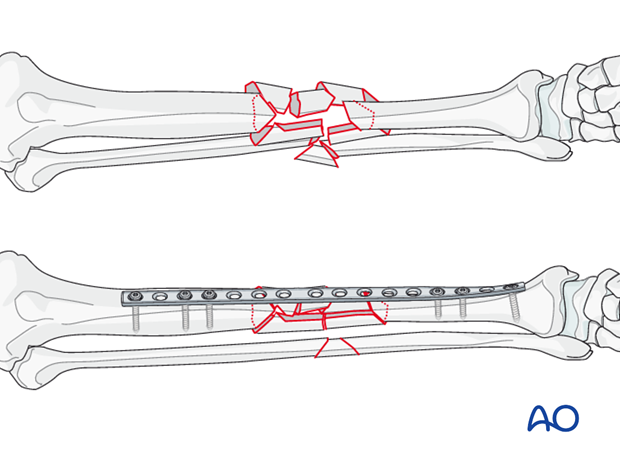
Bridge plate insertion
Bridge plates can be inserted, as illustrated, either with an open exposure that carefully preserves soft-tissue attachments to the fracture fragments, or with a minimally invasive approach that leaves skin and soft tissue intact over the fracture site.
With the minimally invasive (MIPO) approach, incisions are made proximally and distally, and the plate is inserted through an extraperiosteal tunnel. Such minimally invasive plating should be done using image intensification (if available).
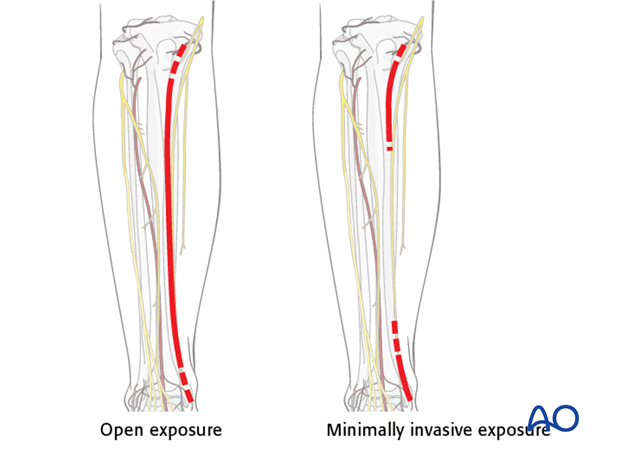
2. Patient preparation and approaches
Patient preparation
This procedure is normally performed with the patient in a supine position.
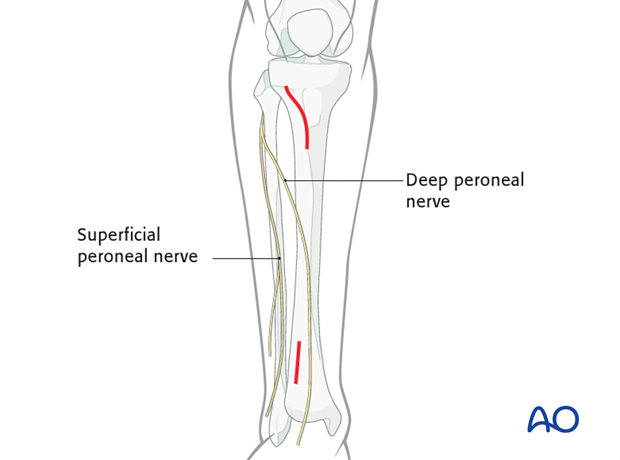
Lateral approach (MIO)
The lateral approach is used for minimally invasive osteosynthesis if the medial soft tissues are injured.
This approach is also used when a precontoured plate (eg, LISS plate) is placed laterally, for fixation of proximal and mid-tibial fractures.
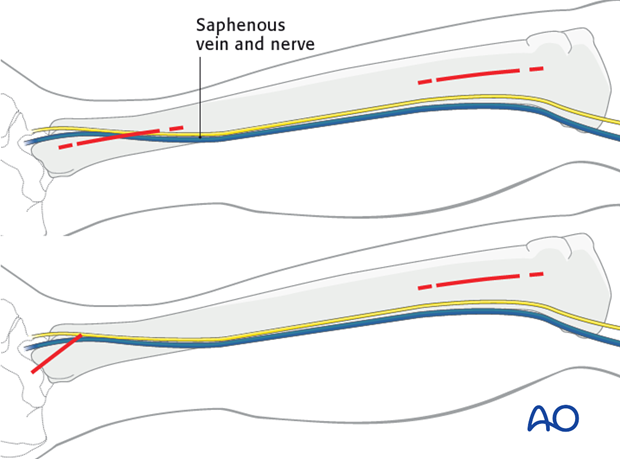
Medial approach (MIO)
Minimally invasive fixation of tibial fractures is preferably done through the medial approach, especially for distal fractures.
3. Reduction
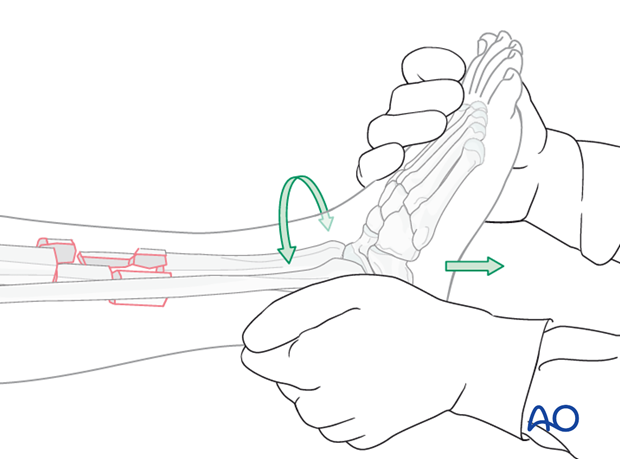
Manual traction
It is important to restore length, axial alignment and rotation.
Apply longitudinal traction to the foot to restore length. When length is restored, correct the axial and rotational alignment.
Compare length, alignment and rotation with the uninjured side.
Reduction aids
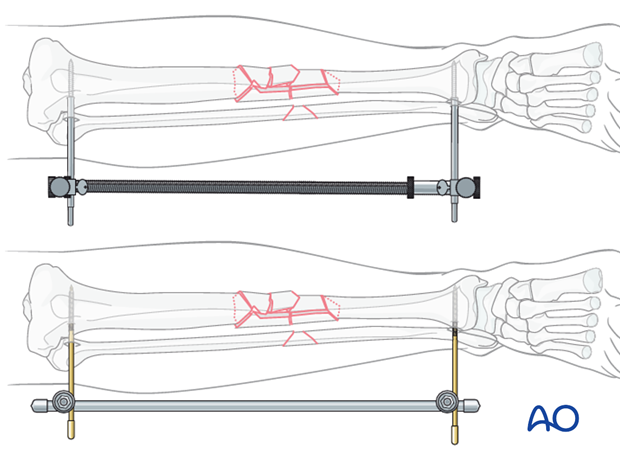
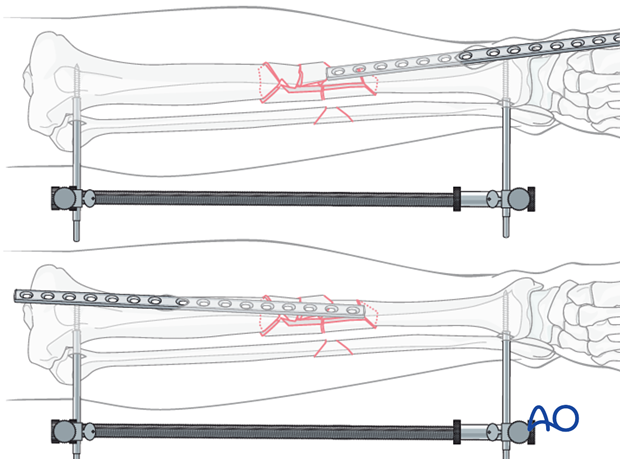
If reduction cannot be achieved by manual traction, use a large distractor for closed reduction. Place one Schanz pin in both the proximal and distal main fragments. Distraction is applied across these pins by turning the thumb screw.
If a distractor is not available, an external fixator can be used instead.
Check reduction, and if necessary, correct rotational deformity.
4. Plate selection and preparation
Choice of implant
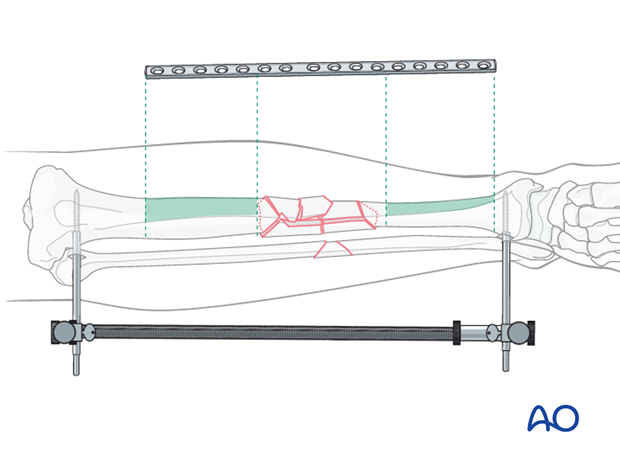
As bridge plating should span a long section of the bone, the length of the implant has to be chosen accordingly. A good rule of thumb is to calculate that one third of the plate should cover the fracture zone, with one third of the length on either side of the fracture. Usually a narrow large fragment plate is chosen.
An angular stable (locking) plate is a good option in osteoporotic bone, and for fractures with a short end segment. Such a plate needs not to be contoured precisely to fit the bone, since it functions as an internal fixator. Attaching it to the bone does not alter fracture alignment, since the screws do not pull the main bone fragments to the plate.
Contouring the plate
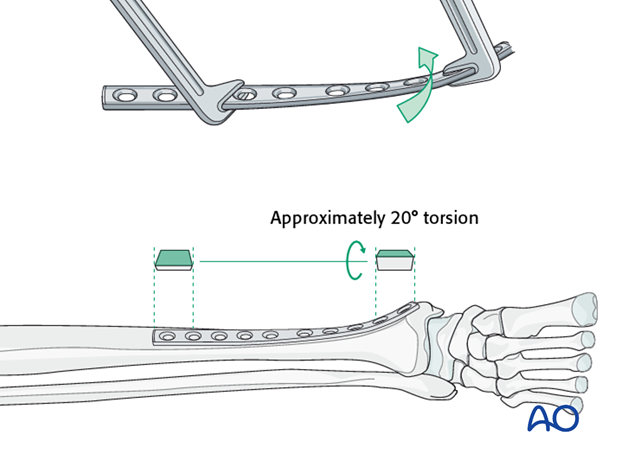
Minimal contouring will be necessary over the fracture site. However, it may be helpful to contour the ends to fit the bone where the plate will be affixed.
To match the orientation of the anteromedial surface of the distal tibia, the distal end of the plate will need to be twisted.
Pearl: plate positioning
If the fracture extends proximally, generally a locking plate is placed laterally because the implant allows us to deal with more proximally located fractures, and may avoid damaged medial soft tissues.
In distal fractures, the preference is to place the plate medially. Anterior and lateral soft tissues (tendon, nerve and blood vessels) make safe placement of the plate laterally difficult.
5. Definitive fixation
Plate insertion - MIPO technique
The plate can be inserted either through the proximal (antegrade) or distal incision (in a retrograde manner).
The tunnel for the plate should be prepared at the time of making the approach either with a specialized tunneling tool, or with blunt instruments.
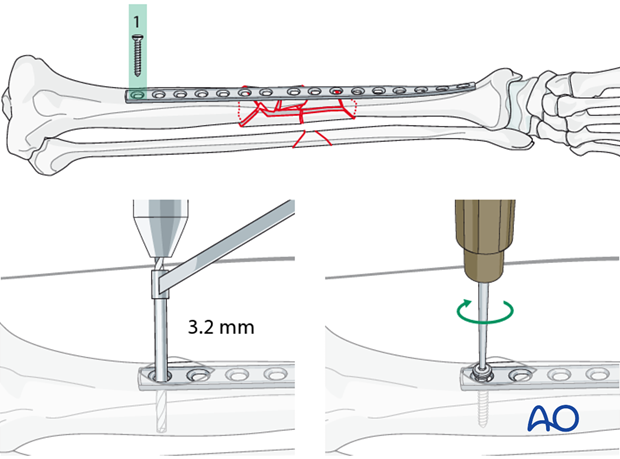
Insertion of first screw
Fixation begins with one end of the plate, and then progresses to the other end.
Each end of the plate must be placed in the center of the bone.
To place the first screw, drill with a 3.2 mm drill bit and neutral drill guide through the plate hole. Measure for screw length, tap with a 4.5 mm tap and a protective sleeve and insert the first screw.
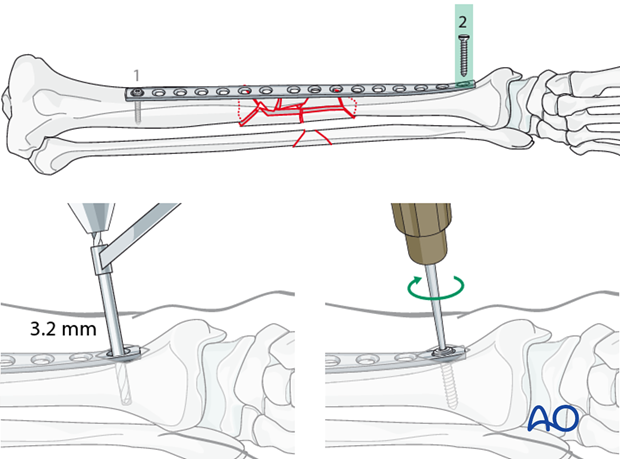
Insertion of the second (distal) screw
At this point, length, rotation and coronal alignment should be checked and, if necessary, corrected.
Insert the second screw in the same fashion as described for the first screw.
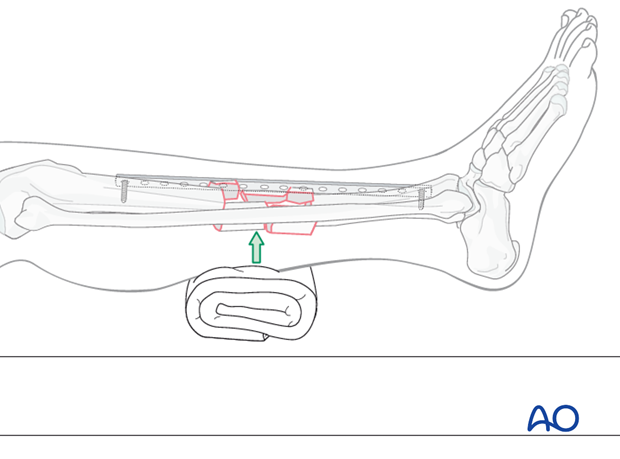
Correcting sagittal displacement
Some sagittal displacement can be corrected after the second screw has been inserted by placing a rolled towel under the fracture.
If image intensification is available, check the completed reduction before inserting further screws.
Insertion of the remaining screws
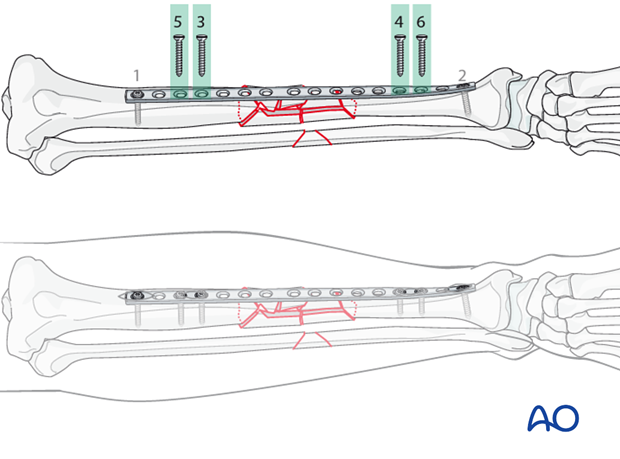
Alternating from one main fragment to the other, insert the remaining screws.
For these screws, additional small incisions over the plate are necessary.
Place two screws as close to the fracture zone as practicable in each main fragment. A minimum of three screws on each side should be used.
6. Pearl: screws in locking plates
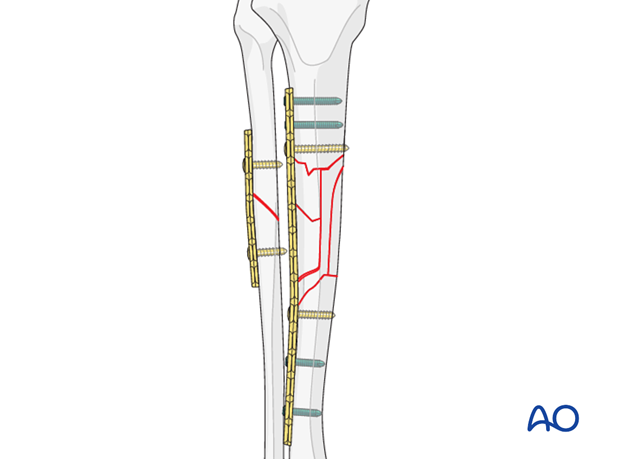
If a locking plate is used, placing the locking screws adjacent to the bridged zone should be avoided.
7. Aftercare of tibial shaft fractures
Weight bearing
If weight bearing without plaster is not advisable or possible, a walking cast is a better option than unprotected walking completely without weight bearing.
After intramedullary nailing, weight bearing is allowed in an earlier phase (immediately postoperatively) compared to plate fixation. After the latter, progressive weight-bearing is usually possible after 8-12 weeks.
If external fixation is considered as the definitive device, weight bearing starting at 10–15 kg should be encouraged early, as in plate fixation.
As soon as callus formation is visible and once there are no clinical signs of instability, the patient can start to bear full weight. After removal of the external fixator, it may be prudent to protect the leg temporarily in a splint or brace.
Follow-up
After suture removal 2 weeks after surgery, the patient should be seen every 4-6 weeks in follow-up with examination and x-rays until union is secure, and range of motion and strength have returned.
Inspection of external fixators every two weeks is optional.
Hardware removal
Interlocking screws are always removed.
As far as plates create stress raising, removal is advisable. The earliest time of implant removal being two years postoperatively.


