

Intramedullary K-wire fixation
1. General considerations
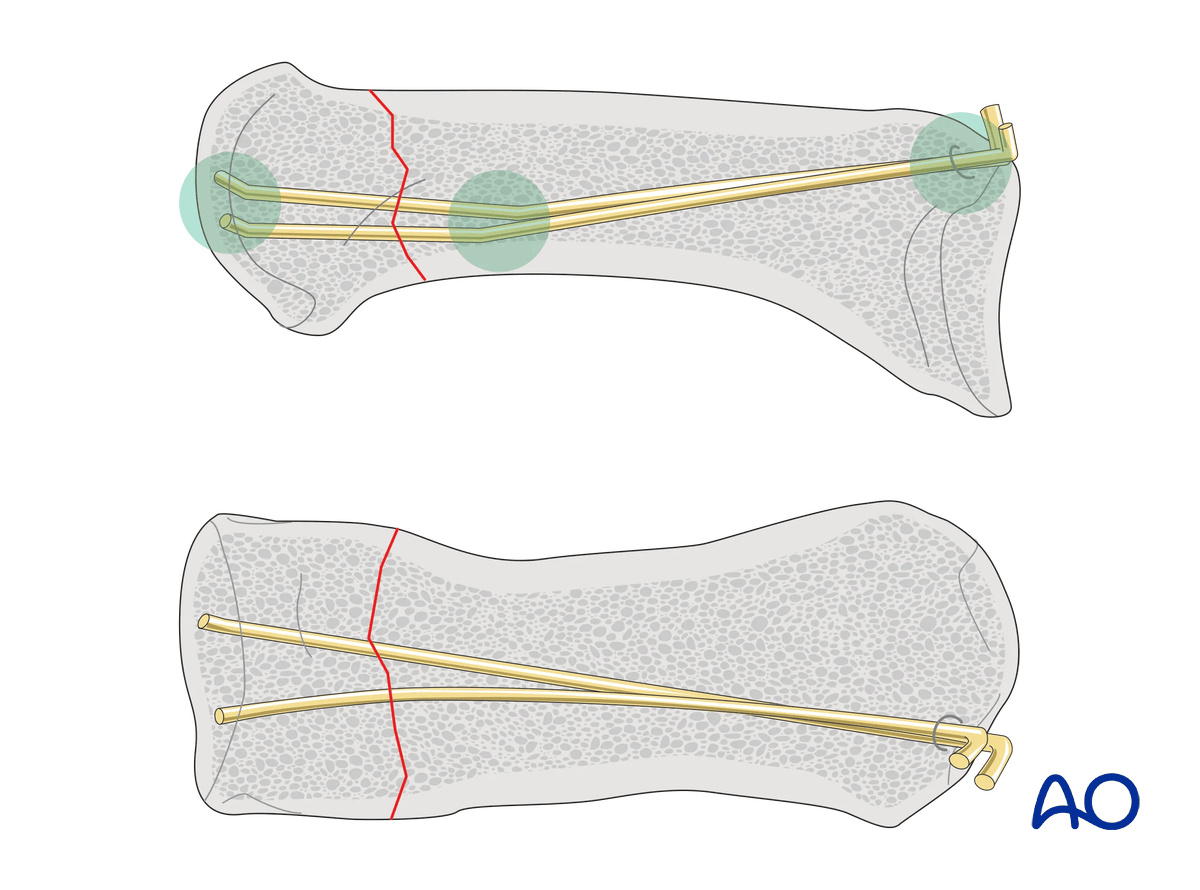
Extraarticular fractures of the metacarpal neck may be stabilized with intramedullary K-wire fixation.
The K-wires are inserted through a small incision at the base of the metacarpal into the bone.
The stabilization principle follows a three-point bone support. This corrects the angulation of the head, controls the rotation, and avoids shortening. Note that the intramedullary cavity of the metacarpus is wide.
This fixation provides inferior overall stability compared to plate fixation. A longer immobilization of the thumb is necessary to ensure good fracture healing.
In older patients, a longer immobilization period may aggravate preexisting carpometacarpal (CMC) joint osteoarthritis.
2. Patient preparation
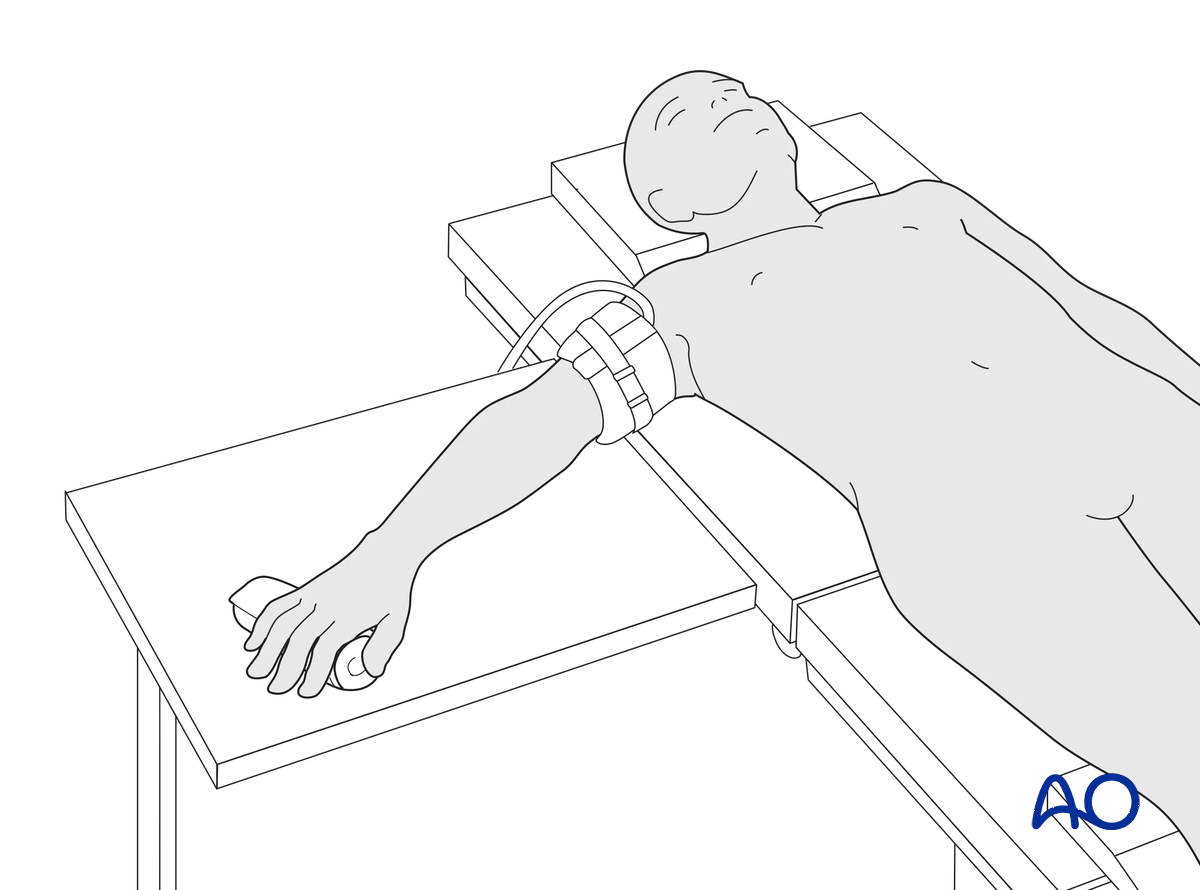
This procedure is usually performed with the patient in a supine position with the arm on a radiolucent side table.
3. Creating an entry portal
Location of the entry point
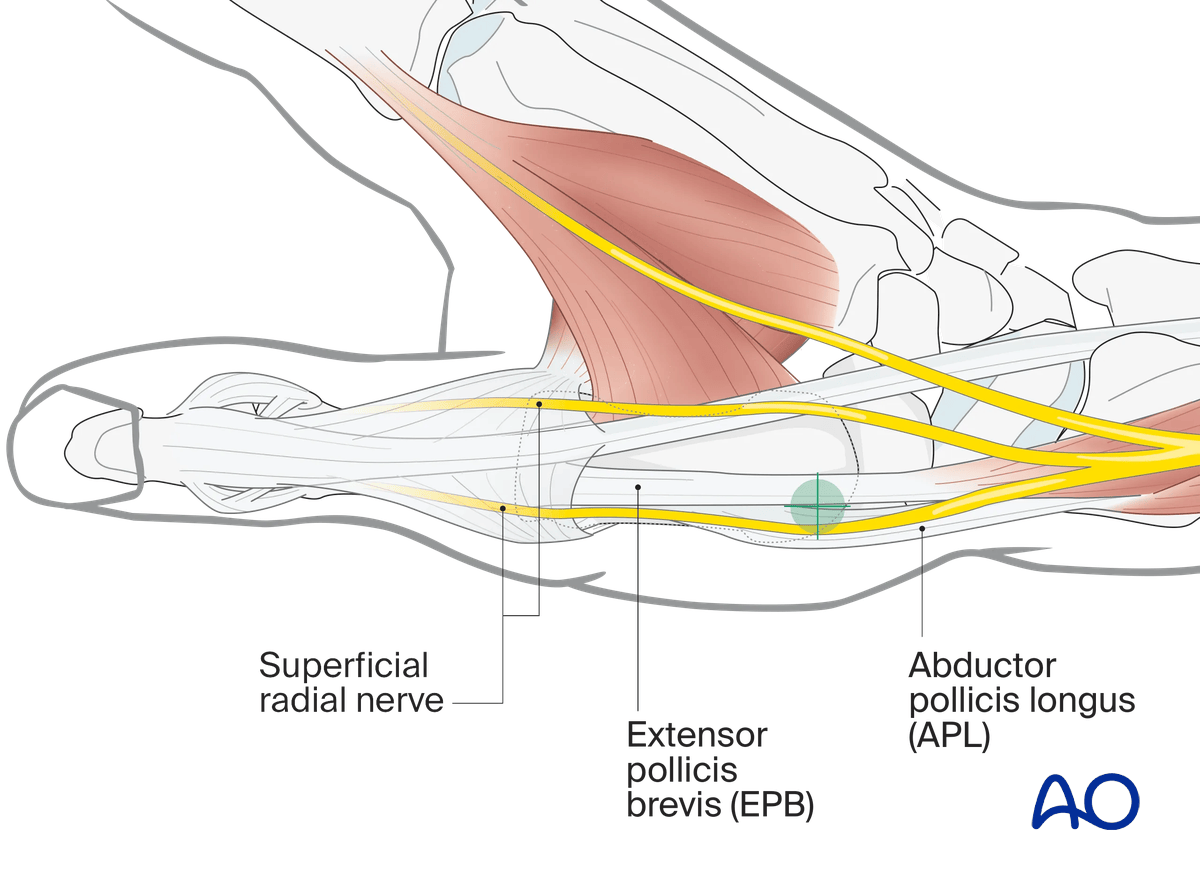
The entry point is dorsal at the metacarpal base without damaging the CMC joint and respecting the insertion of the abductor pollicis longus (APL) tendon. Confirm under image intensification.
Skin incision
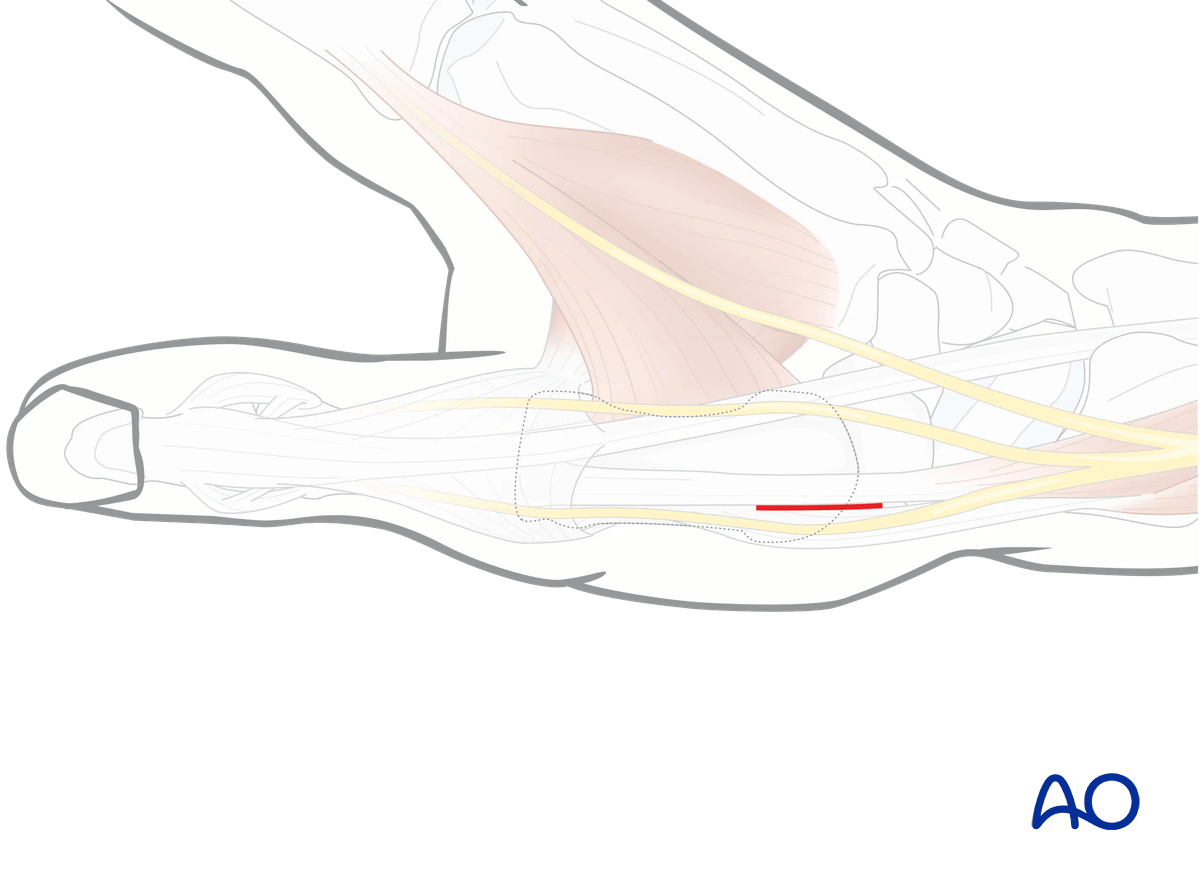
Perform a small longitudinal skin incision to allow drilling with a drill guide to protect the soft tissues.
Opening the cortex
Open the dorsal cortex with a 2 mm drill bit or an awl. Start drilling perpendicular to the bone surface, so the drill does not accidentally slip off the bone.
A drill sleeve must be used to protect the dorsal sensory branch of the ulnar nerve or the extensor tendons.
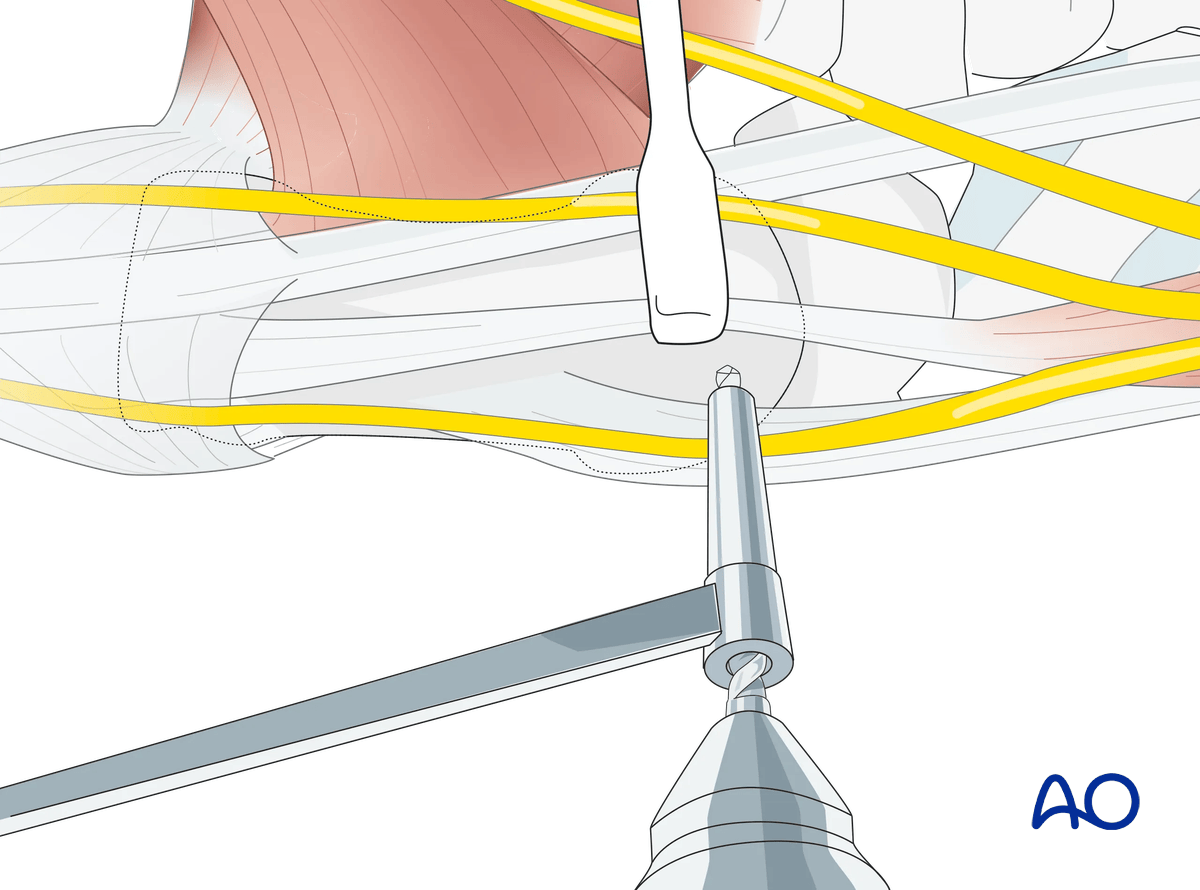
Preparing the entry portal
Tilt the drill by approximately 60°, so it enters the intramedullary canal at as obtuse an angle as possible.
Do not drill through the opposite cortex.
In this oblique direction, the drill hole is then enlarged with a 2.7 mm, or 3.2 mm, drill bit, or a burr.
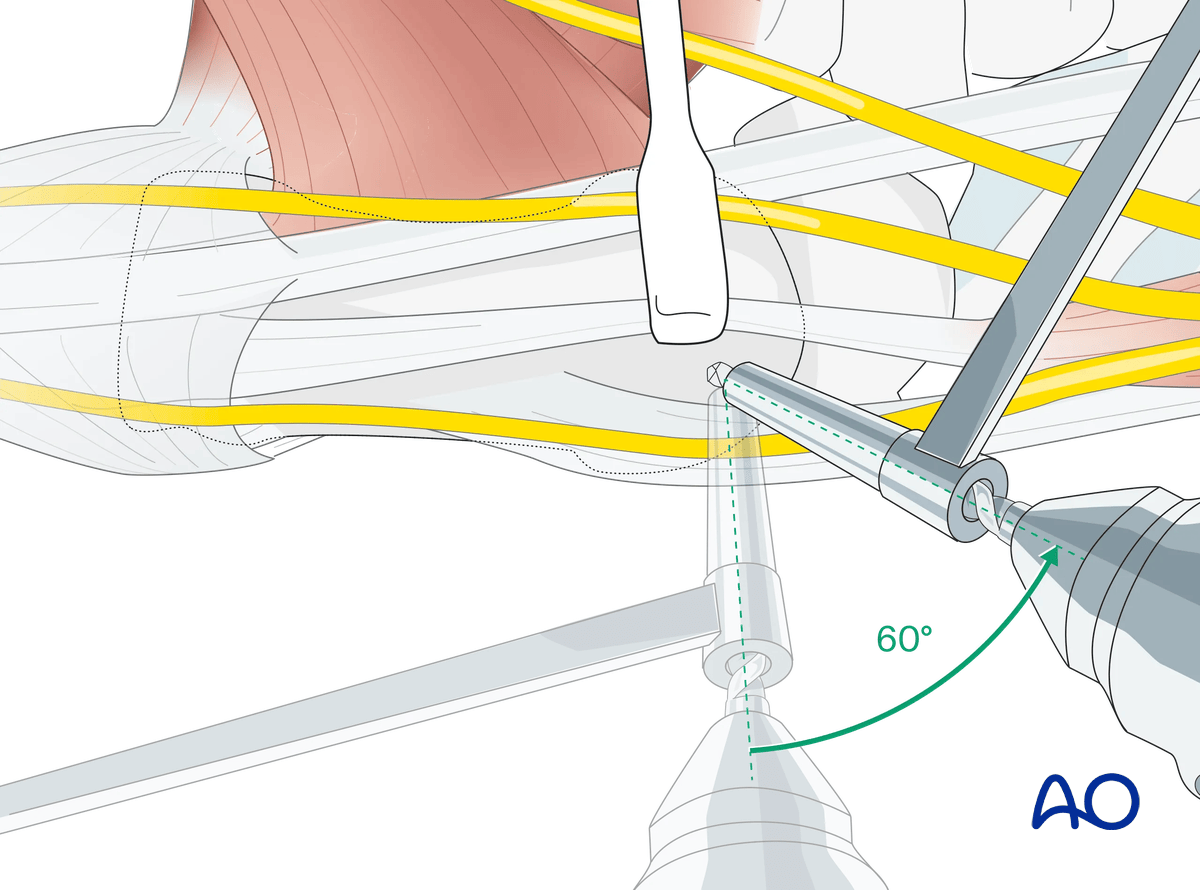
4. Fixation
Prebending the K-wires
Two or three K-wires of 1 or 1.25 mm diameter have to be inserted with the blunt tip first to reduce the risk of perforating the thin cortex of the metacarpal head.
They are bent in the following way.
The distal tip is bent upwards with pliers by about 20°. About 2 cm further, the wire is bent in the same direction by not more than 10°.
At the point where the wire is slightly longer than the metacarpal into which it will be inserted, the proximal end of the wire is bent through 90° in the same plane. This way, the direction of the insertion can always be controlled.
To avoid injury, the sharp end of the wire is bent over.
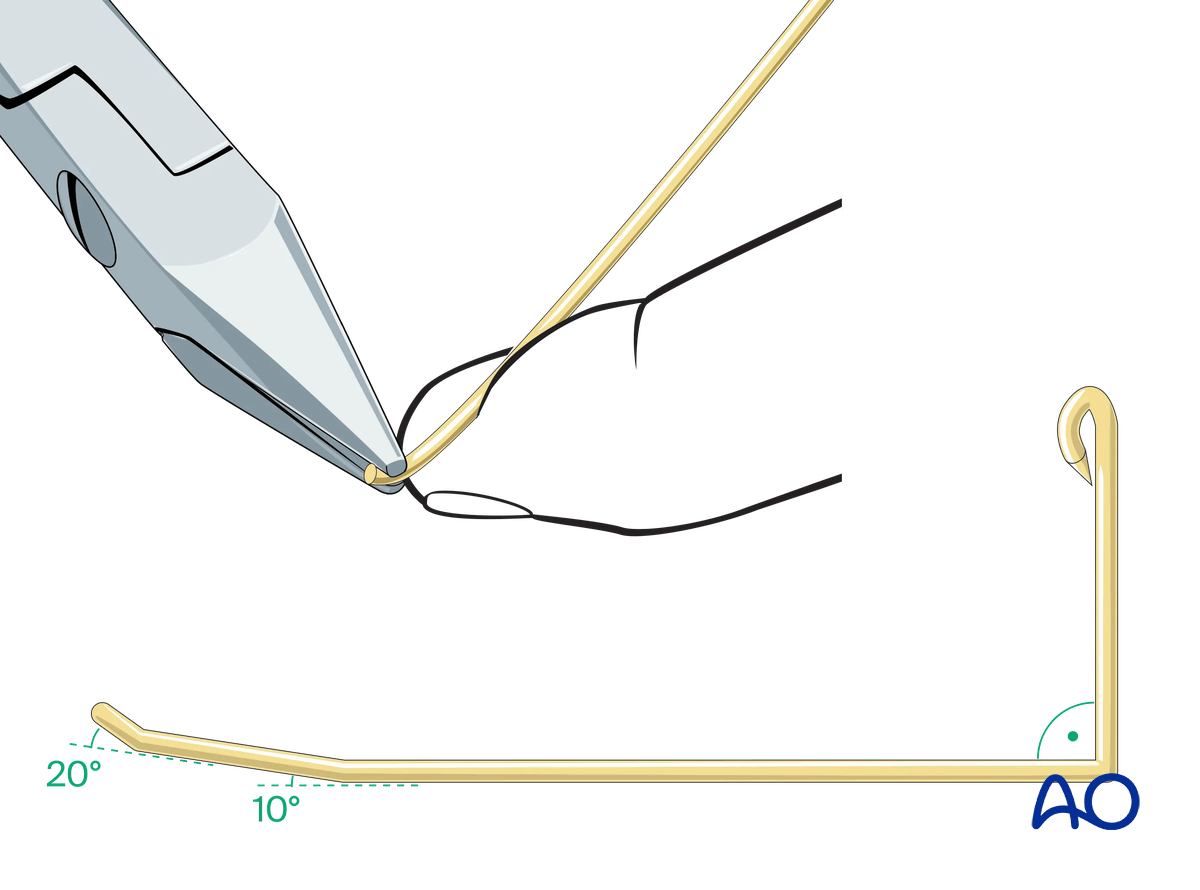
Wire insertion
Insert two wires manually into the medullary canal and advance them into the diaphysis without reaching the fracture zone. The bent tips should point in a palmar direction.
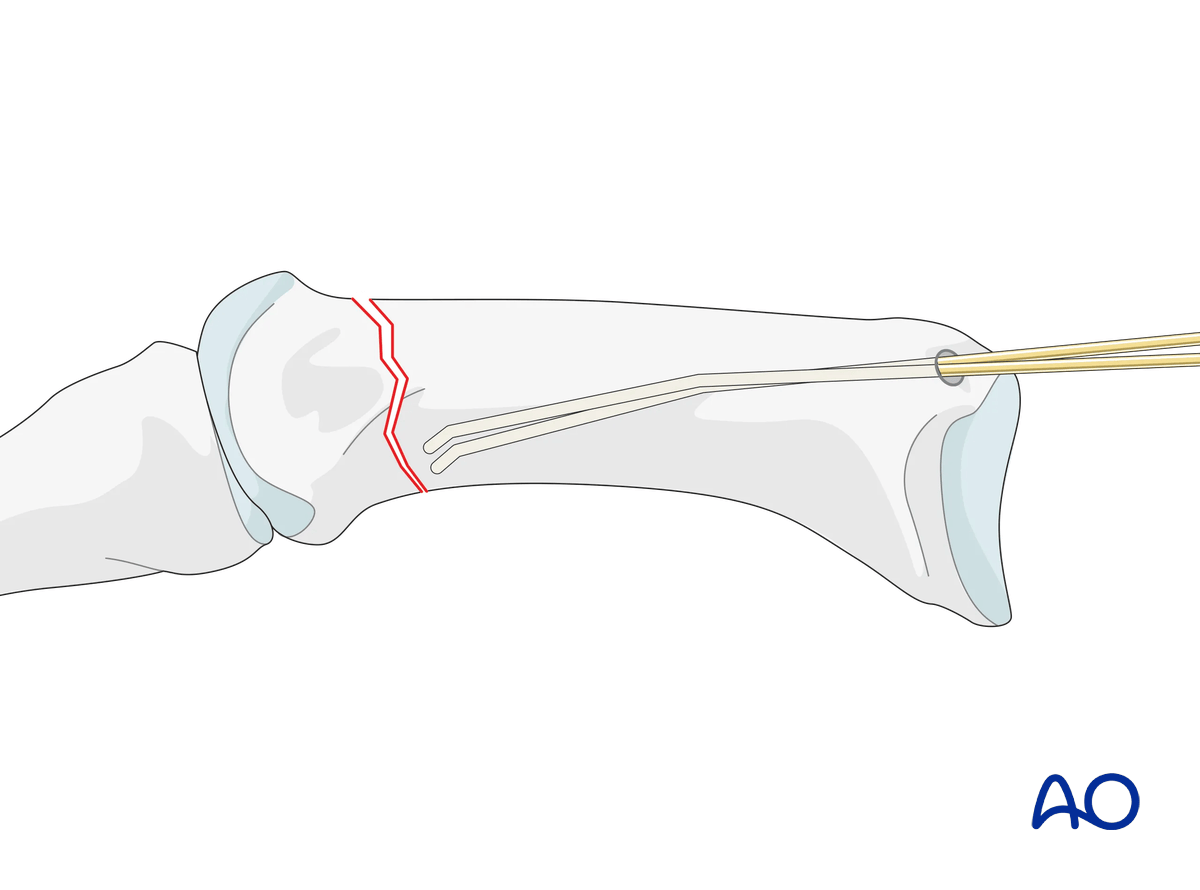
Reduction with K-wires
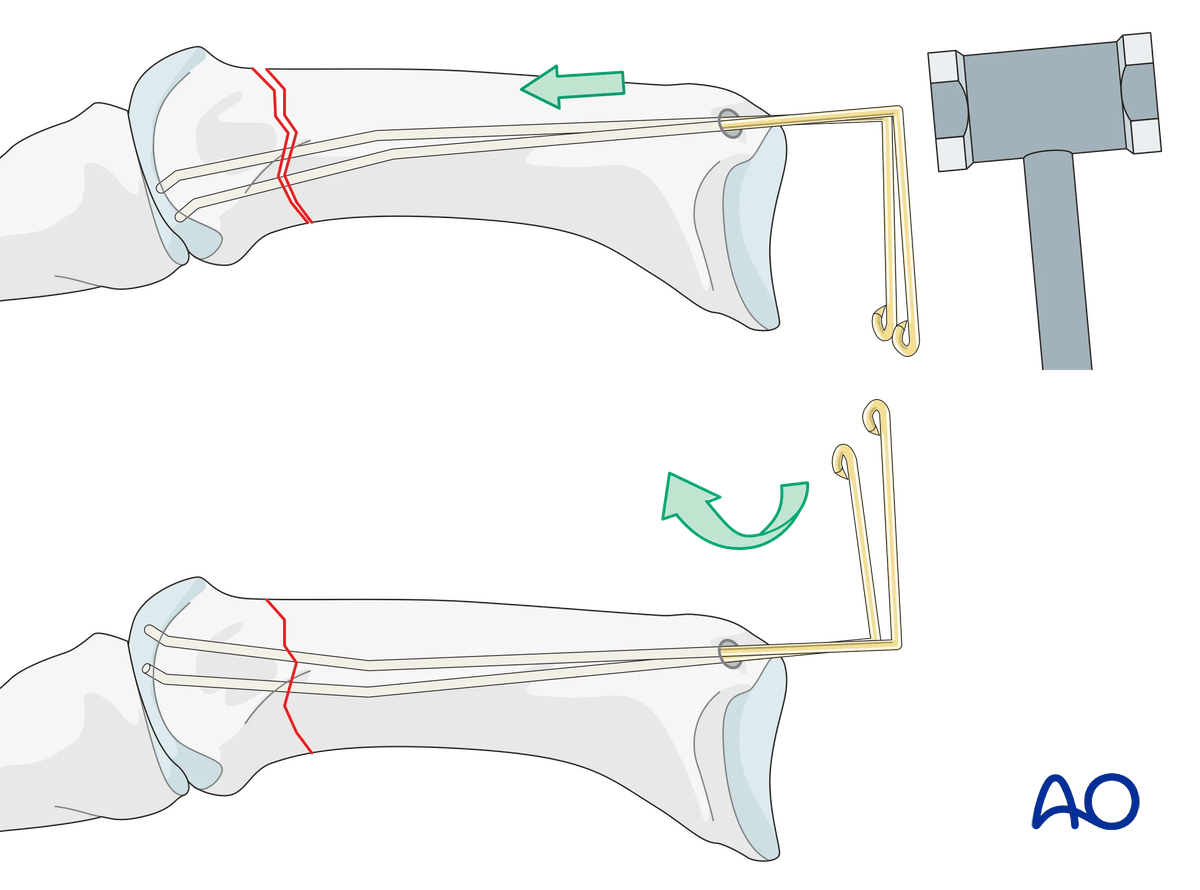
Advance the wires manually or with a hammer across the fracture zone into the head.
Confirm the correct position with an image intensifier. Ensure not to perforate the thin cortex.
Then rotate the K-wires so that the bent tips point dorsally and diverge in slightly different directions (dorsoradial and dorsoulnar).
Ideally, the blunt tips lie underneath the dorsal cortex of the head.
Confirm correct rotational alignment of the thumb.
Complete fixation
This allows for a three-point fixation which increases the construct stability and prevents the K-wires from backing out proximally.
Then bend the K-wires at the level of the entry portal and cut them.
The ends of the K-wires may be buried under the skin or protruding from the skin. The latter will avoid a second surgery for K-wire removal but bears the risk of skin problems.
5. Checking alignment
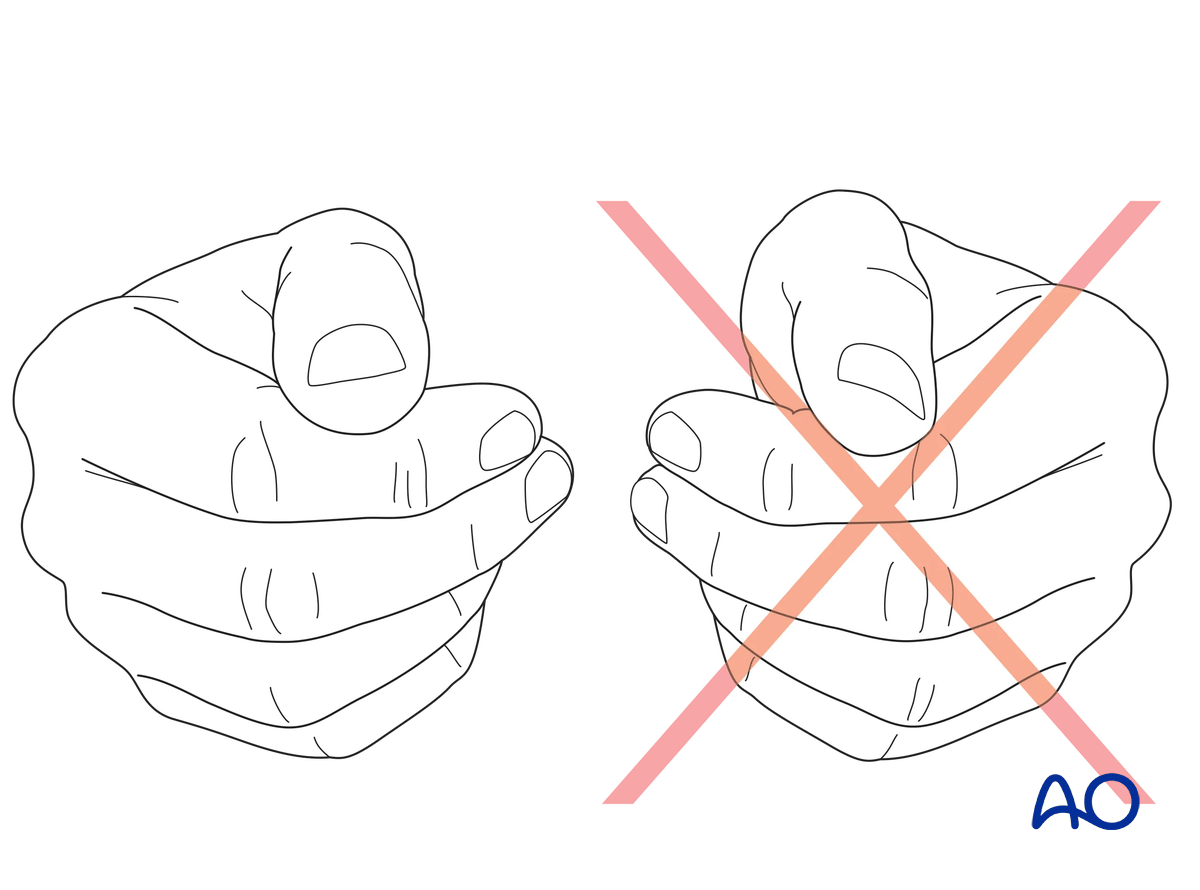
Confirm correct rotational reduction by inspecting the thumb nail plate in relation to the index finger. Compare it to the contralateral side if necessary.
6. Final assessment
Confirm anatomical reduction and correct placement of implants in AP, lateral, and oblique views.
7. Aftercare
Healing phases
The aftercare can be divided into four phases of healing:
- Inflammatory phase (week 1–3)
- Early repair phase (week 4–6)
- Late repair and early tissue remodeling phase (week 7–12)
- Remodeling and reintegration phase (week 13 onwards)
Full details on each healing phase can be found in the chapter Postoperative treatment of thumb injuries.
Postoperative care
Early range of motion, without load bearing, in the hand is important for optimal outcome.
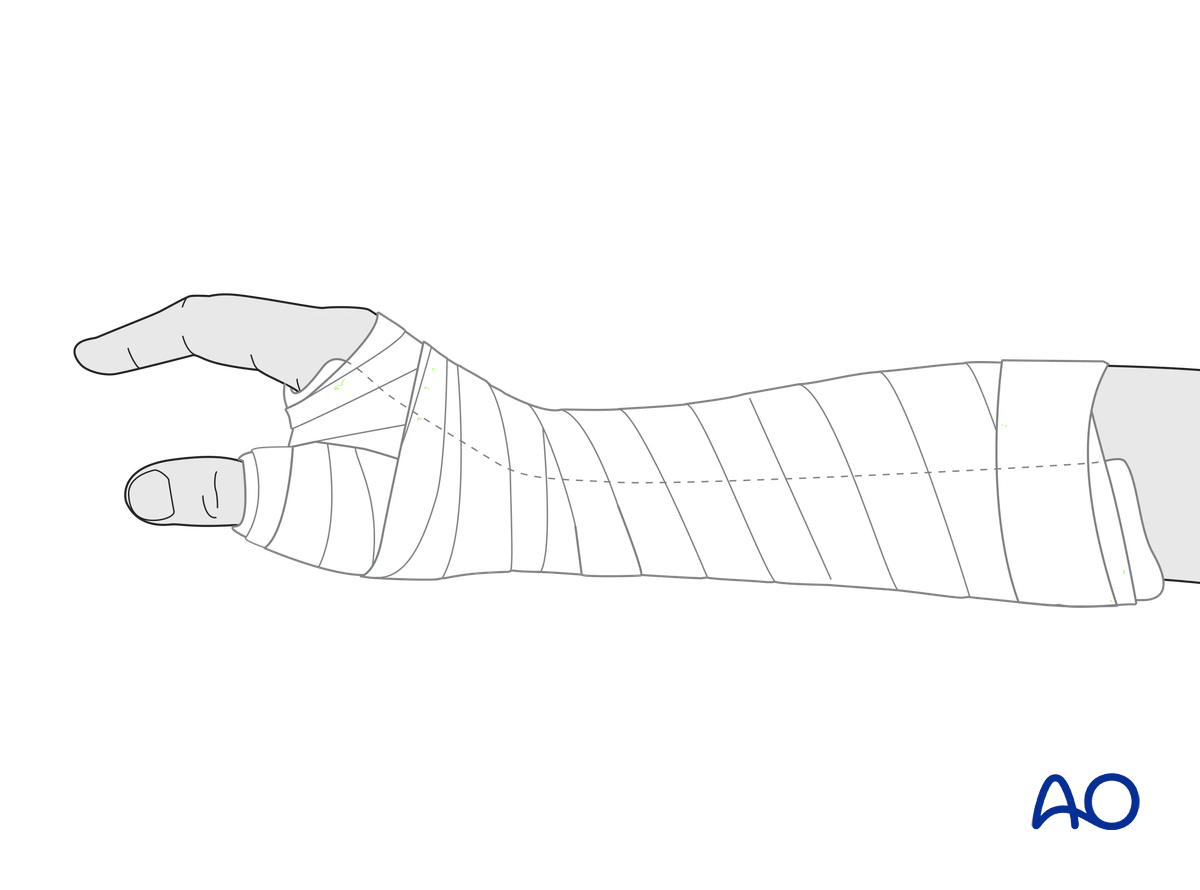
Immediately postoperatively, a temporary plaster splint is applied. This also helps with swelling and pain control.
The plaster splint can be switched to a custom-made thermoplastic splint after a week. The splint should be worn until fracture healing has been confirmed.
Hand therapy should be initiated as soon as possible.
The arm should be actively elevated to help reduce any swelling.
Mobilization
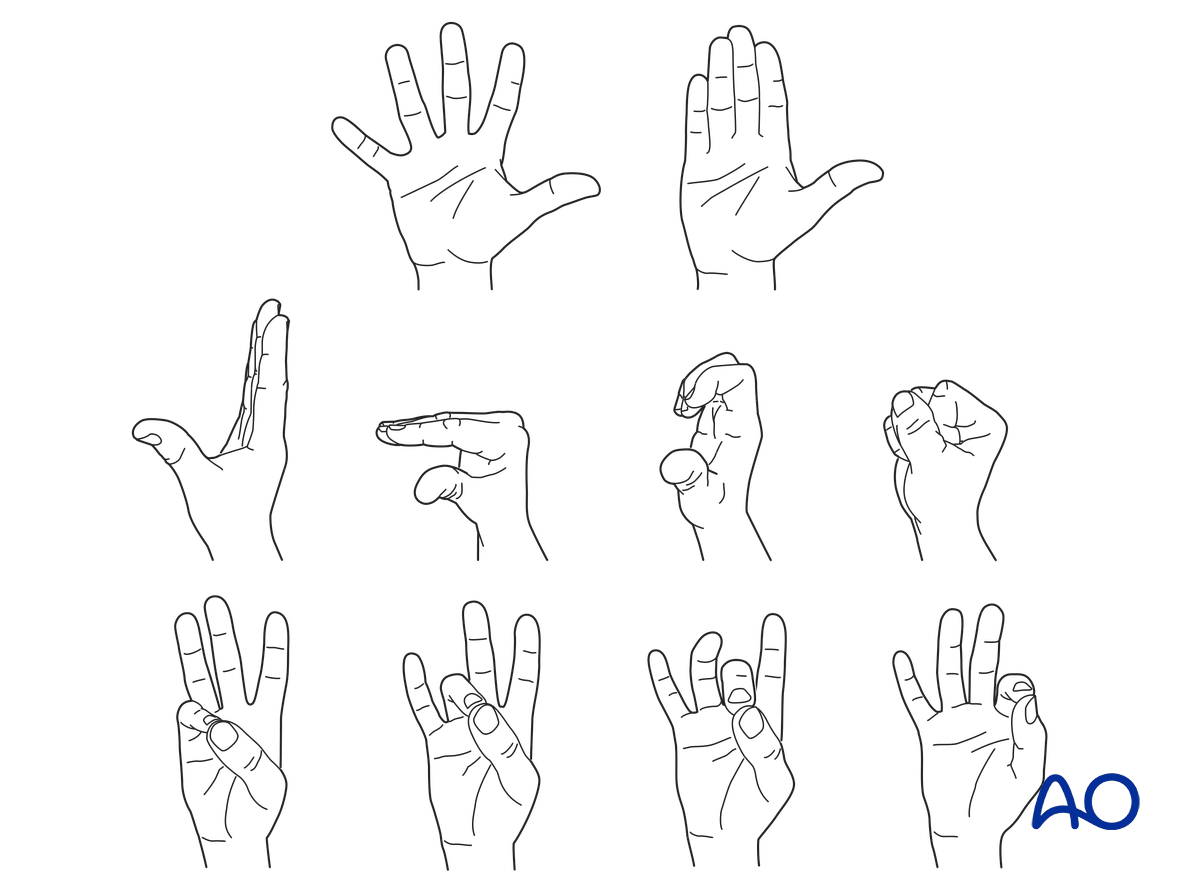
To prevent joint stiffness, the patient should be instructed to begin active motion (flexion and extension) of all nonimmobilized joints of the hand immediately after surgery.
In compliant patients with stable fixation, the splint can be removed under the supervision of a hand therapist, and early active motion exercises started after a few days.
Weight bearing should be avoided until fracture healing is confirmed.
Follow-up
See patient after 2 days for changing of the dressing. After 10–12 days, remove the sutures and confirm with x-rays that no secondary displacement has occurred.
At that time, active mobilization is started, supervised by a hand therapist. The splint is continued.
Additional x-rays are taken 6 weeks after internal fixation to confirm fracture consolidation. Usually, the K-wires can then be removed.


