Ring external fixator (definitive)
1. Principles
Anatomical considerations
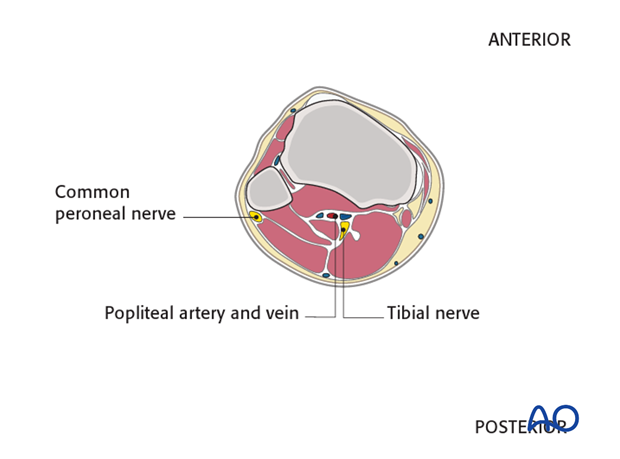
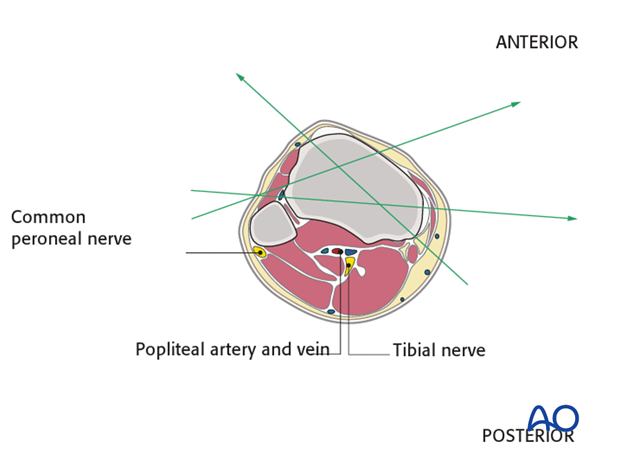
A thorough knowledge of the anatomy is mandatory to perform the correct placement of the K-wires. All important neurovascular structures run in the posterior half of the cross section.
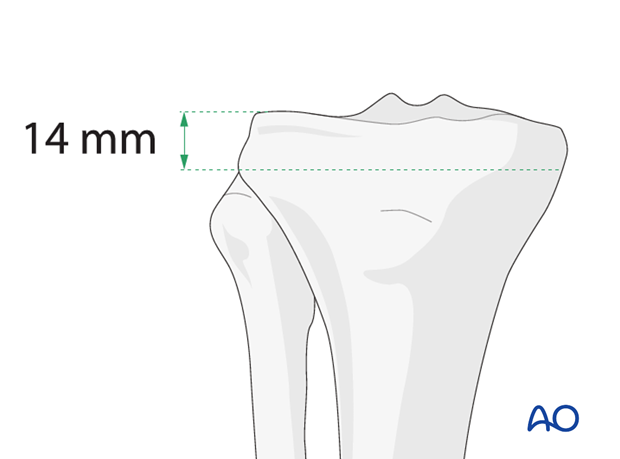
Wires should be positioned as proximal as possible but not through the joint. The most proximal wire should be at least 14 mm below the articular surface because of the distal capsular insertion.
2. Patient preparation
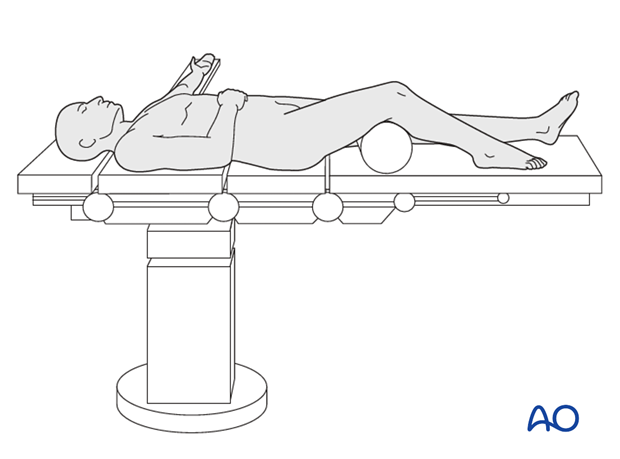
This procedure is normally performed with the patient in a supine position.
3. Proximal ring application
Anatomical considerations
As wires go through both cortices, good knowledge of anatomy is mandatory (see the safe zones). Carefully choose wire corridors. At least two wires have to be used.
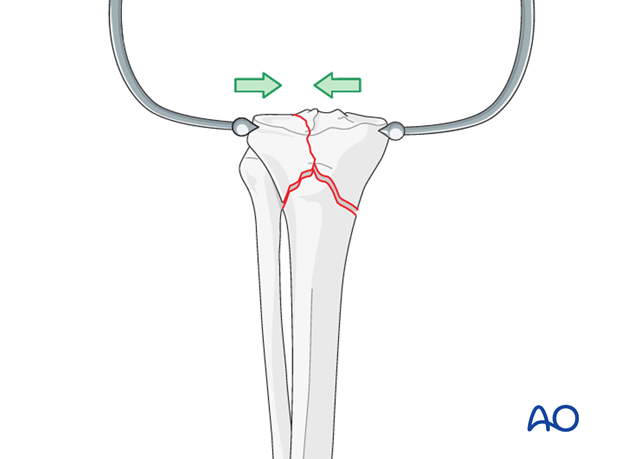
Reduce articular fracture
Reduce the articular fracture and preliminarily secure it with large pointed reduction forceps. Check the reduction under image intensifier control.
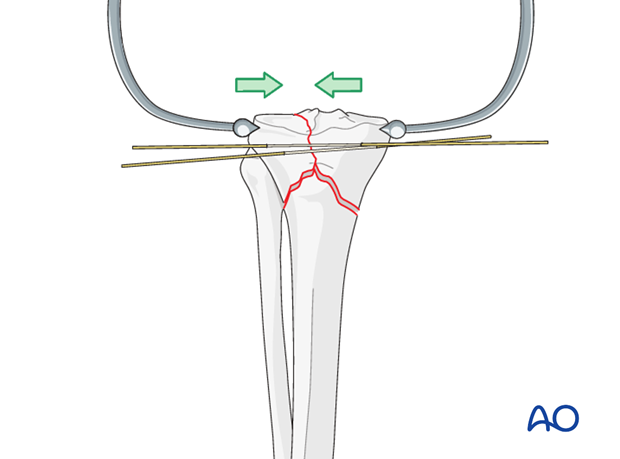
Insert wires
For intraarticular fractures needing compression choose spade-point reduction wires with an “olive”. At least two wires have to be inserted.
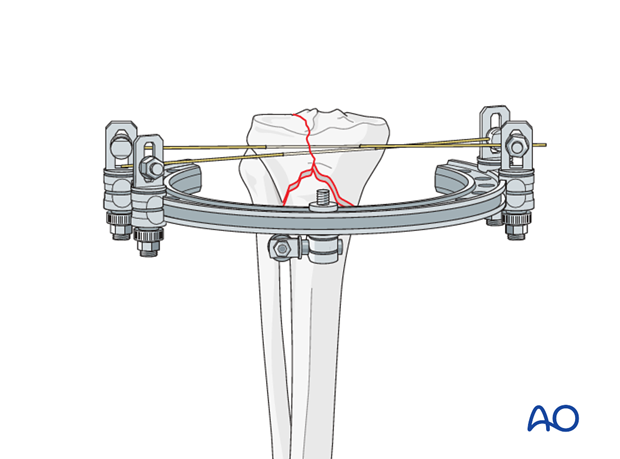
Connect wires with ring
Connect the wires with the ring and tighten clamps. Thereby, the articular fracture component is fixed.
After the wires are tightened, the pointed reduction forceps can be removed.
4. Inserting pins into tibial shaft
Anatomical considerations
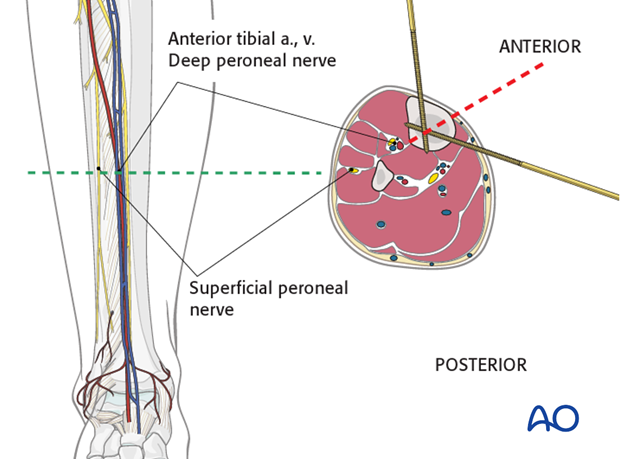
Mid shaft level
The neurovascular bundle (the anterior tibial artery and vein together with the deep peroneal nerve) run anterior to the interosseous membrane close to the posterolateral border of the tibia.
They are at risk if the pin is inserted in the direction as indicated by the red dotted line approximately half way between the anterior crest and the medial edge of the tibia.
Distal shaft level
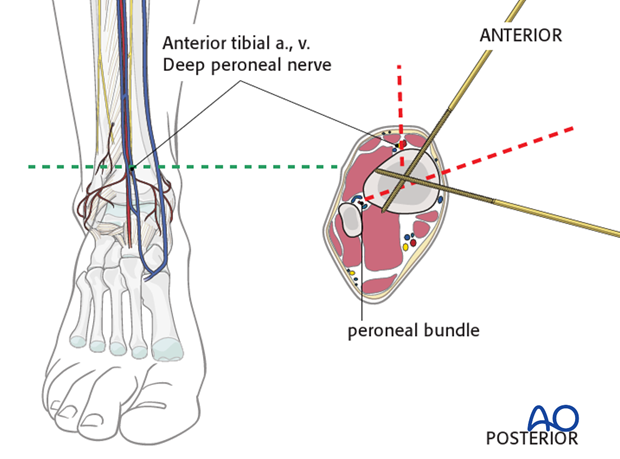
When inserting pins in the distal zone take into account the position of the anterior tibial artery and vein. Percutaneous insertion of pins in this area is dangerous. A minimal incision will allow preparation and safe insertion.
The peroneal bundle is located very close to the posterolateral border of the tibia and therefore at risk if pins are inserted in this direction.
Pins at this level should be inserted as shown in the illustration from anteromedial to posterolateral. A second pin can be inserted from medial to anterolateral, ventral to the fibula.
Standard Schanz screws
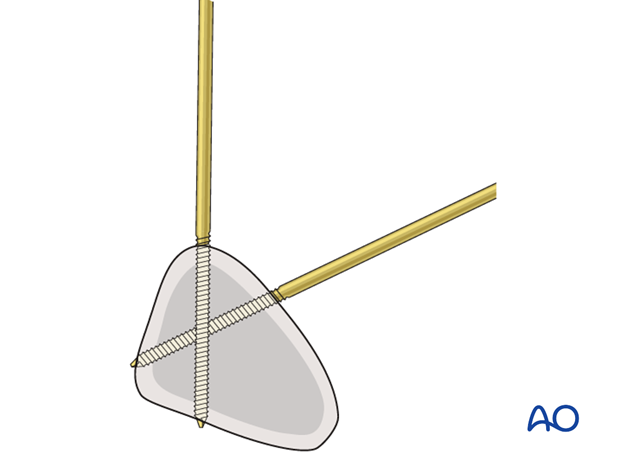
Drill through both cortices with a 3.5mm drill bit.
Use measuring device to determine diameter of bone.
Insert Schanz screw.
Pin insertion depth
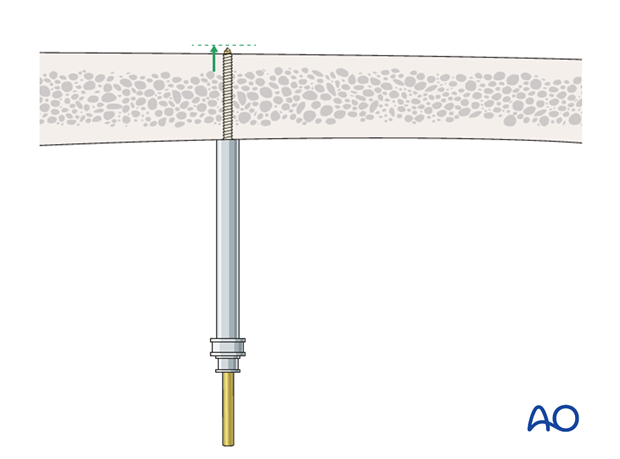
Make sure that the Schanz pins are not penetrating excessively through the far cortex, so as to avoid injury to either the neurovascular structures or soft tissues.
Image intensification control in two planes is recommended.
Insert pins
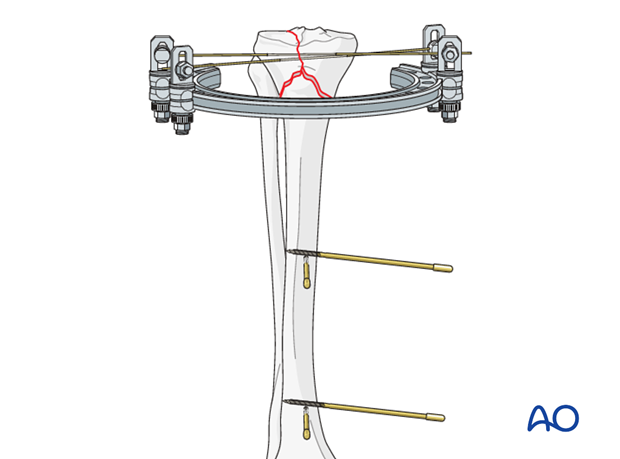
Insert four pins into the tibia two at each level.
Place the proximal Schanz pins as close as possible to the fracture. The second Schanz pin pair must be positioned as distally as possible. The further the pin pairs are apart, the more stable the construction will be.
5. Finalizing the external fixator
Frame construction
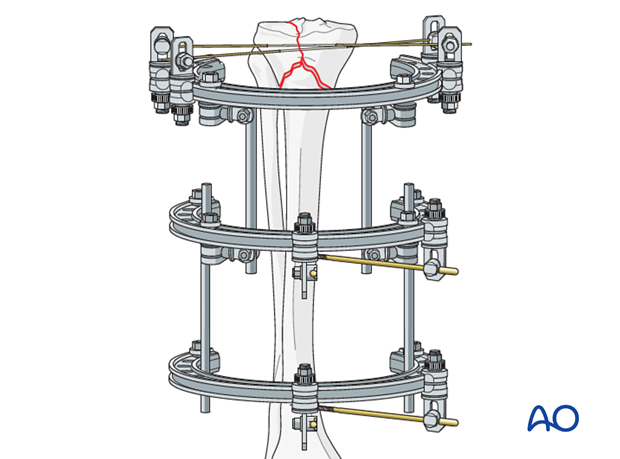
Connect the Schanz screws with the two rings. Then, interconnect all three rings with tubes. The clamps are left loose to allow manipulation.
Reduction
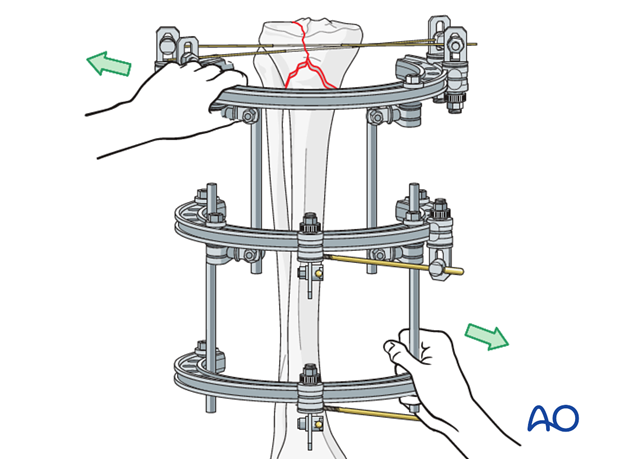
Use the rings to reduce the fracture by manipulation under image intensification.
Fixation
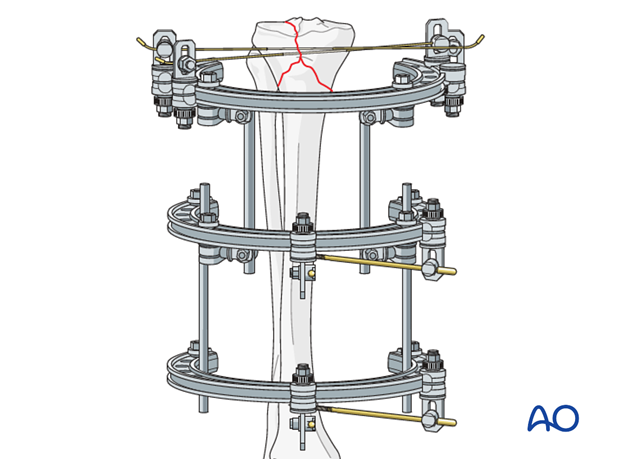
After successful reduction, tighten clamps.
6. Aftercare following nonbridging external fixation
Compartment syndrome and nerve injury
Close monitoring of the tibial compartments should be carried out especially during the first 48 hours to rule out compartment syndrome.
The neurovascular status of the extremity must be carefully monitored. Impaired blood supply or developing neurological loss must be investigated as an emergency and dealt with expediently.
Pin-site care
Various aftercare protocols to prevent pin track infection have been established by experts worldwide. Therefore, no standard protocol for pin-site care can be stated here. Nevertheless, the following points are recommended:
- The aftercare should follow the same protocol until removal of the external fixator.
- The pin/wire-insertion sites should be kept clean. Any crusts or exudates should be removed. The pins/wires may be cleaned with saline and/or disinfectant solution/alcohol. The frequency of cleaning depends on the circumstances and varies from daily to weekly but should be done in moderation.
- No ointments or antibiotic solutions are recommended for routine pin-site care.
- Dressings are not usually necessary once wound drainage has ceased.
- Pin/wire-insertion sites need not be protected for showering or bathing with clean water.
- The patient or the carer should learn and apply the cleaning routine.
Pin/wire loosening or pin track infection
In case of pin/wire loosening or pin track infection, the following steps need to be taken:
- Remove all involved pins/wires and place new pins/wires in a healthy location.
- Debride the pin sites in the operating theater, using curettage and irrigation.
- Take specimens for a microbiological study to guide appropriate antibiotic treatment if necessary.
Before changing to a definitive internal fixation an infected pin track needs to heal. Otherwise infection will result.
Mobilization
Unless there are other injuries or complications, mobilization may be performed on day 1. Static quadriceps exercises with passive range of motion of the knee should be encouraged. Early active range of motion of knee and ankle is encouraged.
Following any injury, and also after surgery, the neurovascular status of the extremity must be carefully monitored. Impaired blood supply or developing neurological loss must be investigated as an emergency and dealt with expediently. See (compartment syndrome) for more details.
The goal of early active and passive range of motion is to achieve as full range of motion as possible within the first 4 - 6 weeks.
Optimal stability should be achieved at the time of surgery, in order to allow early range of motion exercises.
Weight bearing
Partial weight bearing may be allowed only in extraarticular metaphyseal fractures. Weight bearing is usually avoided in the treatment of articular fractures.
The timing and how much weight may be taken through the fracture will be influenced by:
- Patient factors
- Fracture configuration
- Stability of the fixator construct
Follow up
See patient 7-10 days after surgery for a wound check. X-rays are taken to check the reduction.
Frequency of outpatient follow-up depends on the complexity of the injury and on the compliance of the patient. The follow-up visits should not be spaced more than three weeks apart.
