Bridging plate
1. Principles
Bridging
Bridge plating uses the plate as an extramedullary splint, fixed to the two main fragments, while the fracture zone is left virtually untouched.
Reduction of the distal tibiofibular joint is important Therefore, restoration of the length, axis and rotation of the fibula is crucial. and must be checked intraoperatively under image intensification.
Reduction can usually be achieved indirectly by distraction. Anatomical reduction in the fibular fracture zone is not necessary.
Bridging plates are commonly used in multifragmentary lateral fractures.
Mechanical stability
Mechanical stability, provided by the bridging plate, should be adequate for indirect healing (callus formation).
In cases of large zones of comminution, stronger plates, such as reconstruction plates or locking compression plates (LCP), provide better stability than one-third-tubular plates.
The angular stability provided by the LCP may be advantageous.
2. Patient preparation and approach
The patient may be placed in the following positions:
For this procedure a lateral approach is normally used.
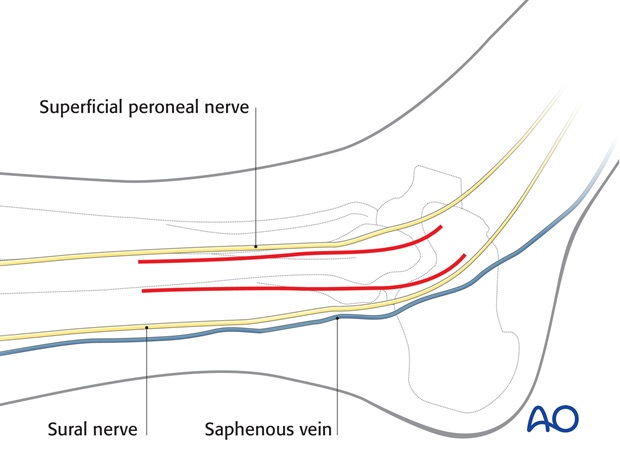
3. Reduction
In multifragmentary fractures, care must be taken to avoid excessive stripping of the periosteum as well as devascularization of the fragments.
Indirect reduction may be obtained by longitudinal traction, either on the foot, or of the main distal fragment using a bone hook.
In a transsyndesmotic fracture, if the distal fragment is large enough, insert one or two K-wires to hold the reduction.
Rotation and anatomical position are difficult to determine. All methods of visualization of the distal tibiofibular joint such as image intensification, and palpation with a finger can be used. It is useful to have a comparative x-ray of the other, uninjured ankle as a template.

4. Plate preparation
Plate selection
Anatomic plates with locking screw option are available from various manufacturers. To illustrate the principles of the procedure, the use of a classic plate is described.
Plate length
The plate must be long enough both to cover the length of the fracture zone and ideally to allow insertion of three screws in each main fragment.
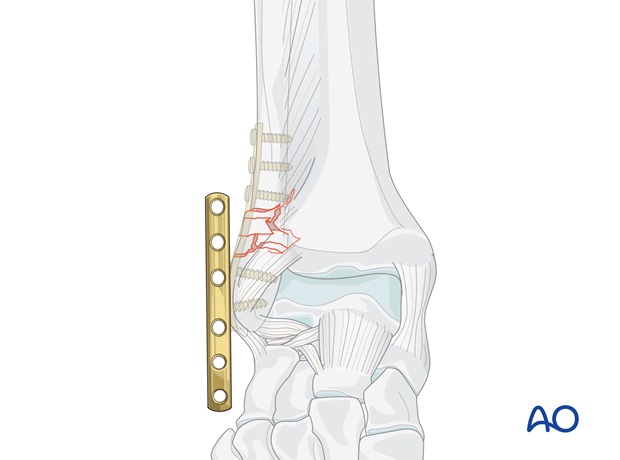
Contouring the plate
Before the plate is applied, it must be contoured.
Contouring is best done with the help of the appropriate aluminum template. The plate should perfectly fit the bone contour throughout its entire length.
If a plate with locking screws is used on the shaft of the fibula, it does not have to fit perfectly against the bone.
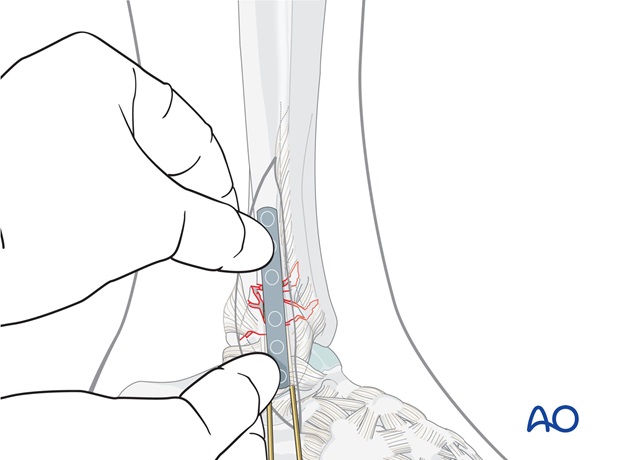
Plate position
Position the plate firmly by hand and plan the position of the first proximal screw near the fracture.
Remove the plate.

5. Fixation transsyndesmotic fractures
Insertion of first proximal screw
Drill a 2.5 mm hole through both fibular cortices at the planned screw site, 3 mm proximal to the fracture.
Measure the length through the plate, tap with the cortical tap and tap sleeve.
Carefully apply the plate. Insert the first proximal screw.
The screw should just penetrate the far cortex.
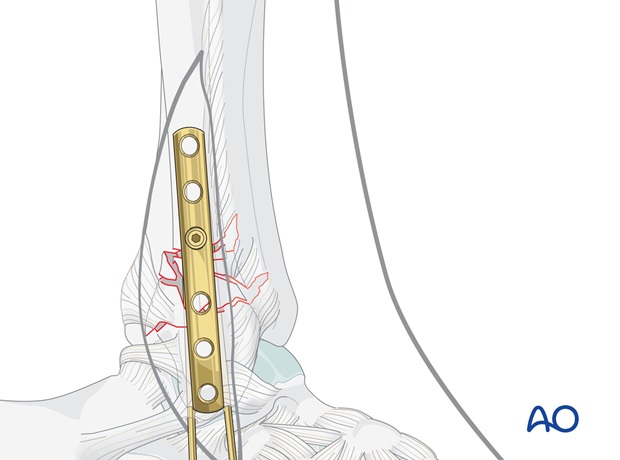
Insertion of first distal screw
Next, insert a screw into the first distal plate hole. All distal screws are aimed towards the articular surface of the lateral malleolus. Ensure that their tips do not protrude into the joint by aiming the drill slightly posteriorly.
Predrill carefully until just reaching the far cortex. Measure the length and select a 3.5 mm cortex screw approximately 2 mm shorter. Tap threads only in the near fibular cortex, and insert the selected screw.
Note
In osteopenic bone, fully threaded cancellous screws can be used.
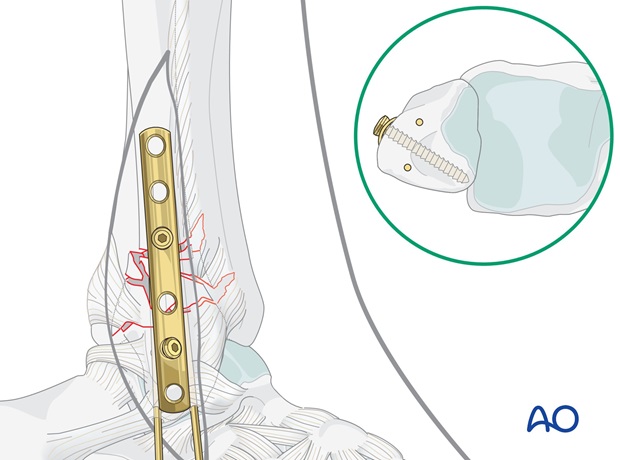
Completing screw insertion
Insert the remaining screws as described above in the sequence determined by the preoperative plan.
The most distal screw is inserted slightly obliquely from distal to proximal in a posterior direction.
Again, choose a screw 2 mm shorter than was measured and tap the threads only in the near cortex.
Gently tighten all screws.
Check under image intensification in both planes and ensure that no screw protrudes into the ankle joint or the syndesmosis.
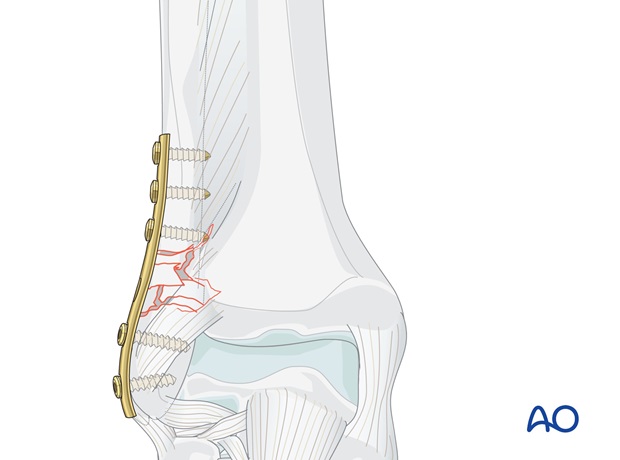
Pearl: Small distal fragment or osteoporotic bone
Consider using a locking screw in case of a small distal fragment or in severe osteoporotic bone.
6. Postoperative treatment of infra- and trans-syndesmotic malleolar fractures
A bulky compression dressing and a lower leg backslab, or a splint, are applied, and the limb is kept elevated for the first 24 hours or so, in order to avoid swelling and to decrease pain.
In anatomically reconstructed, stable malleolar fractures, early active exercises and light partial weight bearing are encouraged after day one. In osteoporotic bone, weight bearing should be postponed.
X-ray evaluation is made after 1 week and then monthly until full healing has occurred. Progressive weight bearing is recommended as tolerated.
