Lag-screw fixation
1. General considerations
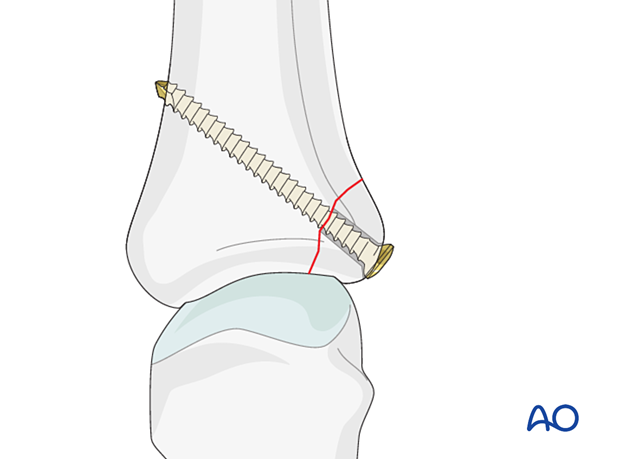
Only avulsion fractures with large fragments can be treated with lag screws.
Drilling the gliding hole through the avulsed fragment in an inside-out technique is recommended. It has the advantage of allowing perfect positioning of the drill hole (perpendicular to the fracture plane and through the center of the fragment).
This fracture type may be associated with metacarpophalangeal (MCP) joint dislocation. In this case, the dislocation must be manipulated, and any interposed soft-tissue structures removed.
2. Patient preparation
Place the patient supine with the arm on a radiolucent hand table.

3. Approach
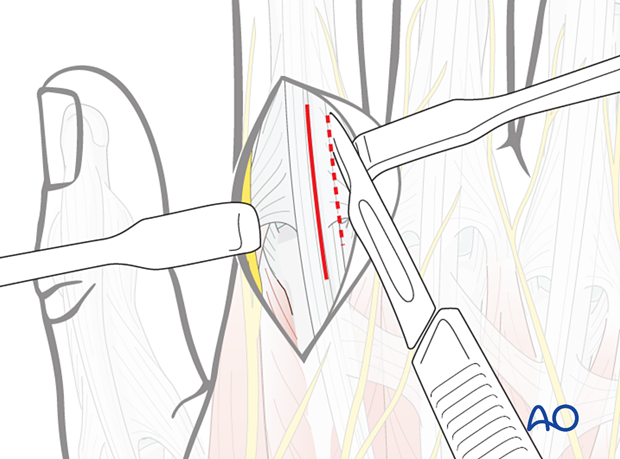
For this procedure, a dorsal approach to the metacarpophalangeal joint is typically used.
4. Reduction of dislocation
Closed reduction
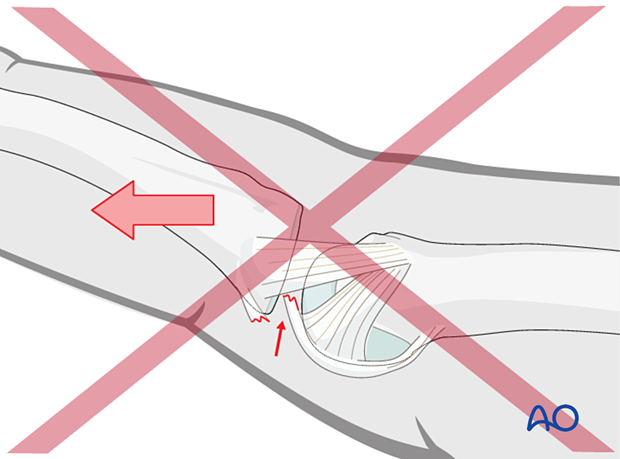
Dislocation usually occurs as an extension deformity.
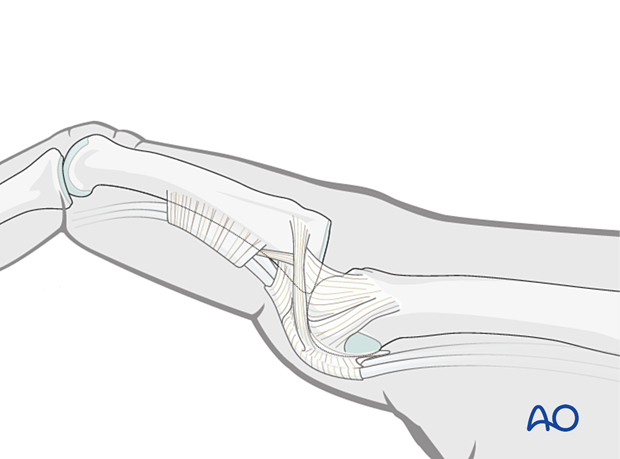
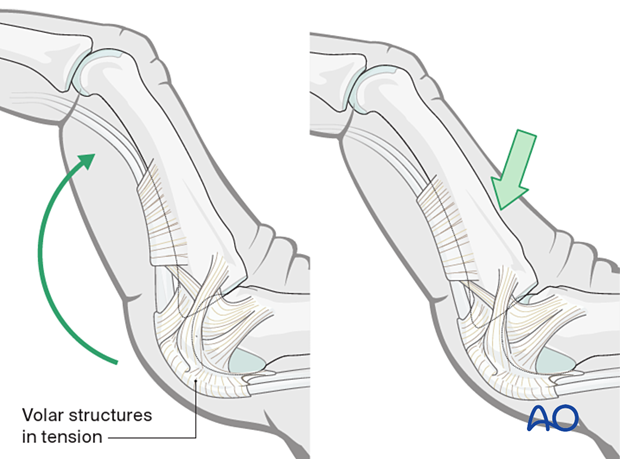
This can be reduced by increasing the deformity with some dorsally applied pressure on the proximal phalanges to reduce the joint. This keeps the volar structures in tension and reduced the risk of soft-tissue interposition.
5. Fracture reduction
Indirect reduction
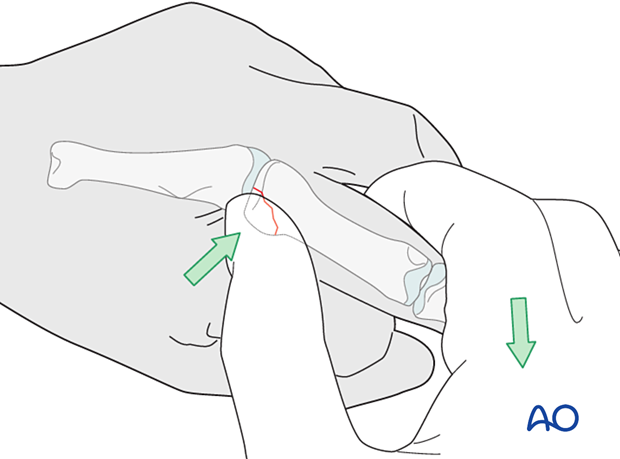
Reduction is achieved by pulling the finger laterally, opposite to the forces that created the fracture, and into MCP joint flexion, as necessary, to approximate the fragment. The avulsed fragment is pushed into place by the surgeon’s thumb.
Open reduction
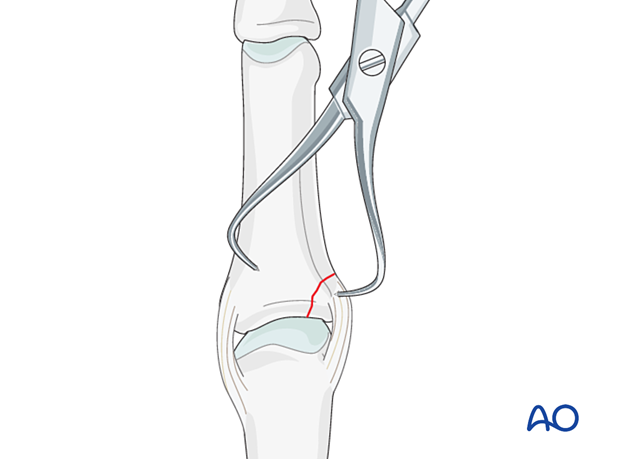
In displaced fractures, open reduction is often necessary after preparing a gliding hole (see later).
Use small, pointed reduction forceps gently to reduce the fracture from palmar to dorsal and proximal to distal. Application of excessive force can result in fragmentation.
Stability evaluation
Confirm reduction with an image intensifier and check the joint stability by flexion and extension. This should show congruent movement compared with the adjacent joints.
6. Fixation
Planning for screw insertion
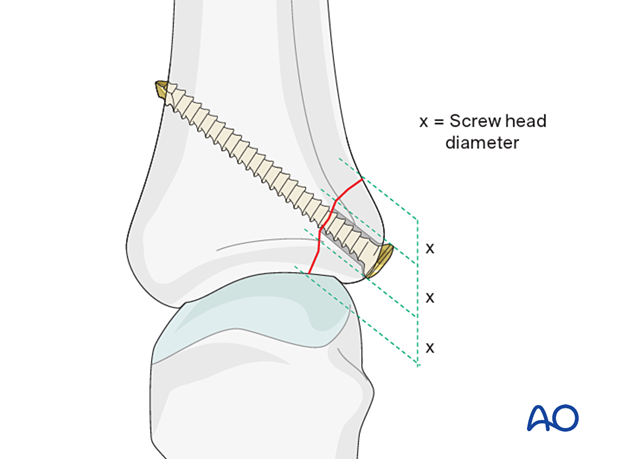
The maximal permitted diameter of the screw head is 1/3 of the diameter of the avulsed fragment.
The screw length needs to be adequate for the screw to penetrate and purchase in the opposite cortex.
Screw size selection
The exact size of the diameter of the screws used will be determined by the fragment size and the fracture configuration.
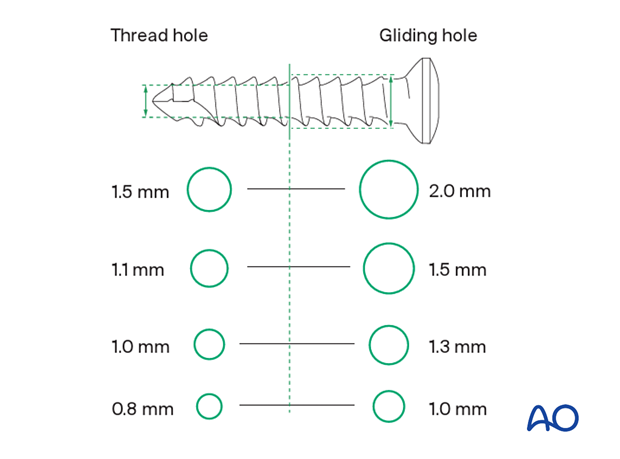
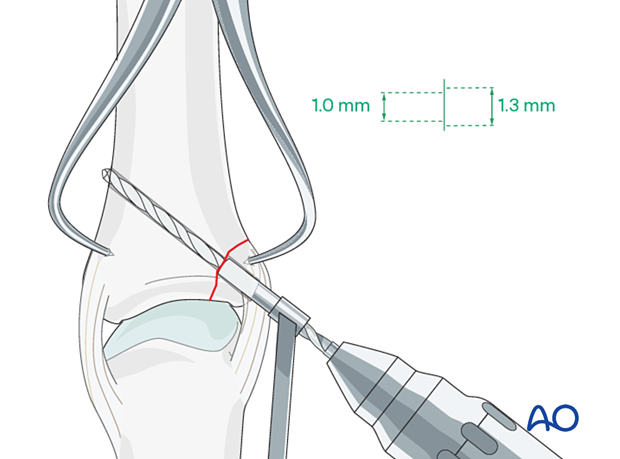
The various gliding and thread hole drill sizes for different screws are illustrated here.
Screw insertion
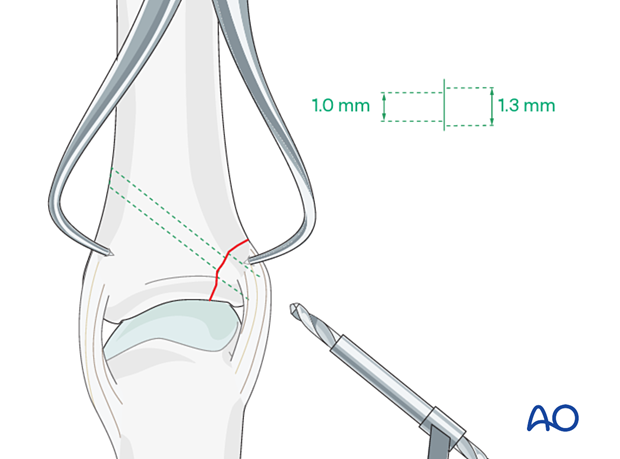
Be sure to insert the screw as a lag screw, with a gliding hole in the near (cis) cortex and a threaded hole in the far (trans) cortex.
Alternative: inside-out technique
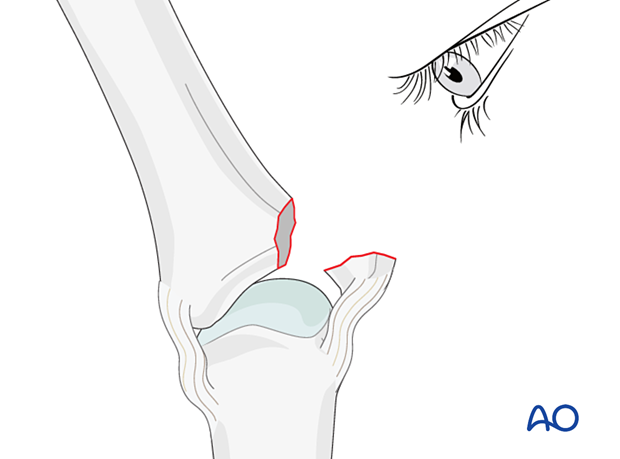
Laterally deviate the phalanx in the opposite direction to gain maximal visualization of the joint (open book).
Evaluate the fracture geometry and determine the ideal position of the gliding hole (perpendicular to the fracture plane and through the center of the fragment).
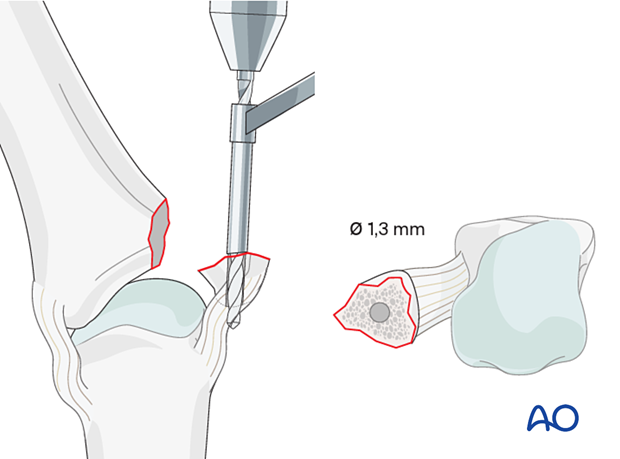
Keeping the finger laterally deviated, drill an inside-out gliding hole through the center of the avulsed fragment.
Reduce the avulsed fragment anatomically, and hold it with pointed reduction forceps, as previously discussed.
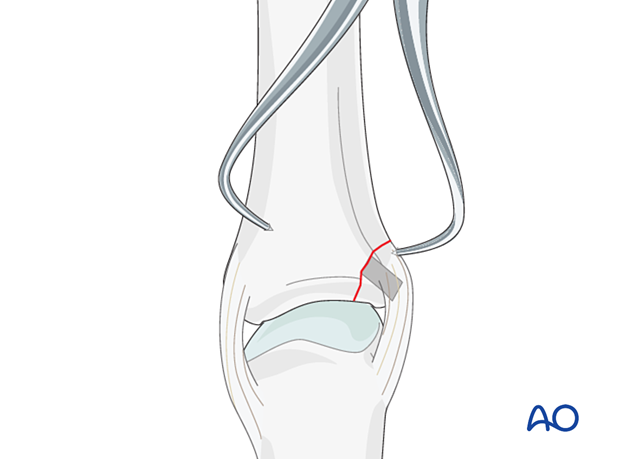
Insert a 1.3 (1.0) mm drill sleeve into the gliding hole.
Now use a 1.0 (0.8) mm drill bit to drill a threaded hole into the opposite fragment, penetrating the far (trans) cortex.
7. Final assessment
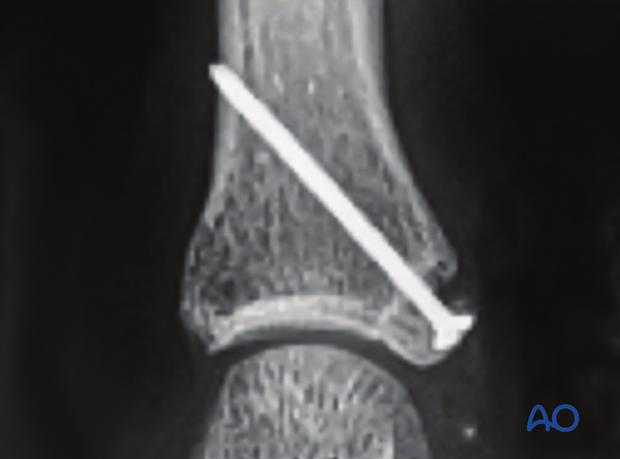
Confirm reduction and fixation with an image intensifier.
8. Aftercare
Postoperative phases
The aftercare can be divided into four phases of healing:
- Inflammatory phase (week 1–3)
- Early repair phase (week 4–6)
- Late repair and early tissue remodeling phase (week 7–12)
- Remodeling and reintegration phase (week 13 onwards)
Full details on each phase can be found here.
Postoperative treatment
The hand is supported with a dorsal splint for 4 weeks. This would allow for finger movement and help with pain and edema control. The arm should be actively elevated to help reduce the swelling.
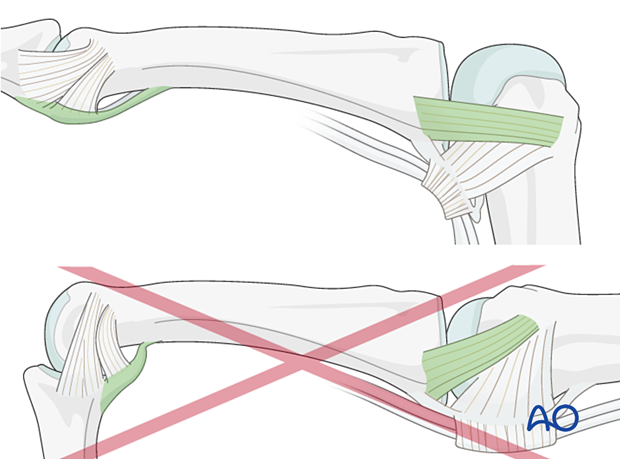
The hand should be splinted in an intrinsic plus (Edinburgh) position:
- Neutral wrist position or up to 15° extension
- MCP joint in 90° flexion
- PIP joint in extension
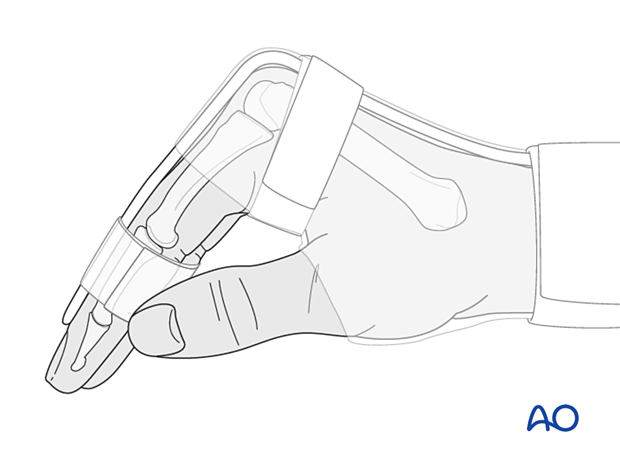
The reason for splinting the MCP joint in flexion is to maintain its collateral ligament at maximal length, avoiding scar contraction.
PIP joint extension in this position also maintains the length of the volar plate.
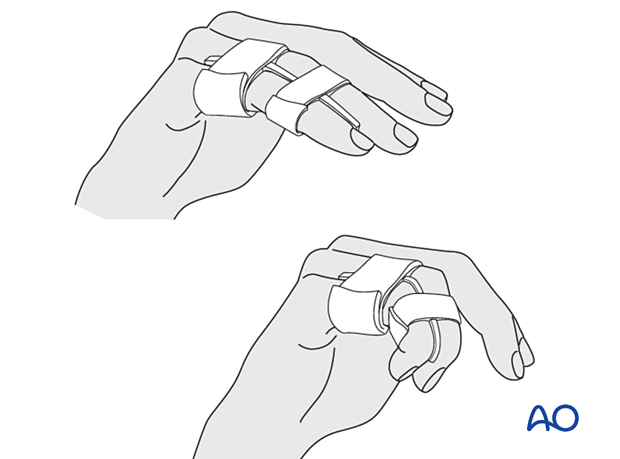
After this period, protect the digit with buddy strapping to the adjacent finger to neutralize lateral forces on the finger.
Functional exercises
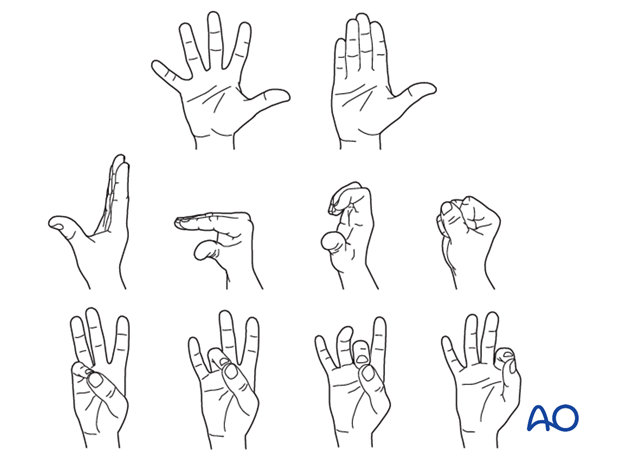
To prevent joint stiffness, the patient should be instructed to begin active motion (flexion and extension) immediately after surgery.
Follow-up
See the patient after 5 and 10 days of surgery.
Implant removal
The implants may need to be removed in cases of soft-tissue irritation.
In case of joint stiffness or tendon adhesion restricting finger movement, arthrolysis or tenolysis may become necessary. In these circumstances, the implants can be removed at the same time.


