Collateral ligament repair
1. General considerations
Introduction
In a dislocation of the proximal interphalangeal (PIP) joint, usually, ligaments are ruptured.
Usually, these soft-tissue injuries heal without reconstruction.
Collateral ligament ruptures may need repair if the joint remains unstable after closed reduction.
Ligament injuries
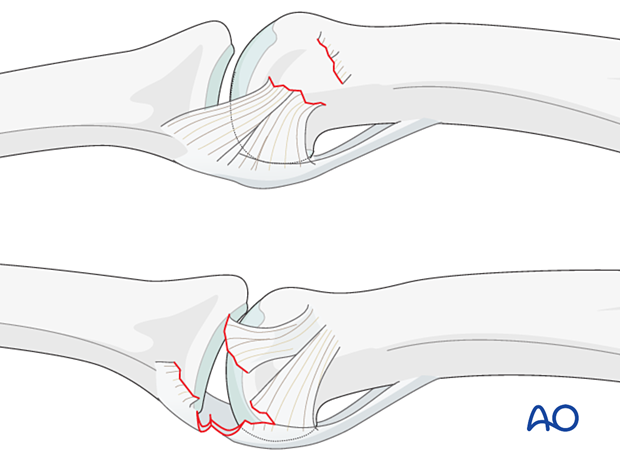
The collateral ligament usually tears at one of two locations:
- At its attachment to the proximal phalanx
- At its attachment to the volar plate and middle phalanx.
Often, these injuries are accompanied by a partial lesion of the volar plate.
For management of associated volar rim and volar plate injuries, see the chapter on Complications and technical failures.
Treatment principles
When ligament repair is necessary, the surgeon should be aware of three guiding principles:
- Know precisely where the lesion is
- Be familiar with the approach and the local anatomy
- Minimize any soft-tissue dissection
Suture anchors or bone tunneling for repair of ligament detachments
Two alternative techniques are available for collateral ligament reattachment: suture anchors or bone tunneling.
The advantage of suture anchors is the relative ease of the procedure. It is also a time-saving technique.
Tunneling is the more demanding procedure, but it is significantly less expensive.
The details on suture anchoring are shown below.
2. Patient preparation
Place the patient supine with the arm on a radiolucent hand table.

3. Approach
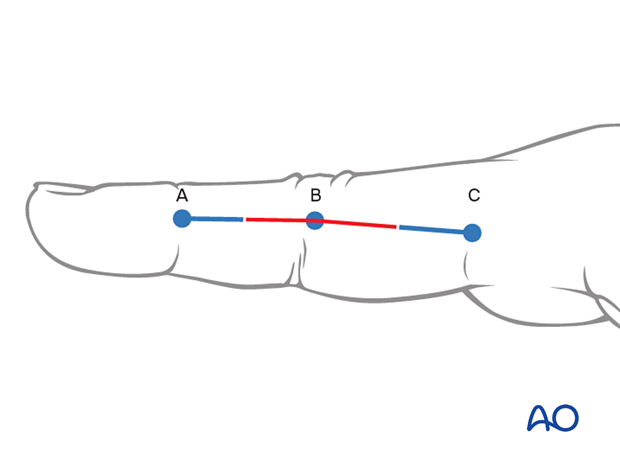
For this procedure a midaxial approach to the proximal interphalangeal joint is normally used.
4. Closed reduction
Apply traction to the finger, with the PIP joint in slight flexion to relax the flexor tendons and the lateral band.
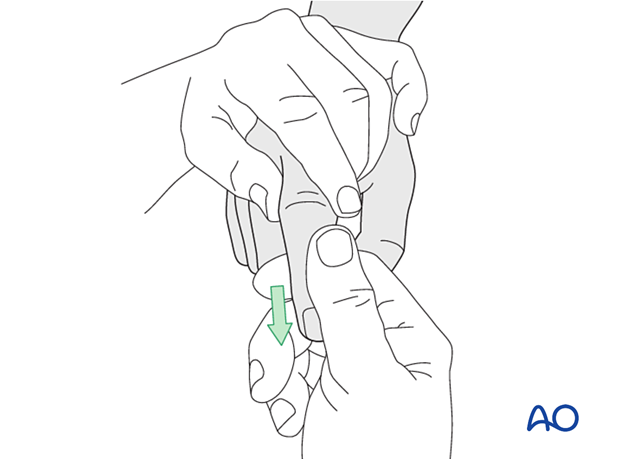
Then, maintaining the traction, deviate the finger laterally...
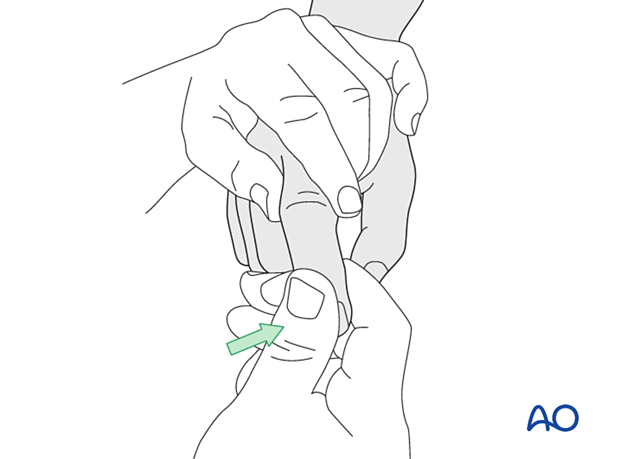
... and rotate it towards the contralateral side.
In most cases, the collateral ligament regains its natural anatomical position after reduction.
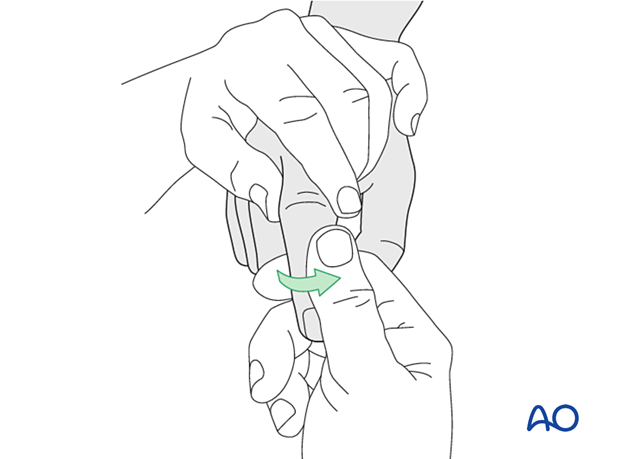
Check reduction with image intensification in two planes. The images should show complete joint congruency.
If this is the case, no further operative treatment is necessary.
If any widening of the joint is visible, soft-tissue interposition, mostly of the lateral band, may be the cause. Then, the condyle is trapped between the lateral band and the central slip (“buttonhole”).
This is an indication for open reduction and ligament repair.
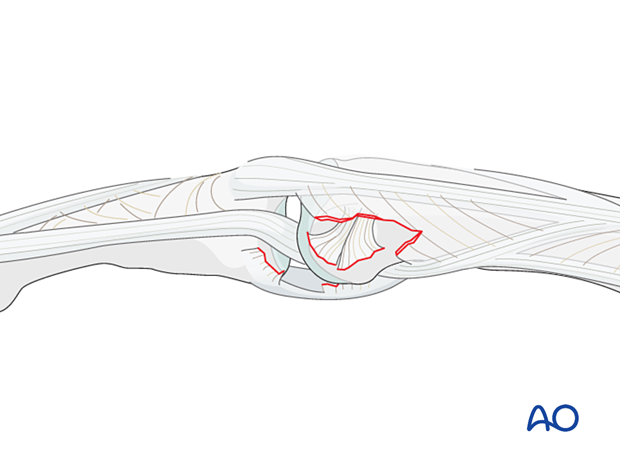
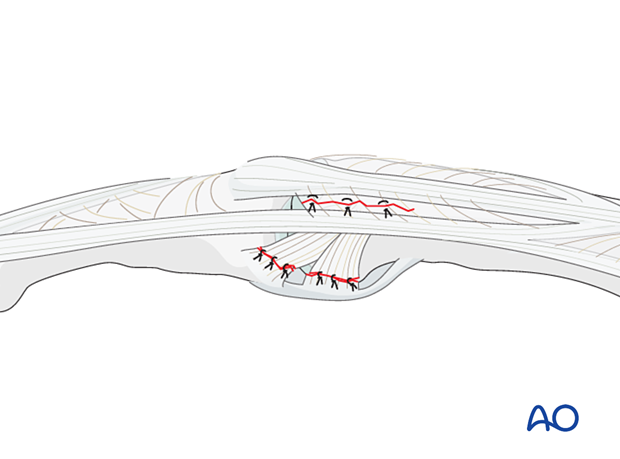
5. Open reduction and repair of interposed tissues
If the lateral band, or, more rarely, the central slip, or the collateral ligament, is trapped in the joint, use a dental pick to free and reduce it, while keeping the PIP joint in flexion.
In such cases, some repair is often necessary.
Use 6.0 nonabsorbable monofilament nylon sutures to repair the injury with interrupted stitches.
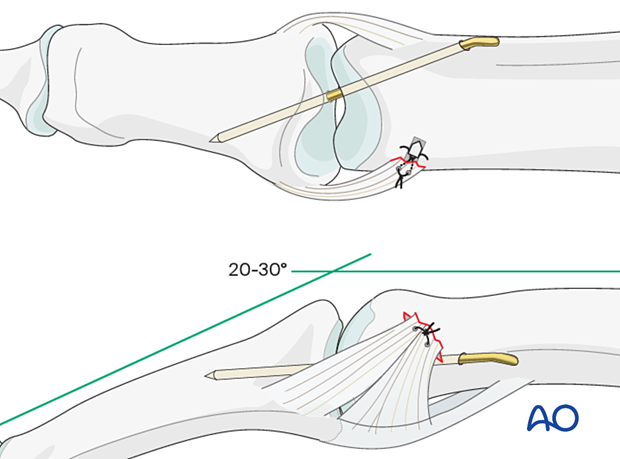
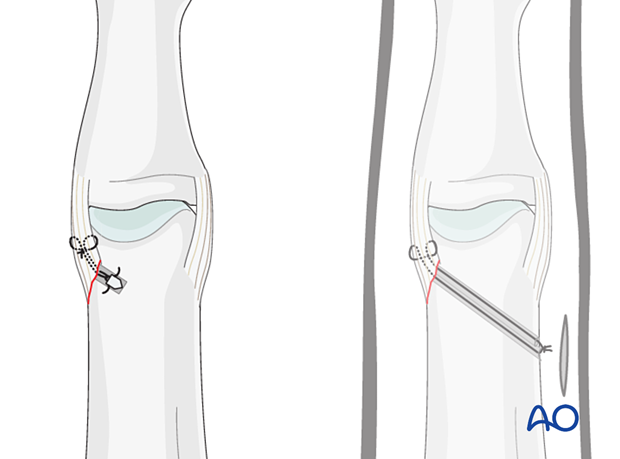
6. Repair of collateral ligament detachment from the proximal phalanx with a suture anchor
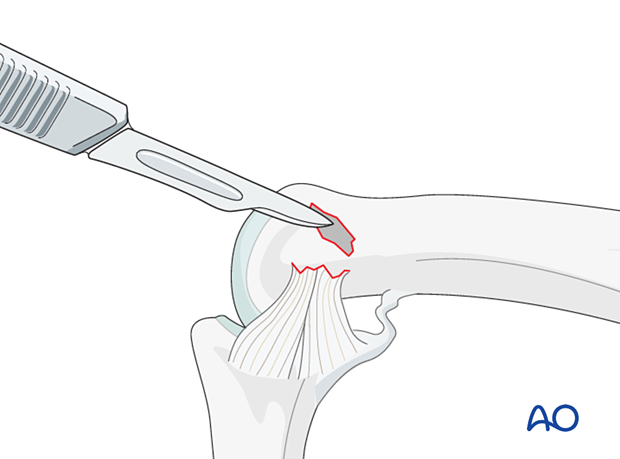
Preparation of the attachment site
Clean the attachment site of the collateral ligament with a scalpel, tiny curette, or small burr of any remaining soft tissues.
Prepare the reattachment site by exposing the cancellous bone. This improves the vascularity of the site and aids later healing.
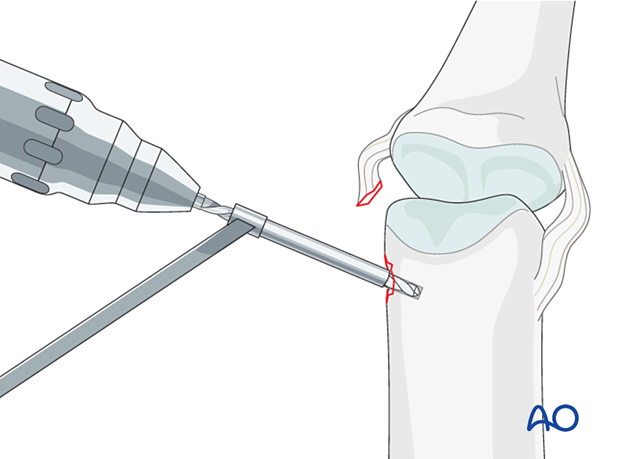
Drilling an anchor hole
Keep the finger flexed for better exposure.
Insert the anchor according to the manufacturer’s instructions at the isometric point of insertion.
Insertion of the anchor
Insert the anchor.
Ensure that the whole anchor is completely buried in the bone.
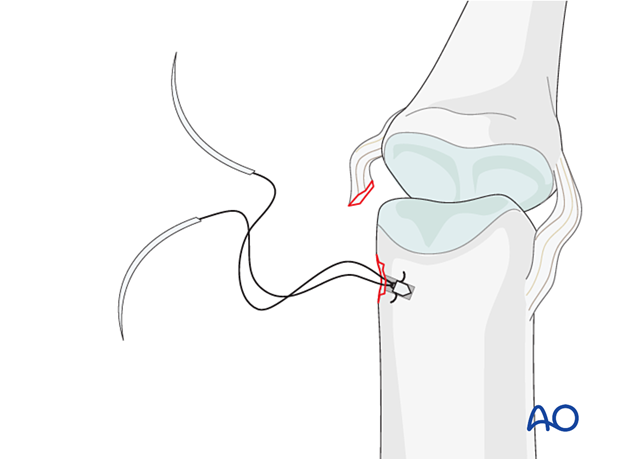
Insertion of sutures
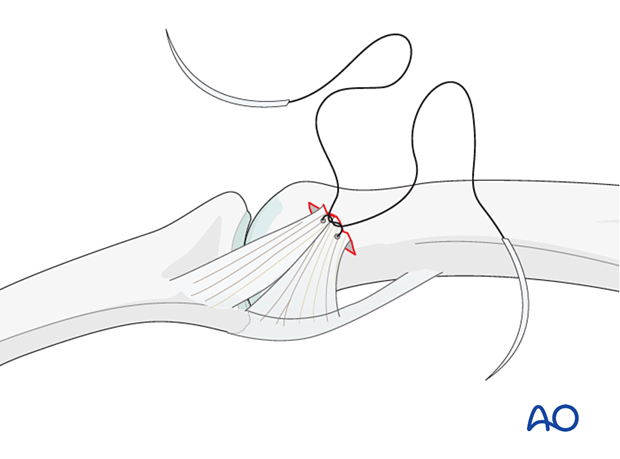
Insert the sutures through the ligament.
Reapproximate the ligament to the phalanx and make a loop in each end of the thread as an anchoring pass. Tie a knot to secure the ligament to the phalanx with the PIP joint in 15°–20° flexion.
Reattaching the ligament close to the subchondral bone will ensure a smooth surface for ideal mobility.
Joint transfixation with K-wire
Insert a K-wire across the PIP joint obliquely, with the finger in 20°–30° of flexion to protect the ligament reattachment.
Leave the end of the K-wire outside of the skin for later removal.

7. Final assessment
Confirm anatomical reduction and fixation with an image intensifier.
8. Aftercare
Postoperative phases
The aftercare can be divided into four phases of healing:
- Inflammatory phase (week 1–3)
- Early repair phase (week 4–6)
- Late repair and early tissue remodeling phase (week 7–12)
- Remodeling and reintegration phase (week 13 onwards)
Full details on each phase can be found here.
Postoperative treatment
If there is swelling, the hand is supported with a dorsal splint for a week. This would allow for finger movement and help with pain and edema control. The arm should be actively elevated to help reduce the swelling.
The hand should be splinted in an intrinsic plus (Edinburgh) position:
- Neutral wrist position or up to 15° extension
- MCP joint in 90° flexion
- PIP joint in extension
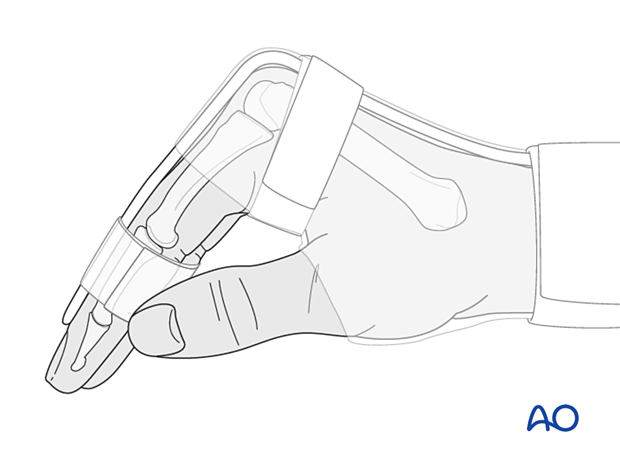
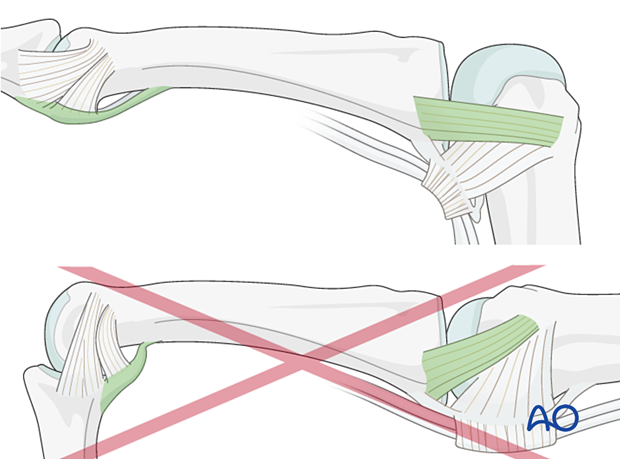
The reason for splinting the MCP joint in flexion is to maintain its collateral ligament at maximal length, avoiding scar contraction.
PIP joint extension in this position also maintains the length of the volar plate.
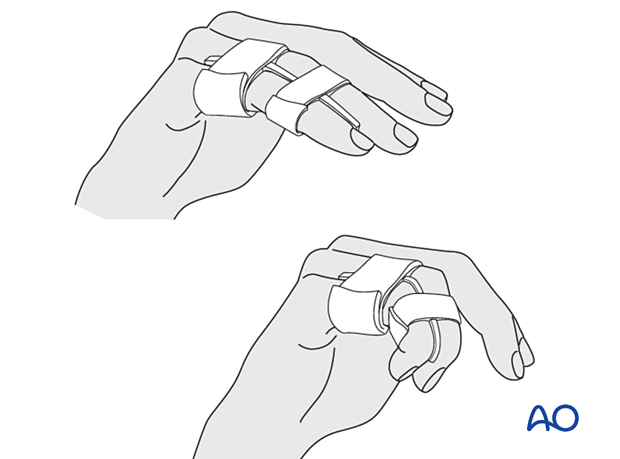
After subsided swelling, protect the digit with buddy strapping to a neighboring finger to neutralize lateral forces on the finger.
Functional exercises
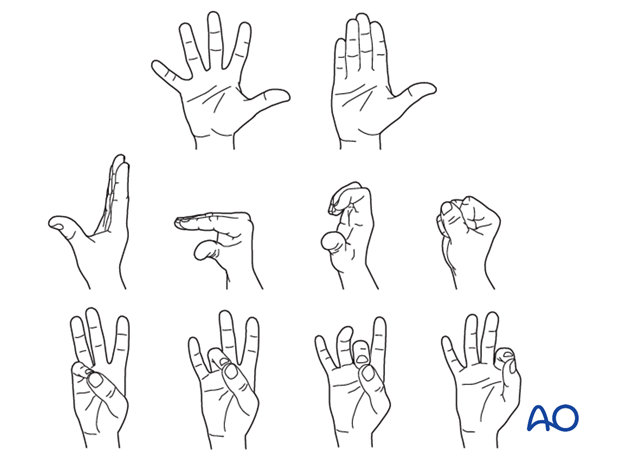
To prevent joint stiffness, the patient should be instructed to begin active motion (flexion and extension) immediately after surgery.
Follow-up
See the patient after 5 and 10 days of surgery.
K-wire removal
The K-wire is removed after 2 weeks.


