Hemihamate arthroplasty with osteocartilaginous graft
1. General considerations
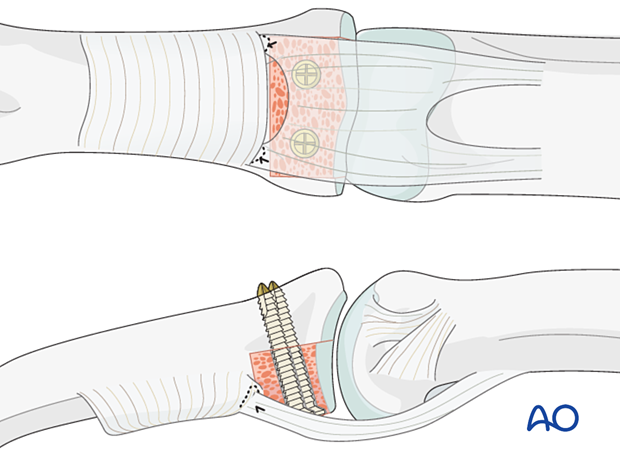
Hemihamate arthroplasty can be performed if more than 50% of the palmar articular surface is affected which may be not reconstructible.
The osteocartilaginous graft is harvested from the dorsal aspect of the distal hamate between the fourth and fifth metacarpal. This recreates the cup-shaped contour of the middle phalangeal articular surface.
The recovery process after such injuries is slow. Advise the patient to expect 6–8 months for full recovery.
2. Patient preparation
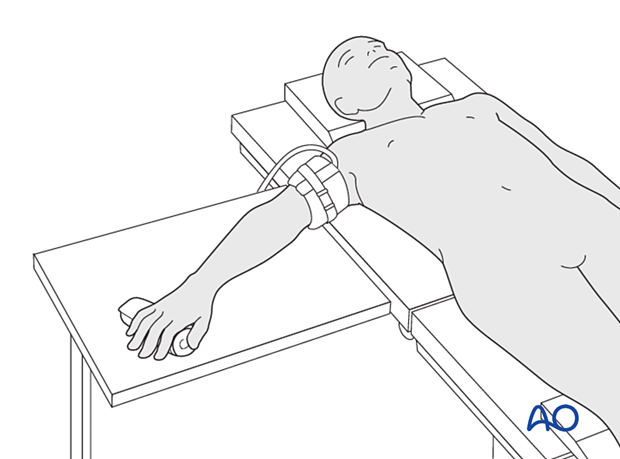
Place the patient supine with the arm on a radiolucent hand table.
3. Approach
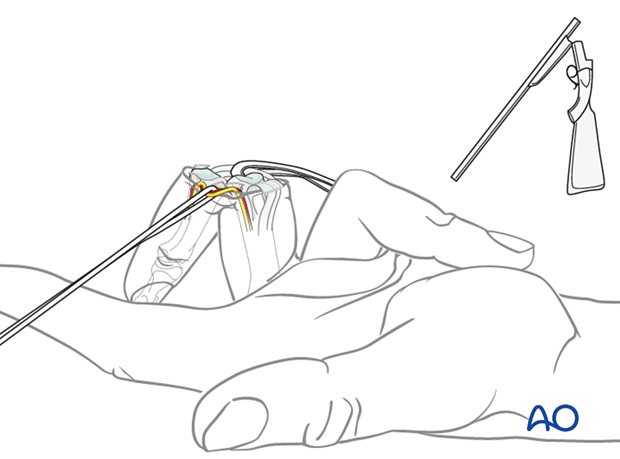
For these injuries, the shotgun extension to the palmar approach is used to gain maximal access to the joint.
4. Fracture evaluation
Evaluate the fracture.
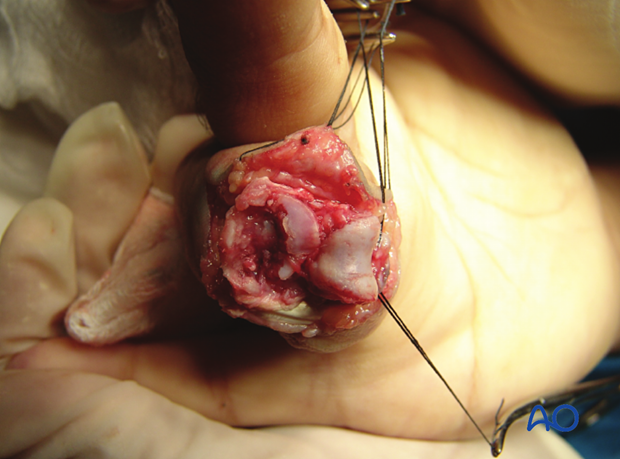
Often the degree of comminution is not apparent from the x-rays and can only be determined under direct vision.
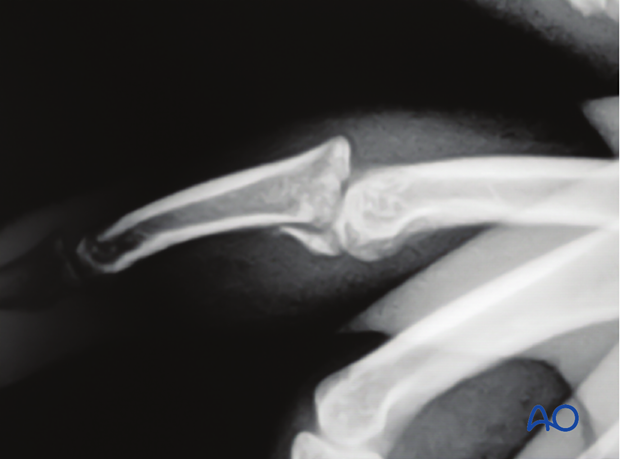
The image shows a fracture with clearly more than 60% of the articular segment damaged. The only remaining articular cartilage is in the dorsal aspect. Bone grafting and reconstruction is the only option.
5. Preparation of the fracture site
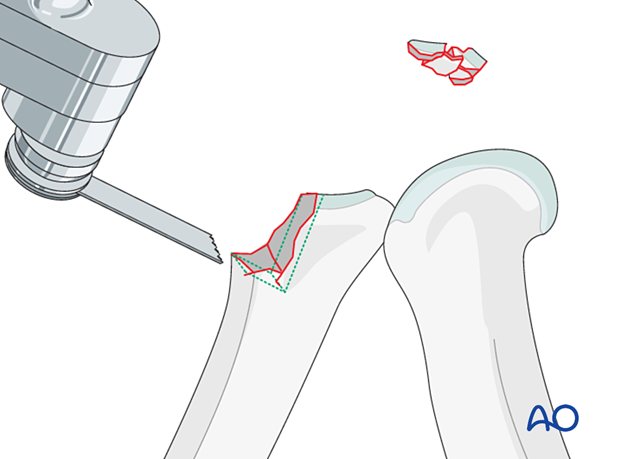
Removal of fragments
Remove all comminuted and impacted fragments. Then use a rongeur, a scalpel, and an oscillating saw to create a “box” which is shaped to receive the bone graft.
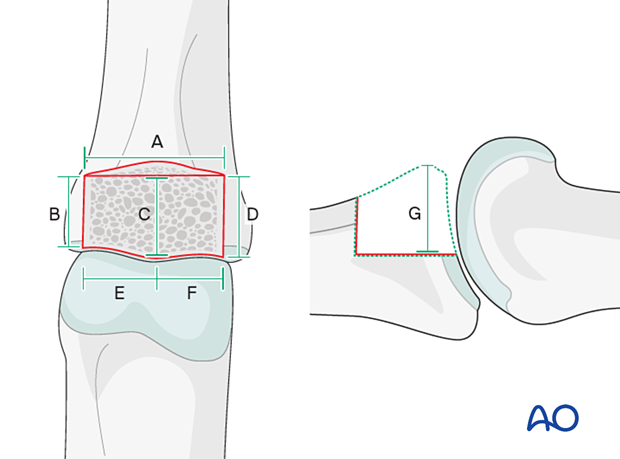
Measuring the “box”
Measure the “box” very carefully in all dimensions.
6. Harvesting the osteocartilaginous graft
Introduction
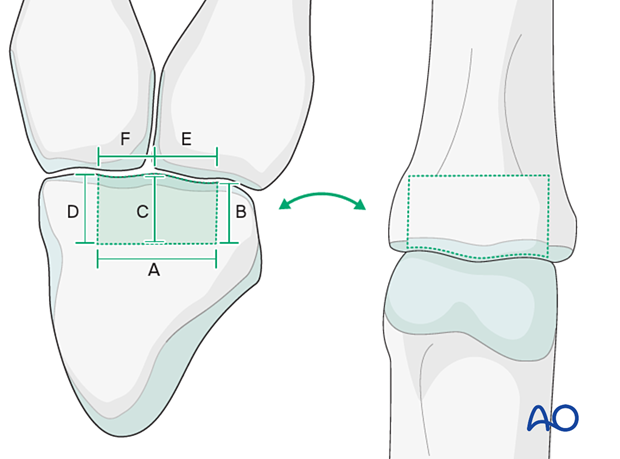
Bone graft will be harvested from the hamate. The distal articular surface of the hamate resembles very closely the form of the base of the middle phalanx.
Approach to the hamate
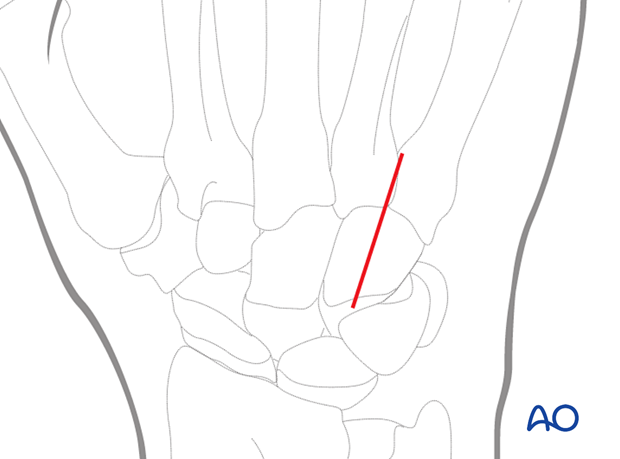
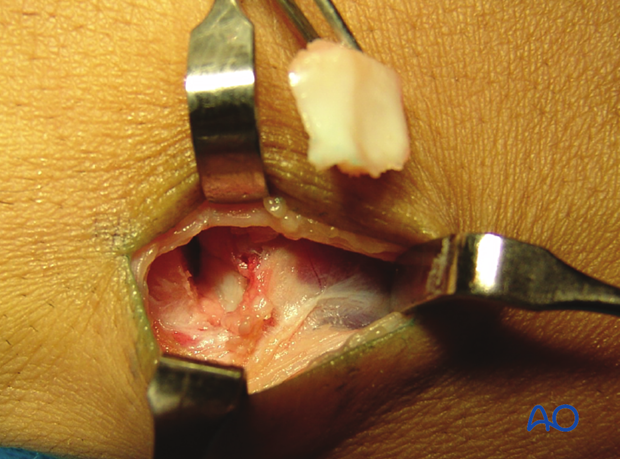
A longitudinal incision of approximately 2 cm is made at the junction of the bases of the 4th and 5th metacarpal, extending proximally.
Make a blunt dissection. The dorsal veins and the sensory dorsal branch of the ulnar nerve must be protected and separated.
The extensor digiti communis (EDC) and extensor digiti minimi (EDM) tendons are separated. The EDC is retracted to the radial side, and the EDM to the ulnar side.
The capsule is now visible. Make a longitudinal capsulotomy.
Preparing the hamate
Mark the exact dimensions of the defect on the exposed hamate.
Be very precise with the measurements.
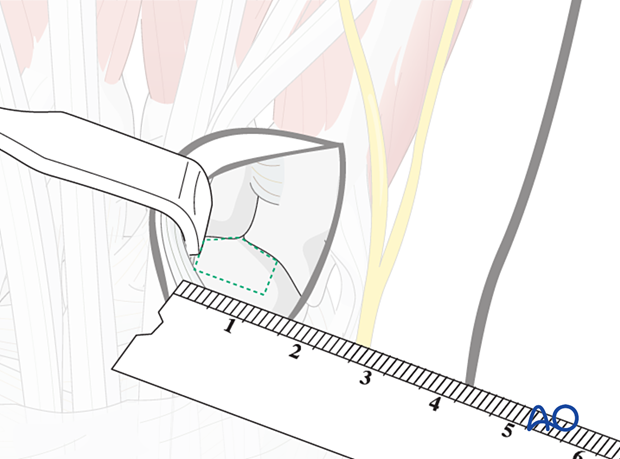
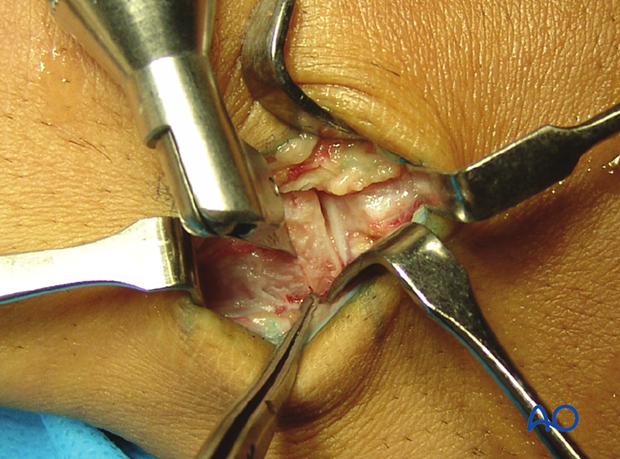
Harvesting from the hamate
Cut the osteocartilaginous graft from the hamate. Use a fine oscillating saw for the vertical and horizontal cuts.
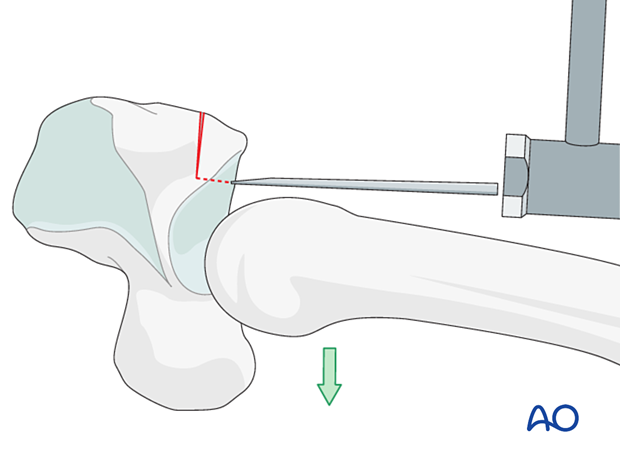
To free the graft fragment from the hamate, dislocate the metacarpals palmarly, and use a chisel as a lever to complete the procedure.
Remove the osteocartilaginous graft.
7. Reconstruction of the articular plate
Insert bone graft
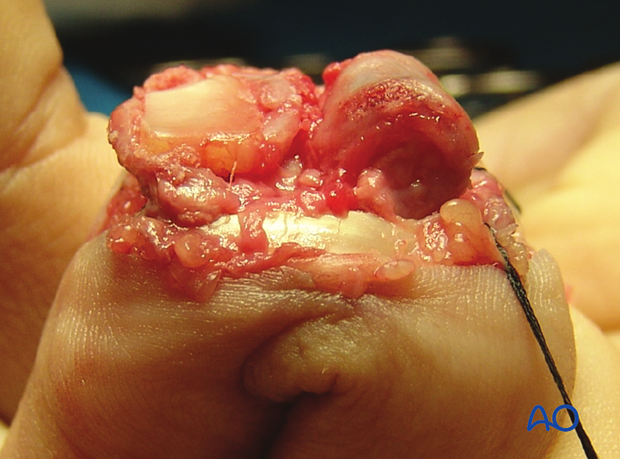
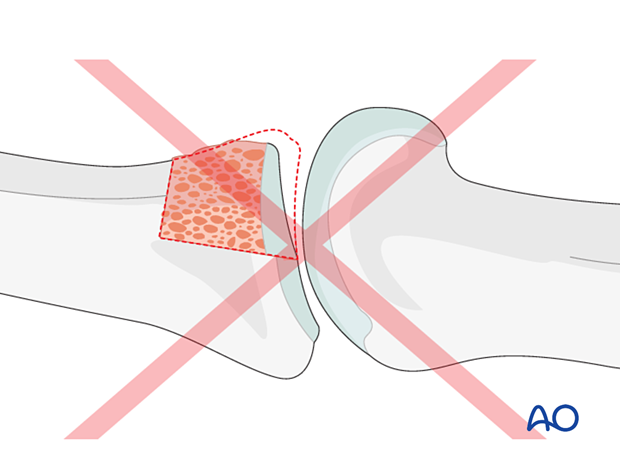
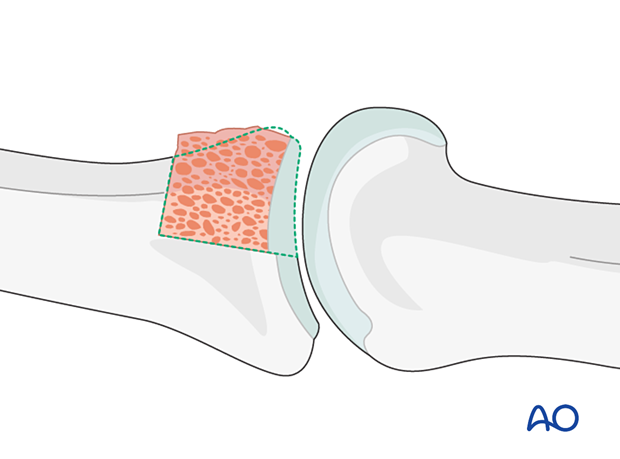
Insert the graft to reconstruct the articular surface. If necessary, use a small rongeur to adjust further both the receiving box and the graft so that they match perfectly.
First reconstruct the articular surface to a perfect fit without gap and concavity. The rest of the graft can be trimmed after this important step.
Check the joint congruency
Reduce the joint to check for congruency. If the joint has been reconstructed anatomically correctly, it will be stable throughout the full range of motion.
Confirm using an image intensifier.
8. Lag-screw fixation
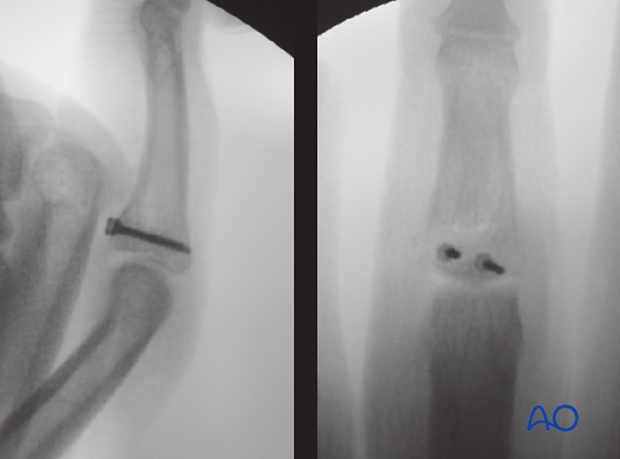
Two lag screws (1.0 mm) will be inserted from palmar to dorsal in the subchondral bone.
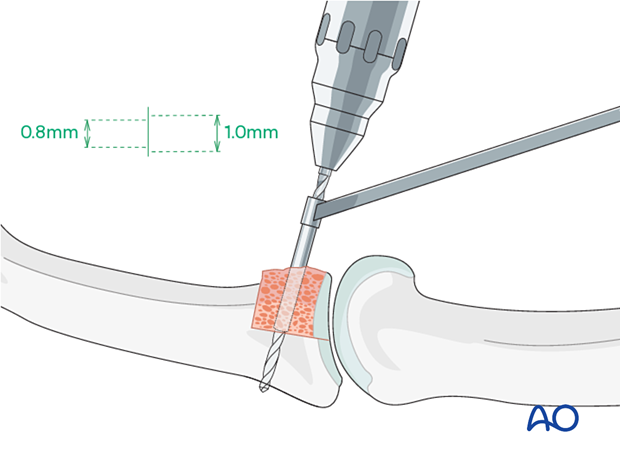
Insert the first screw, but do not tighten it yet.
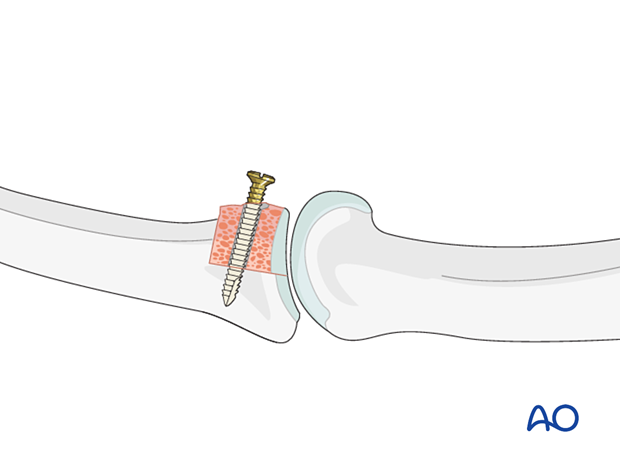
Intraoperative photo showing insertion of the first screw
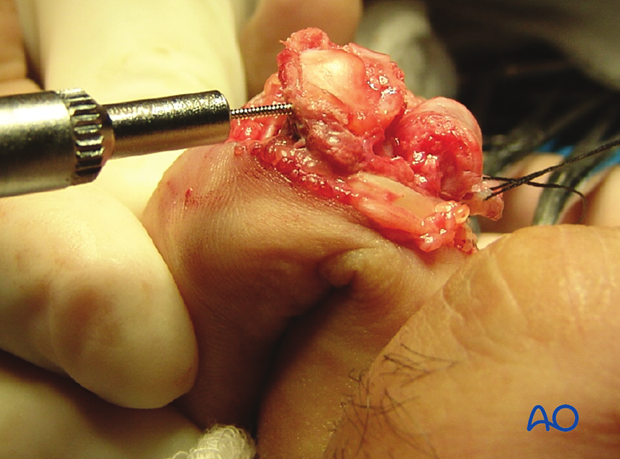
Insert the second screw.
Tighten the two screws alternately.
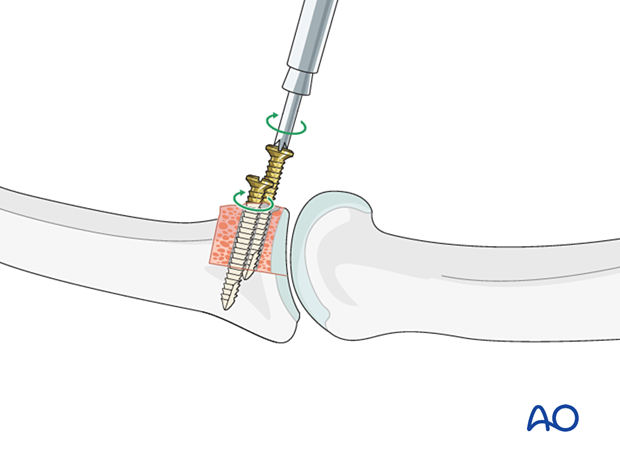
Intraoperative photo with both screws inserted
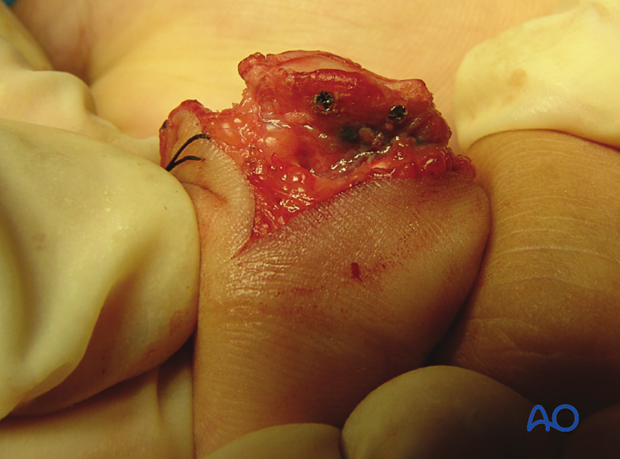
9. Volar plate reattachment
After lag-screw fixation, the volar plate must be reattached. This can prevent the potential complication of hyperextension deformity after this procedure.
Suture the volar plate to the A4 pulley and the remaining pieces of the collateral ligament on both sides of the base of the middle phalanx, using a 4.0 monofilament nonresorbable suture.
The volar plate may also be reattached with suture anchors or bone tunnel.

10. Final assessment
Check joint congruity using image intensification. Articular reconstruction must be anatomical.

11. Aftercare
Postoperative phases
The aftercare can be divided into four phases of healing:
- Inflammatory phase (week 1–3)
- Early repair phase (week 4–6)
- Late repair and early tissue remodeling phase (week 7–12)
- Remodeling and reintegration phase (week 13 onwards)
Full details on each phase can be found here.
Postoperatively
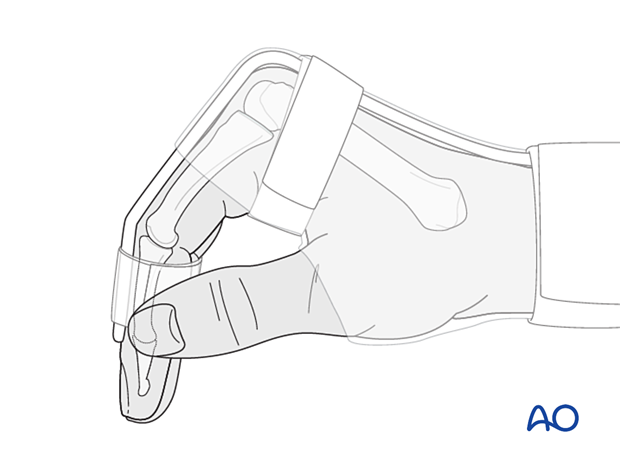
The hand is immobilized with a dorsal splint for 4 weeks with the PIP joint in 20–30° of flexion. This should permit movement of the unaffected fingers and allow for active flexion of the affected finger. The arm should be actively elevated to help reduce the swelling.
The hand should be immobilized in an intrinsic plus (Edinburgh) position:
- Neutral wrist position or up to 15° extension
- MCP joint in 90° flexion
Follow-up
The patient is reviewed frequently to ensure progression of hand mobilization.
In the middle phalanx, the fracture line can be visible in the x-ray for up to 6 months. Clinical evaluation (level of pain) is the most important indicator of fracture healing and consolidation.
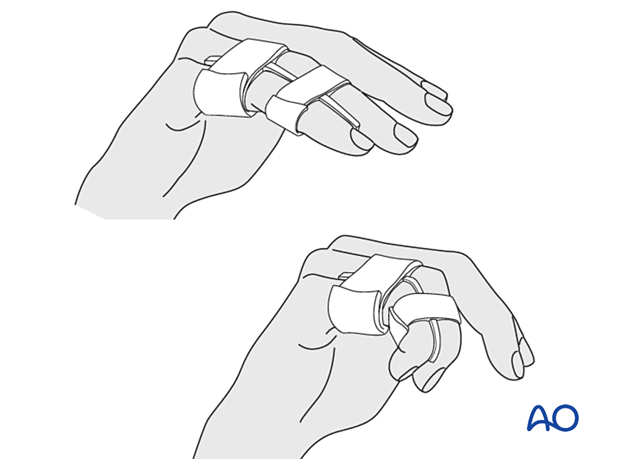
Remove the splint and K-wire after 4 weeks and protect the finger with buddy strapping to a neighboring finger to neutralize lateral forces on the finger.
Mobilization
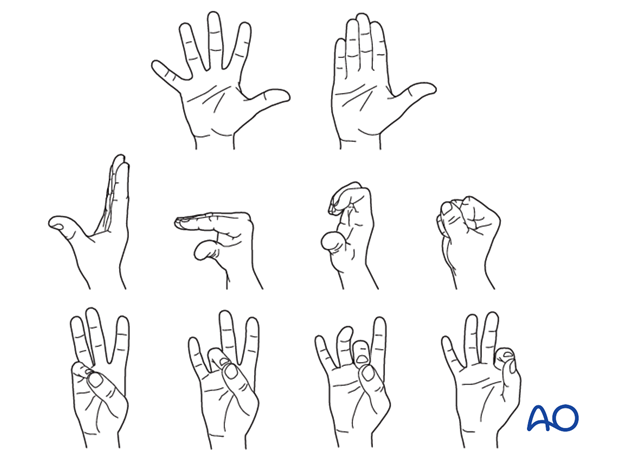
During the whole process, the hand therapist should closely monitor the rehabilitation.
DIP and MCP joint movement is encouraged immediately to avoid extensor tendon adhesion and joint stiffness.
After 4 weeks, the splint is removed, and progressive active extension is permitted.
If active extension is still restricted after 5 weeks, then dynamic extension splinting is recommended.
12. Cases
Case 1
Lateral x-ray showing a palmar impaction fracture with >50% articular surface involved
Intraoperative views with final construct
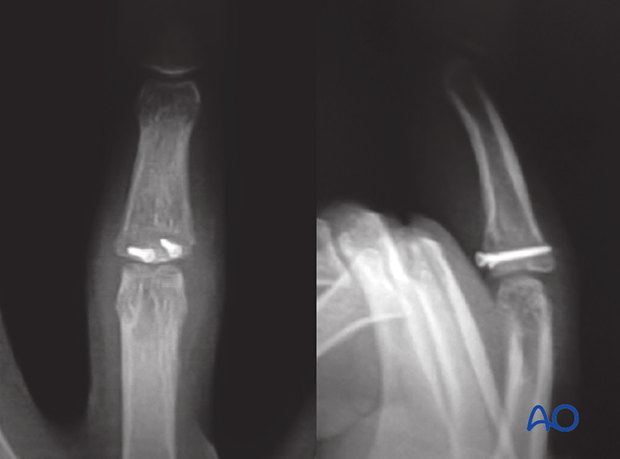
X-rays showing fracture consolidation
Case 2
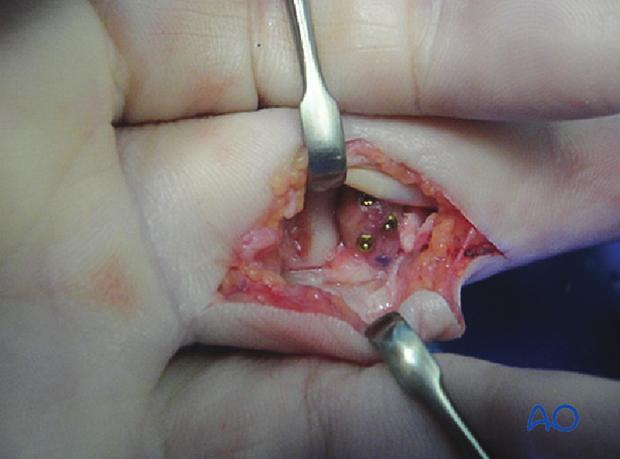
This intraoperative photo shows the case of a middle finger in shot gun extension with a box prepared for insertion of the osteocartilaginous graft.
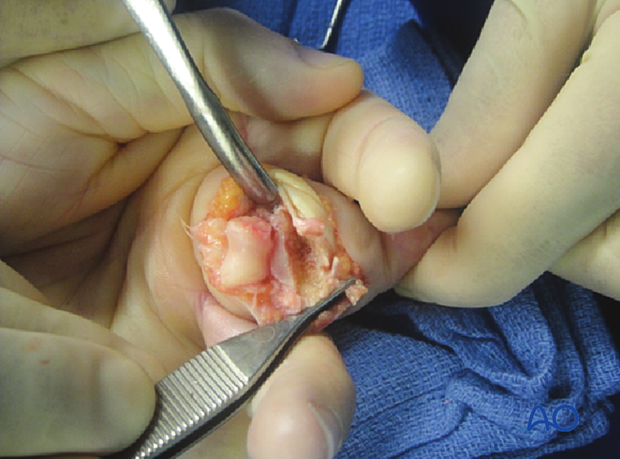
The osteocartilaginous graft has been fixed with three screws to the middle phalangeal base.
