Segmental ulnar fracture: compression plating
1. Principles
Transverse or short oblique fractures
Absolute fracture stability, achieved by interfragmentary compression, results in direct bone healing.
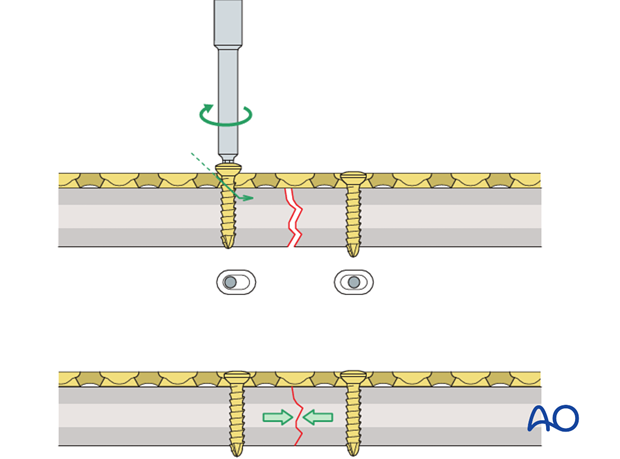
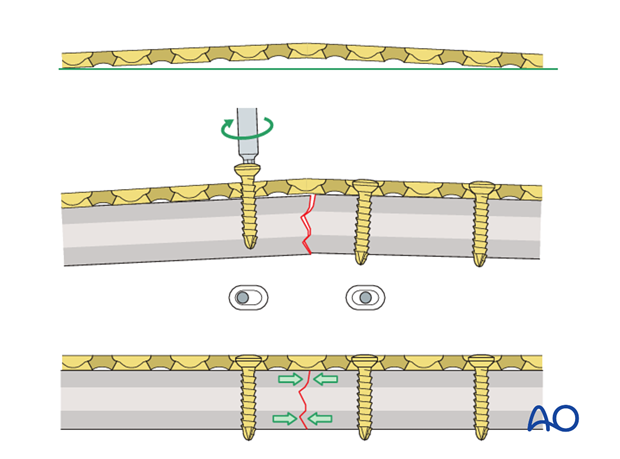
Axial compressionUsing self-compressing plates (DCP, LC-DCP, LCP, etc.), axial compression results from eccentric screw (load screw) insertion.
Oblique fractures
Interfragmentary compression in oblique fractures is achieved by a lag screw, inserted either separate from the plate, or through a plate hole (as illustrated).
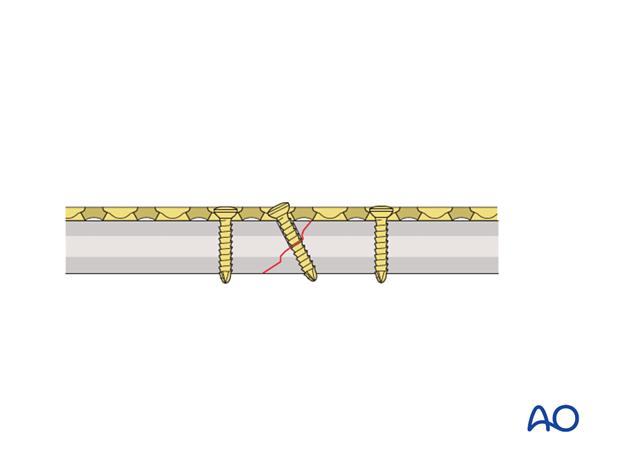
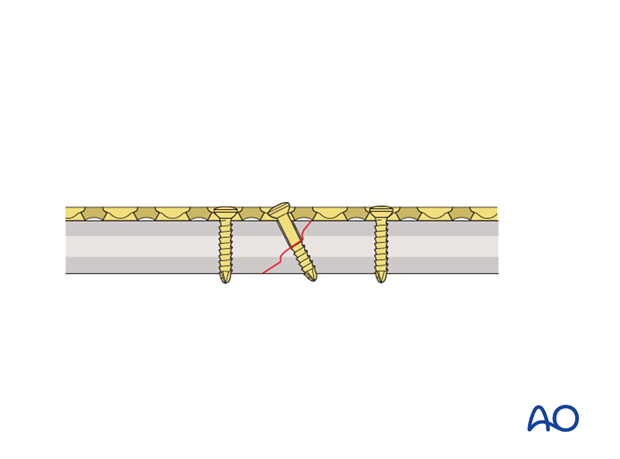
If available, a partially threaded cortical lag screw (shaft screw) can be used to accomplish interfragmentary compression.
Prebending the plate
The solution to this problem is to “over-bend” the plate so that its centre stands off 1-2 mm from the anatomically reduced fracture surface.
When the neutral side of the plate is applied to the bone, slight gapping of the cortex will occur directly underneath the plate.
As the load screw is tightened, the tension generated in the plate compresses the fracture evenly across the full diameter of the bone.
In those segmental fractures in which both fractures are transverse and will need axial compression, the plate will need to be prebent at the site of each transverse fracture.
2. Open and anatomical reduction
Transverse or short oblique fractures
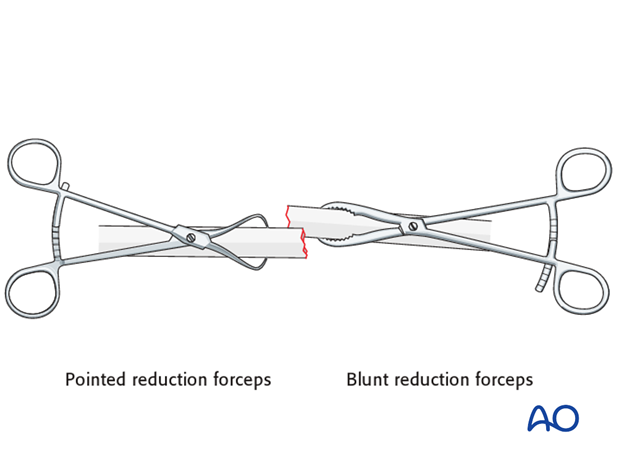
Reduce the fracture anatomically, using a reduction forceps on each main fragment. The use of blunt, as opposed to pointed, reduction forceps can be helpful, particularly if greater forces are required.
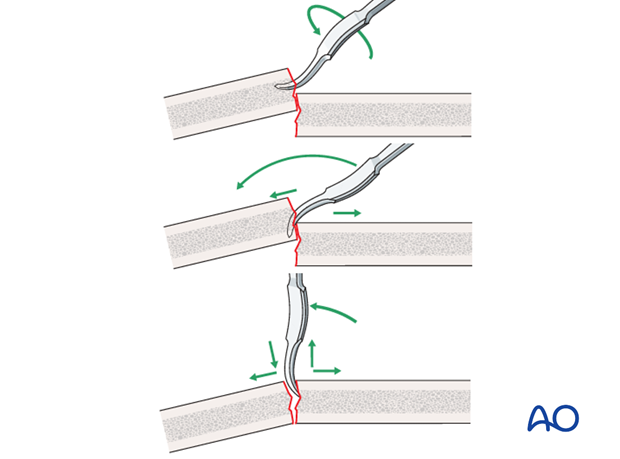
A small bone lever can be used to reduce transverse, or short oblique, fractures as illustrated.
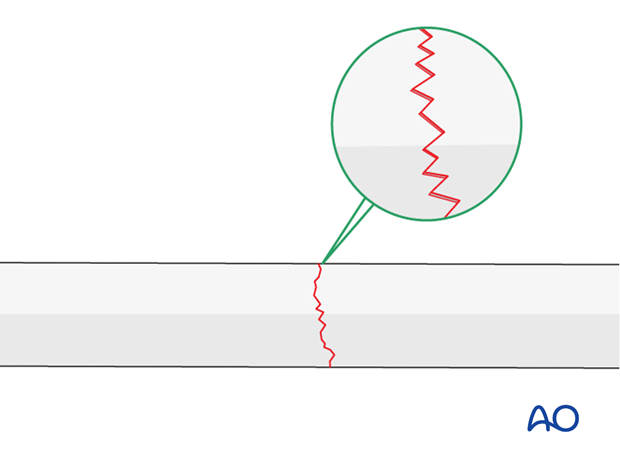
A reduced transverse fracture can not be maintained with reduction forceps alone. However, transverse fractures are usually dentate and are intrinsically stable after anatomical reduction.
If not, fix the plate to the intermediate fragment and then reduce the displaced main fragment onto the plate, maintaining the position with a reduction forceps.
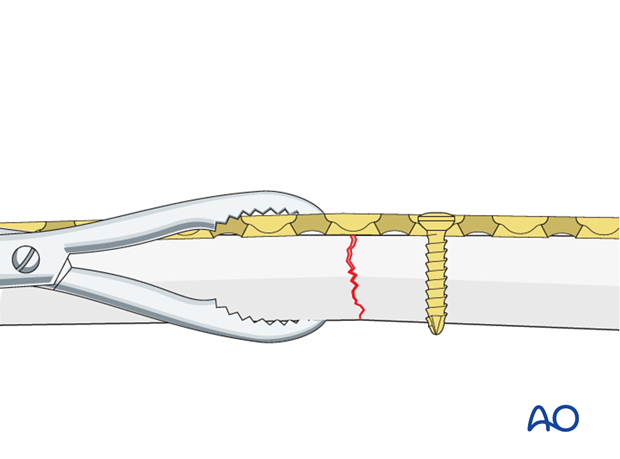
Oblique fracture
Lengthening by twisting of reduction forceps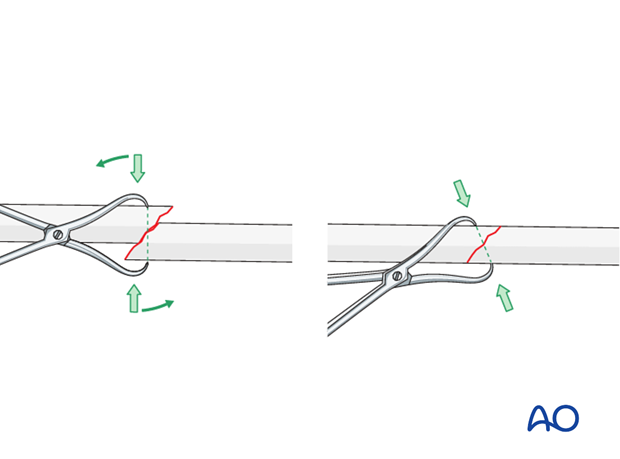
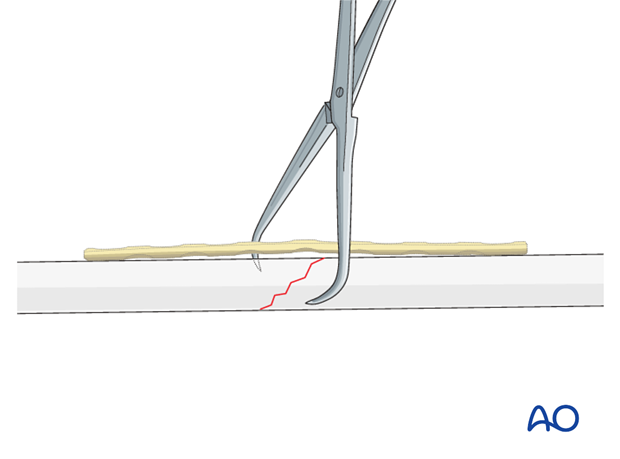
Short oblique fractures may be reduced and maintained using the plate. The plate should be primarily fixed to that fracture fragment with its apex on the opposite side to the plate. The aim of this maneuver is to create an “axilla” into which the other fragment can be locked and compressed, either with a compression screw or using a push-pull technique.
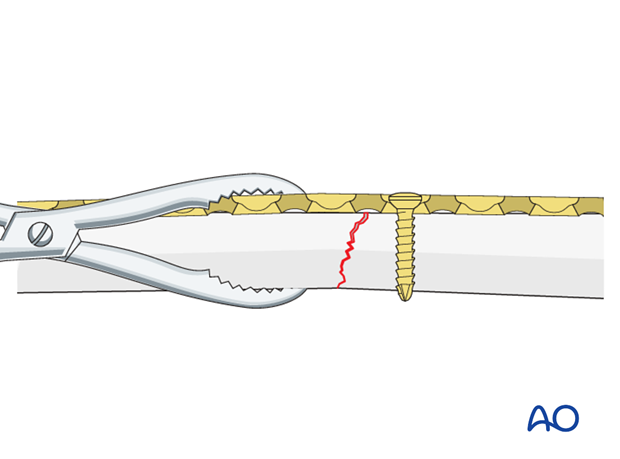
Transverse and oblique fractures
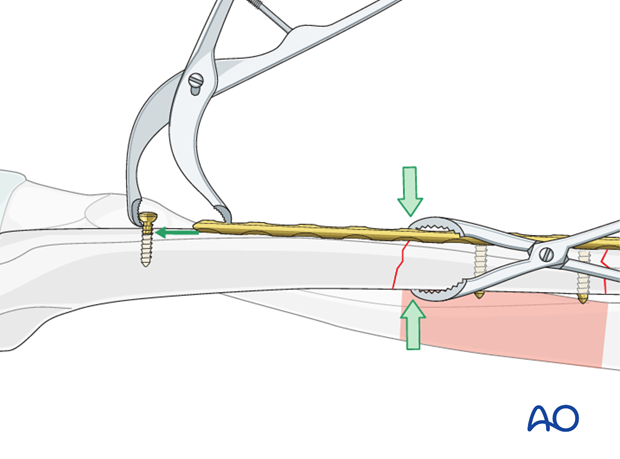
Push-pull techniqueA loosely applied reduction forceps helps to maintain the alignment of the main fragment with the plate.
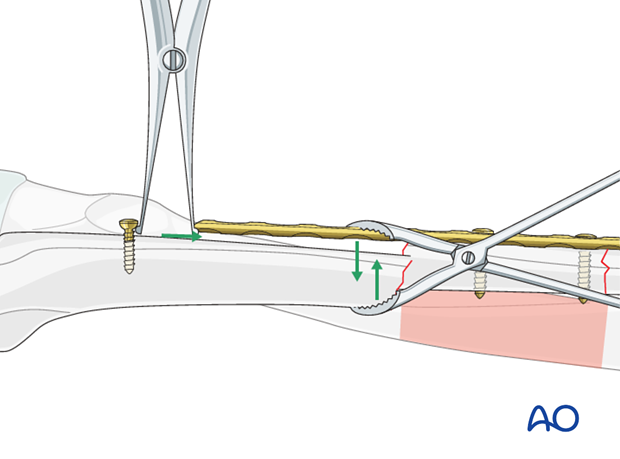
In order to maintain the reduction, using the same independent screw, preliminary axial compression can then be obtained by pulling the plate end towards the screw with a small Verbrugge clamp.
3. Fixation – general considerations
Dynamic compression principle
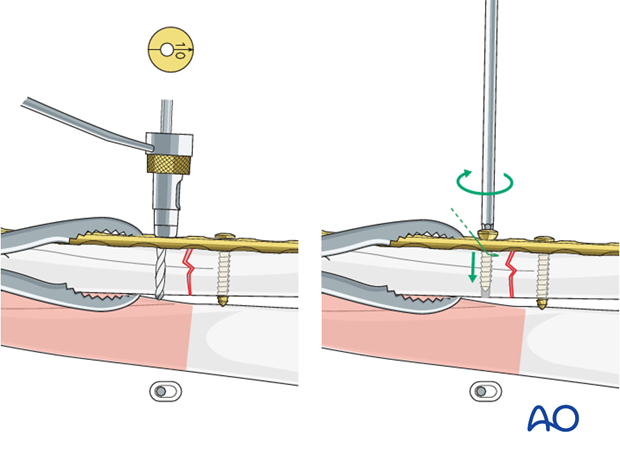
The holes of the plate are shaped like an angled cylinder. The spherical undersurface of the screw head slides down the inclined cylinder as the screw is tightened.
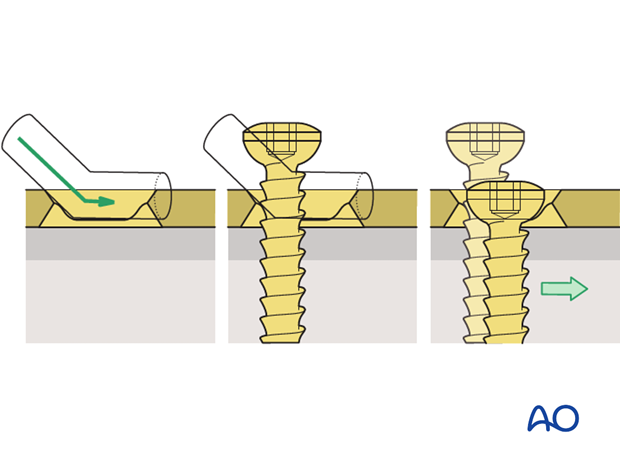
The horizontal movement of the head, as it impacts against the angled side of the hole, results in movement of the bone fragment relative to the plate, and leads to compression of the fracture.

Drill guides
Because of the design of the LC-DCP holes, the neutral drill guides for the LC-DCP have a very slightly eccentric hole and an arrow, which needs always to point towards the fracture line.
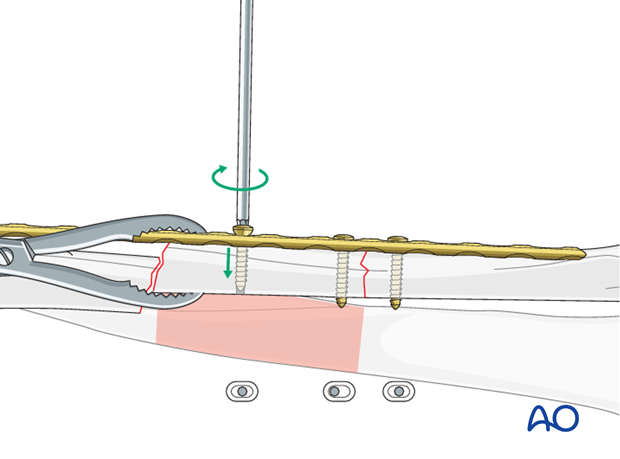
To insert a load screw through an LC-DCP, the drill guide with the yellow (gold) collar is used. The arrow on the top of the drill guide must point towards the fracture to be compressed.
Pearl: alternative drill sleeve
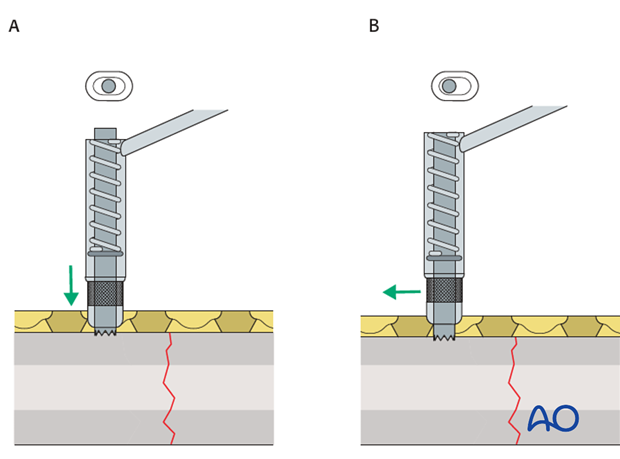
For inserting screws into the limited contact dynamic compression plate (LC-DCP), the Universal Drill Guide can be used as well. When this drill guide is pressed into the plate hole, the screw position will be neutral (A). When it is held against the end of the plate hole, without exerting downward pressure, the screw position will be eccentric (B).
Prebend the plate
After the plate has been contoured anatomically to the reduced bone surface, prebend it with the handheld bending pliers, or a pair of bending irons, as explained in the principles section.
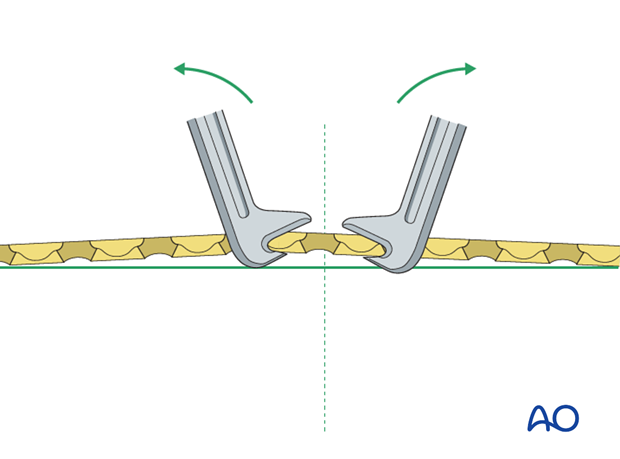
Plate position
In the following procedure, we demonstrate the plate positioned deep to the extensor carpi ulnaris muscle (A).
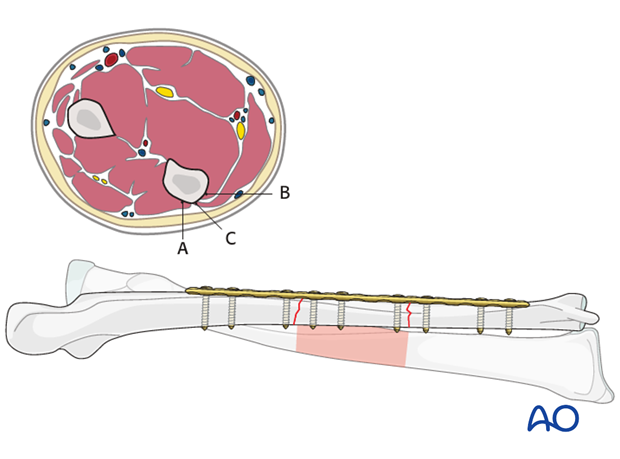
Plate choice
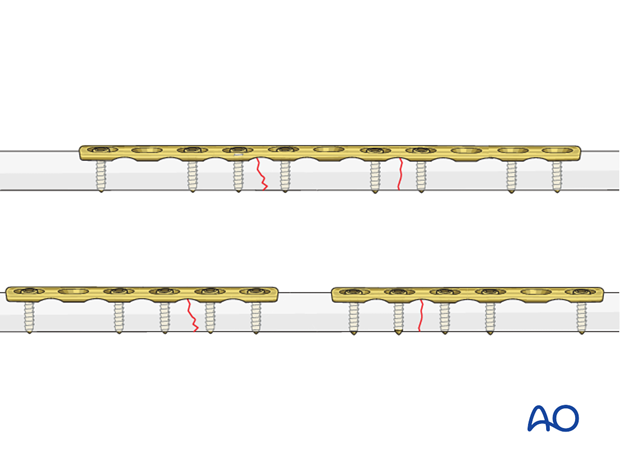
- Convert the bifocal fracture to a unifocal (single fracture line) fracture as a first step and then fix the remaining fracture.
4. Fixation – using a single long plate
Plate length and number of screws

Insert a neutral screw through the plate into the main fragment near the fracture line.
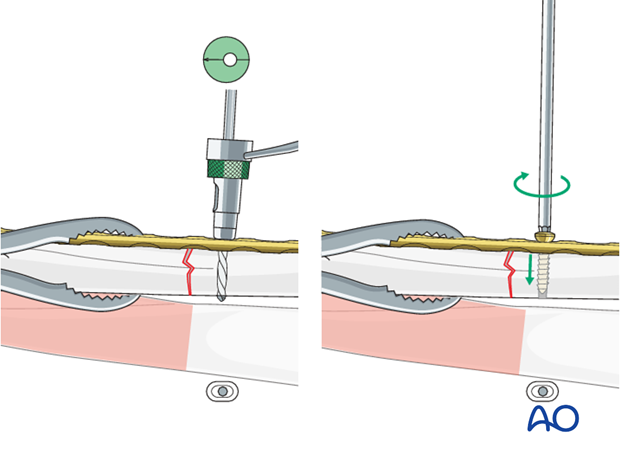
Insert a load screw through the plate on the other side of the fracture line into the intermediate fragment, thereby applying axial compression.

Secure the intermediate fragment to the plate with a neutral screw near the unreduced fracture line.

Reduce the other main fragment onto the intermediate fragment by pushing it towards the plate using a pointed reduction forceps.
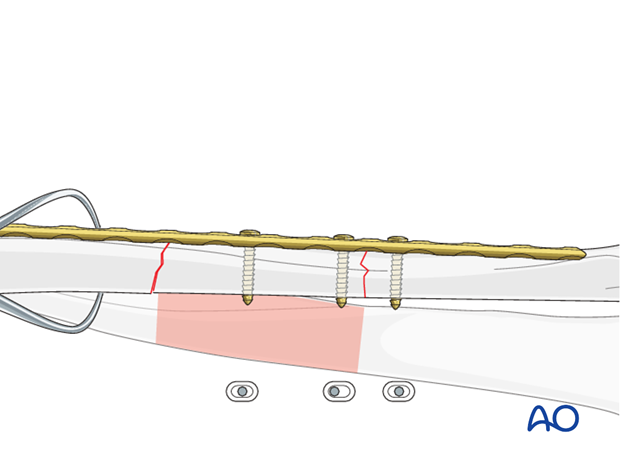
Alternatively, the push-pull technique can be used to distract, reduce,…

… and then preliminarily compress the second fracture.

Fix the second fracture line with a load screw in the main fragment applying the compression principle (as previously described).
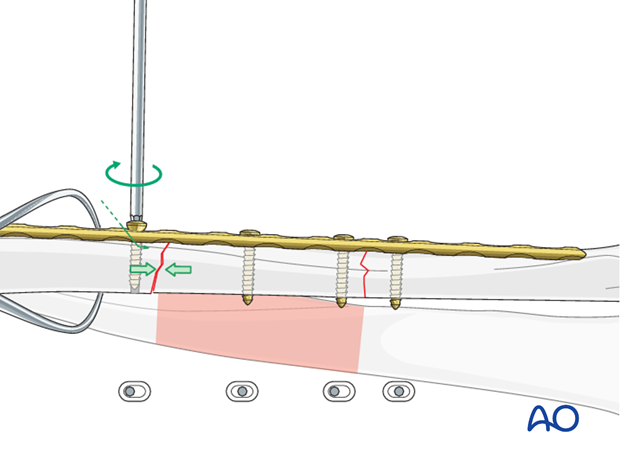
After checking the reductions clinically and using image intensification, insert additional screws in order to complete the fixation. In longer oblique fractures, consider an interfragmentary lag screw either separate from, or through, the plate, depending on the fracture configuration.

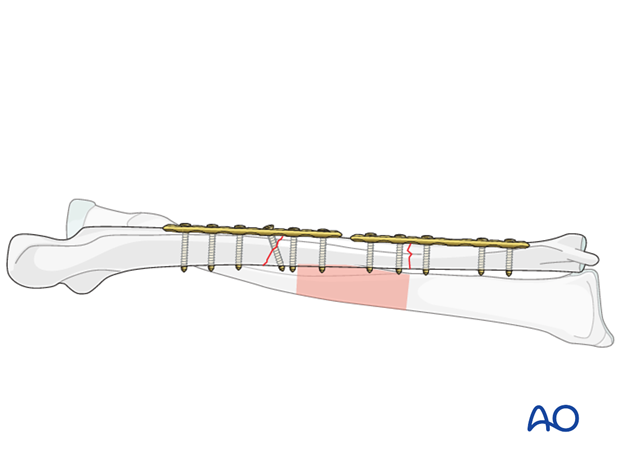
5. Fixation – using two shorter plates
Plate length and number of screws
Note: This is a biomechanically less desirable construct but may be necessary either because of a long intermediate fragment or nonavailability of a single plate of suitable length.
A suitably contoured plate is secured to the intermediate fragment with a neutral screw near the fracture line.
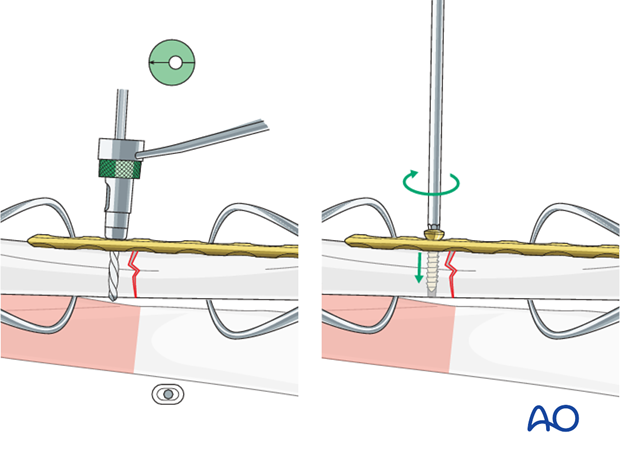
The reduction of the fracture is checked and held with a pointed reduction forceps. A load screw is inserted through the plate into the main fragment near the fracture line.
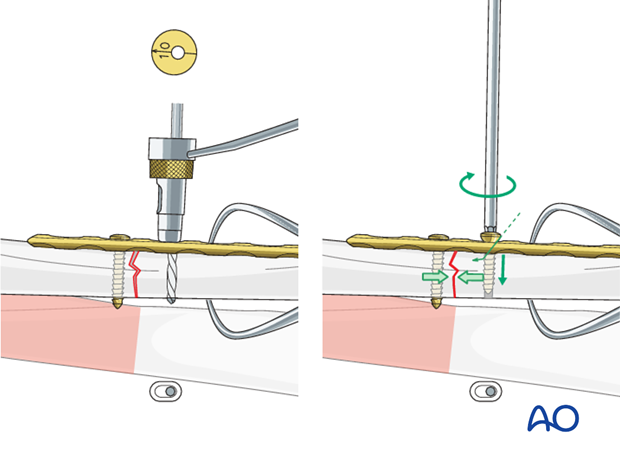
Insert an additional screw into the intermediate fragment …
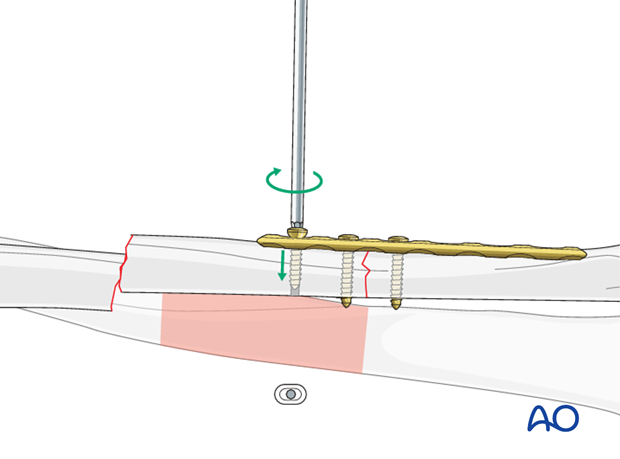
… and then the remaining main fragment screws in order to secure the fixation of the first fracture.
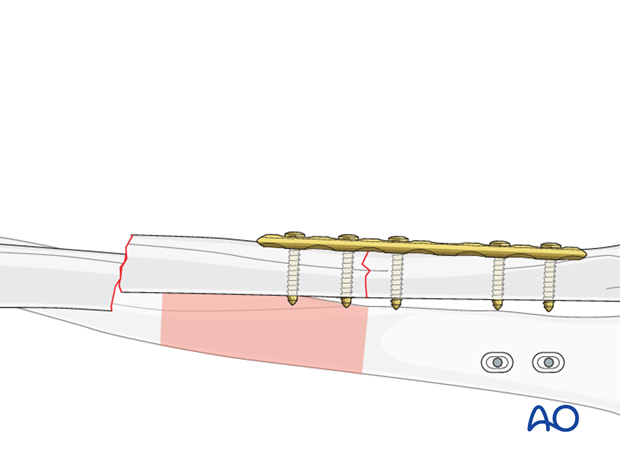
If the second fracture is transverse or short oblique, the technique will be similar to the first fracture.
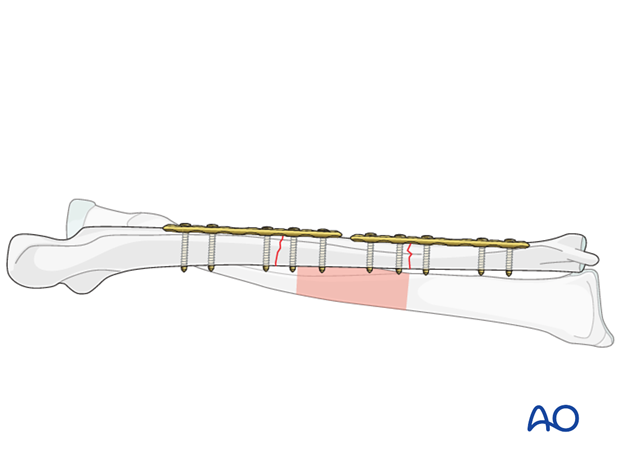
6. Option: using a lag screw
This technique will be used at both sites if the two fractures are oblique.

7. Check of osteosynthesis
8. Assessment of Distal Radioulnar Joint (DRUJ)
Before starting the operation the uninjured side should be tested as a reference for the injured side.
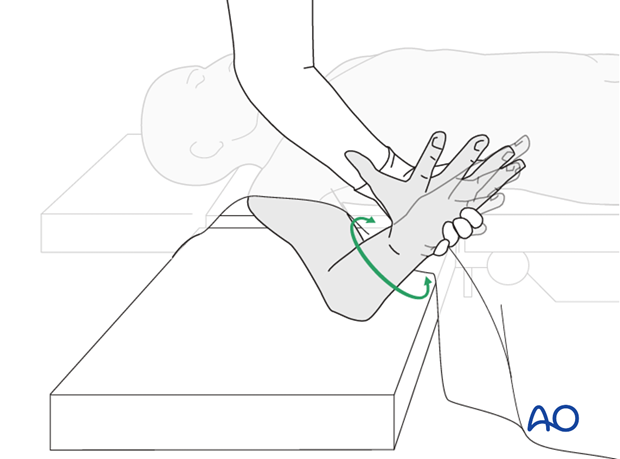
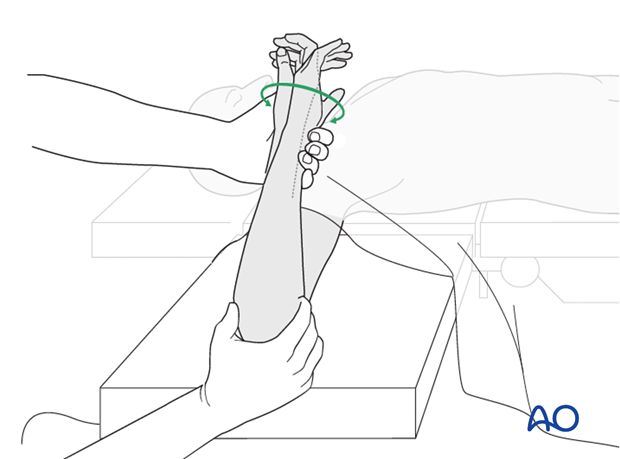
After fixation, the distal radioulnar joint should be assessed for forearm rotation, as well as for stability. The forearm should be rotated completely to make certain there is no anatomical block.
Method 1
The elbow is flexed 90° on the arm table and displacement in dorsal palmar direction is tested in a neutral rotation of the forearm with the wrist in neutral position.
This is repeated with the wrist in radial deviation, which stabilizes the DRUJ, if the ulnar collateral complex (TFCC) is not disrupted.
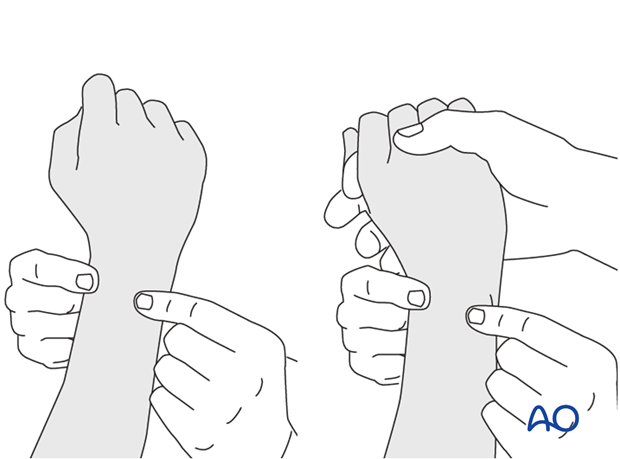
This is repeated with the wrist in full supination and full pronation.
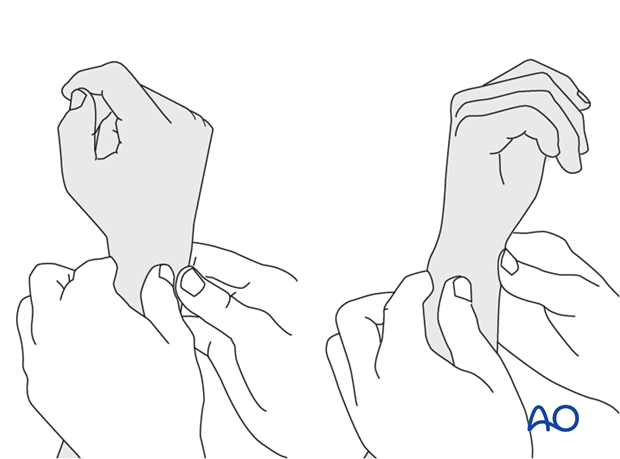
Method 2
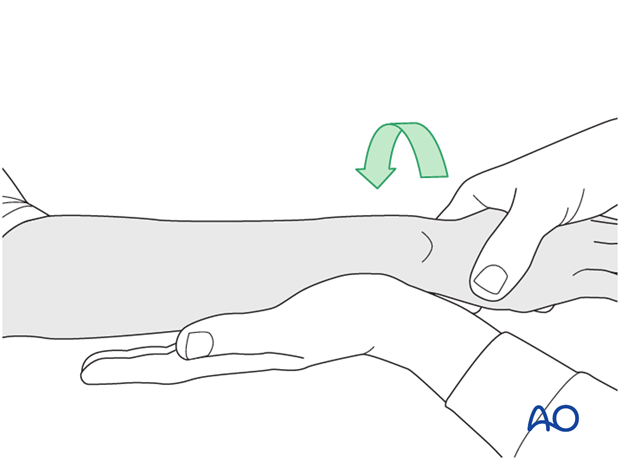
In order to test the stability of the distal radioulnar joint, the ulna is compressed against the radius...
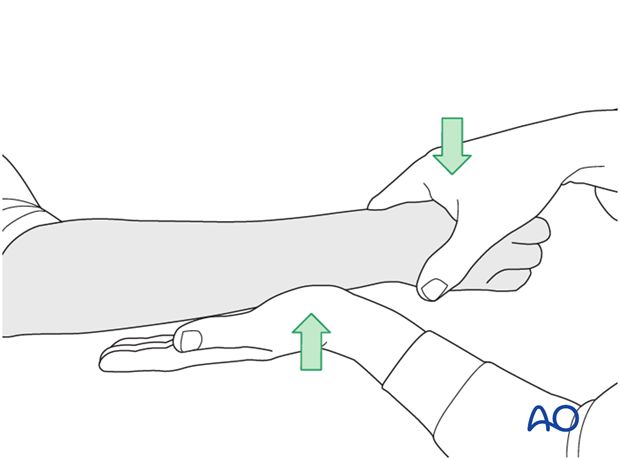
...while the forearm is passively put through full supination...
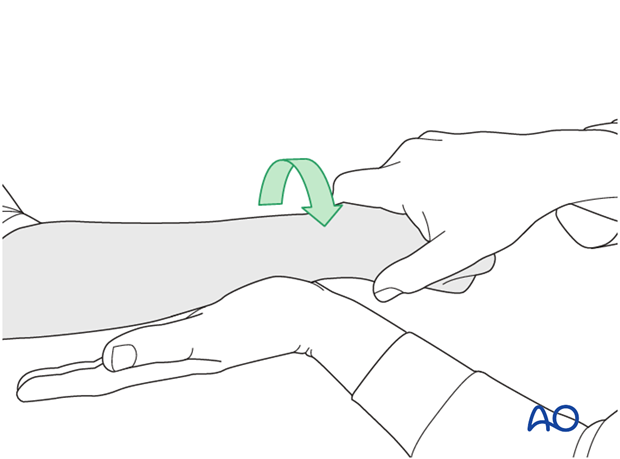
...and pronation.
If there is a palpable “clunk”, then instability of the distal radioulnar joint should be considered. This would be an indication for internal fixation of an ulnar styloid fracture at its base. If the fracture is at the tip of the ulnar styloid consider TFCC stabilization.
