MIO - Bridge plating (LISS or LCP)
1. Principles
Note on illustrations
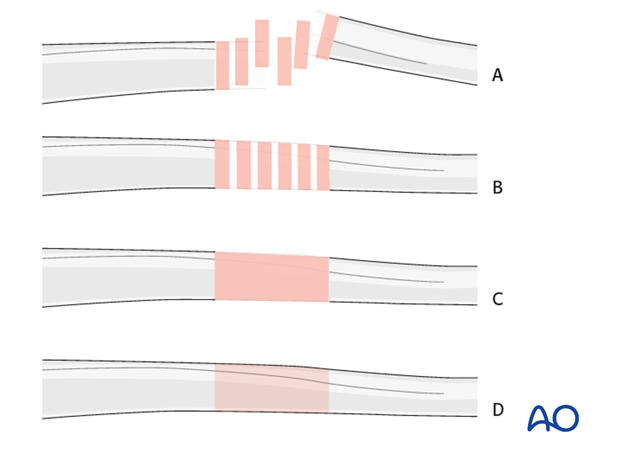
Throughout this treatment option illustrations of generic fracture patterns are shown, as four different types:
A) Unreduced fracture
B) Reduced fracture
C) Fracture reduced and fixed provisionally
D) Fracture fixed definitively
Bridge plating
Bridge plating uses the plate as an extramedullary splint, fixed to the two main fragments, leaving the intermediate fracture zone untouched. Anatomical reduction of intermediate fragments is not necessary. Furthermore, their direct manipulation would risk disturbing their blood supply. If the soft tissue attachments to the fragments are preserved, and the fragments are relatively well aligned, healing is enhanced.
Alignment of the main shaft fragments can be achieved indirectly with the use of traction and the support of indirect reduction tools, or indirectly via the implant.
Mechanical stability, provided by the bridging plate, is adequate for gentle functional rehabilitation and results in satisfactory indirect healing (callus formation). Occasionally, a larger wedge fragment might be approximated to the main fragments with a lag screw.
Bridge plate insertion
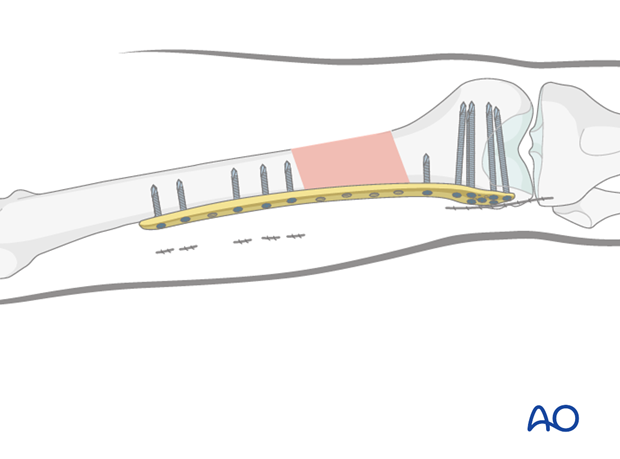
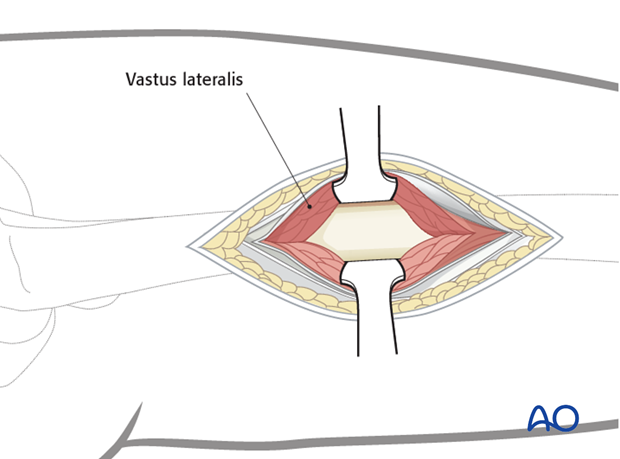
Bridge plates inserted through a minimally invasive (MIO) approach leave the soft tissues intact over the fracture site. The incisions are made proximally and distally, and the plate is inserted through a submuscular tunnel. This normally requires fluoroscopic intensifier monitoring.

Reduction
It is important to restore axial alignment, length, and rotation.
Reduction can be performed with a single reduction tool (eg, large distractor), or by combining several steps (for example fracture table +/- external fixator, +/- reduction via the implant, cerclage wire etc.) to achieve the final reduction.
The preferred method depends on the fracture and soft-tissue injury pattern, the chosen stabilization device, and the experience and skills of the surgeon.
If a large fragment has separated from the fracture zone and impaled the adjacent muscle, direct reduction may be required.
2. Preoperative planning
Plate length
Generally speaking, plates for the bridging technique should be longer than for conventional open plating techniques to distribute the forces, and to provide relative stability.
The preoperative x-ray planning template is useful in determining the length of the LISS plate and the positions of the screws.
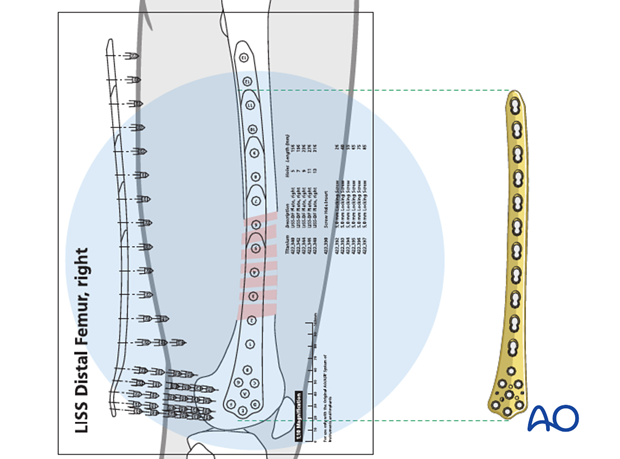
Number of screws
In healthy bone, five well placed monocortical screws are inserted to secure the LISS to the main femoral shaft fragment. As an alternative, three bicortical screws can be chosen, and these are recommended in osteoporosis.
3. Patient preparation
The patient may be placed in one of the following positions:
4. Approach
For this procedure a MIO approach is used.
5. Preliminary reduction
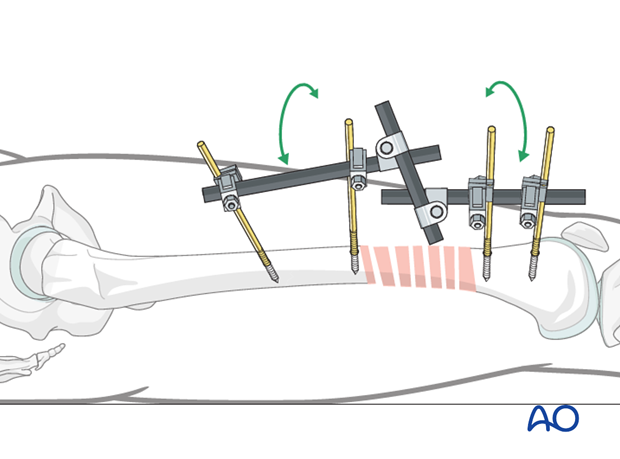
Reduction by external fixator or distractor
Sometimes, manual traction is not sufficient to achieve and hold preliminary reduction.
If manual traction is not sufficient, the use of an external fixator can facilitate the reduction procedure and can provide temporary alignment and stability for the bridge plating procedure.
Proximal and distal fixator screws should be inserted carefully in order not to conflict with the later plating procedure. For this purpose, safe positions would be anterolateral or anterior on the femur.
If no traction table is used, folded linen bolsters under the fracture zone may facilitate the reduction maneuver.
Teaching video
AO teaching video: Application of the large distractor
6. Plate insertion
Assembly of LISS insertion instruments
The LISS was a first generation locking plate with an external guide for locking screw placement. The LCP was the next generation, but it did not have an external guide for locking screw placement.
In this procedure we will demonstrate the insertion of the a LISS plate.
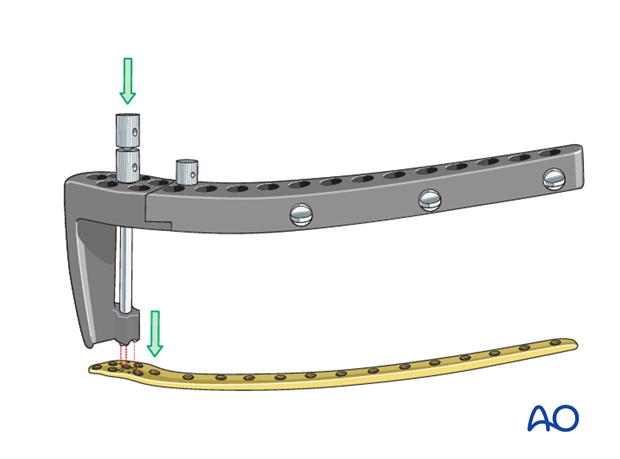
The two parts of the insertion guide are connected, and the fixation bolt is placed in hole A. Then, the insertion guide is placed on the LISS three-point locking mechanism.
The fixation bolt is inserted into the LISS and slightly tightened using the pin wrench. Next, the nut of the fixation bolt is threaded in the direction of the insertion guide and tightened slightly with the pin wrench.
For more stable fixation of the LISS to the insertion guide during insertion, a second stabilization bolt is introduced with the drill sleeve into hole B (and threaded into the LISS).
LCP or LISS insertion
The assembled insertion guide or handles are used to insert the LCP or LISS plate between the vastus lateralis muscle and the periosteum (= extraperiosteal space).
The plate is inserted through the lateral incision.
The LCP or LISS plate is advanced proximally under the vastus lateralis muscle, ensuring that its proximal end remains in constant contact with the bone. The distal end of the plate is positioned against the lateral condyle. To identify the correct position, the plates are moved proximally and then back distally until the plate fits the condyle.
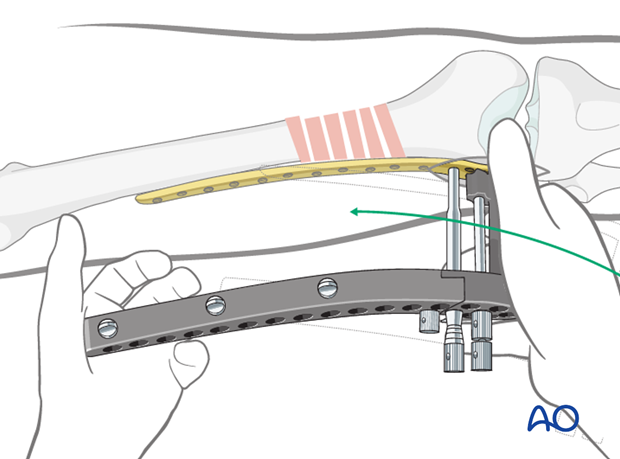
Proper position check - Position on the distal femur
When the plate lies flat on the lateral surface of the condyle, it has been positioned correctly on the distal femur.
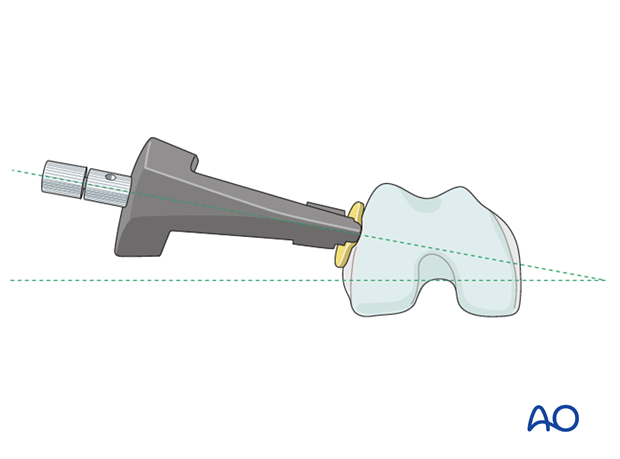
From the AP perspective, a K-wire, inserted through the sleeve of the insertion handle, must be parallel to the plane of the tibiofemoral joint (green dashed line). At that point, the preshaped plate is in the right position, presuming normal anatomy. This is beneficial to restoring the correct alignment in complex fracture patterns.
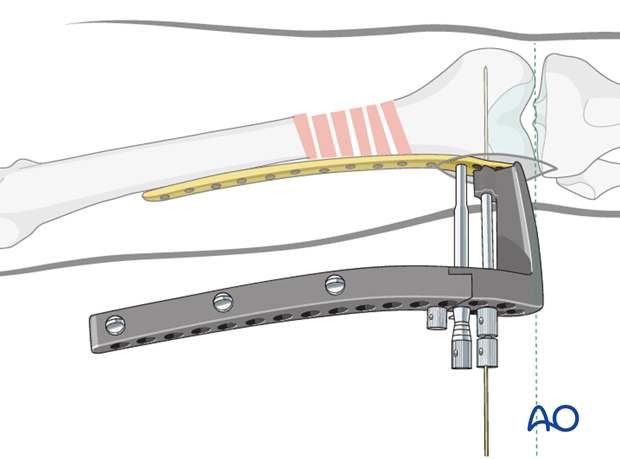
7. Inserting the proximal connecting bolt
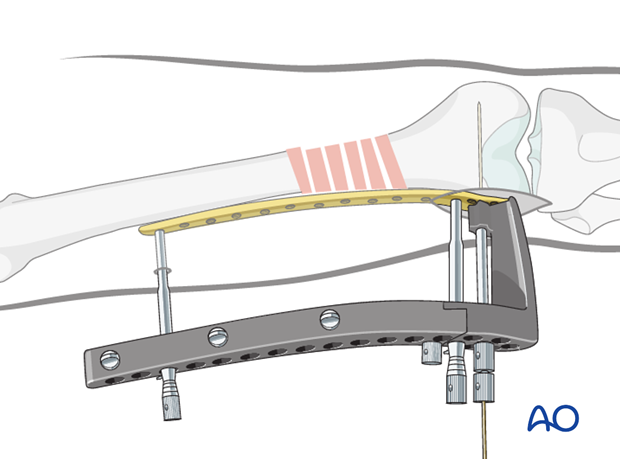
Through an incision over the most proximal plate hole, a connecting bolt is screwed through the insertion handle into the plate.
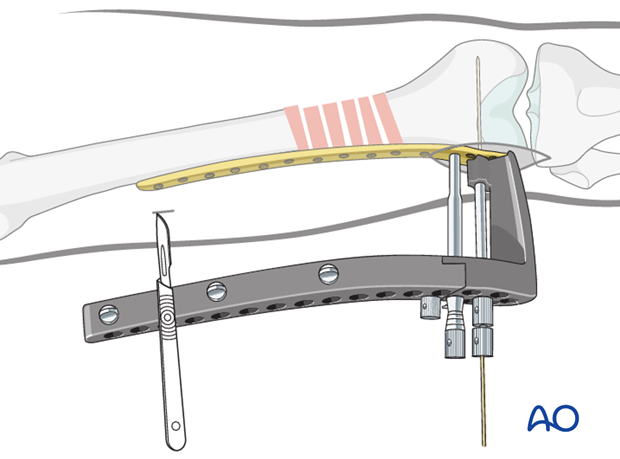
This creates a fixed parallelogram that facilitates further manipulation of the plate.
8. Preliminary LCP or LISS fixation
Position on the proximal femur
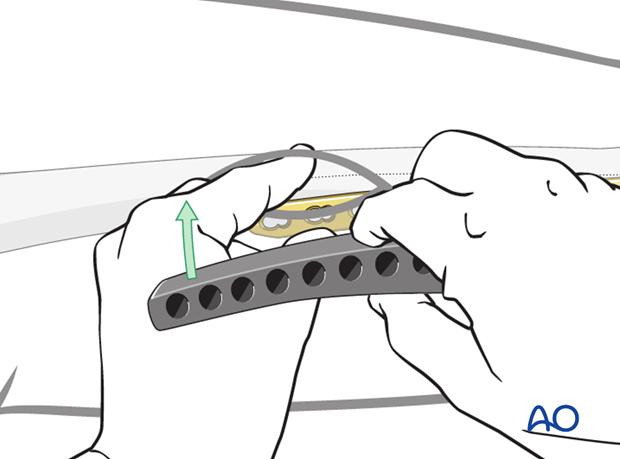
It is very important to confirm the correct plate position proximally. Especially in the minimal invasive technique, this can be challenging. Even the use of an image intensifier does not guarantee an optimal position.
To overcome this problem, the proximal incision is enlarged, and the correct plate position is palpated with the index finger. The finger is placed on the anterior aspect of the femur, and the upper rim of the plate is brought into contact with the volar aspect of the finger.
Proximal guide wire insertion
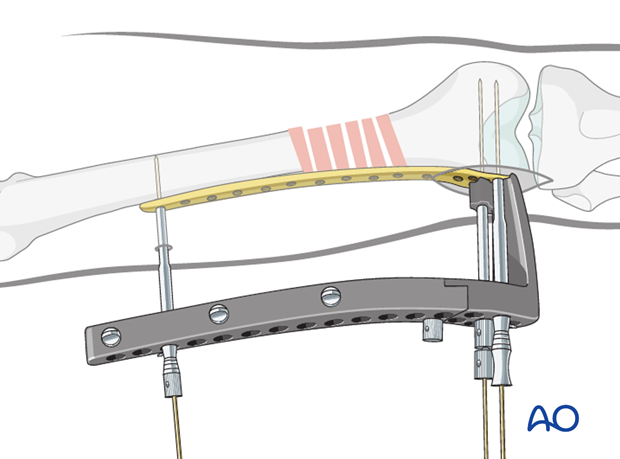
If the length and rotation of the fracture fragments are correct, the proximal guide wire can be inserted after it has been verified that the fixator is on the midlateral aspect of the femur.
It is extremely important to establish correct placement of the guide wire, to ensure proper proximal insertion of the monocortical locking-head screws. After the proper length and rotation are assured, and appropriate positioning of the proximal portion of the plate on the midlateral aspect of the femur has been established, a proximal guide wire is inserted through the sleeve. It is still possible at this point to correct the sagittal plane alignment, as noted below. Small corrections of the adduction of the proximal fragment or of the varus/valgus alignment of the distal femoral condyle are possible.
Once the reduction has been successfully completed and the LCP or LISS plate has been positioned correctly, the locking-head screws can be inserted.
9. Screw insertion in the distal fragment
Length of screws
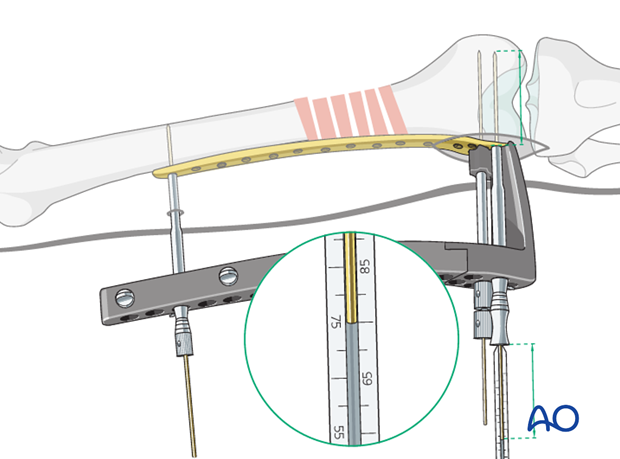
The appropriate screw length can be determined by using a 280 mm long guide wire and an indirect measuring device, or with the help of the preoperative planning template.
Screw insertion
The screws are inserted through the guide sleeves, which are passed through the aiming device, into the plate hole.
For the final locking of the screws, the use of the torque-limited screw driver is necessary.
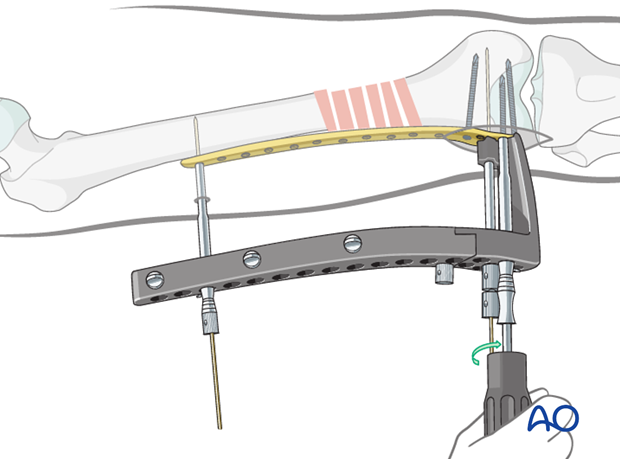
10. Screw insertion into the proximal fragment
Reduction of the proximal femoral shaft with LHS fixation
With the help of the pull reduction instrument (or a co-linear clamp), the desired position of the shaft, in relation to the plate, is secured. This is an important step because otherwise some displacement may occur during the insertion of self-drilling / self-tapping screws (note: this instrument has a 4.0 mm diameter which still allows for the insertion of a 5.0 mm locking screw into the same hole later on).
A syringe, filled with saline, can be attached to the drill sleeve to provide cooling during the bone drilling procedure.
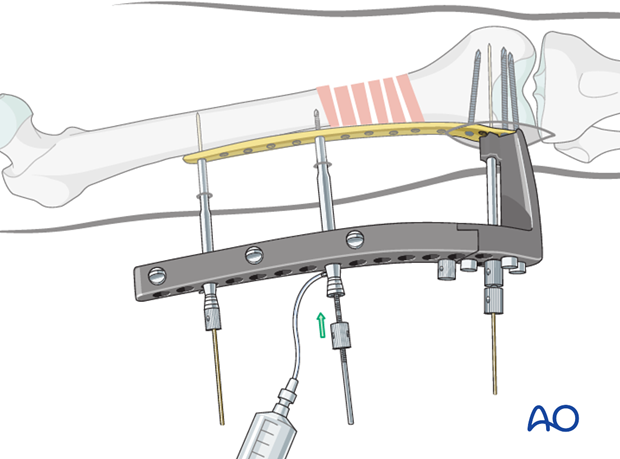
By tightening the bolt of the pull reduction instrument, the shaft is drawn towards the plate.
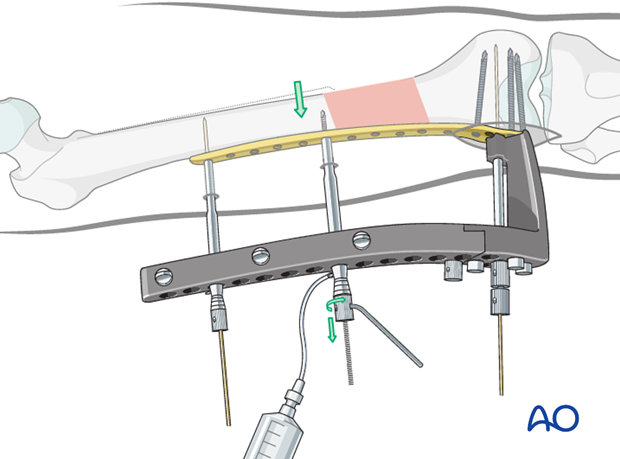
11. Additional screw insertion
Screw placement
Additional locking-head screws (LHS) are subsequently inserted both proximally and distally. In general, a total of five proximal and five distal LHS are placed for the LISS or 4 bicortical screws with the LCP. In case of severe osteoporosis, six proximal and six distal LHS can be used. Bicortical self-tapping LHS are recommended for shaft fixation in severe osteoporosis.
In simple fracture types, 2-3 plate holes should be left unused over the fracture zone to avoid high stress concentration of the implant.
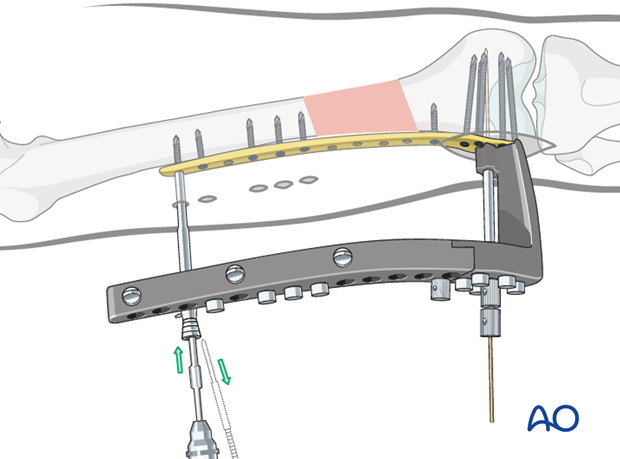
Final screw insertion
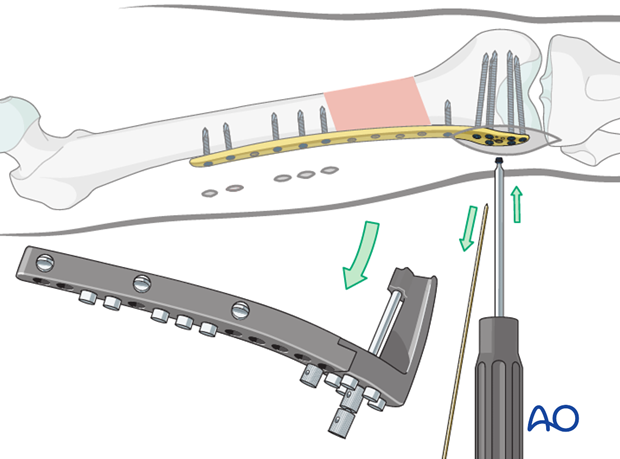
After detachment of the insertion device, a final screw can be inserted into the distal fragment through the central hole in the distal portion of the plate.
12. Wound closure
All wounds are irrigated copiously. The iliotibial tract is closed using absorbable sutures. The skin and subcutaneous tissue are closed in the routine manner.

13. Aftercare
Compartment syndrome and nerve injury
Close monitoring of the femoral muscle compartments should be carried out especially during the first 48 hours, in order to rule out compartment syndrome.
Postoperative assessment
In all cases in which radiological control has not been used during the procedure, a check x-ray to determine the correct placement of the implant and fracture reduction should be taken within 24 hours.
Functional treatment
Unless there are other injuries or complications, mobilization may be started on postoperative day 1. Static quadriceps exercises with passive range of motion of the knee should be encouraged. If a continuous passive motion device is used, this must be discontinued at regular intervals for the essential static muscle exercises. Afterwards special emphasis should be placed on active knee and hip movement.
Weight bearing
Full weight bearing may be performed with crutches or a walker.
Follow-up
Wound healing should be assessed regularly within the first two weeks. Subsequently a 6 and 12 week clinical and radiological follow-up is usually made. A longer period may be required if the fracture healing is delayed.
Implant removal
Implant removal is not mandatory and should be discussed with the patient, if there are implant-related symptoms after consolidated fracture healing.
14. Case
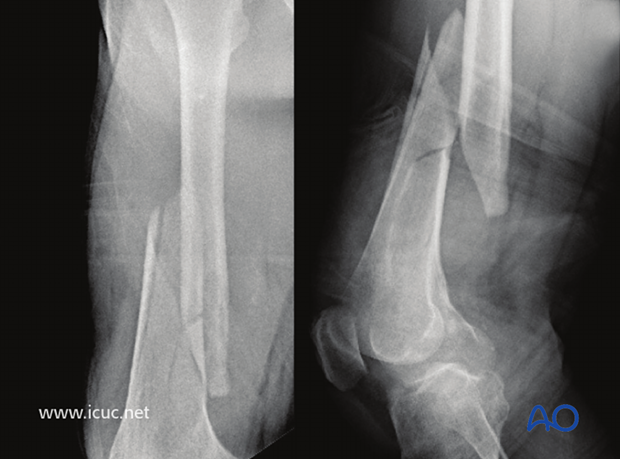
Preoperative X-ray of a closed wedge fracture in the distal third of the proximal femur in a 70-year old male.
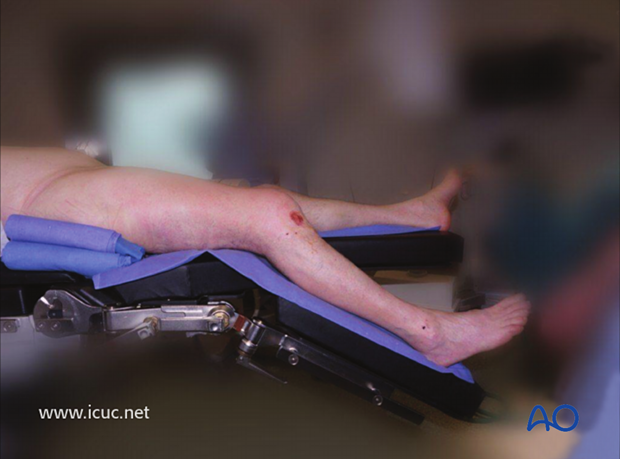
The patient was positioned supine with the knee on the affected leg slightly flexed.
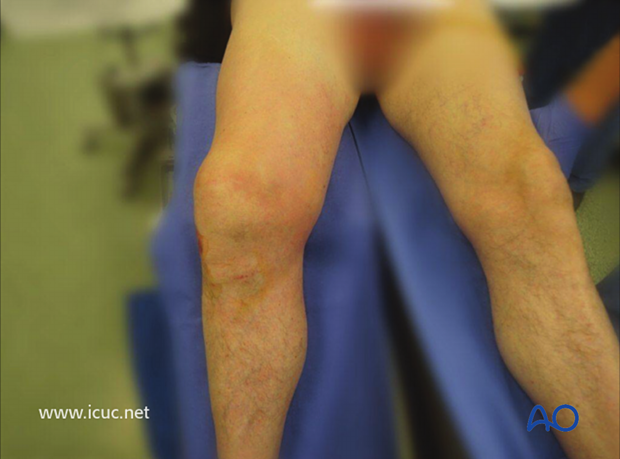
Note the preoperative swelling and shortening of the femoral shaft.
An appropriate sized LISS plate is selected. It can be helpful to confirm the size using the image intensifier.
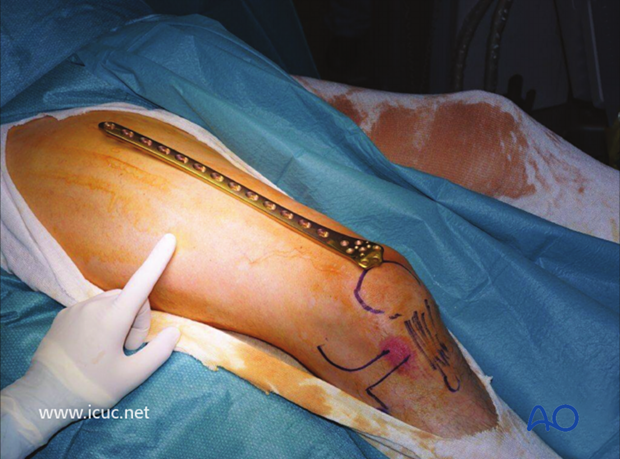
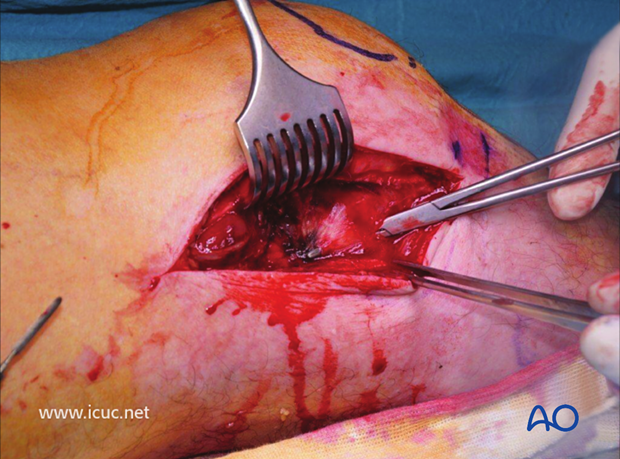
A lateral incision is made over the distal femur.
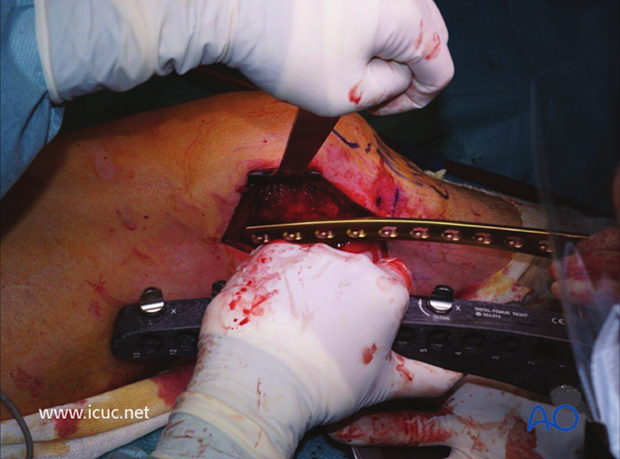
The LISS insertion guide is connected, the LISS plate is introduced, and passed from distal to proximal.
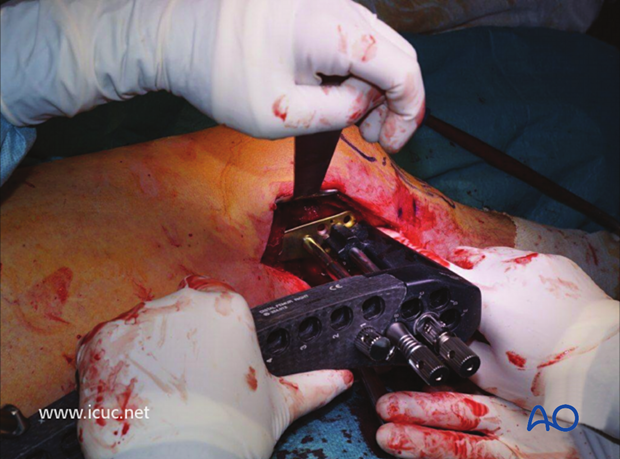
The distal end of the plate is maneuvered into the correct position over the distal femur.
Fluoroscopic image demonstrates that the implant is perpendicular to distal femur with the wire parallel to distal joint. The plate is in good contact with the distal femur.
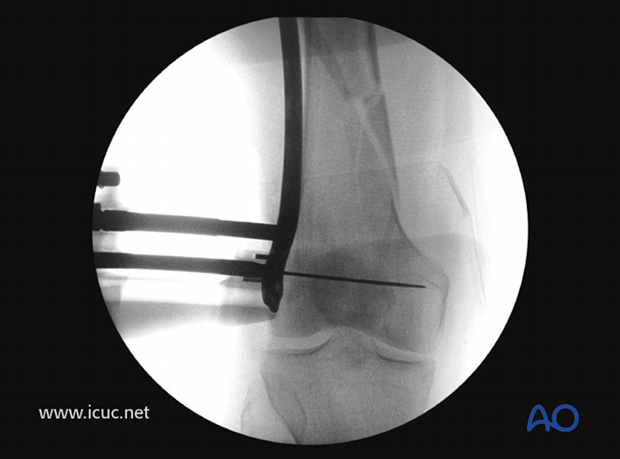
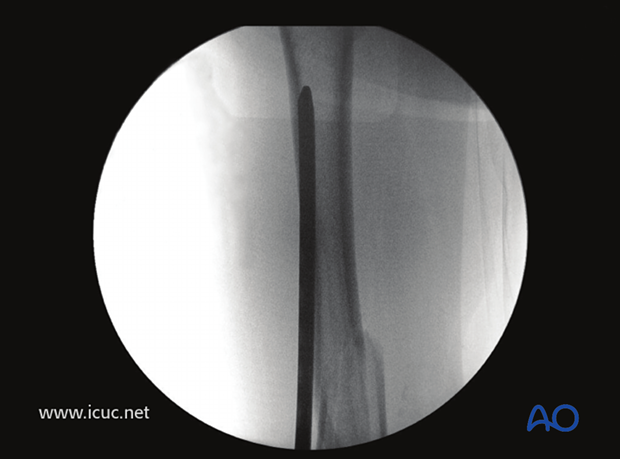
The proximal image shows that the implant is long enough for proximal fixation.
The proximal end of the plate is lying over the front of the femoral shaft. This should be corrected before the distal end of the plate is fixed to the distal femur.
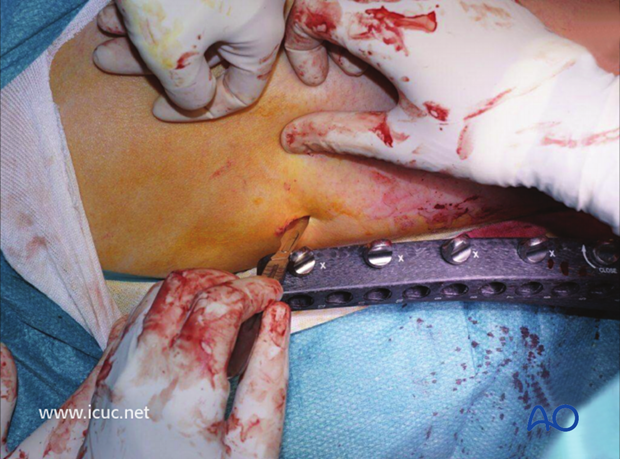
A proximal incision is made to ensure the proximal end of the plate is correctly positioned on the lateral side of the femoral shaft.
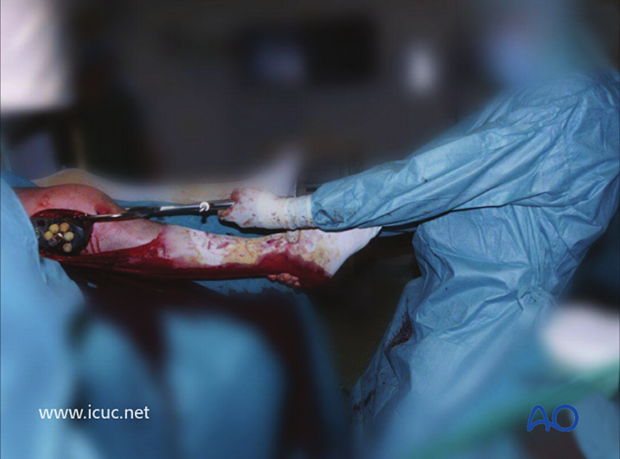
The fracture was reduced using manual traction.
Distal fixation was achieved using at least 5 locking head screws.
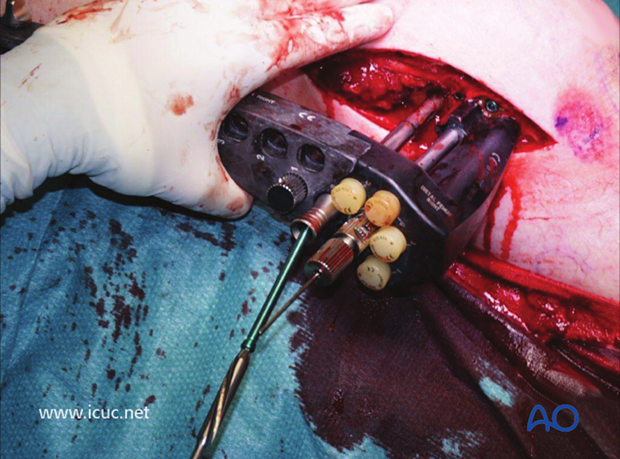
Image showing distal fixation and traction applied such that fracture is reduced and brought to length before proximal fixation is secured.
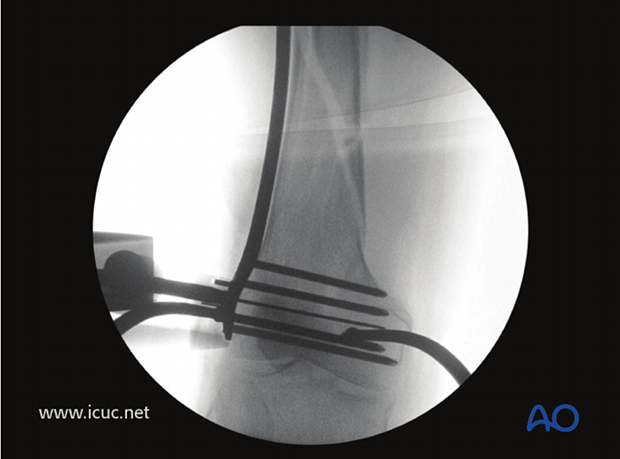
Intraoperative image immediately before proximal fixation and reduction of bone to plate.
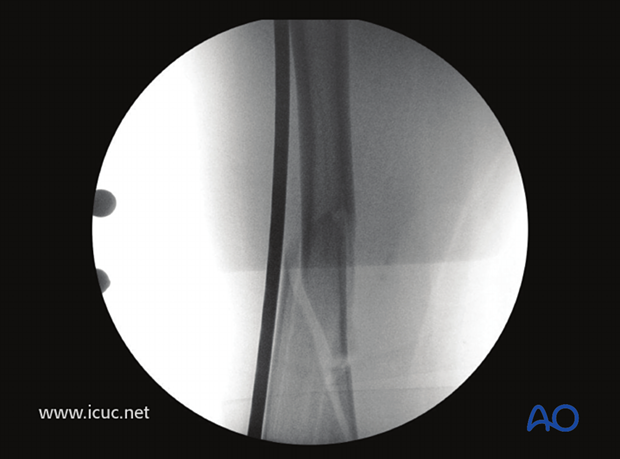
A K-wire was introduced through the jig into the most proximal hole, after confirming that it lay in the correct position on the lateral femoral shaft.
Screws were then inserted into the more distal holes using the guide.
Finally, the K-wire was removed and a screw was inserted into the most proximal hole.
Three bicortical screws are usually sufficient, and the hold is better if the screws are spread out. In this case, screws were placed in hole number 1, 4, and 6.
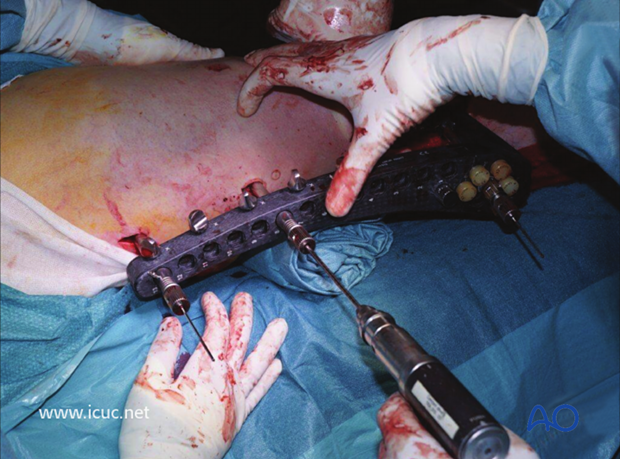
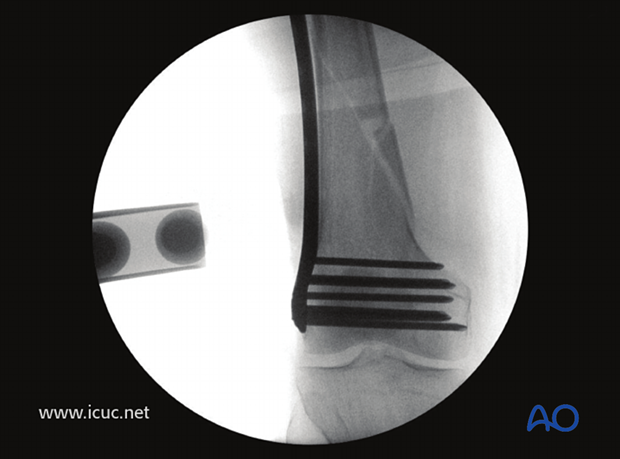
Intraoperative AP view of the final distal fixation.
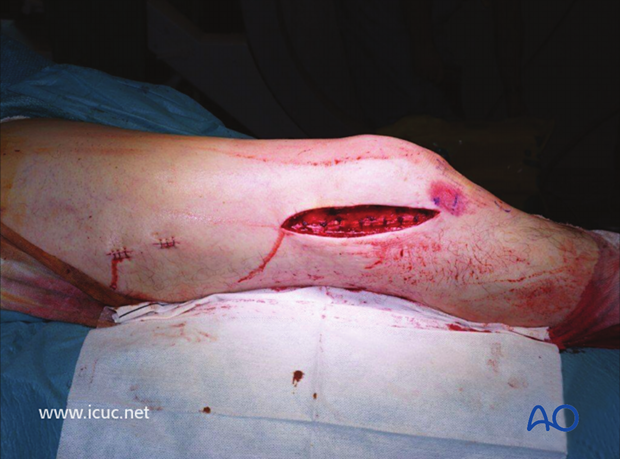
Incision before final closure.
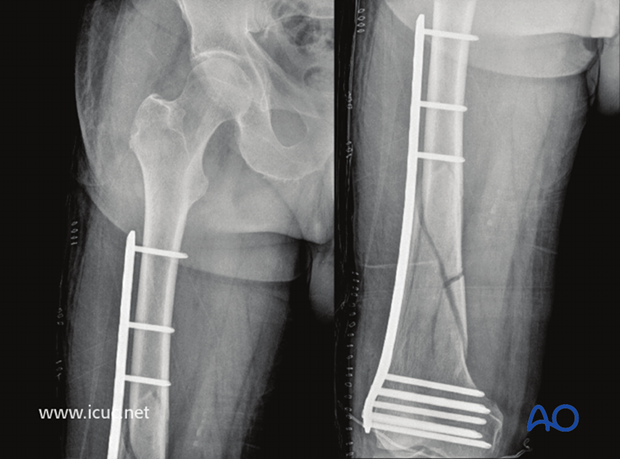
Final postoperative AP images.
The limb alignment is correct. The fracture is not anatomically reduced, but it has not been opened and the plate is in bridging mode, so this fracture should produce abundant callus and heal well.
The proximal plate is not in direct contact with the femoral shaft; this is not an issue as a good hold is still assured by the locking head screws.
Final postoperative images in lateral view. A small incision could have been made at the fracture site for placement of a reduction cerclage wire to enhance the final reduction. As the soft tissues and fracture hematoma were not disturbed, this was not necessary.
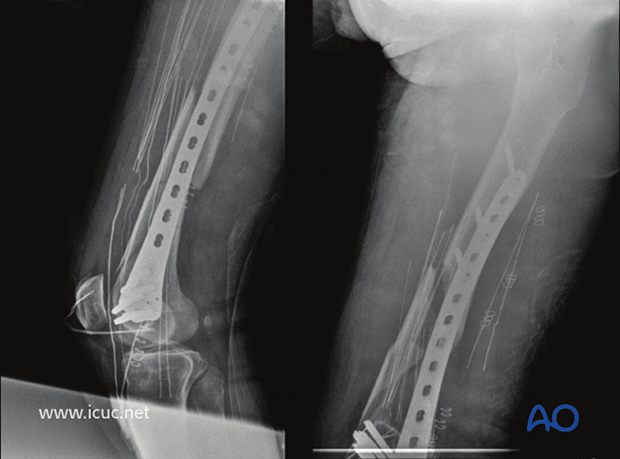
Final images of healed fracture in AP view at 55 weeks.
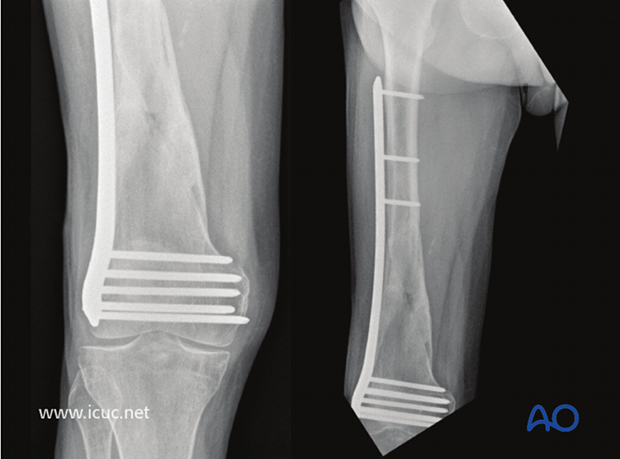
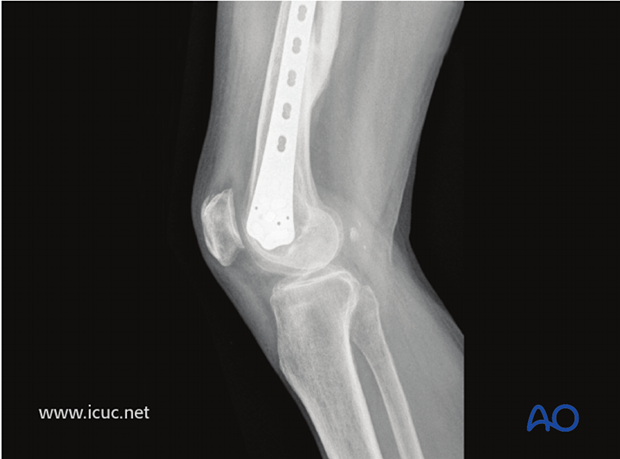
Final images of healed fracture in lateral view at 55 weeks.
