Hemiarthroplasty
1. General considerations
Hemiarthroplasty is an unlinked articulation.
Joint stability in this technique is reliant on anatomical repair of the native collateral ligaments around the implant.
Potential disadvantages of this technique are joint instability and wear of the native olecranon and radial head.
Recommended reading:
- Phadnis J, Watts AC, Bain GI. Elbow Hemiarthroplasty for the Management of Distal Humeral Fractures: Current Technique, Indications and Results. Shoulder Elbow. 2016;8(3):171–183.
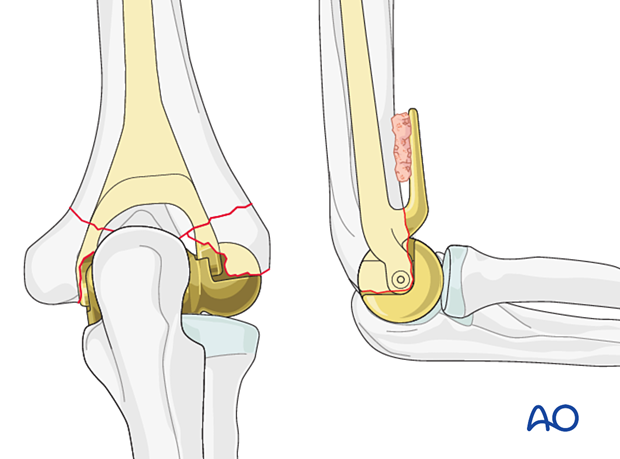
Implant type
Surgeons should refer to the manufacturer’s specific operative technique for their chosen implant for details. One system is illustrated in this procedure to demonstrate the generic techniques and principles.
Implant size
Compare implant size of the humeral trial spools with the patient’s native olecranon and radial head.
Sizing of the spool determines the stem size to be used.
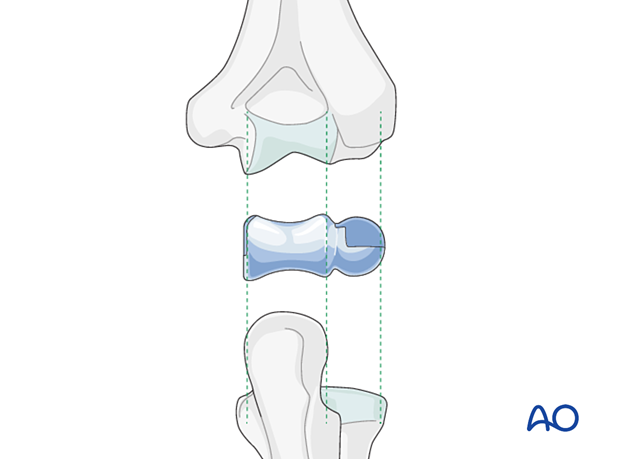
Note: Ulnar nerve at risk
2. Patient preparation and approaches
Patient positioning
The patient is positioned in lateral decubitus or supine position according to surgeon’s preference.
The whole extremity should be prepared and draped.
The use of a sterile tourniquet is optional.
Approaches
For arthroplasty, access is needed to the whole distal humerus.
For hemiarthroplasty, a triceps-sparing approach (ie, paratricipital and lateral paraolecranon) is recommended rather than a triceps-reflecting (triceps split or Bryan-Morrey) or transolecranon approach. Only access to the distal humerus is necessary. Therefore, a triceps-sparing approach is sufficient. In addition, division of the olecranon articular surface following an osteotomy may accelerate native ulnar wear in a hemiarthroplasty.
3. Humeral preparation
The correct implant length and rotation is essential for successful hemiarthroplasty as these are important for elbow joint stability.
Removal of fragments
Remove the fractured articular fragments.
For a hemiarthroplasty, the epicondylar fragments and their associated collateral ligaments must be preserved.
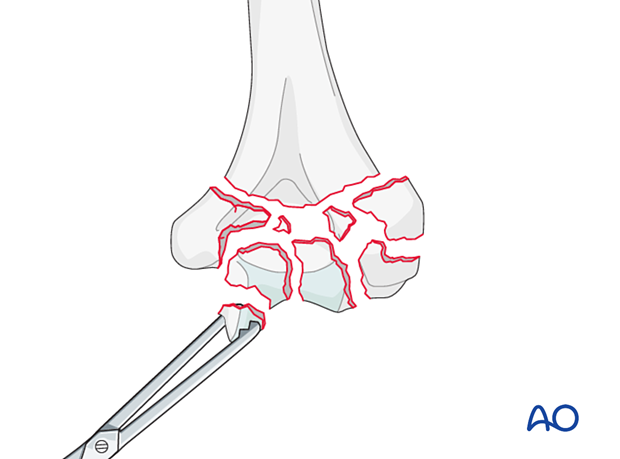
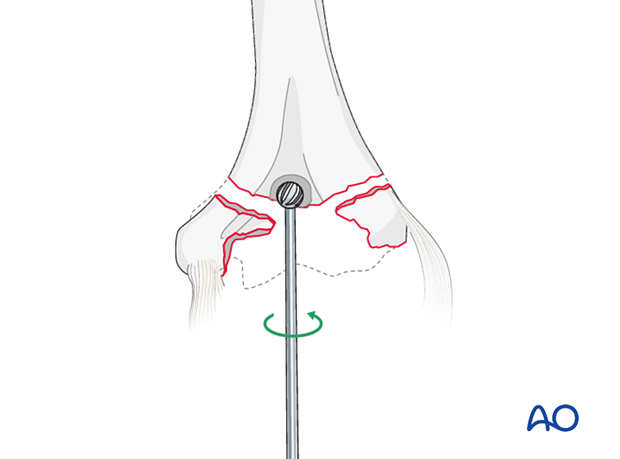
In almost all distal humeral fractures, the roof of the olecranon fossa remains in continuity with the humeral shaft regardless of fracture comminution.
This is the landmark for entry to the humeral canal.
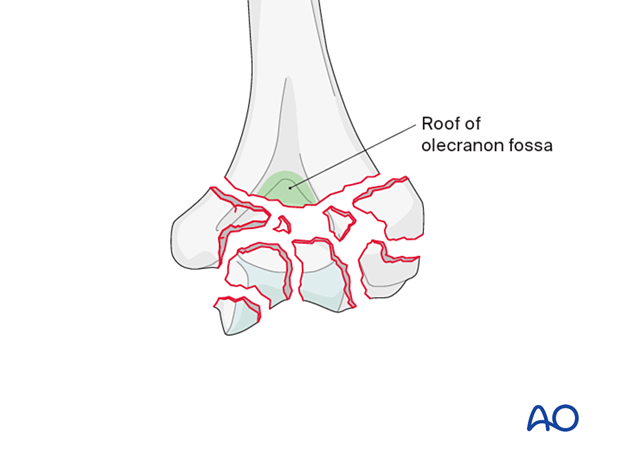
Opening the medullary canal
Open the olecranon fossa roof with a high-speed burr or bone nibbler and broach the humeral canal sequentially.
Alternatively, a guide wire and cannulated reamer may be used before broaching.
Implant length
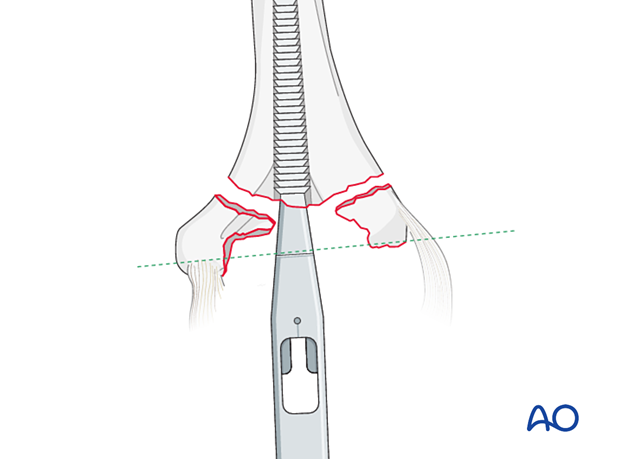
Broach up to the depth where the laser line on the broaching instrument is parallel to the flexion/extension axis of the humerus.
In fractures, the bony landmarks may not be intact, so the olecranon fossa roof should be used as a guide for depth and implant length.
Another way of assessing implant length is to provisionally reduce the fractured condyles around the shaft. The flexion/extension axis lies parallel to the inferior margin of the medial epicondyle.
Remove with a saw, bone nibbler, or rongeur, all remaining bony prominence that will hinder further preparation or proper implant insertion.
Implant rotation
To prepare for the fins of the humeral component, insert the gusset broach in correct rotation into the humerus until the laser line is level with the flexion/extension axis of the humerus.
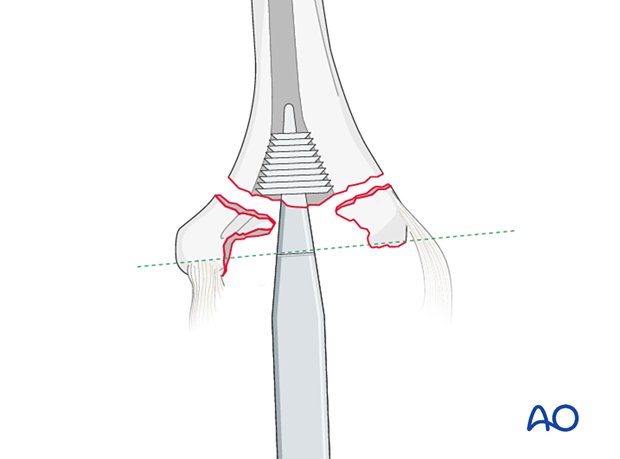
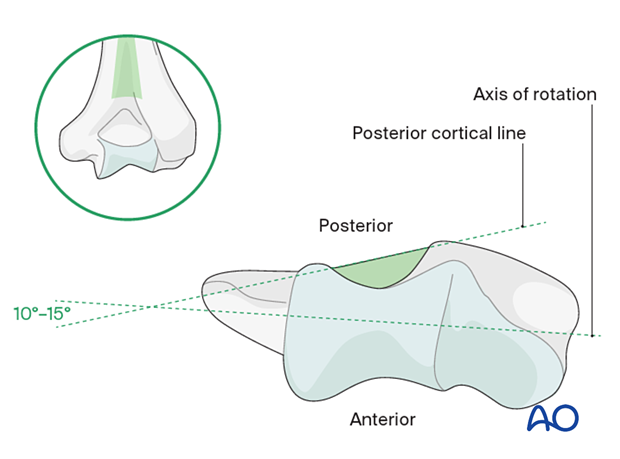
It is important to place the humeral component in the correct rotation. The implant rotation should be parallel to the epicondylar axis.
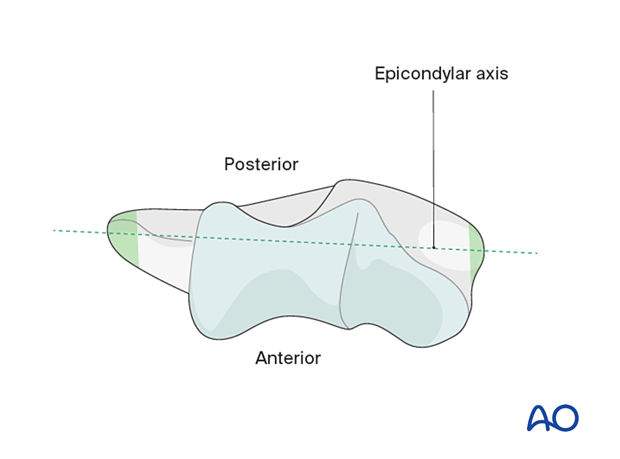
In a fracture, these bony landmarks may be disrupted. In this situation, rotation can be referenced from the flat surface of the intact humerus proximal to the olecranon fossa. The implant should be 10°–15° internally rotated to this landmark to match the correct native rotation.
Humeral trial and reduction
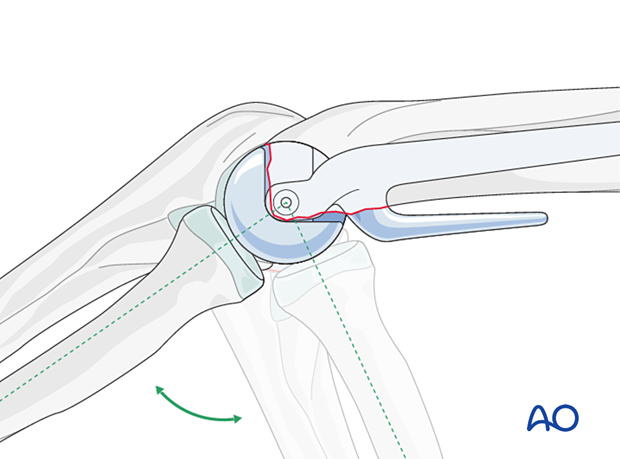
Insert the appropriately sized humeral trial and confirm satisfactory position.
Reduce the joint and confirm that the prosthesis tracks correctly with the native ulna and radial head in all positions of flexion and extension.
4. Preparation of collateral ligaments
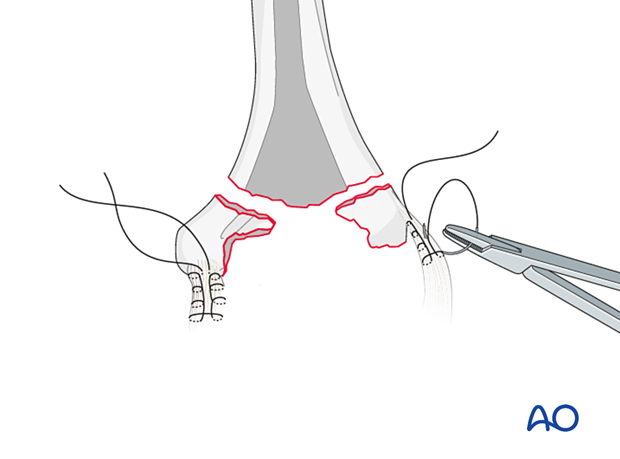
The fractured epicondyles and collateral ligaments should be whip-stitched with nonabsorbable high-strength sutures ready for repair through the prosthesis.
5. Implant insertion
Implant assembly
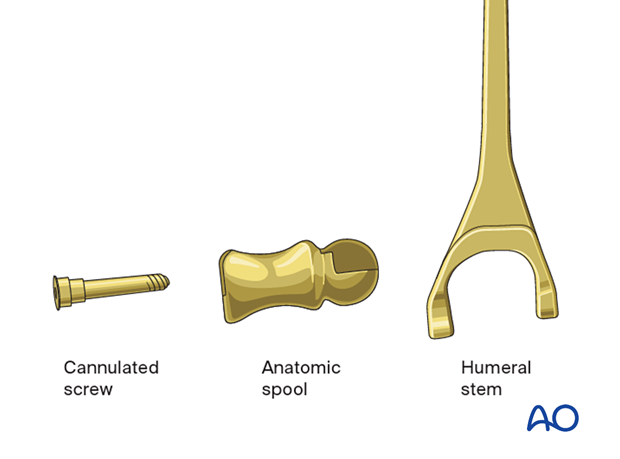
The hemiarthroplasty comprises three components:
- Humeral stem
- Anatomical humeral spool
- Cannulated screw connecting spool with stem
The screw lies in the flexion/extension axis of the implant. It is used to repair the collateral ligaments through the implant, which restores the flexion/extension axis of the elbow.
Cement technique and bone graft
A third-generation cementing technique should be used.
Insert low-viscosity cement in a retrograde fashion using a cement gun behind a cement restrictor.
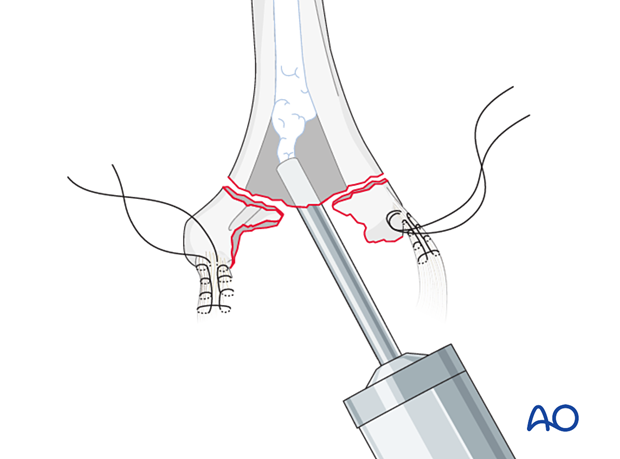
Implant insertion
Insert the implant and remove any excess cement.
Collateral ligament and condyle repair
The prepared collateral ligaments are then repaired through the implant.
Use a suture passer to retrieve the lateral collateral ligament sutures and pull them through the cannulated screw of the implant. Pass these sutures then through the medial ligament and common flexor origin.
Similarly, pass the medial collateral ligament sutures through the implant and the lateral collateral ligament and common extensor origin.
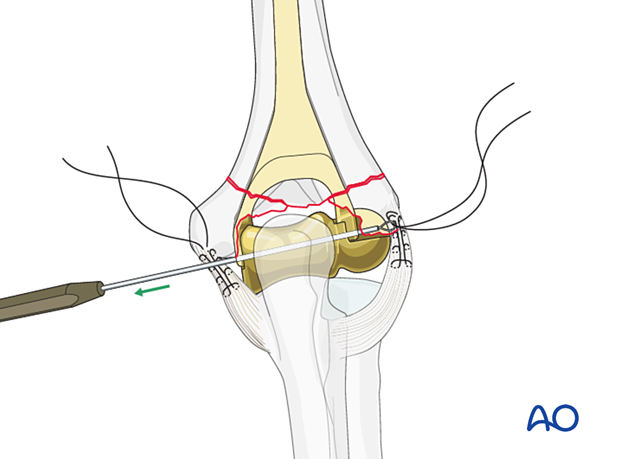
Reduce the condyles anatomically around the prosthesis using reduction forceps.
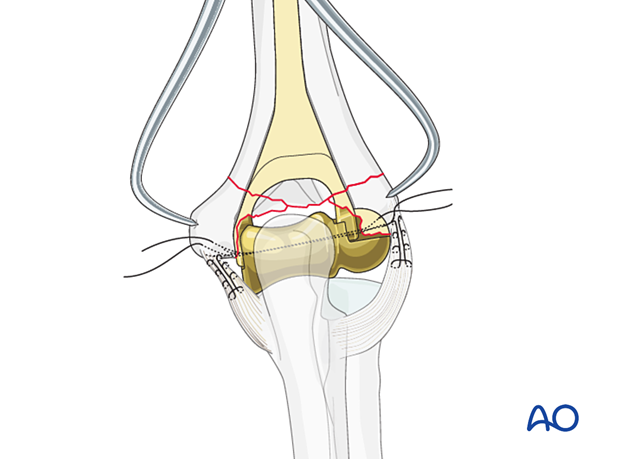
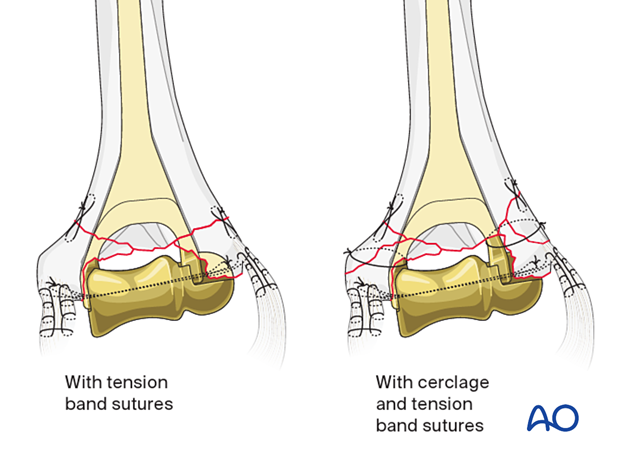
Tighten the collateral ligament sutures on either side of the implant and remove the reduction forceps.
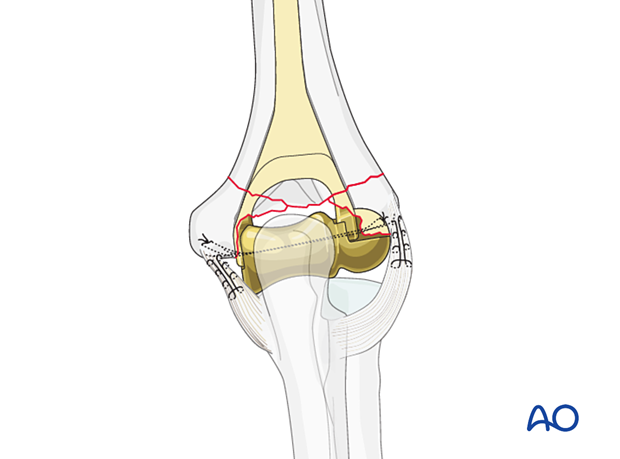
Supplementary cerclage and compression sutures are then placed around the condyles, around the implant, and through the humerus.
This form of fixation was referred to as a “Tension band suture fixation”. We now prefer the term “Compression sutures” because the tension band mechanism cannot be applied consistently to each component of the fracture fixation. An explanation of the limits of the Tension band mechanism/principle can be found here.
6. Supplementary plating of epicondyles
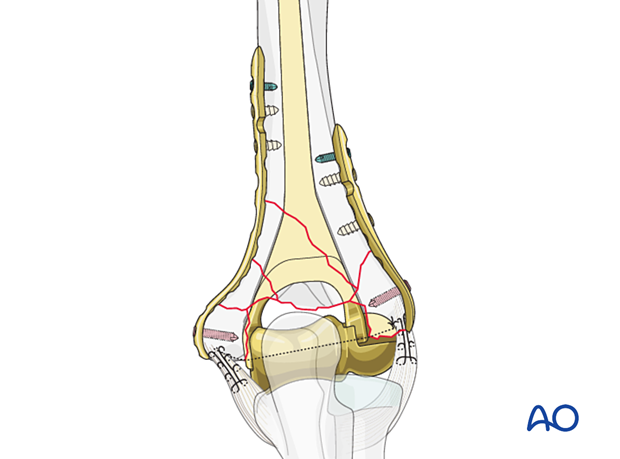
For fractures with significant proximal extension beyond the epicondyles, supplementary plating in conjunction with hemiarthroplasty can be used.
7. Confirmation of joint stability
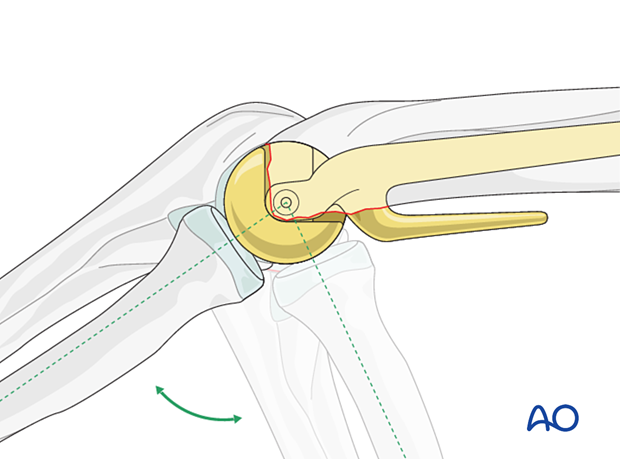
Confirm with image intensifier a congruent joint reduction by applying varus, valgus, and rotational stresses to the joint throughout a full range of motion.
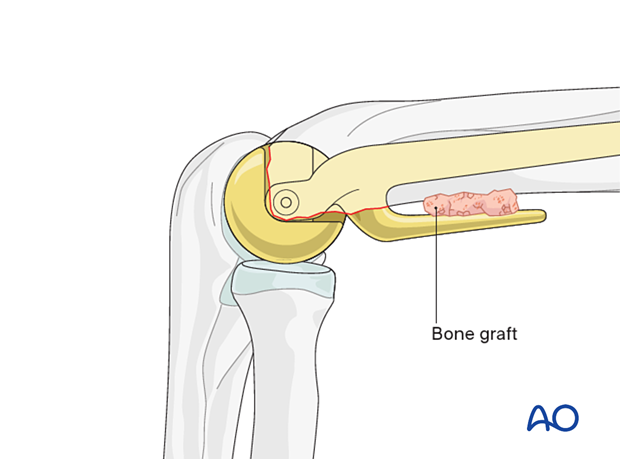
Fashion a wedge-shaped cancellous bone graft from the resected articular fragments and insert it between the anterior humeral cortex and the anterior flange of the implant.
8. Closure
The wound is closed in layers.
The ulnar nerve should be managed according to surgeon’s preference but should be free of tension or impingement against any metallic or prominent bony surface.
9. Aftercare
Immediate aftercare
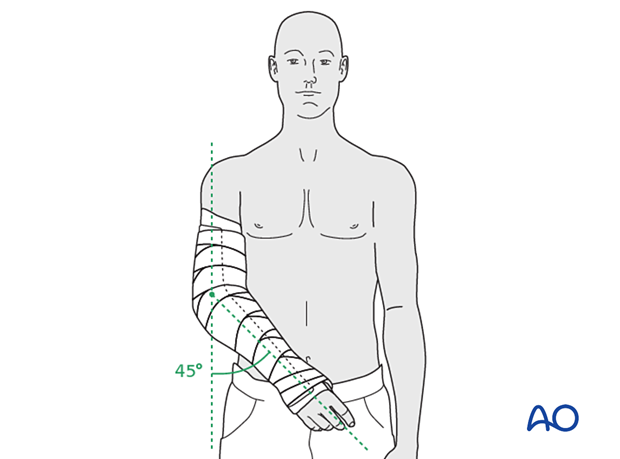
If the soft tissues are vulnerable, it is recommended to rest the elbow in semiextension using a splint for up to 10 days.
Rehabilitation and precautions
No restrictions regarding active extension or range of motion are required if a triceps-sparing approach has been used.
It is recommended that patients avoid lifelong heavy or repetitive use of the operated arm as much as possible to minimize the risk of native radial or ulnar wear and stem loosening.


