Lag screw with neutralization plate
1. Principles
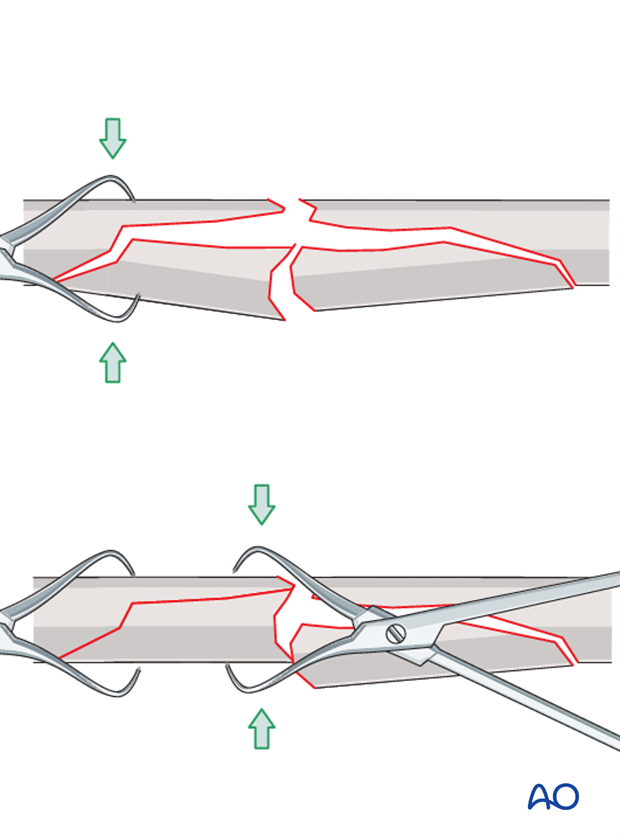
Anatomical reconstruction
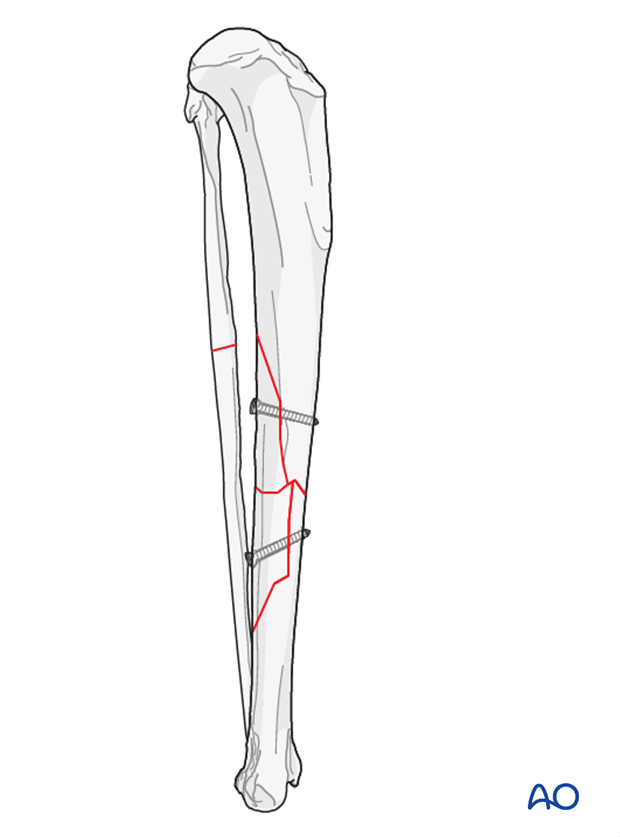
Reducing the free fragment to one of the main bone segments is recommended. This transforms the 3-piece fracture into a simpler 2-piece fracture that allows for an easier anatomical fracture reduction.
2. Positioning and approach
This procedure is performed through the open craniomedial approach to the tibial shaft with the patient placed in either:
3. Surgical technique
Fixation of the fragment
The fragment is secured to one of the main bone segments with a screw in lag fashion.
Read more about lag screw fixation.
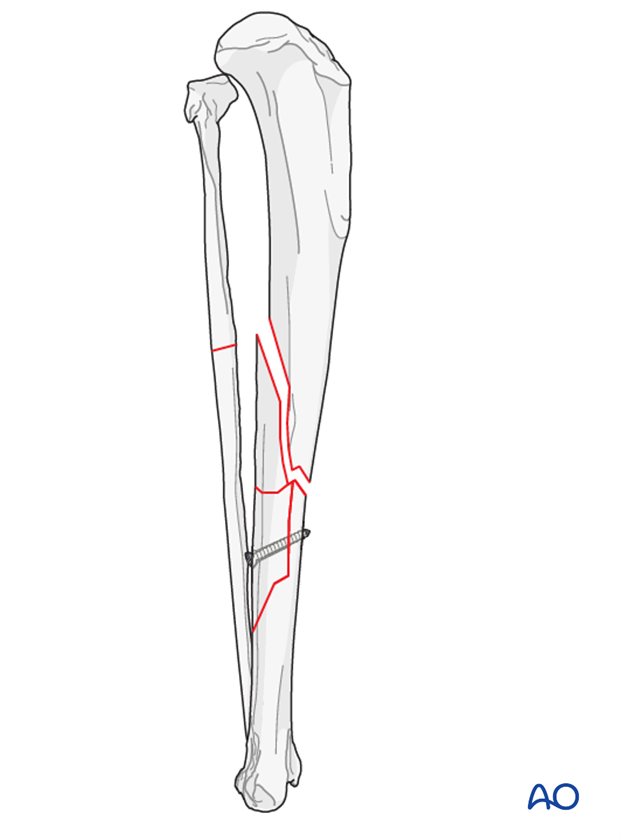
Reduction of the remaining fracture line
Bone-holding forceps are applied to the proximal and distal major fragments for distraction.
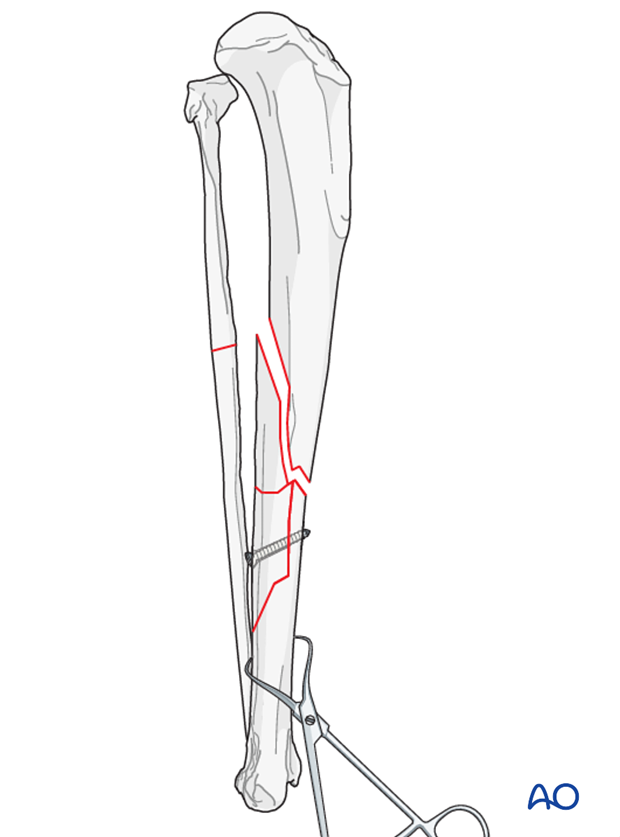
In an oblique fracture pattern, the bones are slid along the fracture line into perfect anatomical reduction with the help of one or two pointed reduction forceps placed across the fracture line.
Note: Care must be taken not to damage the secured fragment during the reduction manoeuvre.
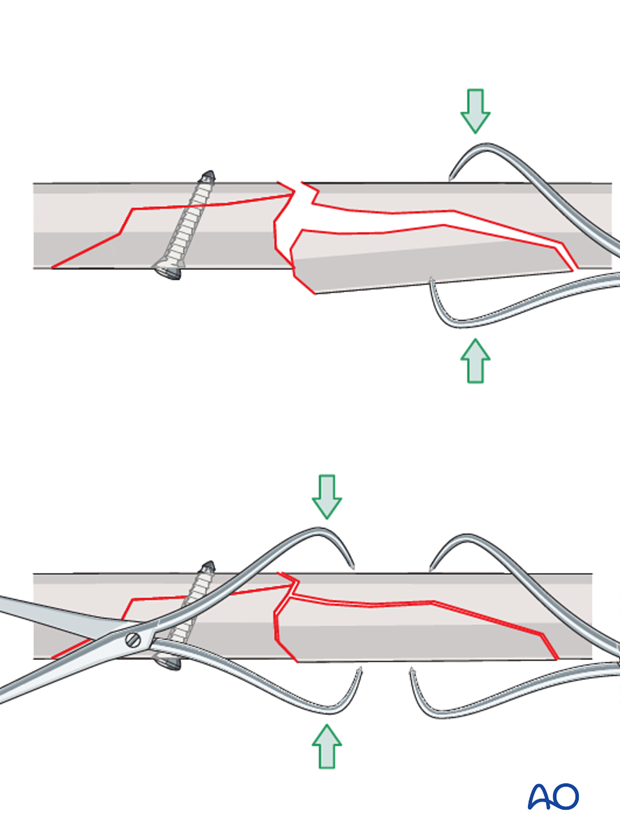
A second screw in lag fashion completes the reconstruction of the bony column.
Neutralization plating
The plate is contoured, applied and preliminary secured to the bone with bone or plate-holding clamps.
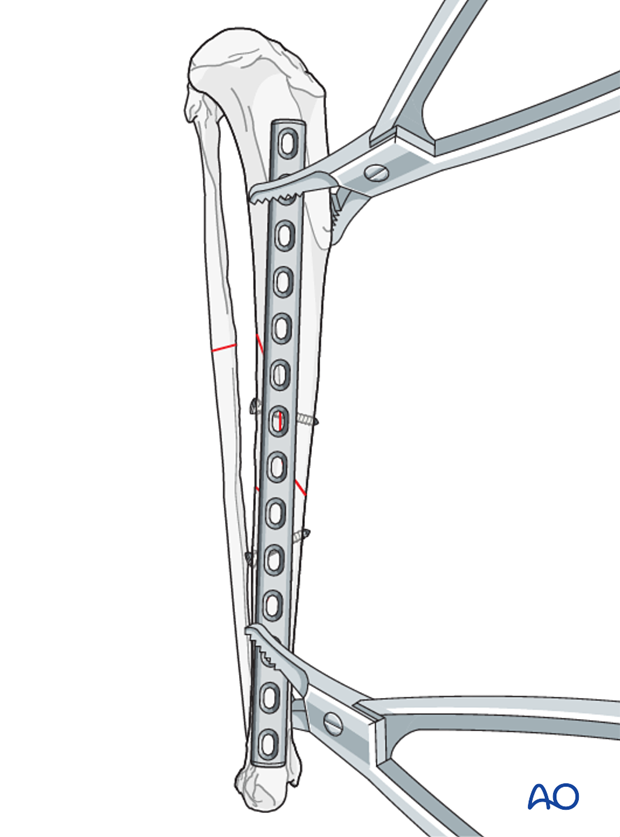
If a locking compression plate is used, temporary stabilization can be achieved with temporary K-wires.
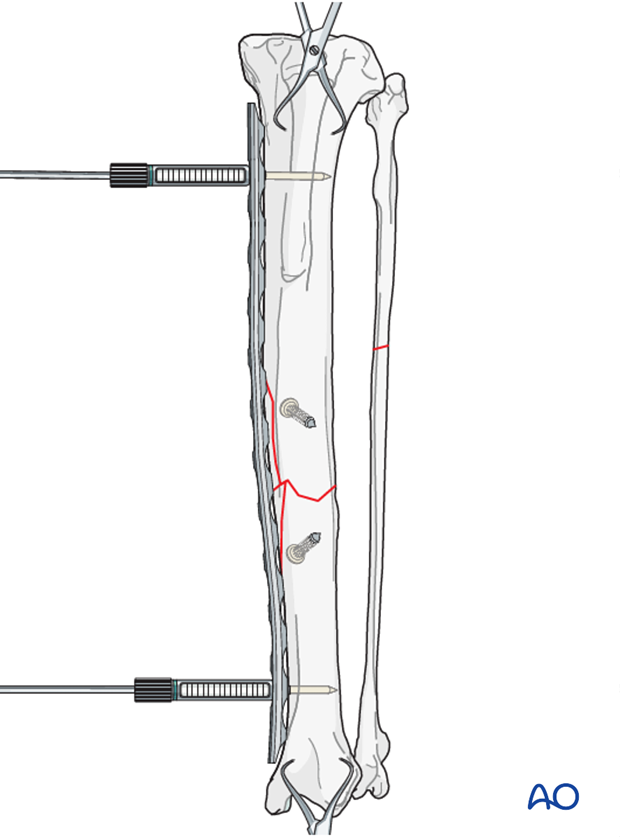
Plate selection
The length of the plate should allow for placement of at least three screws in each the proximal and distal major fragment. To increase stability of the construct, a plate that spans 75% of the tibia length is recommended.
The plate must be meticulously contoured to the bone in order to avoid displacement of the fragments and loss of reduction of the fracture.
Precontouring of the plate to radiographs of the normal contralateral limb is an option. It can reduce operating time and ensure that the S-shaped curve of the tibia is reproduced, thus avoiding valgus deformities.
Read more about plate preparation.
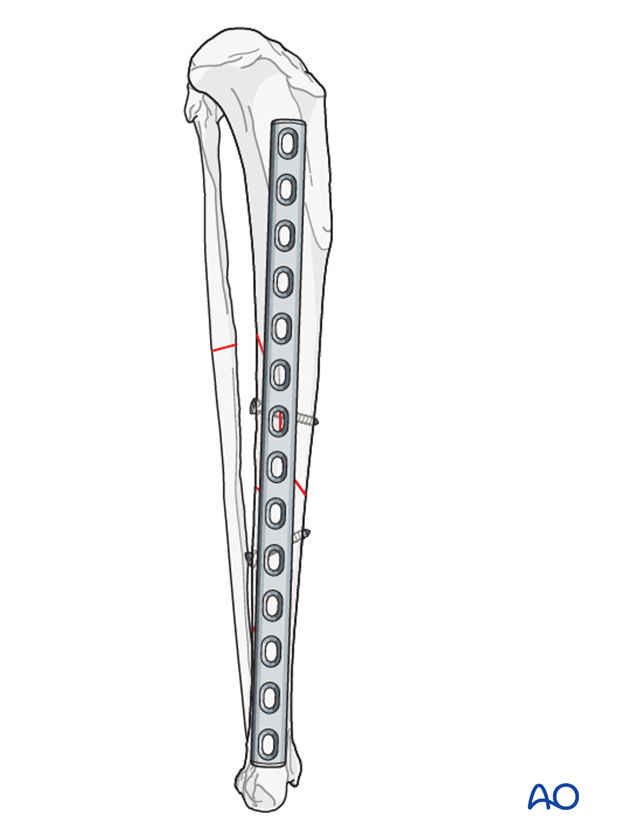
Plate application
The plate is secured with at least three bicortical screws in each of the major fragments. Avoid screw insertion close or at the level of the fracture line. All screws are placed in a neutral mode.
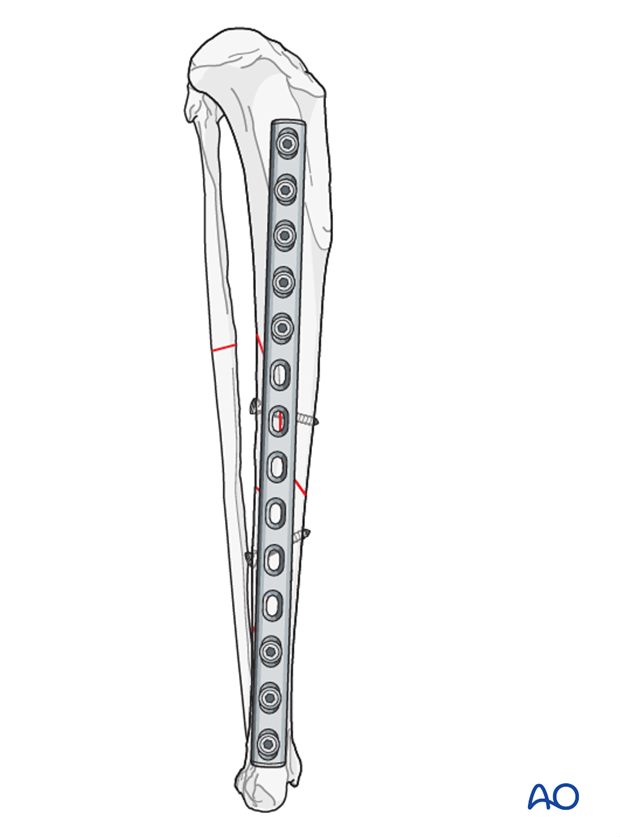
Fixation with a locking compression plate
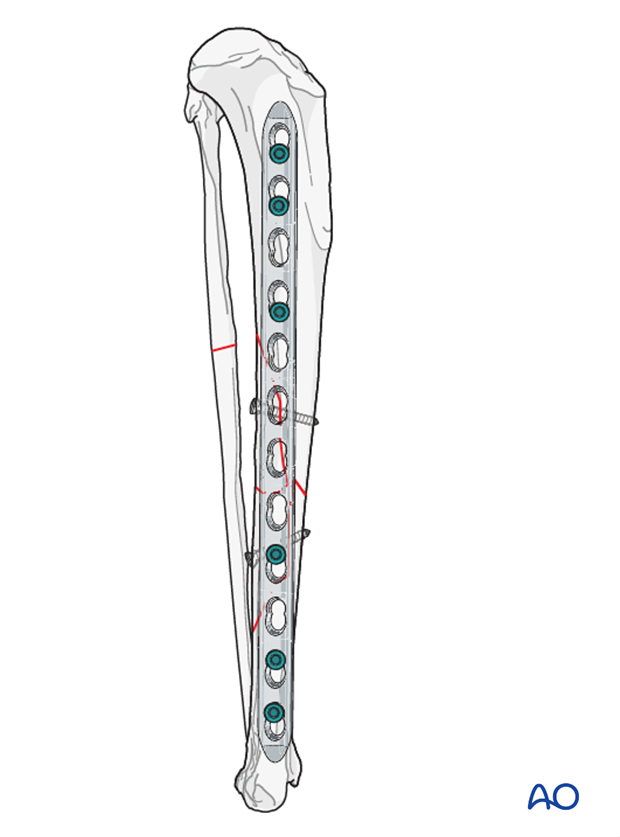
Locking plates lend themselves well to neutralization plating. Perfect contouring is not necessary and locking screws provide superior fixation to the bone. If a locking compression plate is used, two to three locking screws per main fragment are needed
Note: If a combination of cortex and locking screws is used, the plate must be anatomically contoured at the sites of non-locking screw insertion. The non-locking screws must be inserted and tightened before any locking screws are placed.
4. Aftercare
Phase 1: 1-3 day after surgery
The aim is to reduce the edema, inflammation and pain and to protect the surgical wound. A compressive bandage or modified Robert Jones bandage can be used. Integrative medical therapies, anti-inflammatory medications (note in the cat that many are toxic; only use drugs labeled for cats) and analgesics are recommended. In most cases, 10-20 minutes of ice therapy is recommended every 8 hours, but maybe challenging in cats.
Phase 2: 4-10 days after surgery
The aim is to resolve the hematoma, edema and control pain, and prevent muscle contracture. Analgesic medications may still be needed. Anti-inflammatory medications used in the cat are not labeled for continued use after a few days and should be avoided. Rehabilitation and integrative medical therapies can be used.
If the cat is not starting to use the limb within a few days after surgery, a careful evaluation is recommended.
10-14 days after surgery the sutures are removed.
Phase 3: 10 day-bone healing
Radiographic assessment is performed every 4-8 weeks until bone healing is confirmed.
Implant removal
More information about implant removal can be found here.


