

T-plate fixation
1. Indications
The goal of 23-A2 fracture treatment is anatomical reduction.
Bone plate fixation is the treatment of choice in all patients.
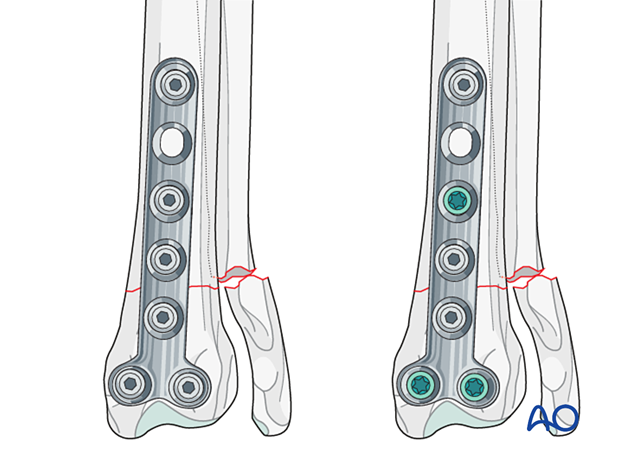
A contoured T-plate is applied on the cranial side of the distal radius and fixed first on the distal fragment and then on the proximal side. With the insertion of a push-pull device (for larger plates) or a drill guide and pin (for smaller plates), plate position and anatomical reduction are checked and adjusted if necessary.
There is a potential for compression with some T-plate designs.
2. Preparation and approach
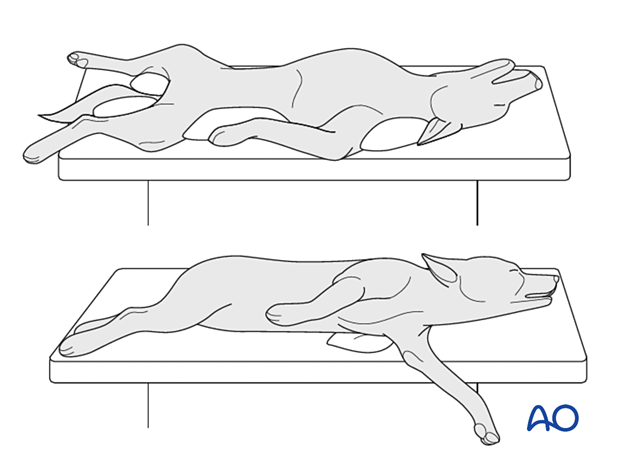
The patient can be in dorsal or lateral recumbency.
In lateral recumbency, the affected leg should be in contact with the table.
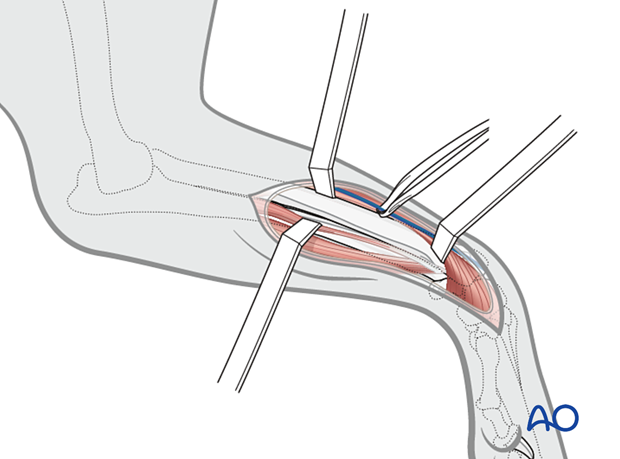
A craniomedial approach to the distal radius is performed.
3. Reduction
The goal is to achieve anatomical reduction.
The extensor carpi radialis tendon should be elevated and retracted laterally to create room for bone manipulation and plate fixation.
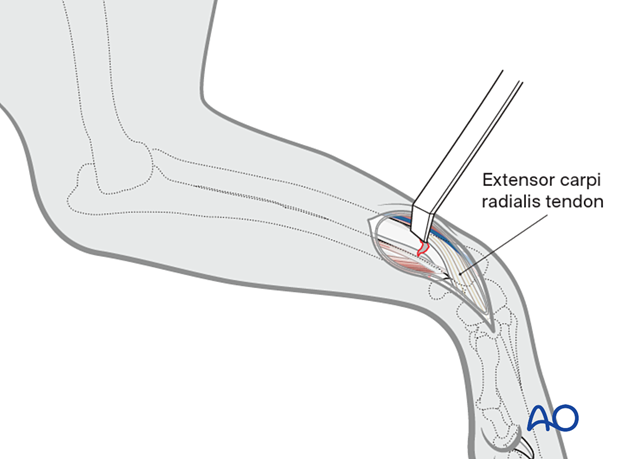
Bone-holding forceps are applied to the proximal and distal fragments for distraction. This is necessary to counteract the strong muscles surrounding the bone, particularly in large breed dogs.
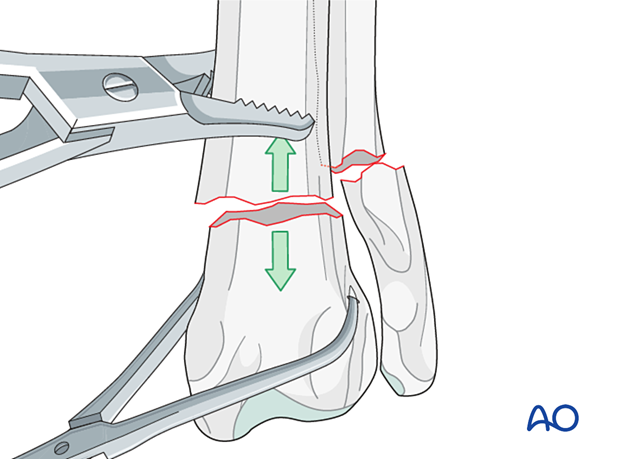
The fracture ends are elevated, toggled, and placed back into reduction.
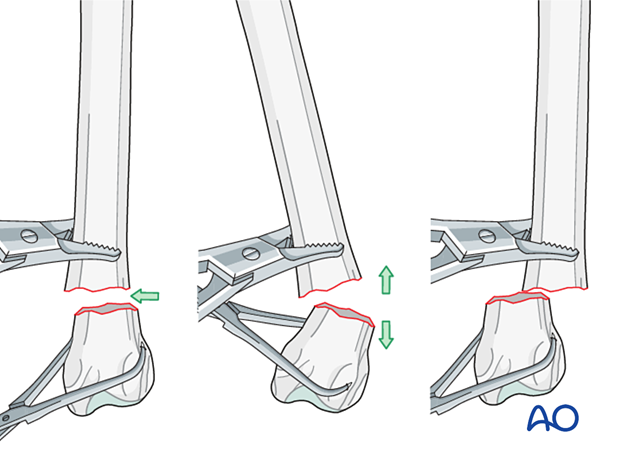
Alternatively, a Hohmann retractor or similar instrument can be used as a lever to align the fragments.
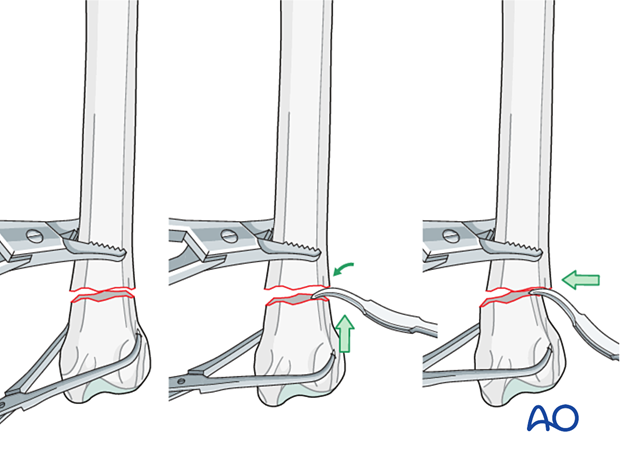
Option
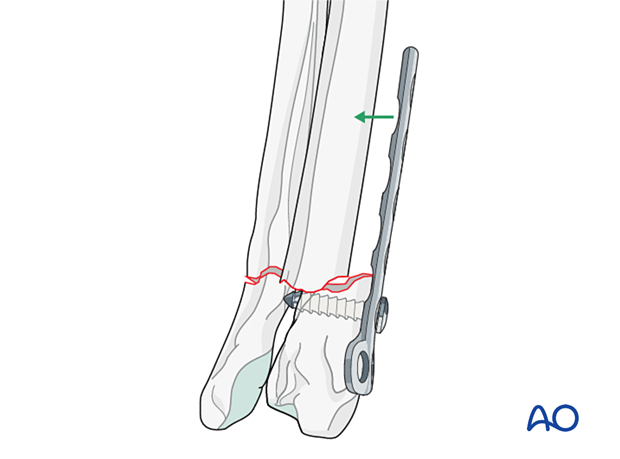
Alternatively, the plate can be fixed in the distal fragment first and then used to achieve reduction on the proximal fragment. In this case, the plate should be contoured before application.
4. Fixation
Plate selection
There are different formats of long and short T-plates, including locking, nonlocking, and hybrid locking plates.
The T-plate should have a minimum of two screws in the distal fragment and three screws in the proximal fragment.
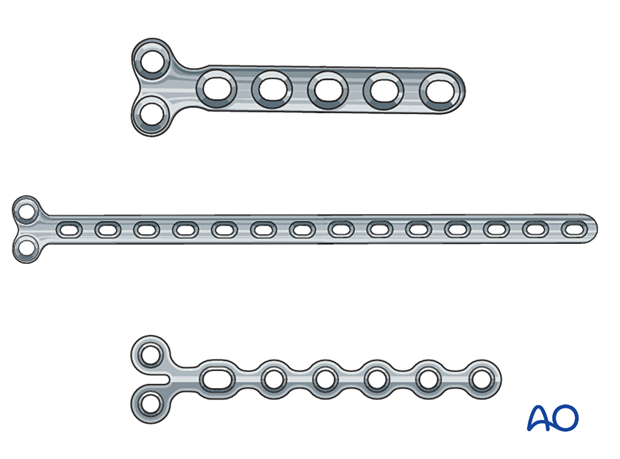
Plate contouring
A plate of appropriate size is contoured to fit the shape of the distal radius, taking into consideration the procurvatum. The degree of procurvatum can vary according to the breed and should be checked in the unaffected leg, if possible.
T-plate application – nonlocking plate
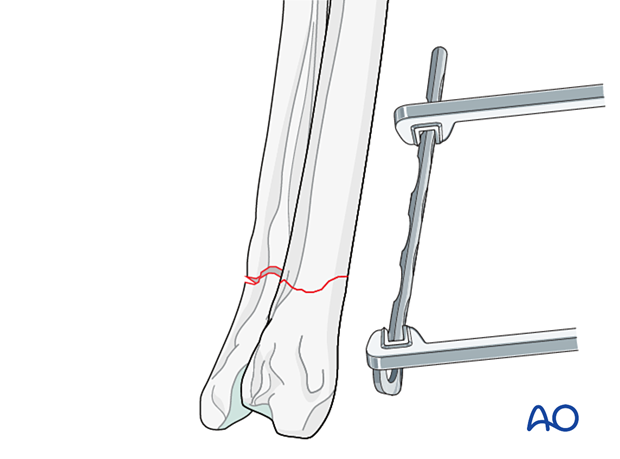
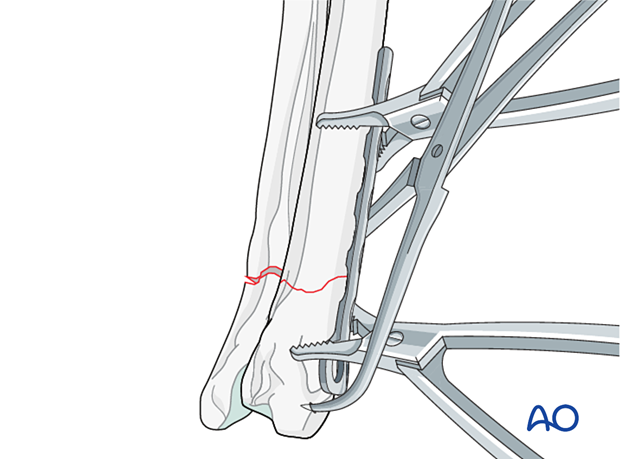
The contoured plate is applied on the cranial surface of the distal radius and secured with plate-holding forceps.
The anatomical reduction is carefully checked. If required, the alignment is corrected, and the plate-holding forceps are repositioned.
Screw insertion
Usually, the plate is secured to the distal fragment first.
The first cortical screw is inserted after drilling with a neutral guide through the plate. The screw is fully tightened.
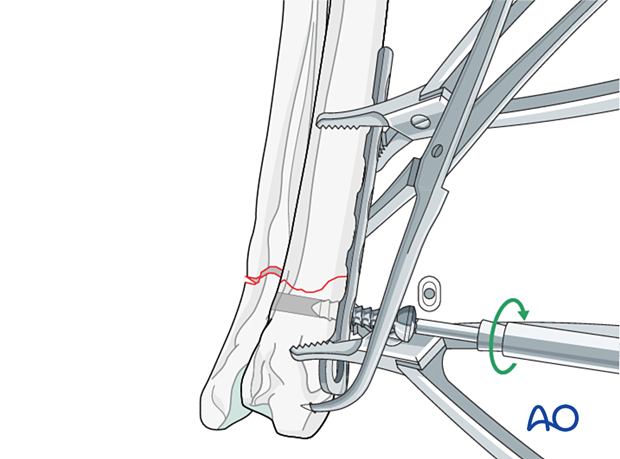
The second cortical screw is inserted in the proximal fragment using the drill guide in load position.
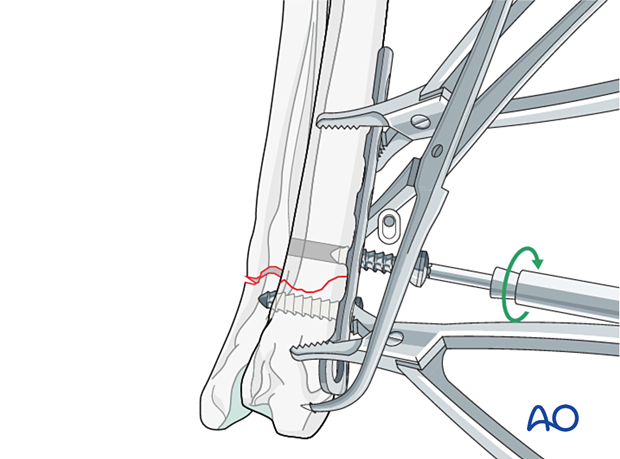
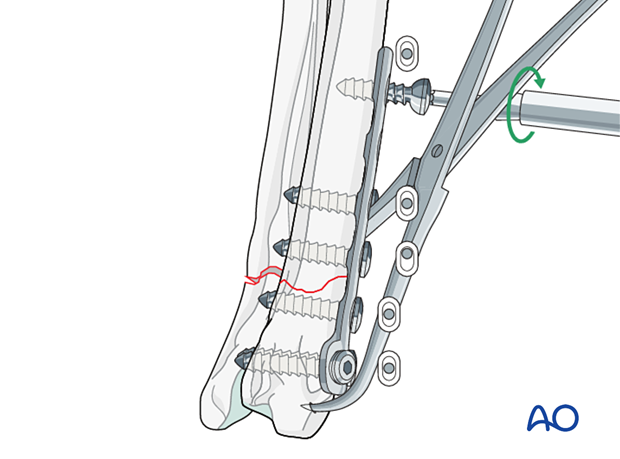
The remaining cortical screws are applied in neutral mode.
The plate is secured with at least two bicortical screws in the distal fragment and three in the proximal one. It is not necessary to fill all the available plate holes.
T-plate application – locking/hybrid plate
The contoured plate is applied on the cranial surface of the distal radius and secured with plate-holding forceps.
The anatomical reduction is carefully checked. If required, the alignment is corrected, and the plate-holding forceps are repositioned.
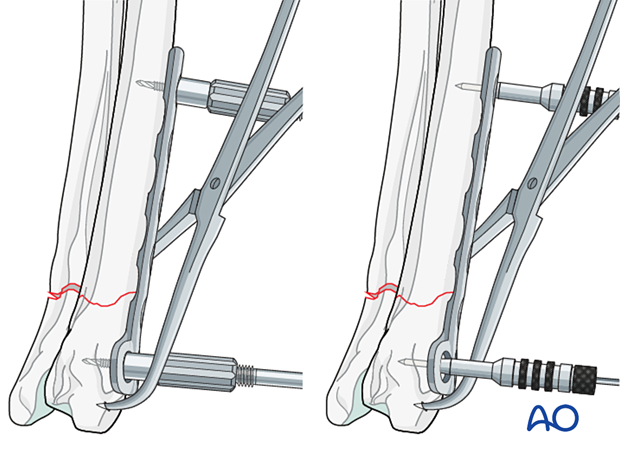
A push-pull device (for larger plates) or a drill guide and pin (for smaller plates) can be used instead of plate-holding forceps in the proximal and distal fragment to temporarily stabilize the plate if a locking compression plate is used.
With the temporary fixation in place, plate position and anatomical reduction are checked thoroughly and adjusted.
Alternatively, in smaller plates, a pin placed through the locking guide may be used to hold the plates in place.
Management of concurrent ulnar fractures
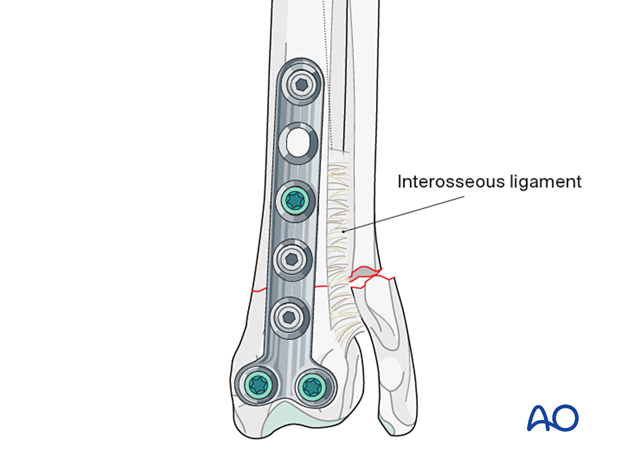
Fracture of the distal radius is usually associated with fracture of the distal ulna. Fixation of the radial fracture is sufficient in the majority of cases.
Fixation of ulnar fractures is required only in case of lateral collateral ligament instability or in giant breed dogs.
5. Aftercare
Phase 1: 1–3 days after surgery
The aim is to reduce edema, inflammation, and pain.
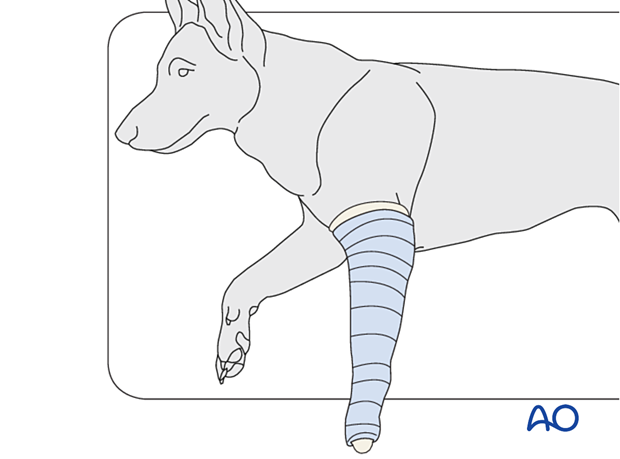
Following appropriate internal fixation, there should be no absolute need for external coaptation for a 23-A2 fracture. If bandaging is used to decrease edema and protect the surgical wound, it should be removed after 24–48 hours to reduce the risk of complications.
Integrative medical therapies, anti-inflammatory medications, and analgesics are recommended.
10–20 minutes of ice therapy is recommended every 8 hours in most cases.
The patient can immediately bear weight, but with strict control of activities.
Phase 2: 4–10 days after surgery
The aim is to resolve hematoma and edema, control pain, and prevent muscle contracture. Anti-inflammatory and analgesic medications may still be needed.
Rehabilitation and integrative medical therapies can be used.
A careful evaluation is recommended if the patient is not starting to use the limb within a few days after surgery.
Phase 3: > 10 days after surgery
The sutures are removed 10–14 days after surgery. Immature patients should be radiographed every 4 weeks.
A radiographic assessment is performed every 4–6 weeks until bone healing is confirmed, more frequent assessment may be necessary for skeletally immature patients.


