

Compression plate fixation
1. Indications
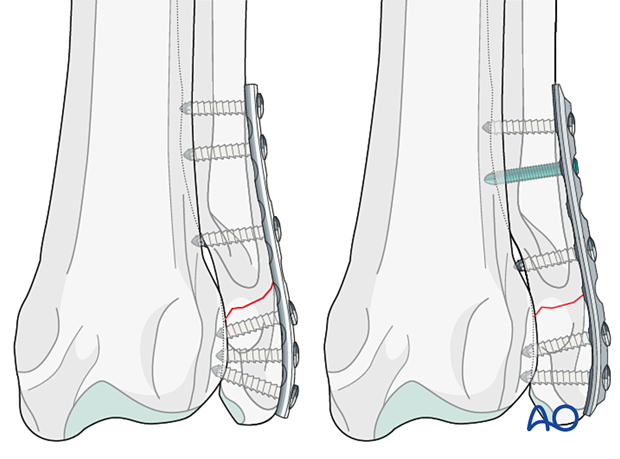
The goal of 23-A1 fracture treatment is anatomical reduction. This can be achieved by compression plating with a locking or nonlocking straight plate applied on the lateral side.
Plate fixation of an isolated distal ulnar fracture is mainly indicated in large, giant breed, and performance working dogs, or in dogs where there is collateral ligament instability. The use of compression plates provides immediate stability eliminating the need for postoperative coaptation and the associated risk of bandage- or cast-related complications.
2. Preparation and approach
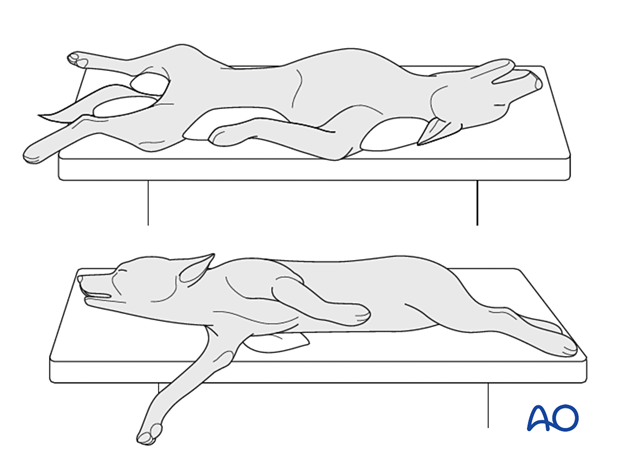
The patient can be in dorsal or lateral recumbency.
In lateral recumbency, the nonaffected leg should be in contact with the table.
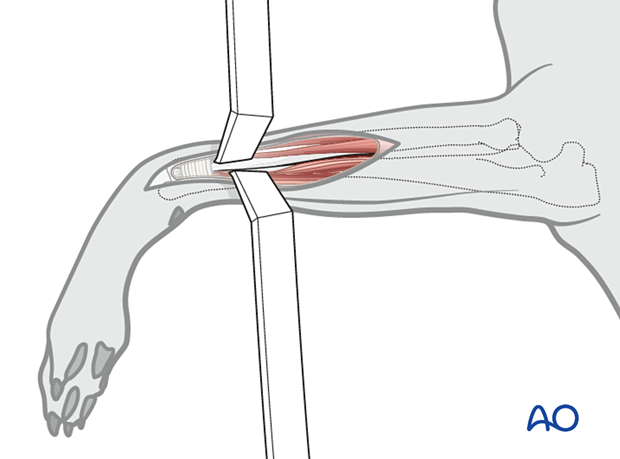
For an isolated 23-A1 fracture of the ulna, a direct lateral approach to the distal ulna is used.
3. Reduction
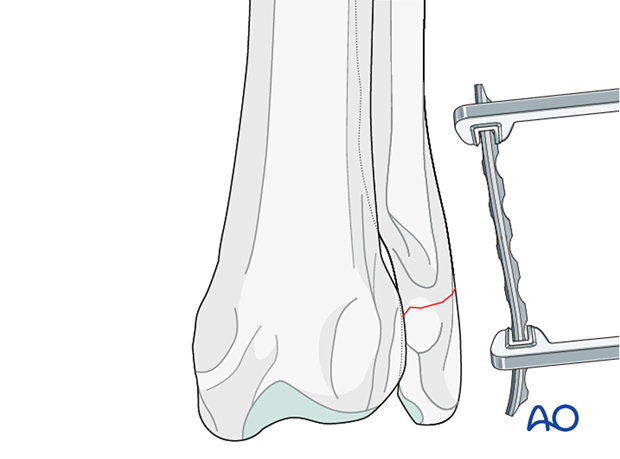
The goal is to achieve anatomical reduction of the ulna.
The proximal fragment may be connected to the proximal radius through the interosseous ligament. If stable, the proximal ulna does not require manipulation.
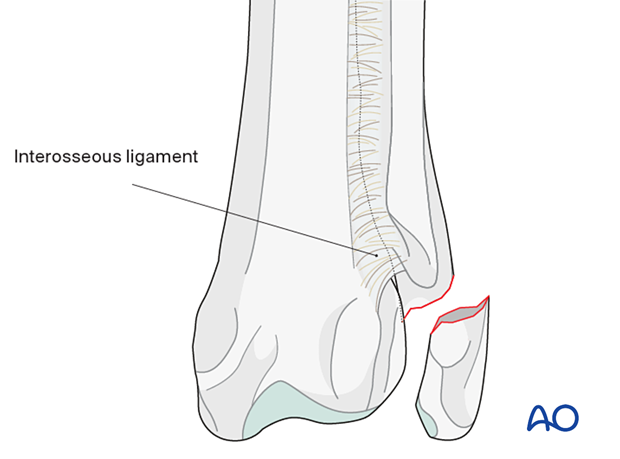
The distal fragment is manipulated with a pointed reduction forceps to achieve reduction.
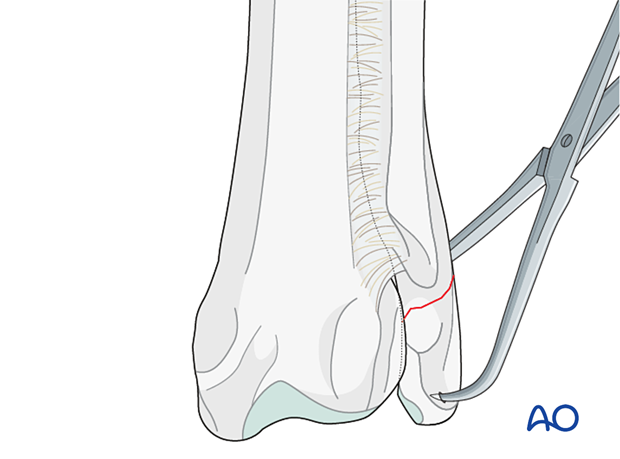
Option 1
A temporary K-wire inserted in the distal fragment can be used as a joystick to achieve reduction and then driven into the proximal fragment.
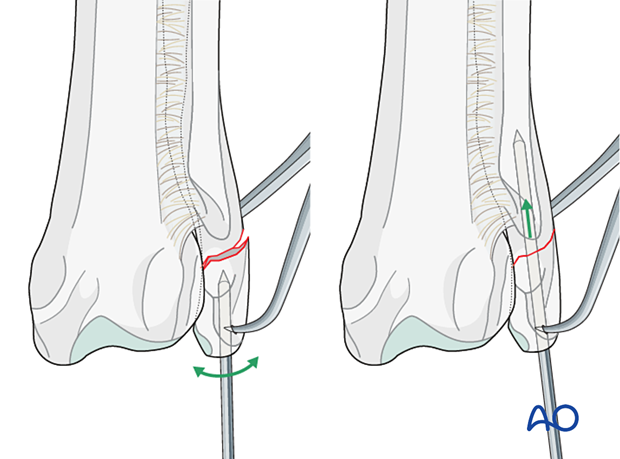
Option 2
Alternatively, the plate can be fixed in the distal fragment first, and then used to achieve reduction on the proximal fragment.
In this case, the plate should be contoured before application.
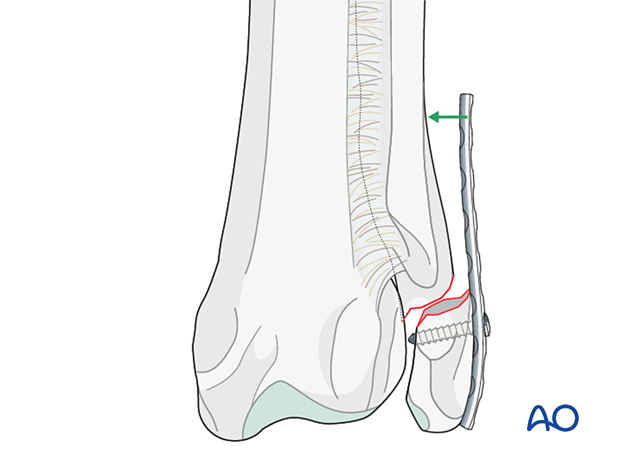
4. Fixation
Plate selection
Usually a 6- or 8-hole straight nonlocking or locking compression plate is used for repair of the ulna.
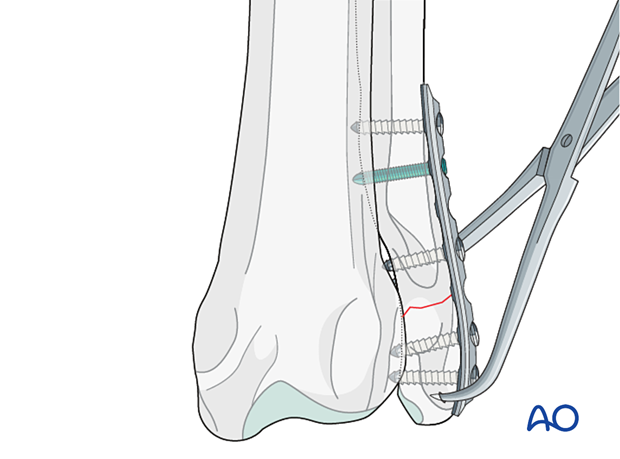
Two or three screws should be used in the distal fragment, and usually three screws in the proximal one.
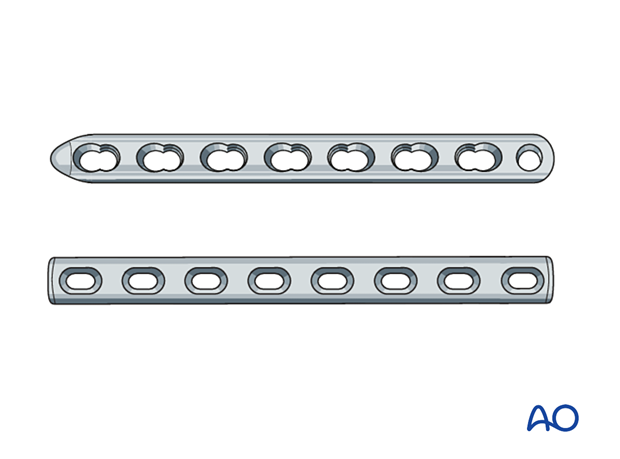
Plate contouring
A plate of appropriate size is contoured to the shape of the distal ulna and the styloid process.
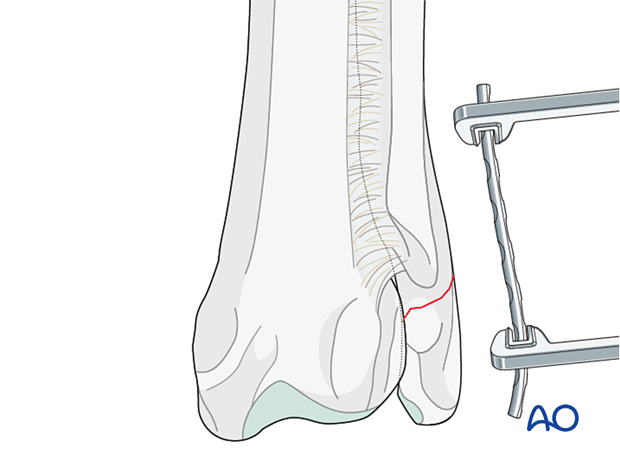
Standard plate application
The contoured plate is applied to the lateral surface of the bone and secured with plate-holding forceps.
The anatomical reduction is carefully checked. If required, the alignment is corrected, and the plate holding forceps are repositioned.
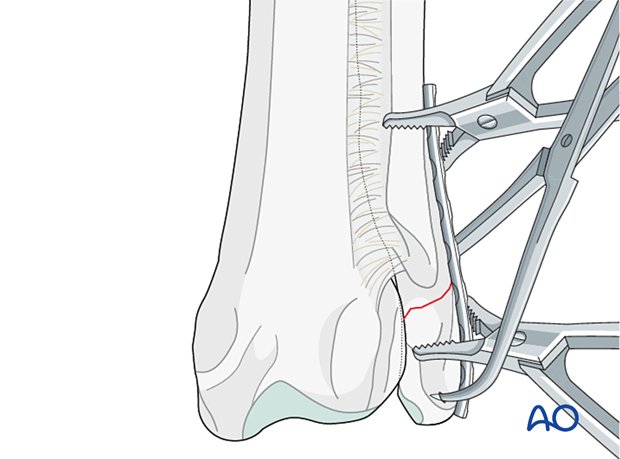
Usually, the plate is fixed on the distal fragment first.
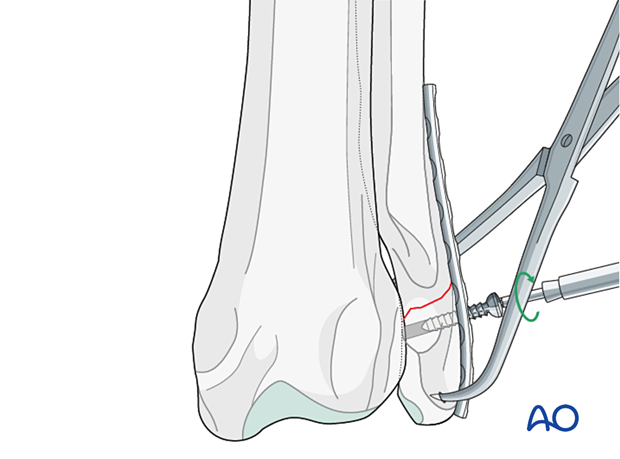
When a locking compression plate is selected, a push-pull device can be inserted instead of plate-holding forceps in the proximal and distal fragment to temporarily stabilize the plate.
With the temporary fixation in place, plate position and anatomical reduction are checked thoroughly and, if necessary, adjusted.
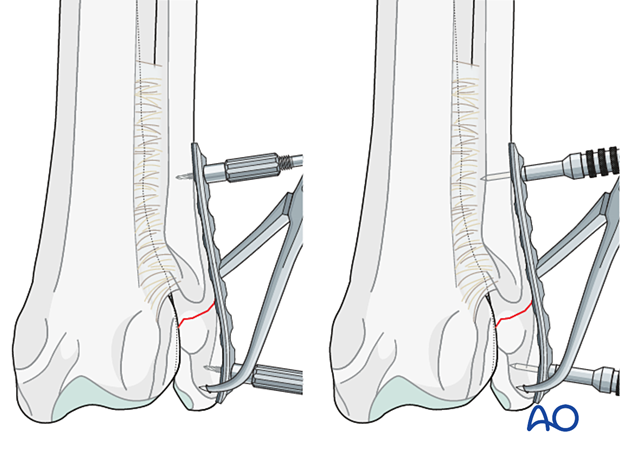
Fixation with a nonlocking compression plate
The first screw is inserted in compression mode after drilling with a neutral or load guide through the plate on one side of the fracture line. The screw is not fully tightened.
The compression screws should be near the fracture line but should not enter it.
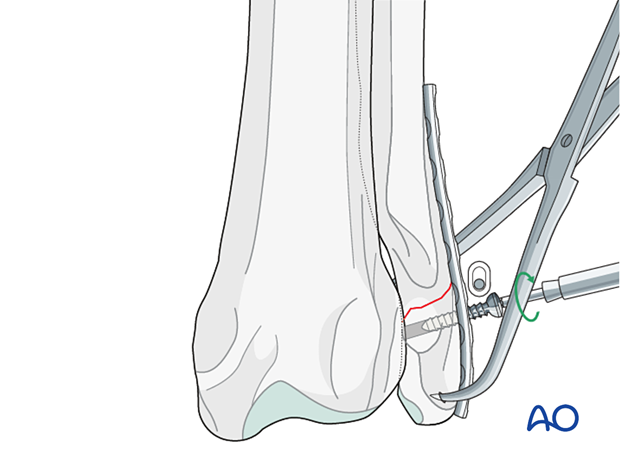
After drilling with the load guide, a second screw is inserted in compression mode on the other side of the fracture.
The screws are tightened alternatingly, generating interfragmentary compression across the fracture line.
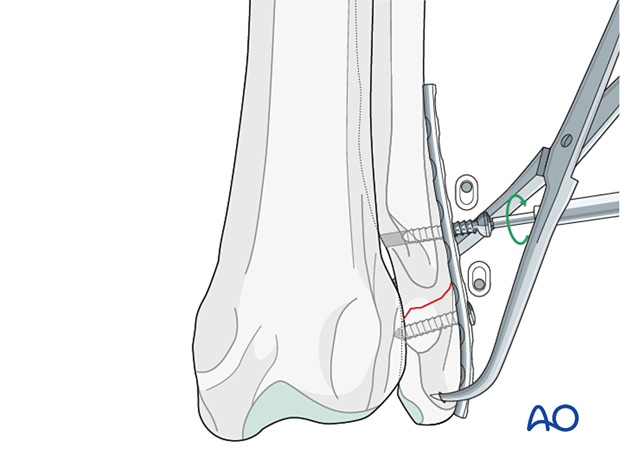
The most distal and most proximal screws are inserted in neutral mode.
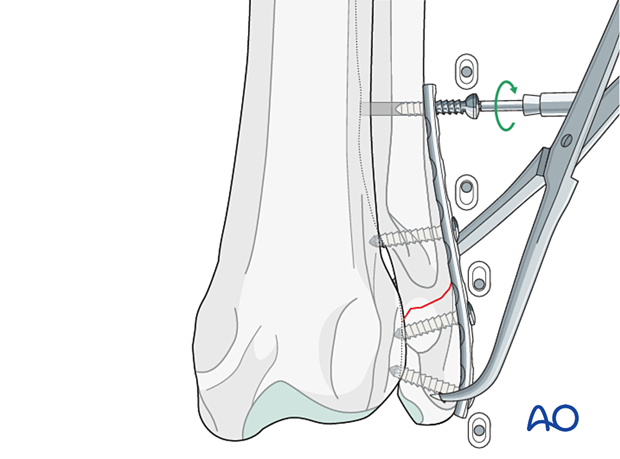
All remaining screws are inserted in neutral mode. The plate is secured with at least three bicortical screws in each major fragment. It is not necessary to fill all the available plate holes.
Sometimes, it is not possible to insert three screws in the distal fragment, but a minimum of two screws is required.
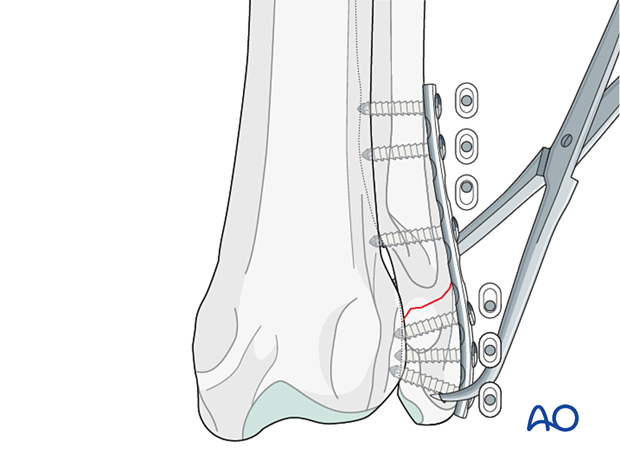
Fixation with a locking compression plate used in compression
When using a locking compression plate (LCP), the plate must be contoured to match the bone's anatomy. Failure to do so can lead to the displacement of the fragments or malalignment when the nonlocking screws are tightened.
If a combination of nonlocking and locking screws is used, the nonlocking screws must always be inserted and fully tightened before the locking screws are inserted. However, it is not necessary to use locking screws for compression plating.
5. Aftercare
Phase 1: 1–3 days after surgery
The aim is to reduce edema, inflammation, and pain.
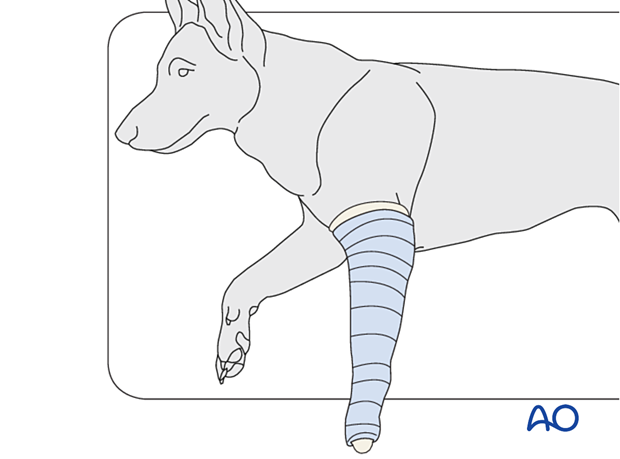
Following appropriate internal fixation, there should be no need for external coaptation for a 23-A1 fracture. If bandaging is used to decrease edema and protect the surgical wound, it should be removed after 24–48 hours to reduce the risk of complications.
Integrative medical therapies, anti-inflammatory medications, and analgesics are recommended.
10–20 minutes of ice therapy is recommended every 8 hours in most cases.
The patient can immediately bear weight, but with strict control of activities.
Phase 2: 4–10 days after surgery
The aim is to resolve hematoma and edema, control pain, and prevent muscle contracture. Anti-inflammatory and analgesic medications may still be needed.
Rehabilitation and integrative medical therapies can be used.
A careful evaluation is recommended if the patient is not starting to use the limb within a few days after surgery.
Phase 3: > 10 days after surgery
The sutures are removed 10–14 days after surgery. Immature patients should be radiographed every 4 weeks. A radiographic assessment is performed every 4–6 weeks until bone healing is confirmed, more frequent assessment may be necessary for skeletally immature patients.


