Microscopic tubular unilateral laminotomy for bilateral decompression (MT-ULBD)
1. Introduction
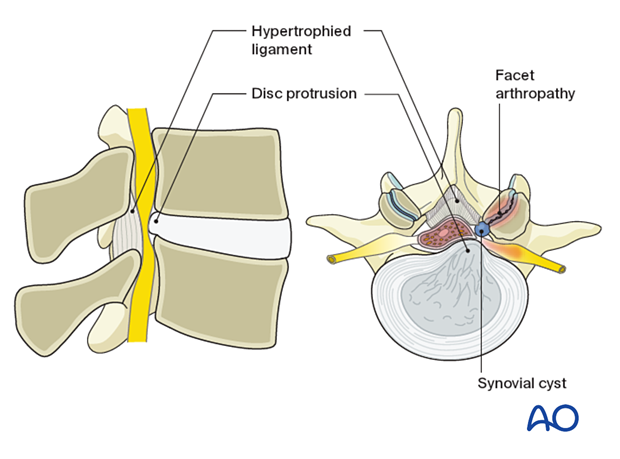
Microscopic tubular unilateral laminotomy for bilateral decompression (MT-ULBD “over the top” decompression) is the minimally invasive procedure for direct decompression of lumbar spine stenosis.
The main advantage is that a unilateral approach can be used for bilateral decompression, which minimizes muscle dissection and bleeding. Compared to traditional open decompression procedures, it also minimizes the risk of producing iatrogenic instability that would require fusion.
Meticulous intraoperative hemostasis is crucial to prevent postoperative hematoma.
2. Required instruments
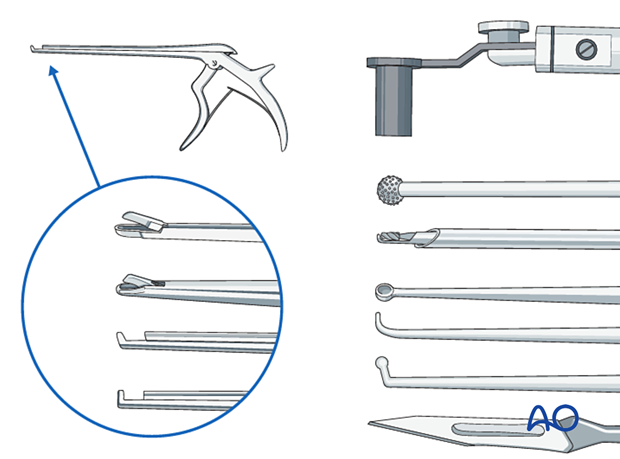
The following specialized instruments are recommended for this procedure:
- Tubular retractor system, 18–22 mm diameter tubes, variable lengths, or specular retractor
- Surgical microscope
- CSF repair kit
Bayonetted MISS instruments:
- Kerrison rongeurs 1–4 mm, 45° and 90° angle
- Pituitary rongeurs
- Ball tip nerve hook
- Knife
- Curettes of various sizes and angles
- Nerve root retractor
- High-speed burr with a diamond or side-cutting (matchstick) burr with an extra-long angled or curved handpiece
- Suction
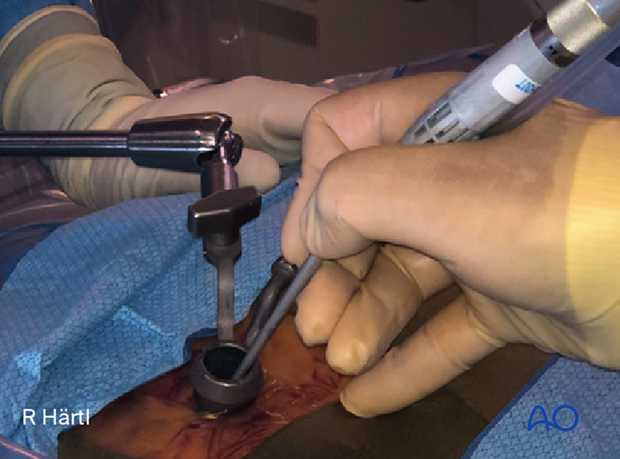
- Always stabilize/support instruments, including the burr, on the edge of the tubular retractor.
- When using the burr, the surgeon may initially use two hands. With increased experience, the surgeon should be able to control the drill with one hand when stabilizing it along the edge of the tube, and maybe by using the fourth or fifth finger to touch the sterile field surrounding the tube (see image). This will free up the other hand to use the suction.
3. OR set up and patient positioning
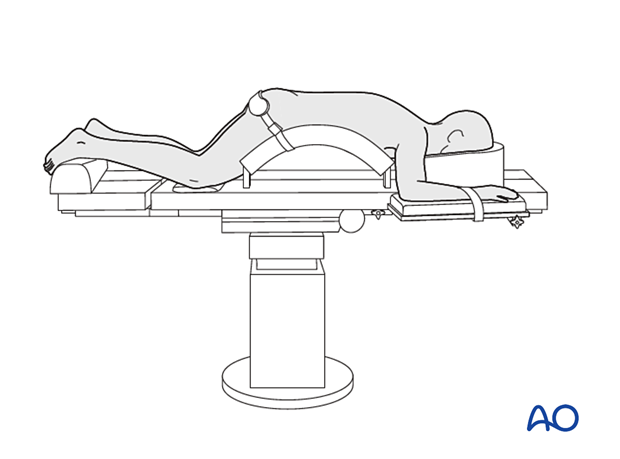
The patient is placed prone on a Wilson frame or with pelvic and thoracic rolls.
4. Fluoroscopic identification of target level after draping
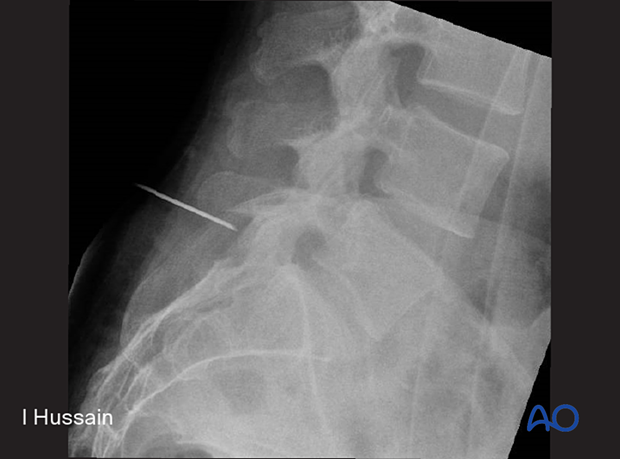
Using a spinal needle and AP and lateral fluoroscopy, identify the correct operative level.
Aim the needle parallel to the disc space, pointing toward the inferior edge of the target lamina.
Alternatively, use 3D navigation to verify the correct level throughout the procedure.
5. Visualization of the surgical field
Incision
The skin can be infiltrated as per the surgeon’s preference.
Especially in obese patients, identify the midline by finger palpation. If necessary, an X-ray may be used.
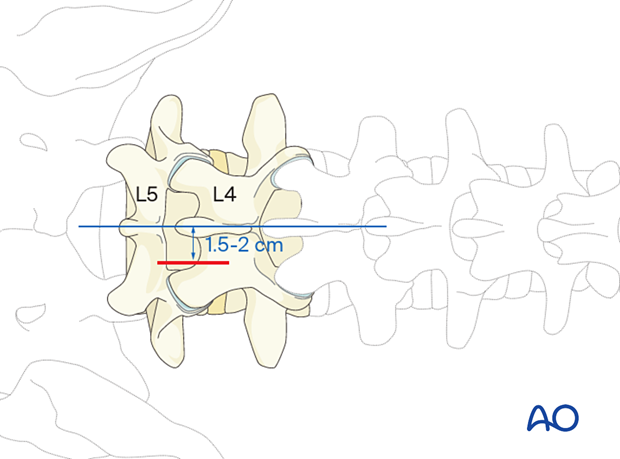
Perform an appropriately long skin incision 1.5–2 cm laterally to the midline, centered on the spinal needle skin entry point (depending on patient size).
The incision is made closer to the midline in the higher lumbar spine.
Open the fascia longitudinally.
Insertion of dilators
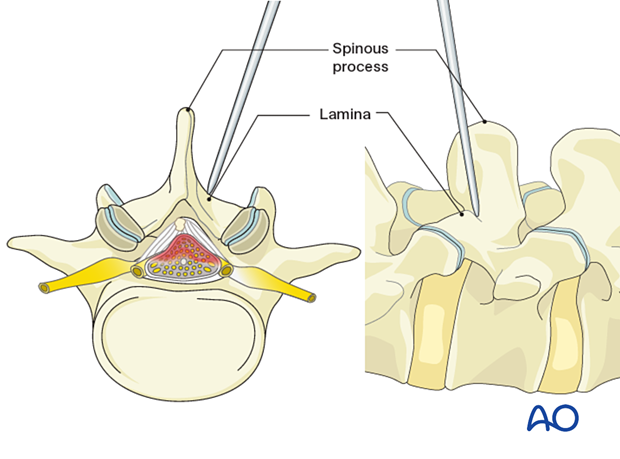
Insert the first dilator, angle it slightly medially, and “feel” for the spinous process and lamina base.
After the first dilator has been positioned on the bone, verify that it is located at the correct level using fluoroscopy.
Insert sequential dilators until the appropriate dilation has been achieved.
Determine the required tube length and insert the final tubular retractor (typically 18–21 mm diameter) level to the skin. The tube is typically angled 10°–15° medially.
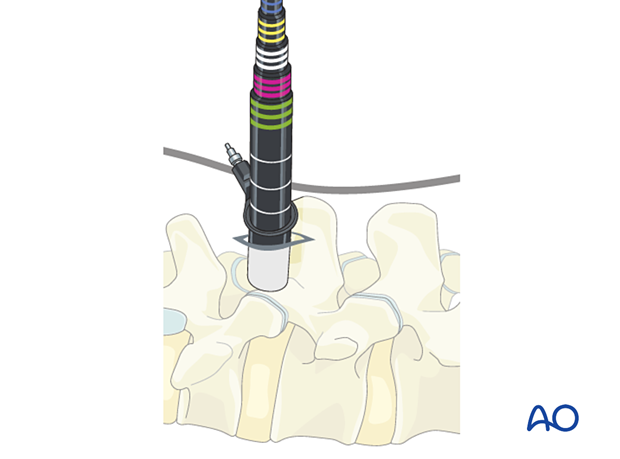
Secure the retractor to the table-mounted arm.

Confirm adequate tube positioning and correct level with lateral x-ray.
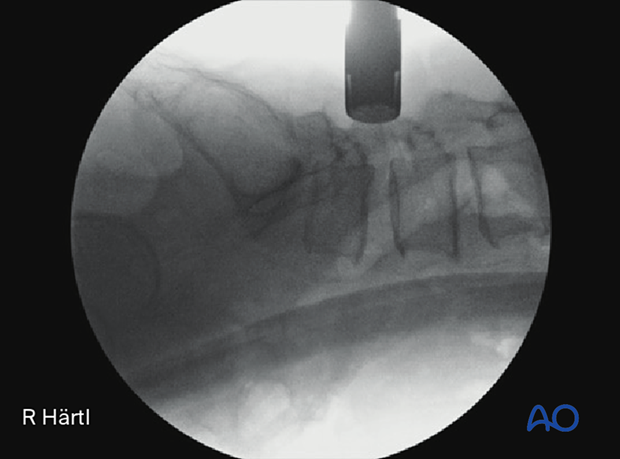
Visualization
Use the microscope for visualization. Alternatively, an exoscope or loupes and headlights may be used.
Position the microscope so that the surgeon can be positioned parallel to the spine. This position will help with orientation.
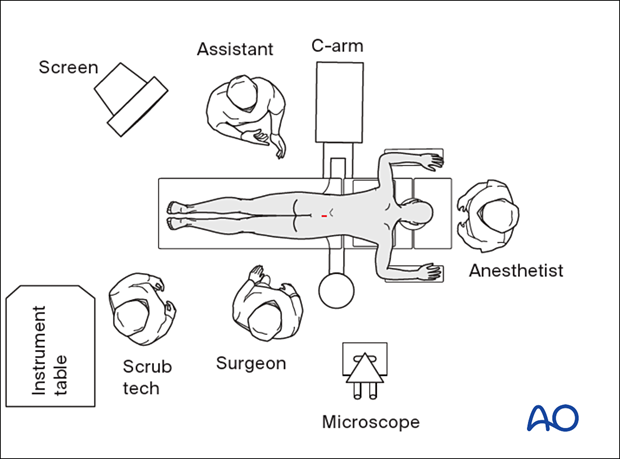
6. Ipsilateral decompression
Exposure of the ipsilateral lamina
Expose the starting point for drilling at the intersection of the base of the spinous process and medial lamina.
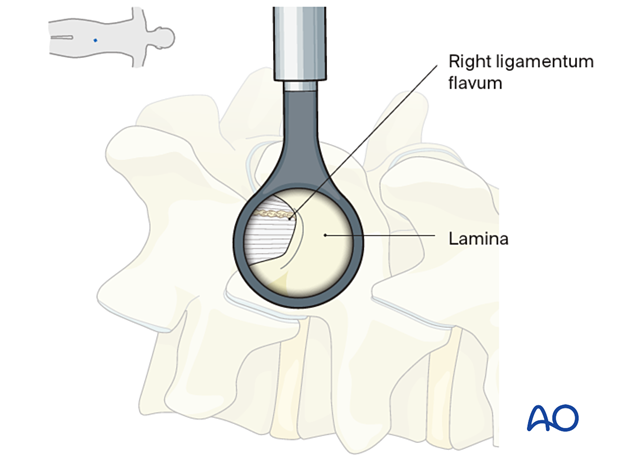
Laminotomy
Start drilling at the inferior edge of the lamina. This starting point will facilitate the estimation of the thickness of the lamina.
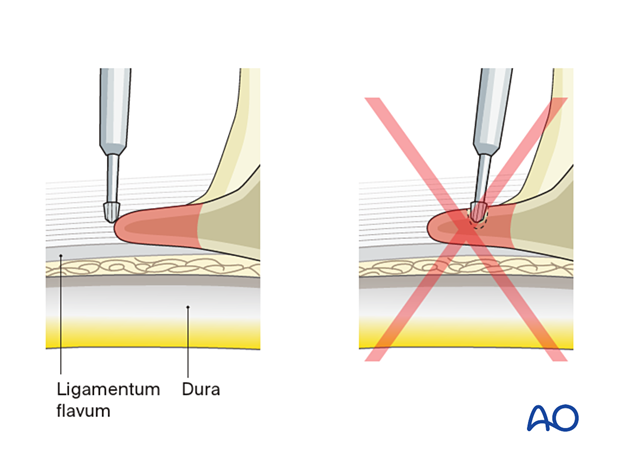
The lamina is then drilled into in a caudal to cranial direction until close to the insertion of the ligamentum flavum.
During this part of the drilling, the thick ligamentum flavum protects the dura from the drill bit.
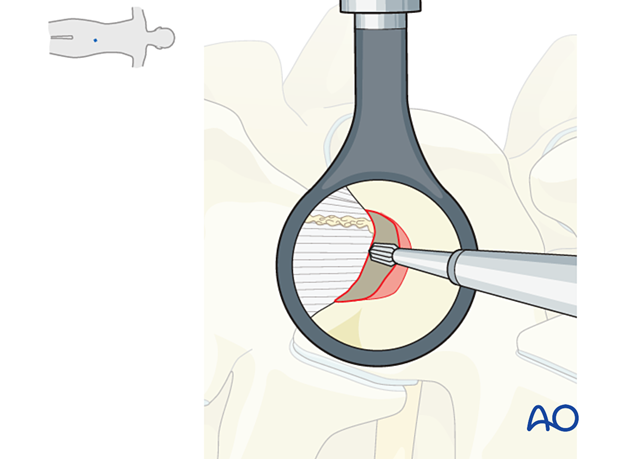
Remove the last millimeters of the lamina using Kerrison rongeurs (to protect the dura) and expose the cranial insertion of the ligamentum flavum. This area is typically identified by the presence of epidural fat.
When drilling laterally, be careful not to violate the pars interarticularis or too much of the medial facet, especially in the upper levels of the lumbar spine.
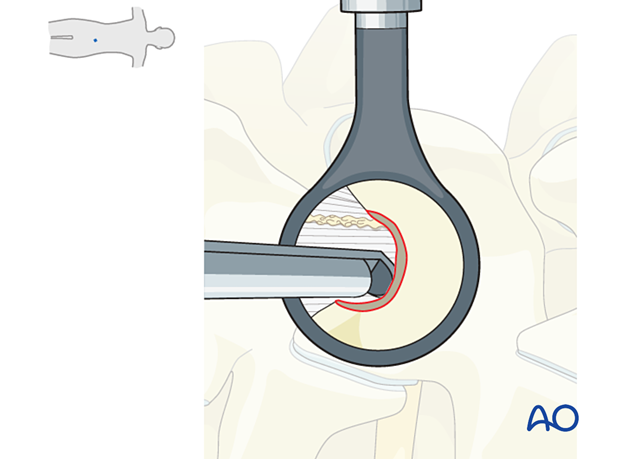
Flavectomy
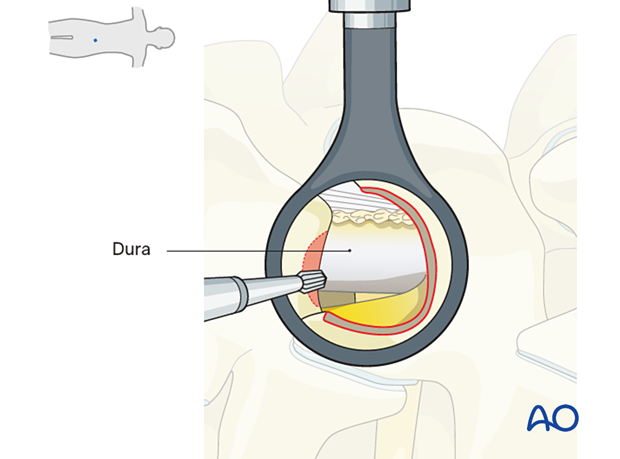
Carefully separate the ligamentum flavum from the dura with a ball-tip instrument.
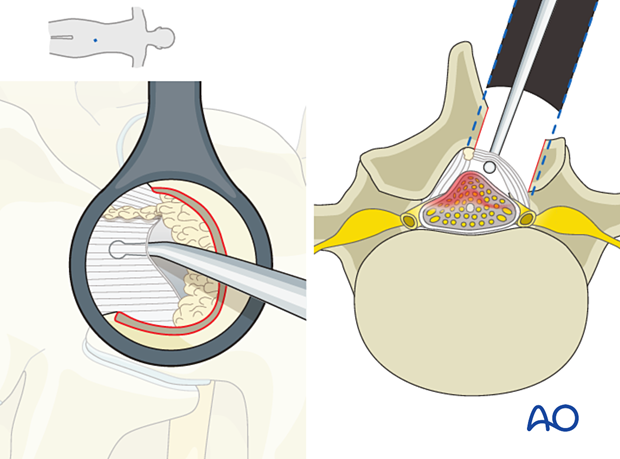
Starting cranially, use a Kerrison rongeur to resect the ipsilateral ligamentum flavum down to its caudal insertion at the lamina below.
Direct the tubular distractor caudally as needed to facilitate visualization.
Removing the ligamentum flavum improves the understanding of the anatomy, especially the medial to the lateral extension of the thecal sac.
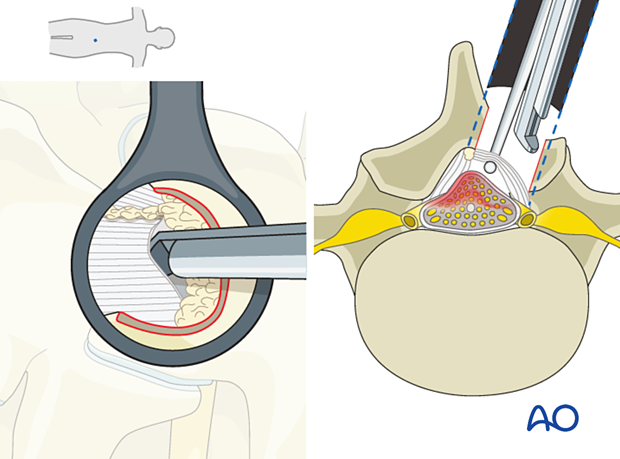
To ensure adequate decompression of the thecal sac has been achieved, remove a few millimeters of the cranial portion of the lower lamina.
Studying the T2-weighted sagittal MRI image can help determine the extent of the caudal decompression needed to achieve adequate decompression of the thecal sac.
7. Contralateral decompression
Contralateral visualization
Angle the OR table away from the surgeon (10°–20°) and then angle the tubular retractor more medially.
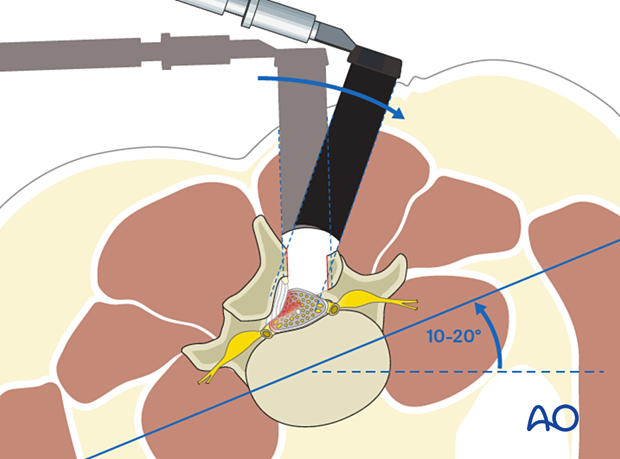
At this point, the ipsilateral ligamentum flavum has been removed, and the contralateral ligamentum flavum is still in place, protecting the dura.
Identify the interface between the contralateral ligamentum flavum and the covering bone.
Drill a starting hole the size of the drill bit into the contralateral bone (lamina) immediately dorsal to the contralateral ligamentum flavum. This should be done while protecting the dura with the suction with slight downward retraction.
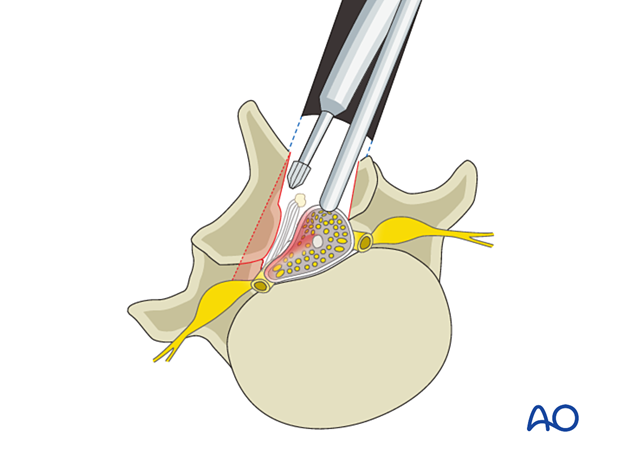
Extend this trough cranially and caudally; the preserved contralateral ligamentum flavum and the suction will protect the dura from the drill bit.
Drilling continues cranially, caudally deeper into the contralateral recess to expose the entirety of the contralateral ligamentum flavum.
Flavectomy
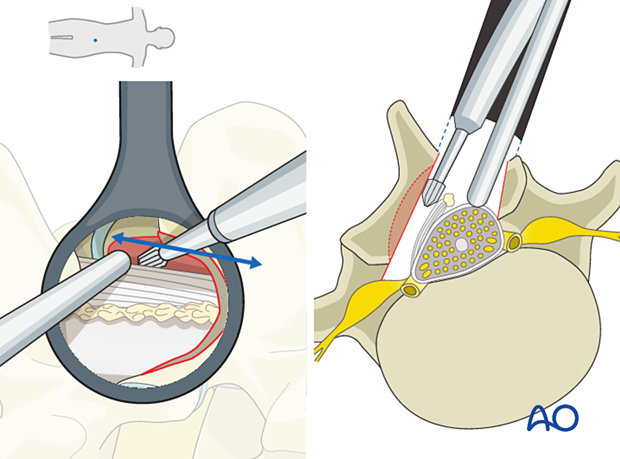
Identify the plane between the contralateral dura and the ligamentum flavum, dissect with a ball tip or Penfield instrument, and free up adhesions to avoid injury to the dura.
Start with the contralateral flavectomy at the cranial insertion point. That will mobilize the LF better and allow a more efficient resection.
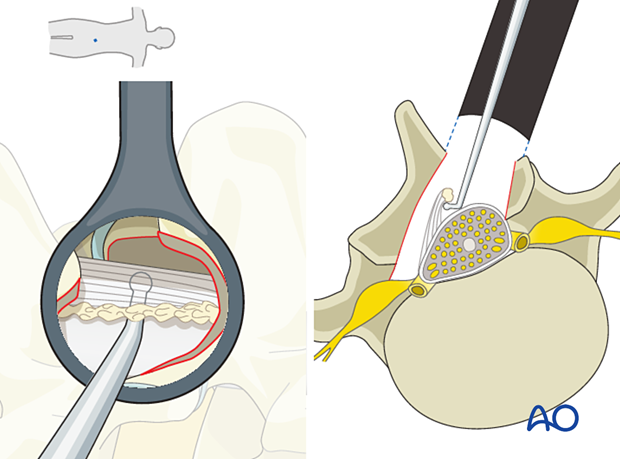
Once the contralateral ligamentum flavum has been exposed and mobilized, resect it using a Kerrison rongeur to expose the:
- Contralateral dura
- Contralateral transversing nerve root
- Contralateral foramen
Visualize the Kerrison rongeur footplate as much as possible.
Before committing to a bite of the ligament, ensure that the dura is not included in the bite. This can be achieved by gently wiggling the rongeur from side to side and up and down to observe any tension on the dura.
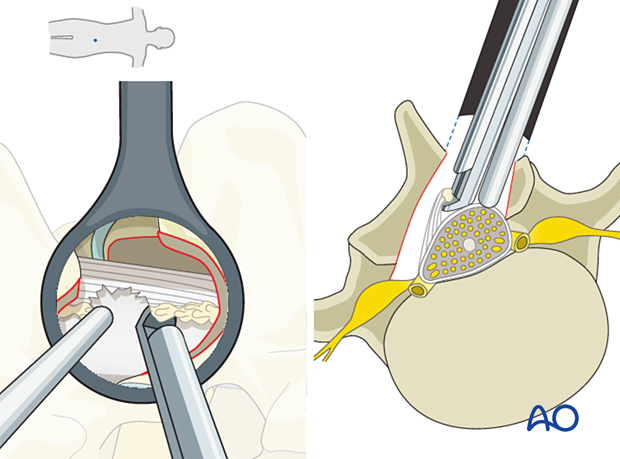
If there is significant soft tissue obstructing the access to the contralateral anatomy, it is advantageous to proceed with decompression and tissue removal from superficial to deep.
Ensure adequate decompression of the contralateral foramen using a ball tip probe. To ensure this, an x-ray can be taken with the ball tip in the contralateral foramen.
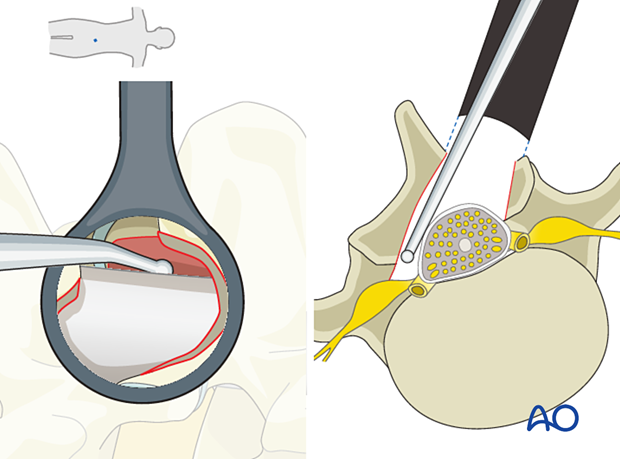
The table can be turned back to neutral, and the tubular retractor angled laterally to the original position to inspect the ipsilateral lateral recessed decompression.
Additional bites with the Kerrison rongeurs can be taken. The 90° rongeur may be preferred for this maneuver. A ball tip probe is used to ensure adequate decompression of the ipsilateral traversing nerve root.
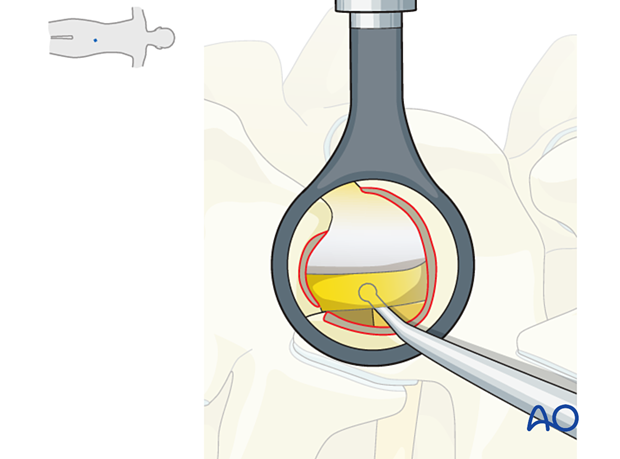
8. Verification of decompression
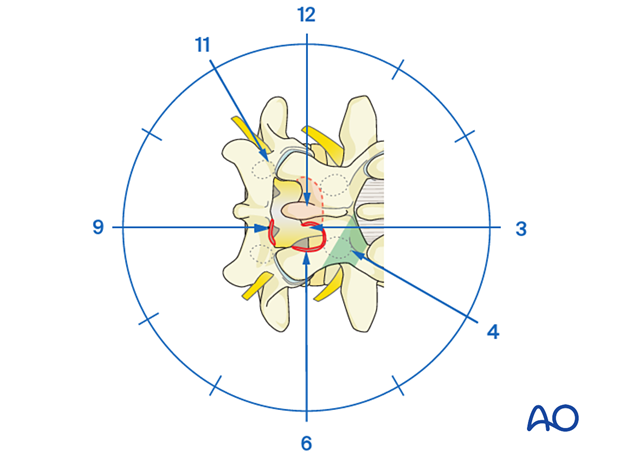
Assess the decompression systematically in a clockwise manner starting at 11 o’clock.
It may be necessary to adjust the microscope and tube.
12–1: Contralateral dura and lateral recess: inspect the contralateral foramen and exiting nerve root if indicated.
3: Confirm that the LF has been removed cranially.
4–5: Confirm that the ipsilateral pars is intact.
5–6: Inspect the ipsilateral cranial laminotomy to ensure all the ligamentum flavum has been removed. Visualize the ipsilateral lateral recess.
8–9: Inspect the ipsilateral caudal decompression and confirm that all the ligamentum flavum has been removed and that the dura is well decompressed, especially if the preoperative MRI shows that compression is caudal to the disc space.
10: Confirm the removal of the upper part of the contralateral caudal lamina.
9. Tube removal and closure
Hemostasis is achieved with hemostatic agents or bipolar cautery.
The tube is slowly removed. Any muscular bleeding should be identified and cauterized.
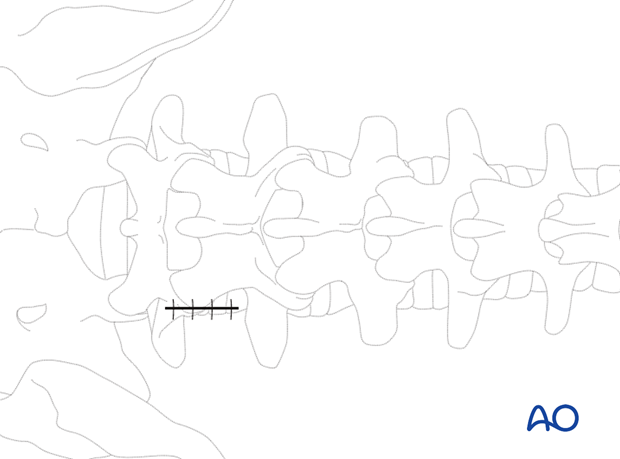
The fascia is typically closed using an interrupted suture. Infiltration of the muscle with local anesthetics is optional.
Standard multilayer closure of subcutaneous layers and skin is performed.
10. Aftercare
The patient can usually be discharged on the day of surgery or the following day with a short course of pain medication.
Lumbar immobilization is not required.
Patients may feel incisional or muscular pain that usually subsides within a few days.
Patients can develop postoperative pain and muscle spasms in a delayed fashion.
Small intraoperative CSF leaks can usually be treated with dural sealant materials and postoperative bed rest for 24 hours. Larger leaks, especially if there is a potential for herniation of nerve roots, should be treated with direct repair and followed by bed rest for at least 24 hours.


