Extraforaminal microscopic tubular lumbar discectomy (EMTLD)
1. Introduction
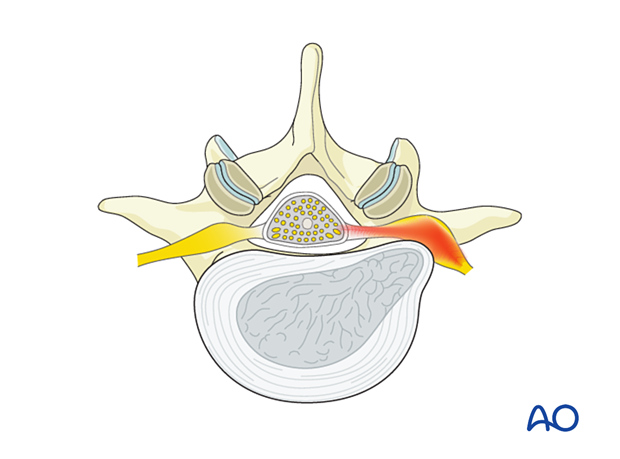
This operation allows the successful treatment of posterolateral disc herniation without requiring a complete facetectomy or stabilization procedures.
The lack of landmarks makes orientation during this procedure more challenging. It is essential to frequently verify the anatomy using fluoroscopy and/or navigation.
A good understanding of preoperative imaging is crucial for orientation during surgery.
Different approaches have been described to identify the exiting nerve root and disc fragment. By following the bony landmarks, first of the cranial level transverse process to the pars interarticularis and then further to the inferior wall of the cranial pedicle, the approach detailed below provides a reliable identification of the exiting nerve root early in the procedure.
2. Preoperative planning
Before performing this surgery, carefully examine preoperative MRI and/or CT and X-rays to confirm that the pathology can be successfully treated through the extraforaminal approach.
This procedure is best suited to address extraforaminal (outside the foramen) soft disc (“fresh” disc) prolapse, causing compression of the exiting nerve root in patients who have failed appropriate nonoperative management.
The procedure may also address foraminal disc prolapse or the combination of extraforaminal and intraforaminal disc prolapse. These cases may require a more extensive resection of the lateral facet joint. These cases are technically more difficult, have a higher risk of destabilizing the segment, and should only be performed by surgeons already experienced with the extraforaminal approach.
3. Required instruments
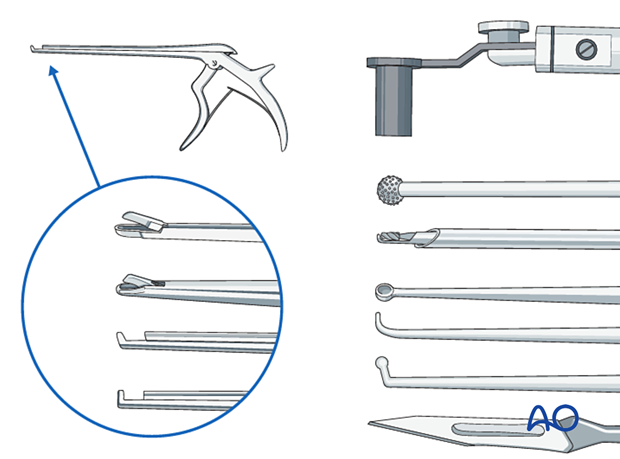
The following specialized instruments are recommended for this procedure:
- Tubular retractor system, 15 mm–18 mm diameter tubes, variable lengths, or specular retractor
- Surgical microscope
Bayonetted MISS instruments:
- Kerrison rongeurs 1–4 mm, 45° and 90° angle
- Pituitary rongeurs
- Ball tip nerve hook
- Knife
- Curettes of various sizes and angles
- Nerve root retractor
- High-speed burr with diamond or a side-cutting (matchstick) burr with an extra-long angled or curved handpiece
- Suction
- Intraoperative monitoring may help to identify the exiting nerve root and to confirm adequate decompression
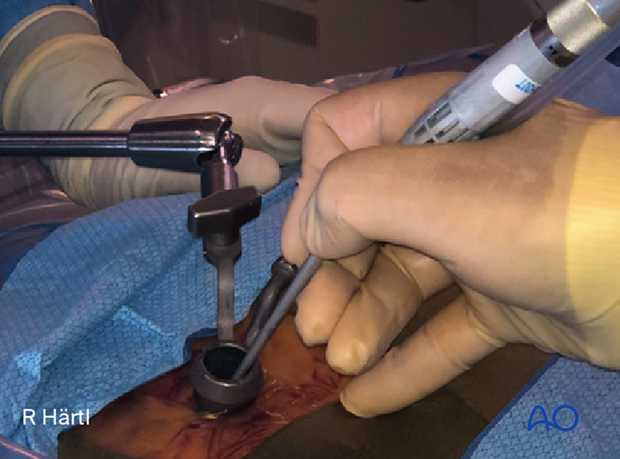
- Always stabilize/support instruments, including the burr, on the edge of the tubular retractor.
- When using the burr, the surgeon may initially use two hands. With increased experience, the surgeon should be able to control the drill with one hand when stabilizing it along the edge of the tube, and maybe by using the fourth or fifth finger to touch the sterile field surrounding the tube (see image). This will free up the other hand to use the suction.
4. OR set up and patient positioning
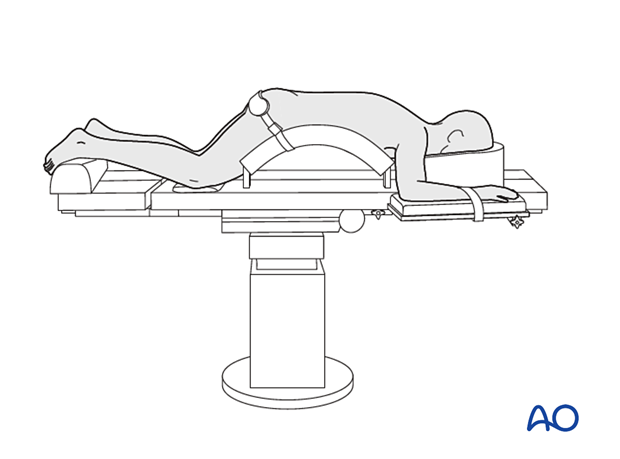
The patient is placed prone on a Wilson frame or with pelvic and thoracic rolls.
5. Fluoroscopic identification of target level and skin incision marking
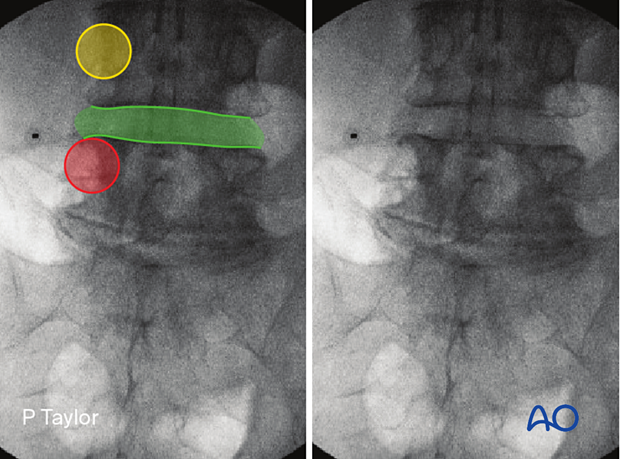
Obtain the true AP view of the appropriate disc and identify the following landmarks:
- The ipsilateral caudal pedicle (red)
- The ipsilateral cranial pedicle (yellow)
- The disc space (green)
Mark a line 5–10 mm lateral to the lateral border of the pars at the level of the disc space (further lateral in larger patients).
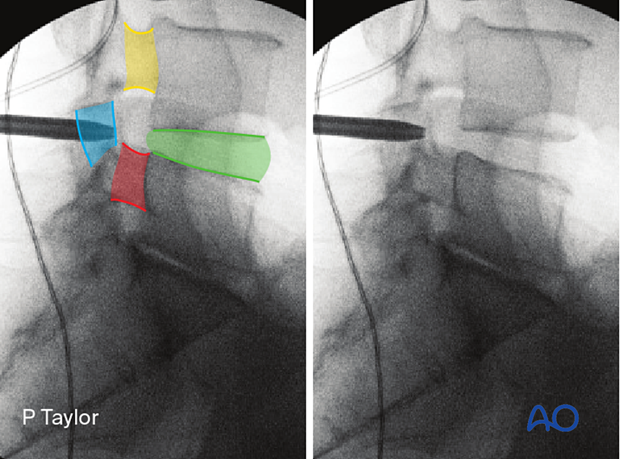
Obtain the true lateral view of the appropriate disc and identify the following landmarks:
- The caudal pedicle (red)
- The cranial pedicle (yellow)
- The disc space (green)
- The pars (blue)
Mark a line at the level of the disc space.
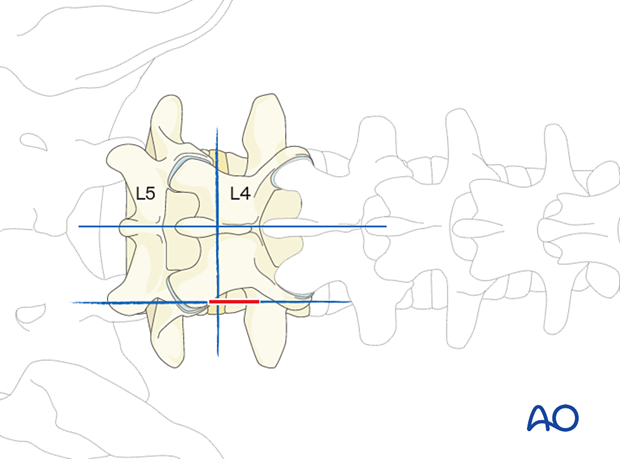
The skin incision is made at the intersection of these two lines.
Alternatively, use 3D navigation to localize the correct level throughout the procedure.
6. Visualization of the surgical field
Incision
The skin can be infiltrated as per the surgeon’s preference.
Perform an appropriately sized incision centered on the spinal needle skin entry point.
Open the fascia sharply.
Insertion of dilators
Insert the first dilator to its docking point at the intersection between the transverse process and the pars.
Once the first dilator has been positioned on the bone, verify that it is located at the correct level using fluoroscopy.
Insert sequential dilators until the appropriate dilation has been achieved.
Determine the required tube length (typically 15–18 mm diameter) and insert the final tubular retractor level to the skin.
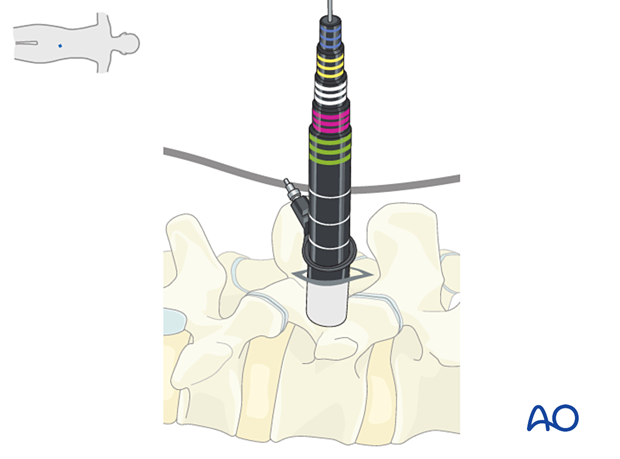
Secure the retractor to the table-mounted arm.

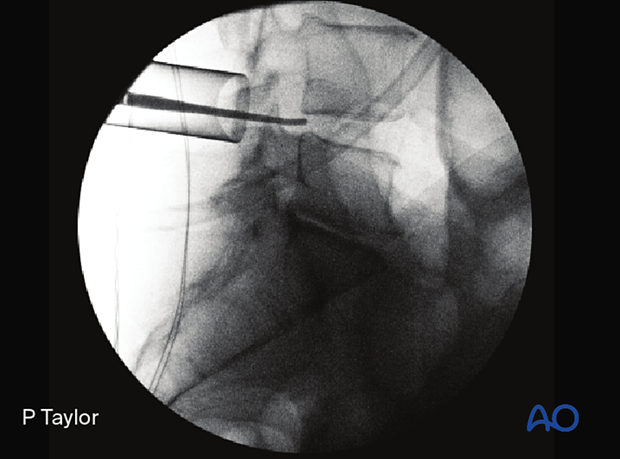
The final x-ray should confirm the appropriate placement of the tubular retractor.
Visualization
The microscope should be brought in at this point. Alternatively, an exoscope or loupes and headlights may be used.
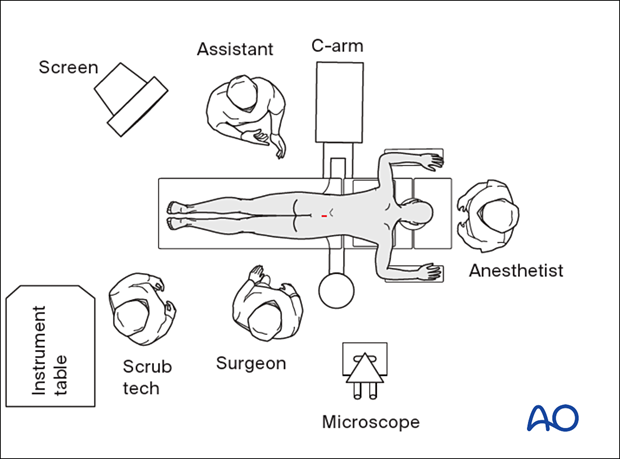
Insert the microscope so that the surgeon can be positioned parallel to the spine. This position will help with orientation.
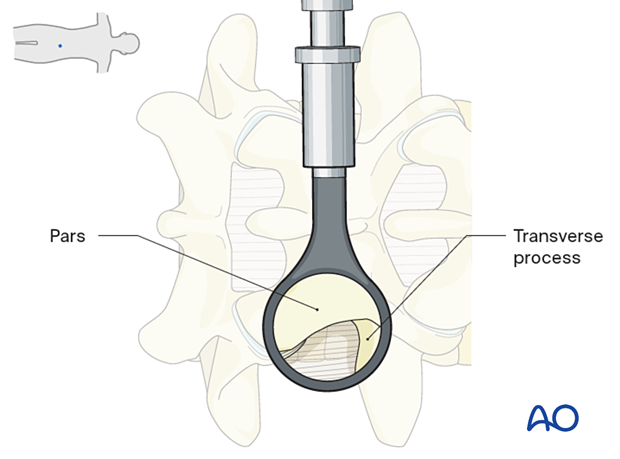
Remove the soft tissues using monopolar or bipolar diathermy to visualize the inferior edge of the cranial level transverse process and the lateral border of the pars.
Optimal visualization is obtained when the lateral portion of the pars is clearly visualized.
7. Freeing the exiting nerve
Thin out the lateral aspect of the pars interarticularis using the high-speed burr.
Caudal exposure is gained by partial drilling of the superior and lateral aspects in the inferior level’s superior articular process.
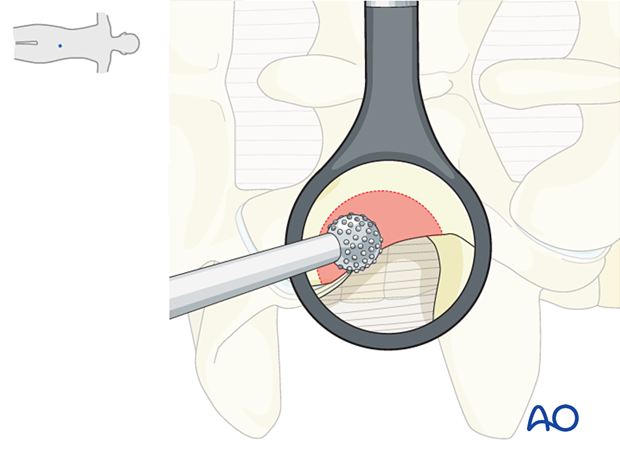
Further bone removal of the lateral aspect of the pars is performed using Kerrison rongeurs.
Take care to protect the medial portion of the pars to maintain stability.
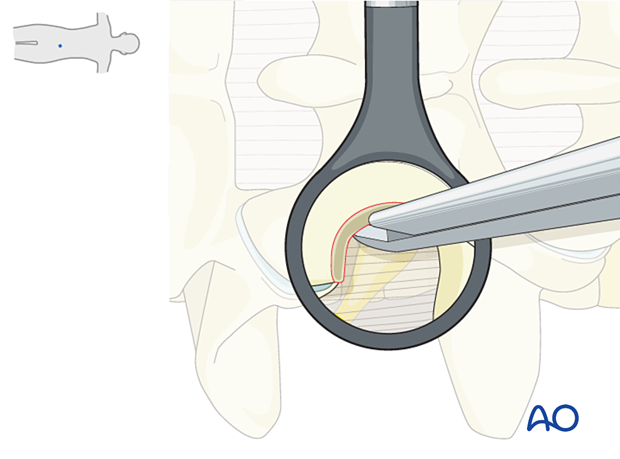
A ball-tip instrument can be used to palpate the smooth, inferior part of the cranial pedicle.
The exiting nerve root is located just caudal to the pedicle.
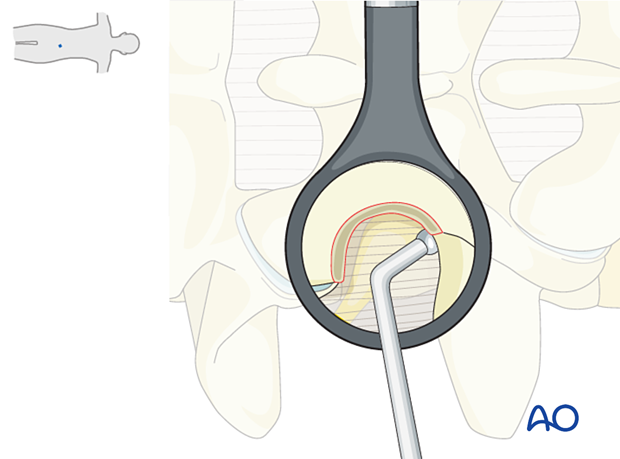
Remove the exposed lateral extent of ligamentum flavum, the intertransverse process ligament, and the soft tissues covering the exiting nerve root using a Kerrison rongeur.
Visualization of fat is indicative of close approximation to the nerve (perineural fat).
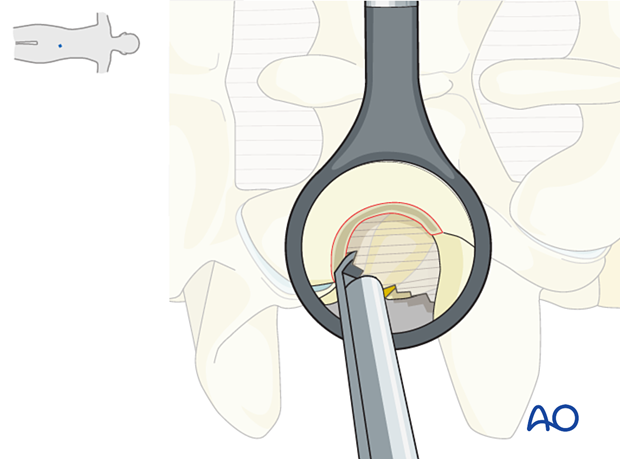
Beware of the pars vessel, which branches off a segmental artery and pierces the intertransverse membrane. The vessel is usually in close association with the exiting nerve root. Bipolar diathermy is usually sufficient.
When using bipolar diathermy, always use irrigation to prevent sticking and overheating of the neural structures.
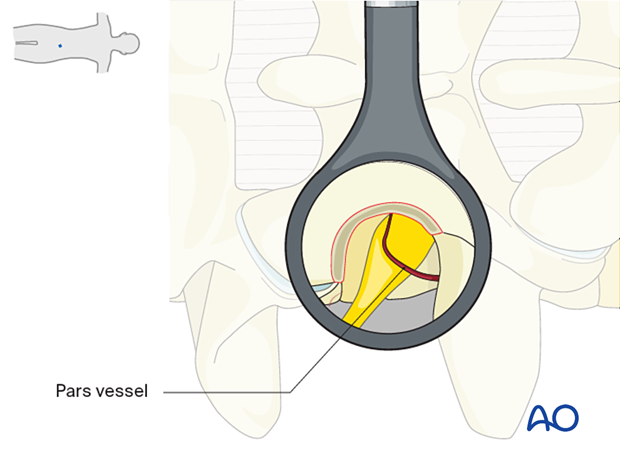
Dissect along the nerve root laterally. Mobilize the nerve root cranially or caudally to identify the disc fragment.
Use gentle mobilization of the nerve root so the dorsal root ganglion is not compromised.
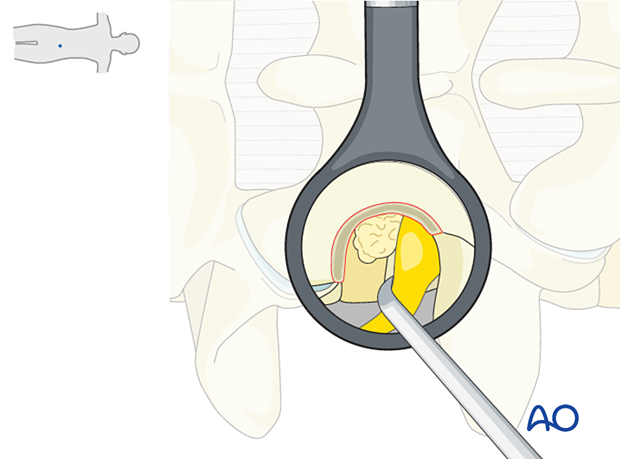
8. Removal of disc fragments/decompression
Typically the disc prolapse migrates cranially from the disc.
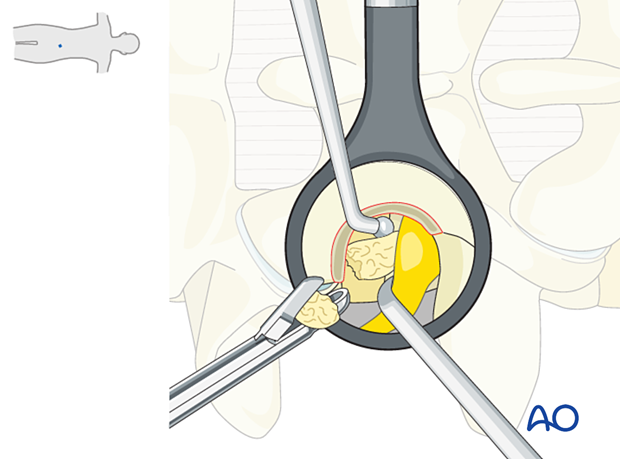
It is essential not to “grab blindly” with a rongeur. Use a blunt ball-tipped hook to tease out the disc fragments from around the root first.
Carefully inspect for further fragments, as there are often more than one.
The dissection is performed around the dorsal root ganglion, a very sensitive structure. Try to limit the manipulation of the nerve itself.
9. Tube removal and closure
Hemostasis is achieved with hemostatic agents or bipolar cautery.
The tube is slowly removed. Any muscular bleeding should be identified and cauterized.
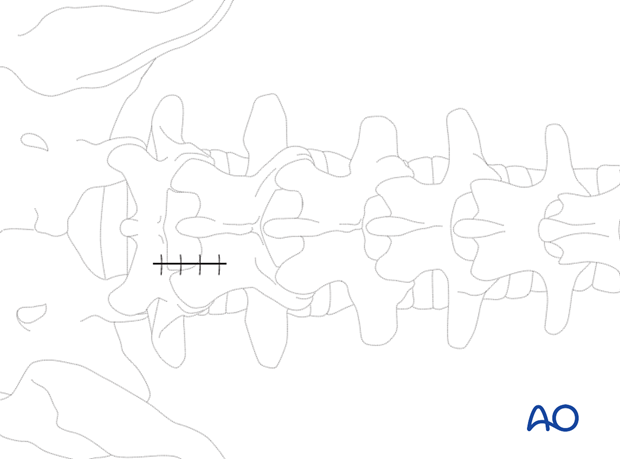
The fascia is typically closed using an interrupted suture. Infiltration of the muscle with local anesthetics is optional.
Standard multilayer closure of subcutaneous layers and skin is performed.
A drain may be used if necessary.
10. Aftercare
The patient can usually be discharged on the day of surgery or the following day with a short course of pain medication.
Lumbar immobilization is not required.
Patients may feel incisional or muscular pain that usually subsides within a few days.
Patients can develop postoperative pain and muscle spasms in a delayed fashion.


