Interlaminar microscopic tubular lumbar discectomy (IMTLD)
1. Introduction
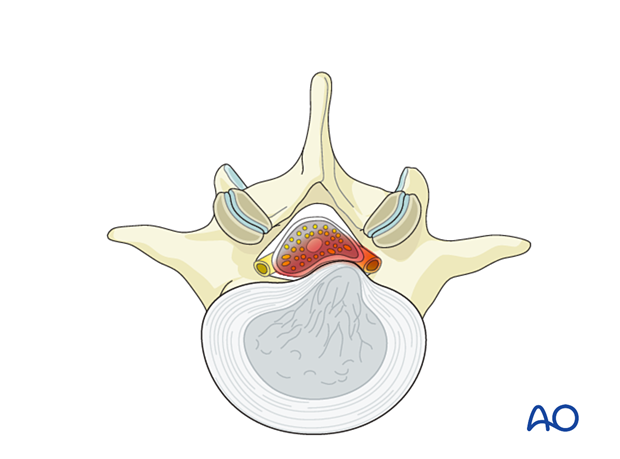
This operation allows for a minimally invasive solution to most lumbar disc herniations in the central, posterolateral, and lateral recess locations. A paraspinal approach with successive dilators allows for docking a tubular retractor through a “muscle splitting” rather than a “muscle cutting” approach. Preservation of midline stabilizing structures and musculature leads to less blood loss, less postoperative pain, and faster recovery in most cases.
After appropriate anatomic docking of the tubular retractor, a small laminotomy is drilled, and resection of the ligamentum flavum is then performed. This exposes the dura and nerve root. Retraction of the nerve root and thecal sac allows access to the epidural space and disc/disc herniation.
As with other tubular approaches, the limited field of view and working corridor means that attention to key landmarks at progressive steps is required in order for the procedure to be successful.
2. Required instruments
The following specialized instruments are recommended for this procedure:
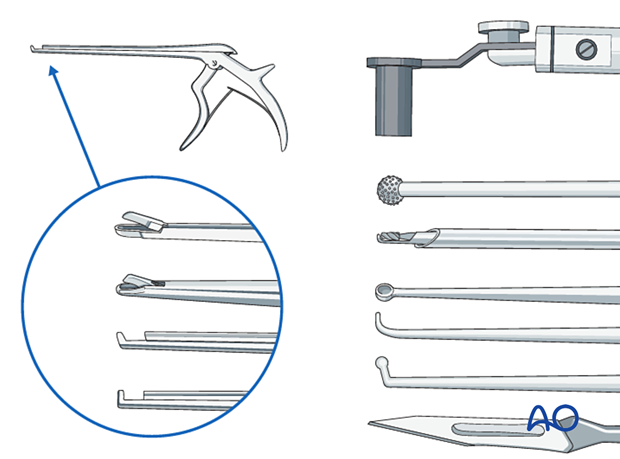
- Tubular retractor system, 15 mm–18 mm diameter tubes, variable lengths, or specular retractor
- Surgical microscope - an exoscope or loupes and headlights may be used as an alternative
- CSF repair kit
Bayonetted MISS instruments:
- Kerrison rongeurs 1–4 mm, 45° and 90° angle
- Pituitary rongeurs
- Ball tip nerve hook
- Knife
- Curettes of various sizes and angles
- Nerve root retractor
- High-speed burr with a diamond or side-cutting (matchstick) burr with an extra-long angled or curved handpiece
- Suction
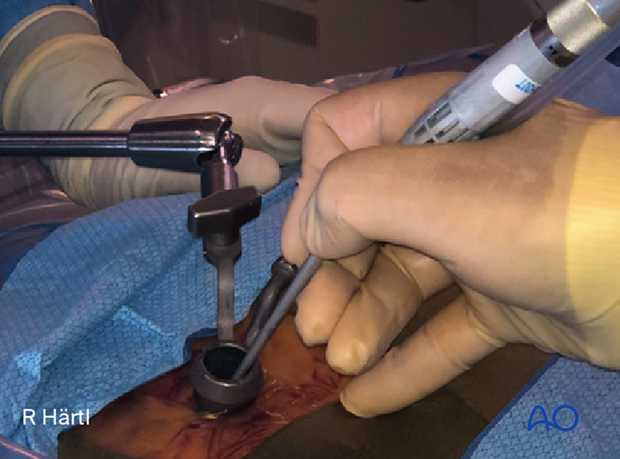
- Always stabilize/support instruments, including the burr, on the edge of the tubular retractor.
- When using the burr, the surgeon may initially use two hands. With increased experience, the surgeon should be able to control the drill with one hand when stabilizing it along the edge of the tube, and maybe by using the fourth or fifth finger to touch the sterile field surrounding the tube (see image). This will free up the other hand to use the suction.
3. OR set up and patient positioning
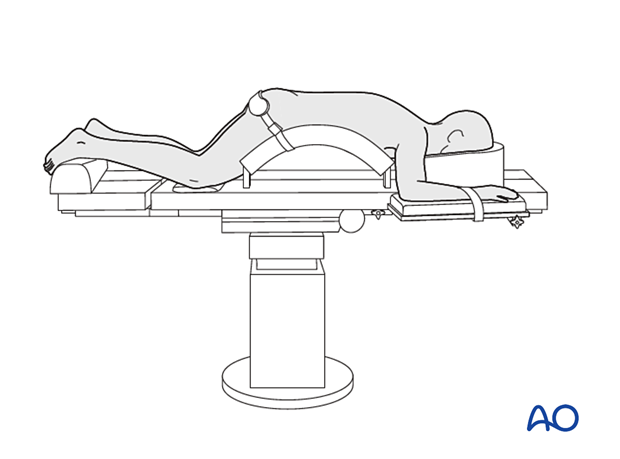
The patient is placed prone on a Wilson frame or with pelvic and thoracic rolls.
4. Fluoroscopic identification of target level after draping
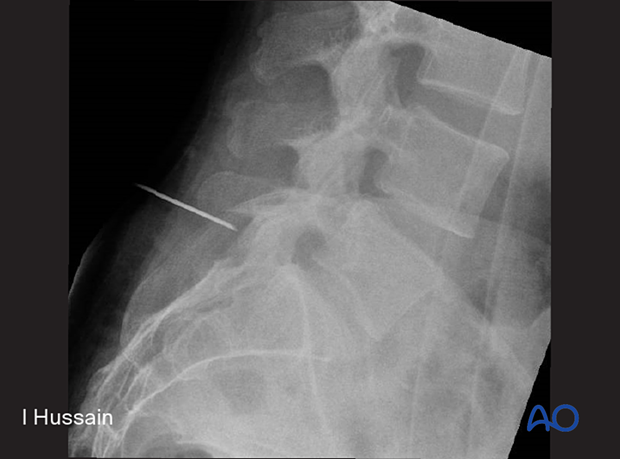
The correct operative level is determined using a spinal needle and lateral fluoroscopy.
Aim the needle parallel to the disc space, pointing toward the inferior edge of the target lamina.
Alternatively, use 3D navigation to localize the correct level throughout the procedure.
5. Visualization of the surgical field
Incision
The skin can be infiltrated as per the surgeon’s preference.
Especially in obese patients, identify the midline by finger palpation.
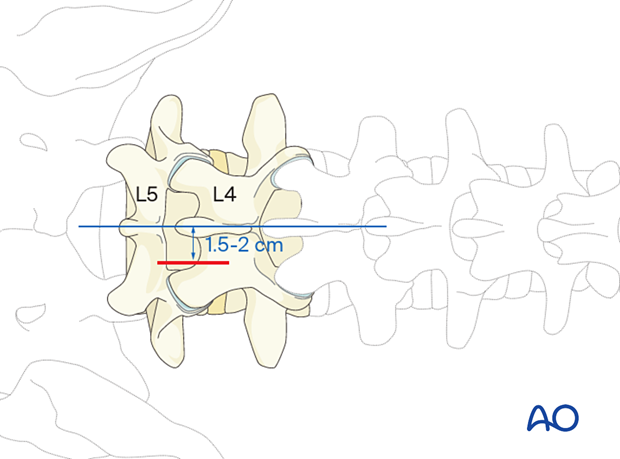
A skin incision is made 1.5–2 cm lateral to the midline, centered on the spinal needle skin entry point.
The incision is made closer to the midline in the higher lumbar spine.
The fascia is opened sharply and longitudinally.
Insertion of dilators
Insert the first dilator, angle it slightly medially, and “feel” for the base of the spinous process and the inferior edge of the lamina. A characteristic “step-off” should be felt as the dilator falls off the inferior edge of the cranial level lamina.
After the first dilator has been positioned on the bone, verify that it is located at the correct level using fluoroscopy.
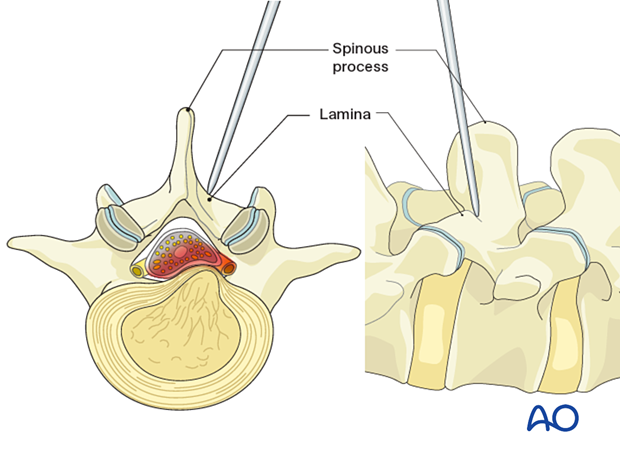
Insert sequential dilators until the appropriate dilation has been achieved.
Determine the required tube length and insert the final tubular retractor (typically 15–18 mm diameter) level to the skin. The tube is typically angled 10–15° medially.
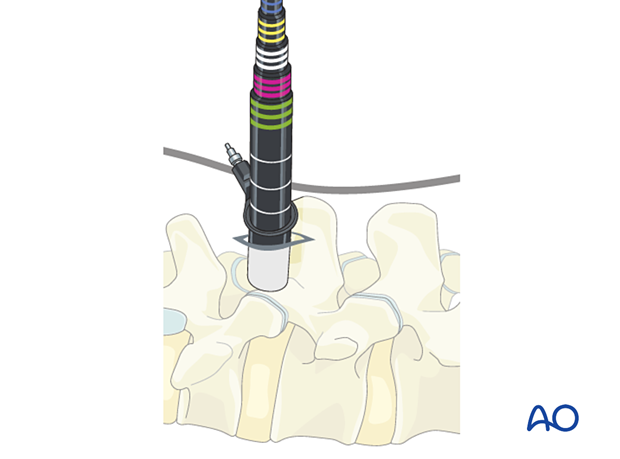
Secure the retractor to the table-mounted arm.

Visualization
Use the microscope for visualization. Alternatively, an exoscope or loupes and headlights may be used.
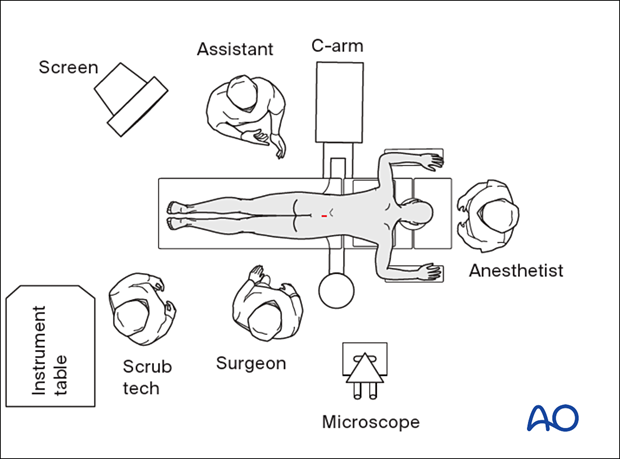
Position the microscope so that the surgeon can be positioned parallel to the spine. This position will help with orientation.
6. Decompression
Exposure of the lamina
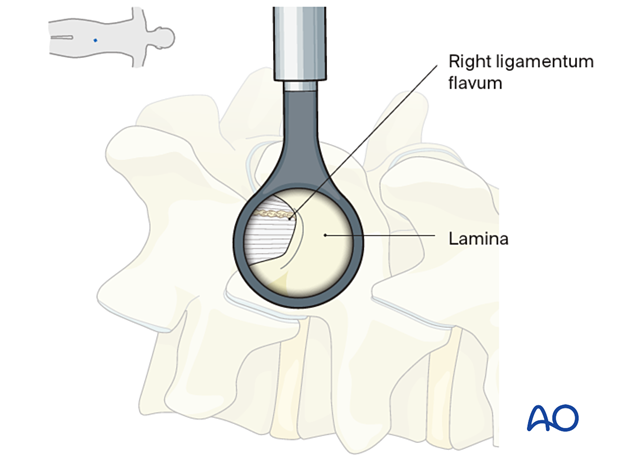
Expose the starting point for drilling at the intersection of the base of the spinous process and the medial inferior edge of the cranial level lamina.
Laminotomy
Start drilling at the inferior edge of the lamina along the surface of the ligamentum flavum.
Starting drilling at the inferior edge of the lamina will also facilitate the estimation of the thickness of the lamina.
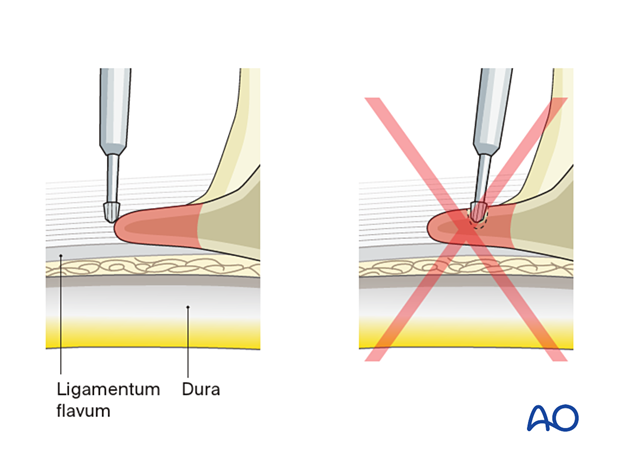
Proceed to drill cranially and laterally until a portion of the ipsilateral ligamentum flavum has been adequately exposed.
Caution should be taken if approaching the cranial aspect where the insertion of the LF thins out, with the dura directly exposed beneath.
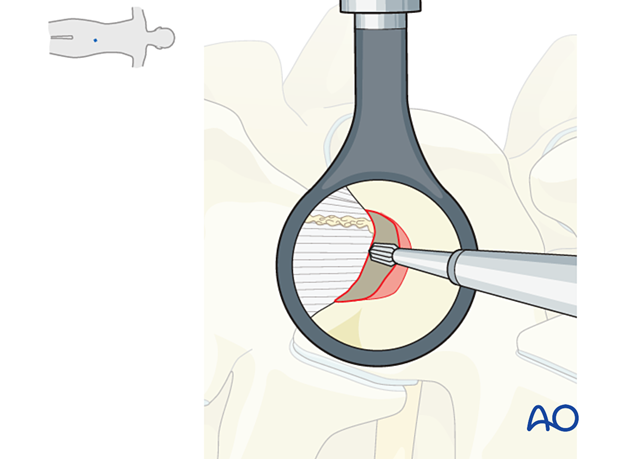
Additional exposure of the LF can be obtained using Kerrison rongeurs in the cranial and lateral aspects.
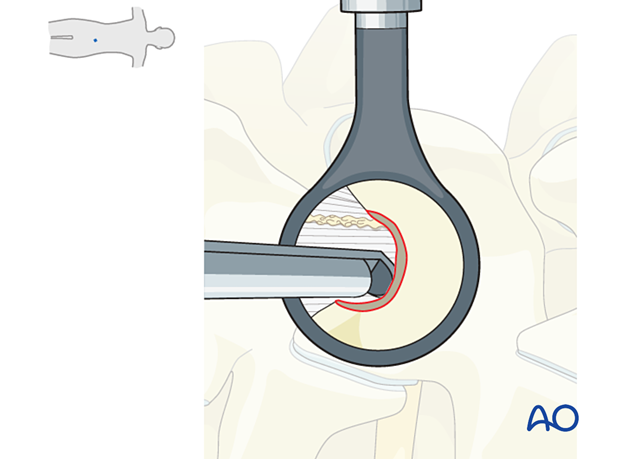
Flavectomy
Using an upgoing curette or Penfield dissector, gently split the fibers of the ligamentum flavum as medially as possible.
Carefully separate the undersurface of the ligamentum flavum from the dura with a ball-tip instrument to establish a free plane.
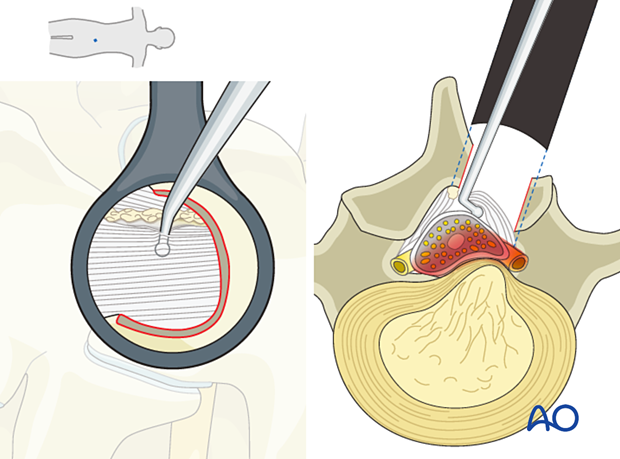
Starting medially, use a Kerrison rongeur to take backhand bites to resect the ipsilateral ligamentum flavum from medial to lateral. This exposes the dural sac and the ipsilateral traversing nerve root.
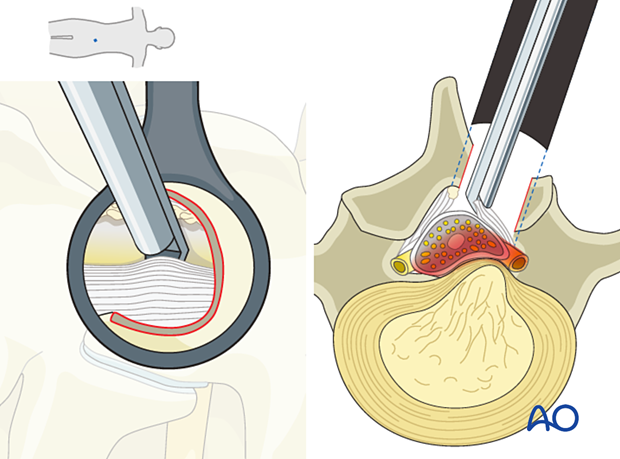
Nerve mobilization
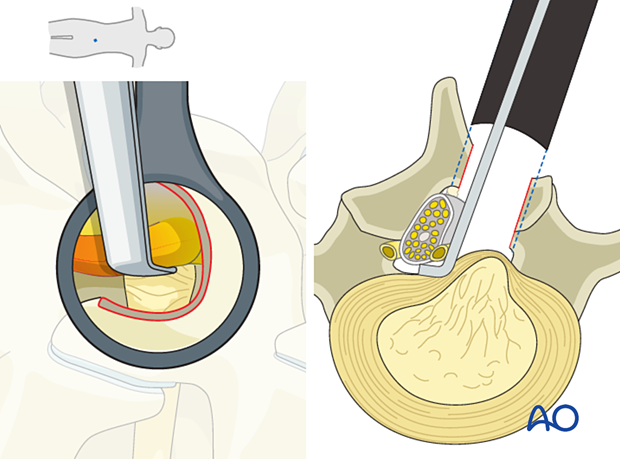
Separate the nerve root from the disc herniation using the ball-tip instrument medially and laterally (ie, in the axilla and the shoulder of the nerve root).
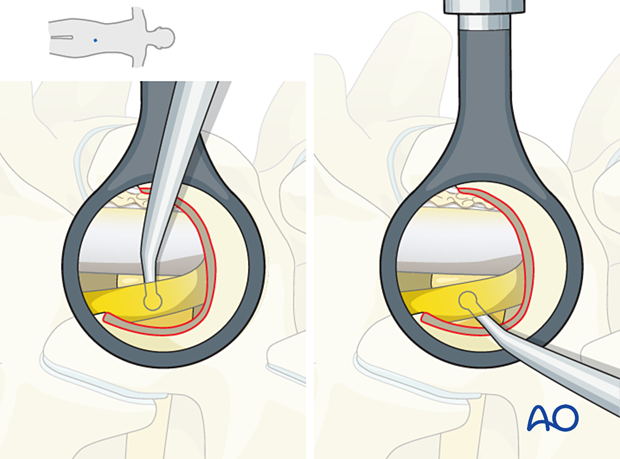
Depending on the location of the herniation, the nerve root may need to be retracted medially or laterally using a nerve root retractor.
Removal of disc hernia
If this is a contained disc herniation without a disc defect, open the annulus using a bayonetted 11 or 15 blade.
It is essential to direct all cuts away from the dura and the nerve root.
Some surgeons prefer to create one slit incision, while others prefer a cruciate or box-shaped opening.

Enter the annulotomy with a ball tip probe, a down- or upgoing curette, and loosen the herniation.
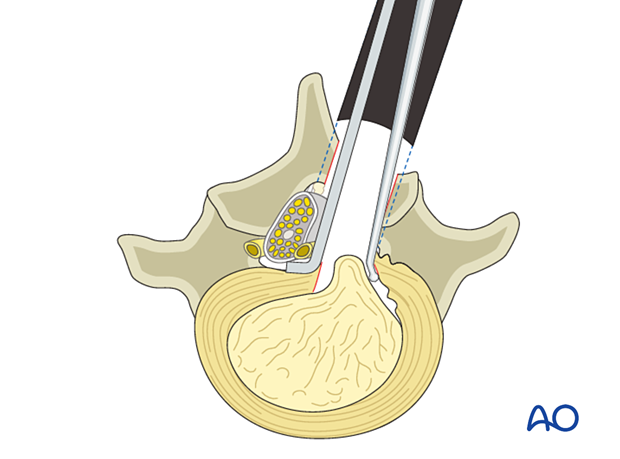
Remove the loose disc fragments with a pituitary rongeur.
Some surgeons remove the entire nucleus, others just the loose disc fragments. This is at the surgeon’s discretion.

Verification of complete decompression
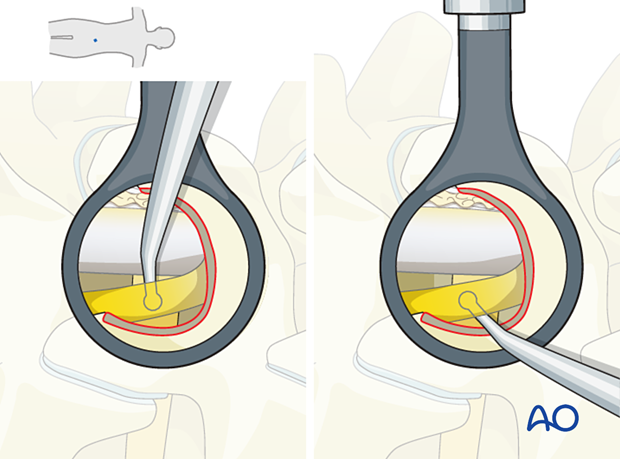
Use the ball tip instrument to verify that the decompression is complete by palpating medial and lateral to the nerve root.
7. Tube removal and closure
Irrigation of the surgical site is performed. Hemostasis is achieved with hemostatic agents and/or bipolar cautery.
The tube is slowly removed. Any muscular bleeding should be identified and cauterized.
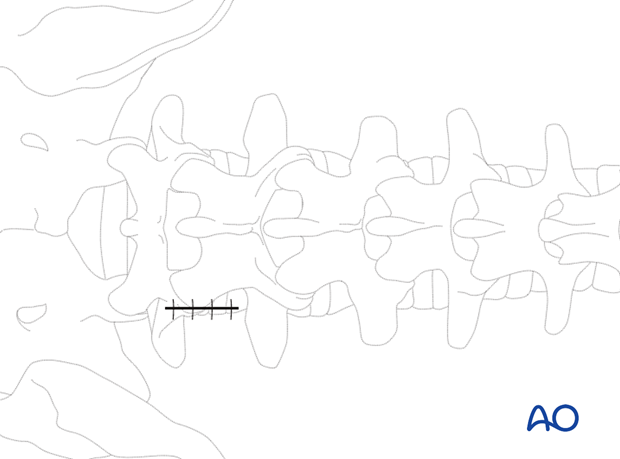
The fascia is typically closed using an interrupted suture. Infiltration of the muscle with local anesthetics is optional.
Standard multilayer closure of subcutaneous layers and skin is performed.
A drain may be used if necessary.
8. Aftercare
The patient can usually be discharged on the day of surgery or the following day with a short course of pain medication.
Lumbar immobilization is not required.
Patients may feel incisional or muscular pain that usually subsides within a few days.
Patients can develop postoperative pain and muscle spasms in a delayed fashion.
Small intraoperative CSF leaks can usually be treated with dural sealant materials and postoperative bed rest for 24 hours. Larger leaks, especially if there is a potential for herniation of nerve roots, should be treated with direct repair and followed by bed rest for at least 24 hours.


